Webcam Not Working on Windows? Try These Fixes!
Webcam not working on your computer can be a source of frustration, especially if your work mostly depends on video meetings and conferences. There are quite a few solutions you can try when this happens but before that, it is important to identify the cause of the problem in your case.
Here are a few reasons why you might be having issues while your webcam is not working:
- Insufficient camera permissions – The apps you are trying to use the camera with (Zoom, for instance) might not be allowed by the system to access the camera. In this case, you can simply allow the apps to access the camera to fix the problem.
- Faulty drivers – If the camera driver is faulty or outdated, the system will fail to connect with the hardware component, leading to the issue at hand.
- Overly protective antivirus – If your third-party antivirus program is overly-protective, it might be blocking the camera from accessing the system. You can disable or uninstall the antivirus if this scenario applies to you.
Now, let’s have a look at the potential solutions that worked for other users and can help you fix the problem as well.
1. Begin With the Basic Fixes
Before we move to the complicated troubleshooting methods, there are a few basic, one-step fixes that you can try in order to fix the problem.
The first thing you should do is restart your PC. If a temporary bug or error within the camera app is causing the problem, restarting the computer should fix the problem.
In case you are trying to use the camera in an app, then we recommend launching the camera app separately to see if the issue is within the app or the camera itself. While you are at it, we also recommend checking if the physical camera button on your laptop has not turned the camera off.
The third thing we recommend doing is installing the pending system updates. This is because if your system is outdated, issues like the one at hand can arise due to compatibility problems. This fix may seem irrelevant, but it was recommended by Microsoft itself, so we suggest you give it a try.
If none of these fixes help and the webcam is not working still, move to the troubleshooting steps below.
2. Allow Apps to Access the Webcam (If Applicable)
If the problem arises when trying to use the webcam with an app, then there is a chance that you are facing the problem because the targeted application does not have enough permissions to access the camera.
By default, only a handful number of applications are allowed to use the camera. However, these permissions can be provided to other applications manually as well.
If the targeted app does not have enough permissions, follow these steps to allow it access to the webcam:
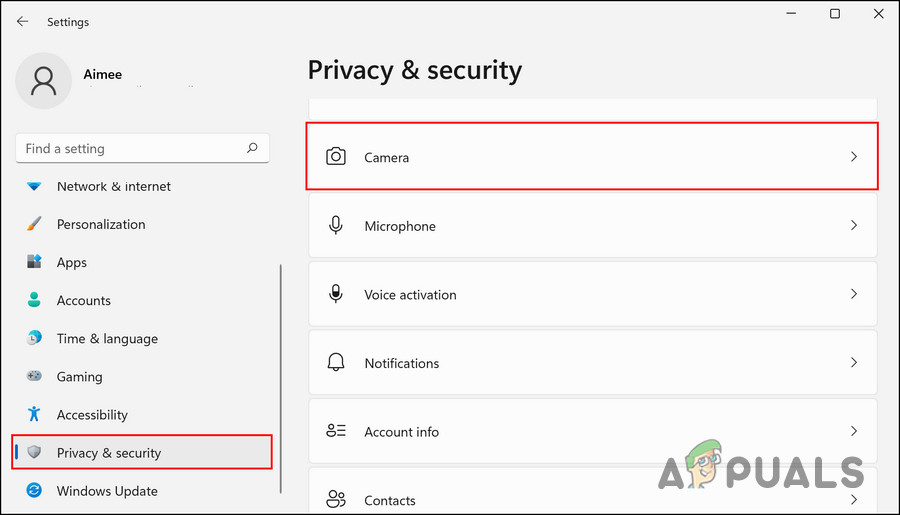
- Launch Settings by pressing the Win + I keys together.
- Navigate to Privacy & security > Camera.
Camera settings - Make sure the toggle for Camera access is enabled.
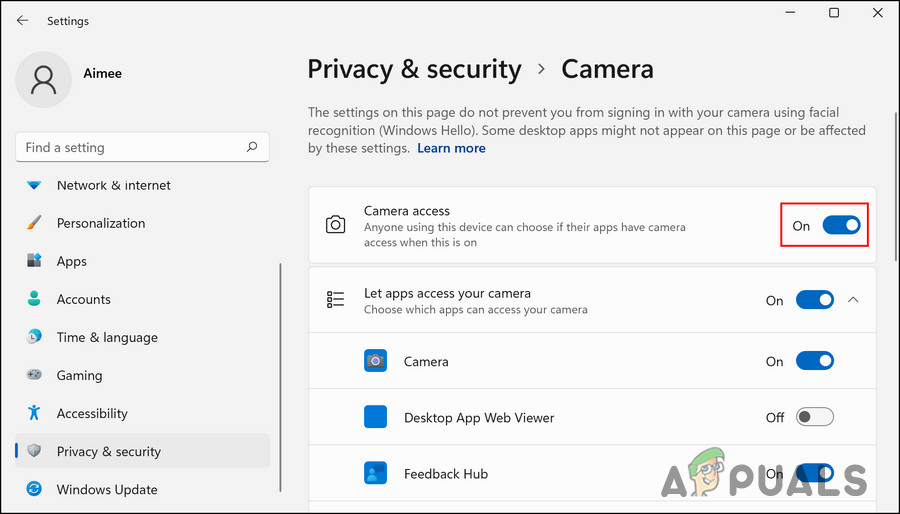
Enable the toggle for Camera access - Next, make sure the Let apps access your camera option is enabled.
- You will also see a list of apps that are allowed to access the camera. If the targeted app does not have access, turn the toggle associated with it on.
- In case you cannot locate the app, turn the toggle on for Let desktop apps access your camera.
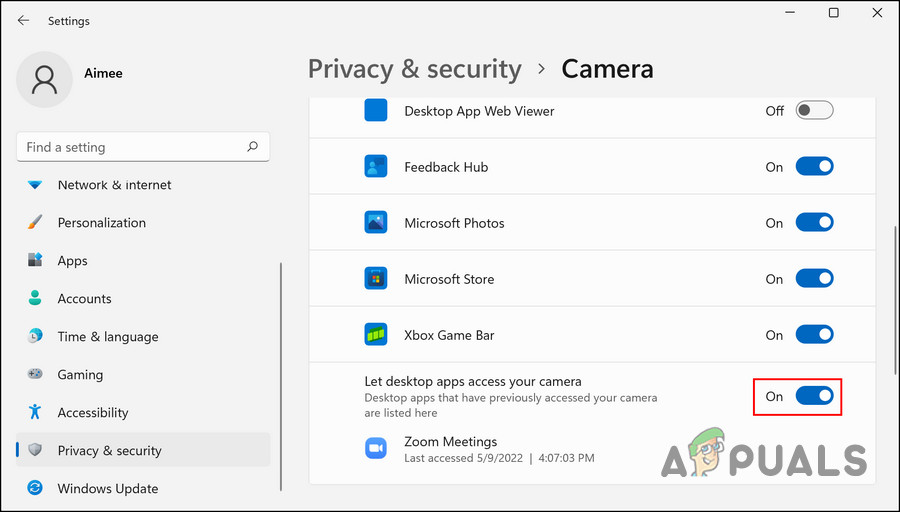
Provide camera access to desktop apps
Once done, check if the webcam is working now.
3. Fix the Camera Drivers
Your webcam might also not be working to a driver problem. In most cases, outdated or corrupt drivers prevent hardware devices like webcams and speakers from working properly.
In this method, we will first show you how to update the webcam driver on your Windows computer. If that does not work, then we will proceed with reinstalling the driver from scratch.
However, before you begin, it is important to know that if the issue started occurring after installing a driver update, then the problem might be with the update. In that case, head over to our other post to learn how to uninstall a driver update on Windows.
Here is how you can update your camera driver:
- Type Device Manager in Windows search and click Open.
- In the following window, expand the Cameras section and locate your webcam. If you cannot find it in the Cameras section, look for it in the Imaging devices category.
- Once you locate it, right-click on the webcam and choose Update driver from the context menu.
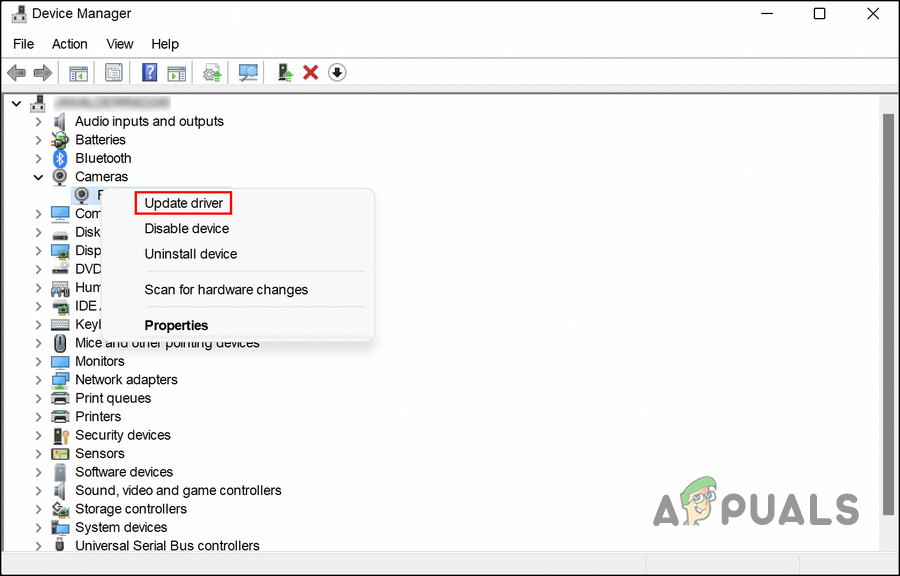
Update driver option - Now, choose Search automatically for drivers and follow the on-screen instructions to proceed.
Once the driver update is installed, check if the issue is resolved. If the problem persists, here is how you can reinstall the driver:
- In the Device Manager window, right-click on your camera driver and choose Uninstall device.
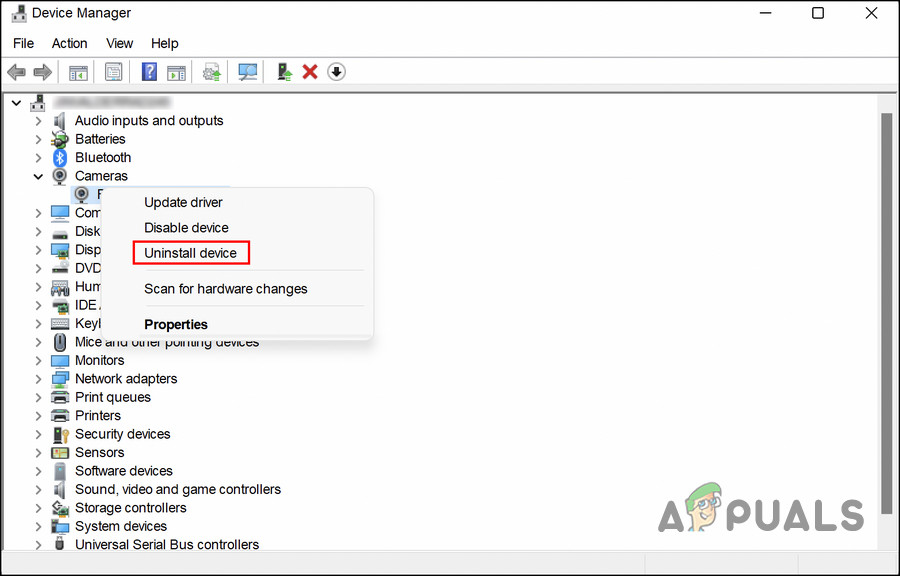
Choose the Uninstall device option - Select the Attempt to remove the driver for this device option and click OK.
- Follow the on-screen instructions to proceed.
- Once the driver is uninstalled, click on the Action menu and choose Scan for hardware changes.
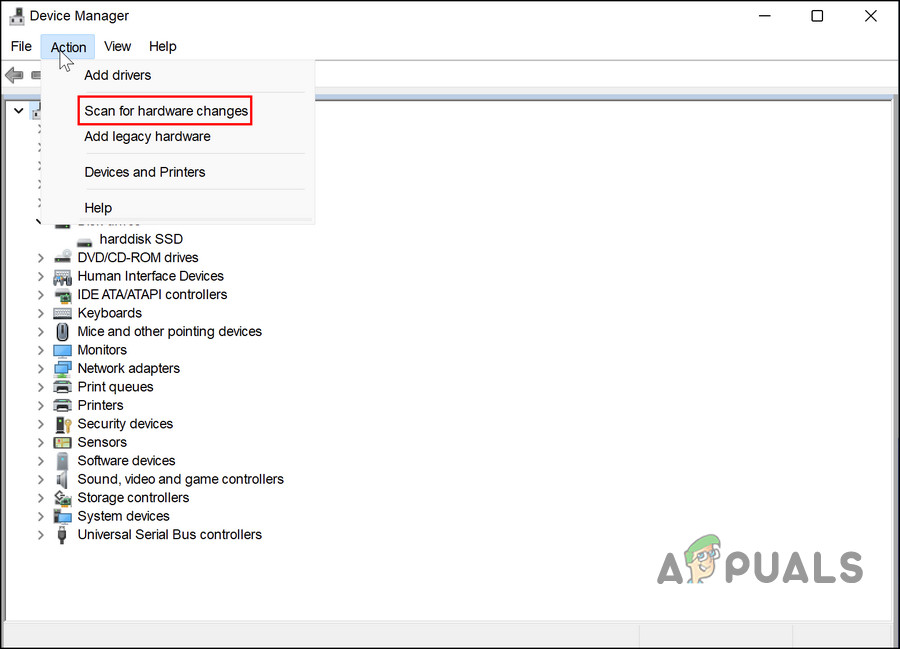
Scan for hardware changes - Your PC will now detect the changes you made and reinstall the driver automatically. After that is done, restart your computer and check if the issue is resolved.
4. Disable Antivirus Temporarily
In some cases, an overly protective antivirus was also preventing the webcams from working on the computers.
If you are using a third-party security program, we recommend disabling it and checking if that fixes the problem. If it does, then you can uninstall the program completely and switch to a better alternative.
5. Switch to a UVC Driver
If you are using a USB webcam, then you should know that such cameras are typically only compatible with UVC drivers that are built into Windows by default.
Considering this, you can try switching to a UVC driver to see if that makes any difference.
- Type Device Manager in Windows search and click Open.
- In the following window, expand the Cameras section and locate your webcam. If you cannot find it in the Cameras section, look for it in the Imaging devices category.
- Once you locate it, right-click on the webcam and choose Update driver from the context menu.
- Select Browse my computer for drivers and then click on Let me pick from a list of available drivers on my computer.
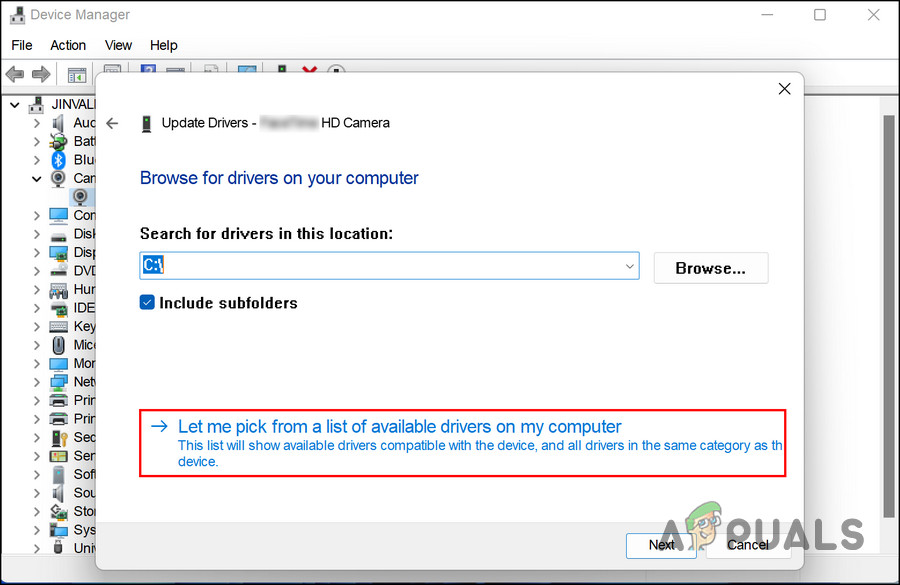
Pick an available driver on your computer - Choose USB Video Device and hit Next.
- Finally, click Close.
Hopefully, you will now be able to use the webcam without any problems.


