How to Use Inpaint to Fix Eyes in Stable Diffusion
 Reviewed by Huzaifa Haroon
Have you ever wondered about the magic behind creating lifelike images with technology? It’s all thanks to artificial intelligence! But, as impressive as it is, it’s not flawless. Sometimes, especially with the Stable Diffusion model, some parts of the pictures, mainly the eyes, don’t look as good.
They can seem odd or out of place. But this can be fixed with a tool called Inpaint. In this blog post, we’ll discuss Inpainting, how it works, and the steps to make those eyes look right in Stable Diffusion images.
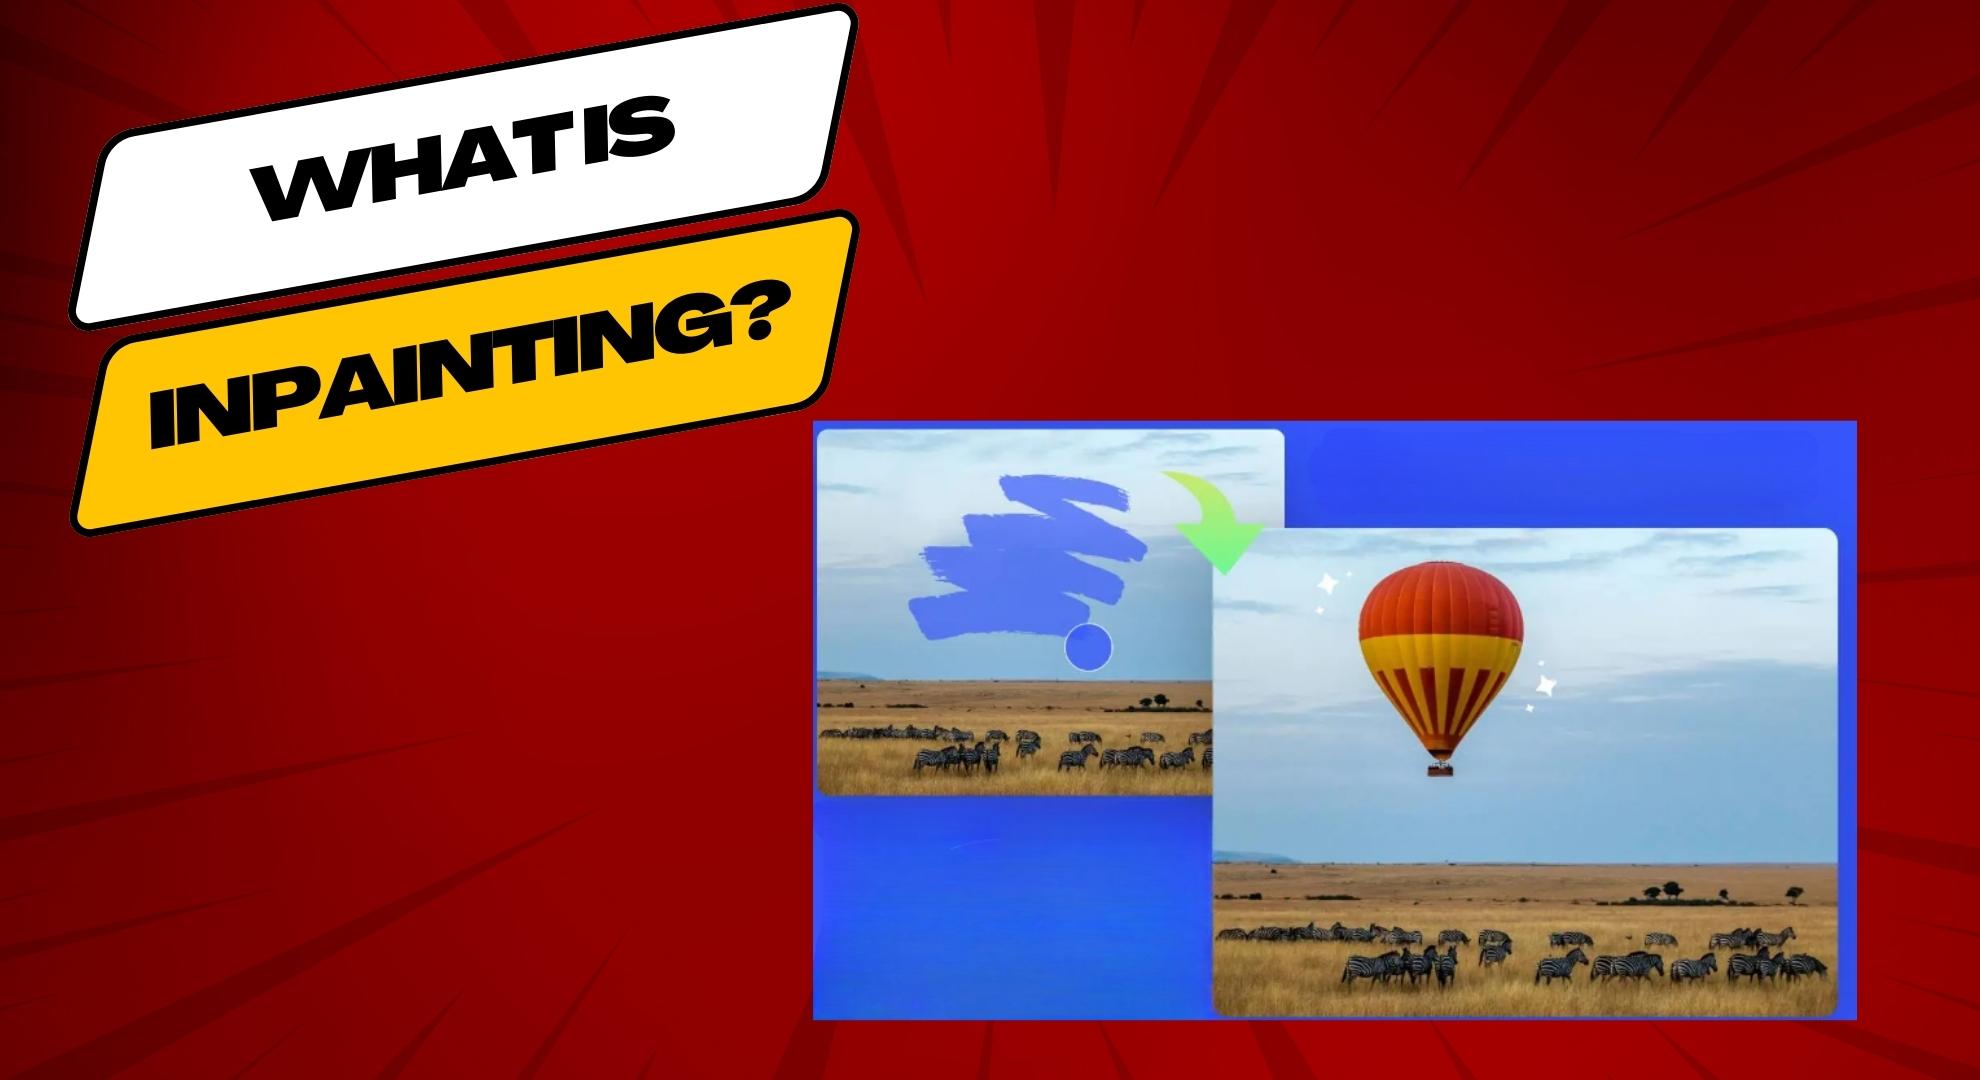
Inpainting is a way to fix parts of an image that might be damaged or missing. For example, in Stable Diffusion, you can use Inpaint to glitch faces in AI-generated images to look better. You can either change the whole face to look like someone else or fix just some parts, like the eyes while keeping the face the same.
- Inpaint helps fix or fill in parts of images that are damaged.
- Content-aware tools in software fill gaps in images by using Inpainting
- Computer vision, medical imaging, video editing, and image restoration are a few examples of uses of Inpaint.
- It works on fixing significant missing parts or tricky contexts.
- CNNs and GANs algorithms make Inpainting look more natural.
How Does Inpaint Work?
Inpaint is like a digital magic tool that fixes problems in pictures, like missing or damaged parts. First, it looks at the patterns, shades, and colors near the problematic area. Then, it uses different ways to fill in the missing or damaged parts.
Some ways are simple, like linking the dots in a straight line. But AI smart algorithms also use data they’ve learned from many pictures to fill the gaps. These algorithms synthesize data to seamlessly blend the inpainted region with the surrounding pixels, generating an image that is visually consistent and coherent.
The resourceful inpainting methods use things like learning patterns from many photos. They get what’s special about a picture, which helps them fix even tricky problems. The result? A fixed picture that looks just like the original, without any signs of damage.
How to Fix a Character’s Eyes with Inpaint in Stable Diffusion?
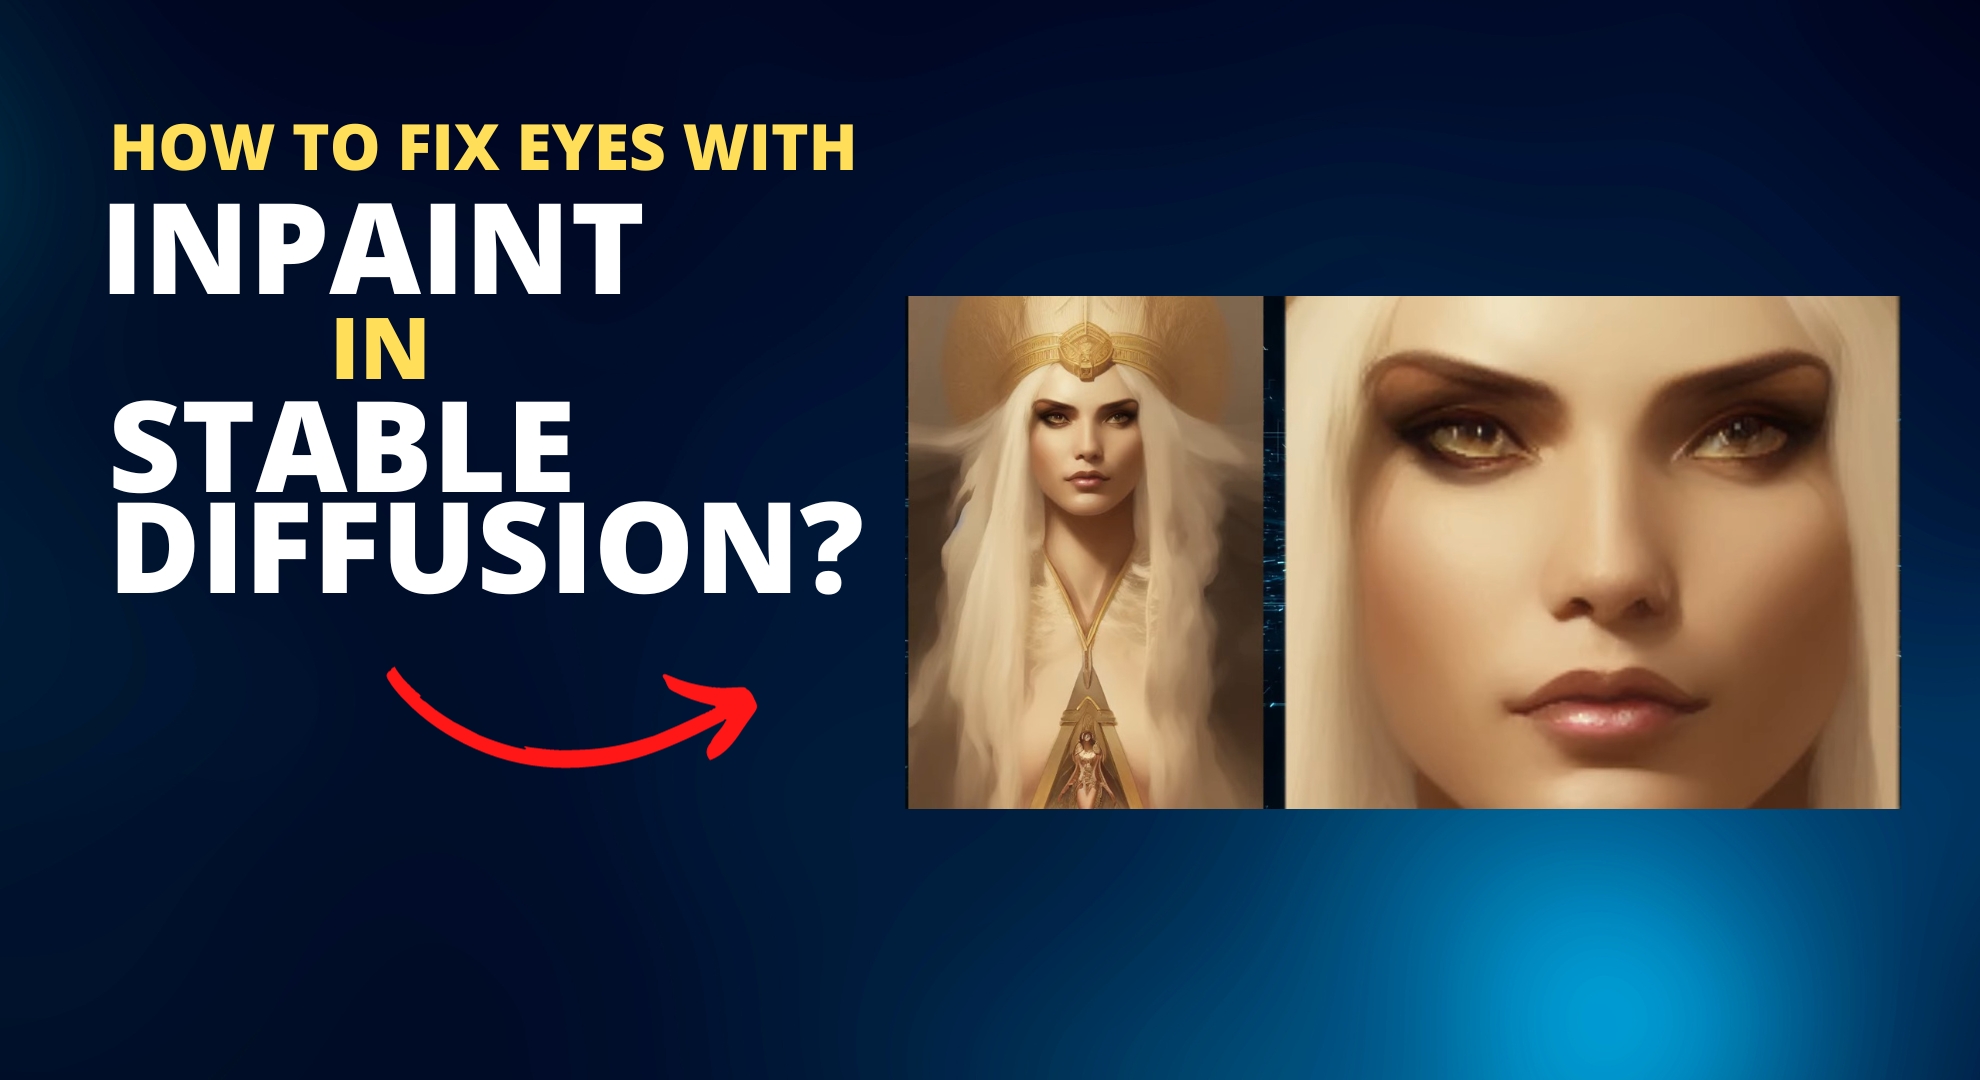
Inpainting is a handy tool in the AUTOMATIC1111 stable-diffusion-webui. It helps fix images where something’s missing or looks wrong. A common use is fixing faces that didn’t turn out right with Stable Diffusion.
With the inpainting tool, you can pick the part of the image you want to fix, and then the tool will automatically generate a new image. It fills in what’s missing or wrong, making the image look good again. If you want to use it, look for the “Inpaint” option in the img2img section. Here’s a step-by-step guide on using Inpaint to make eyes look just right:
Step 1: Save your image and copy your prompt
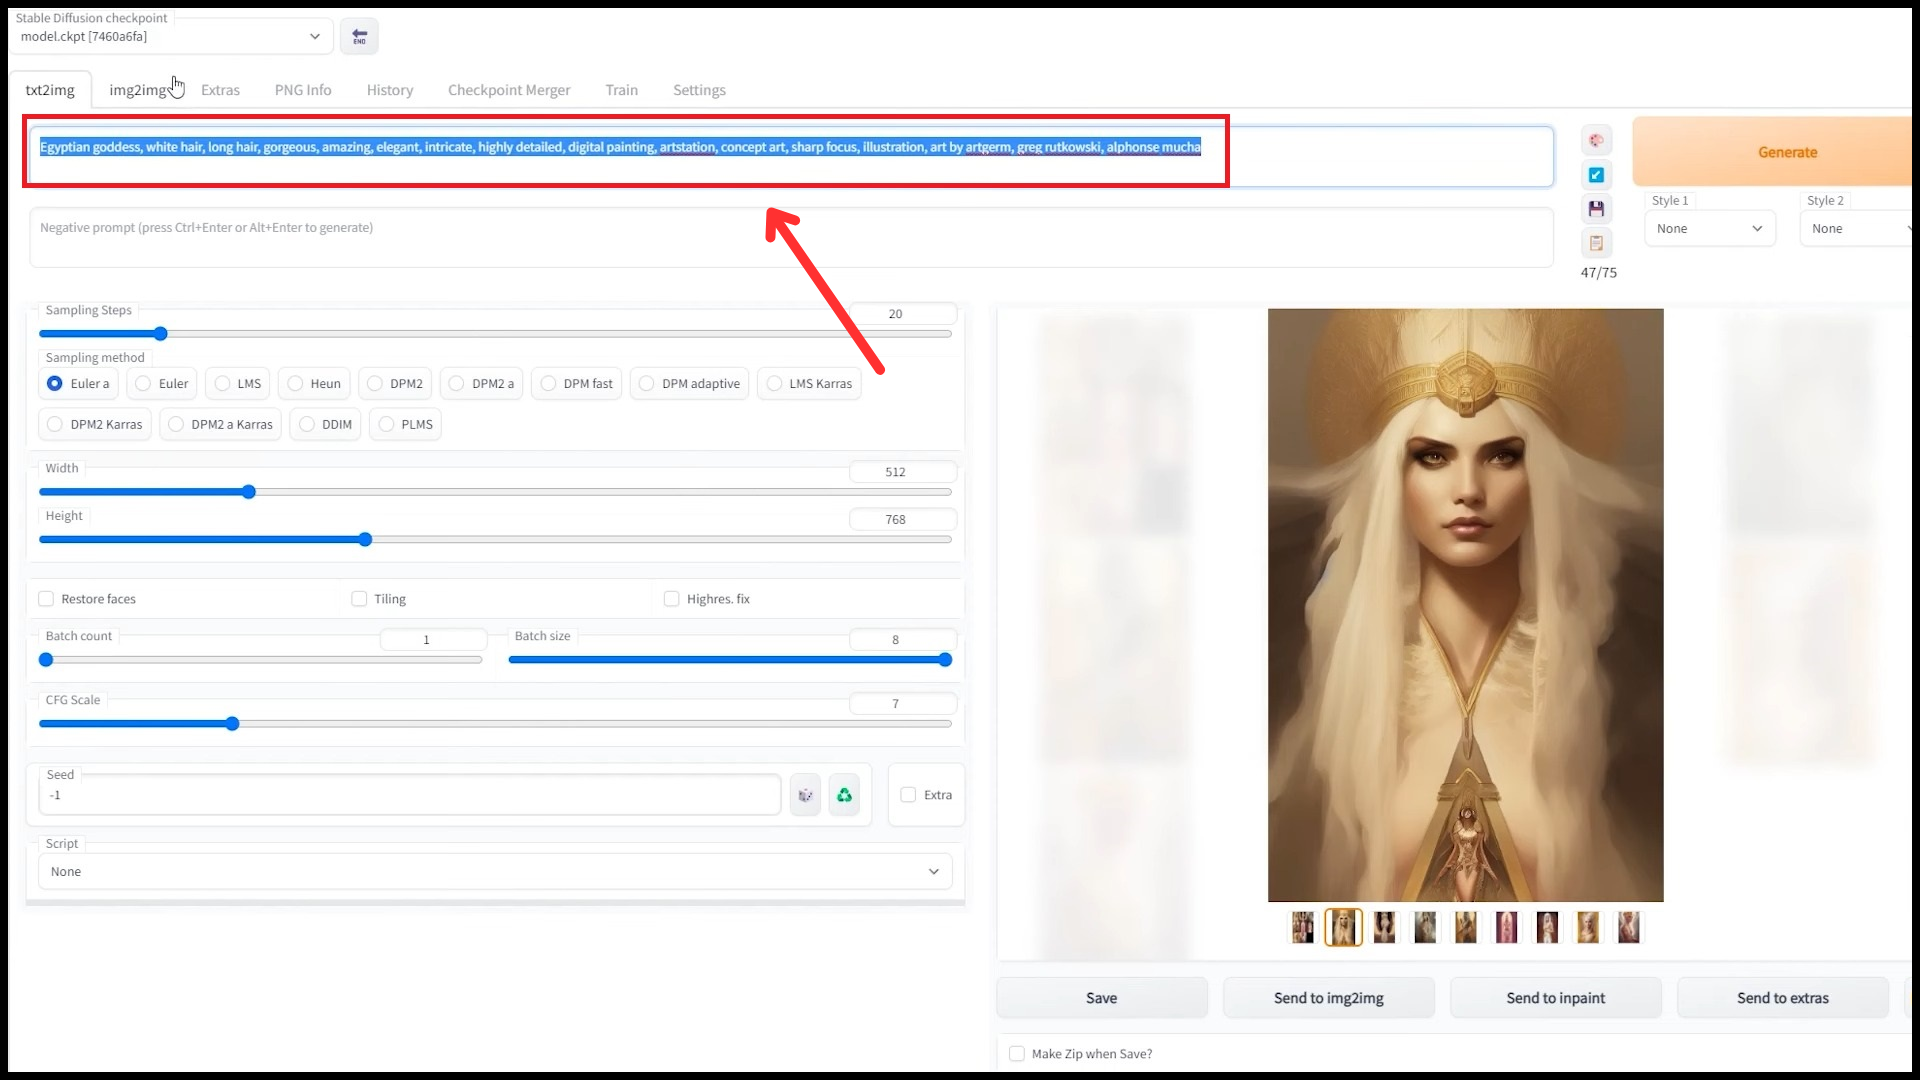
Before you start, save your image. That way, you won’t lose what you started with. Also, remember the exact prompt you used when you first made the image with the eyes that didn’t look right. Write it down or copy it.
Step 2: Access the Inpaint tab
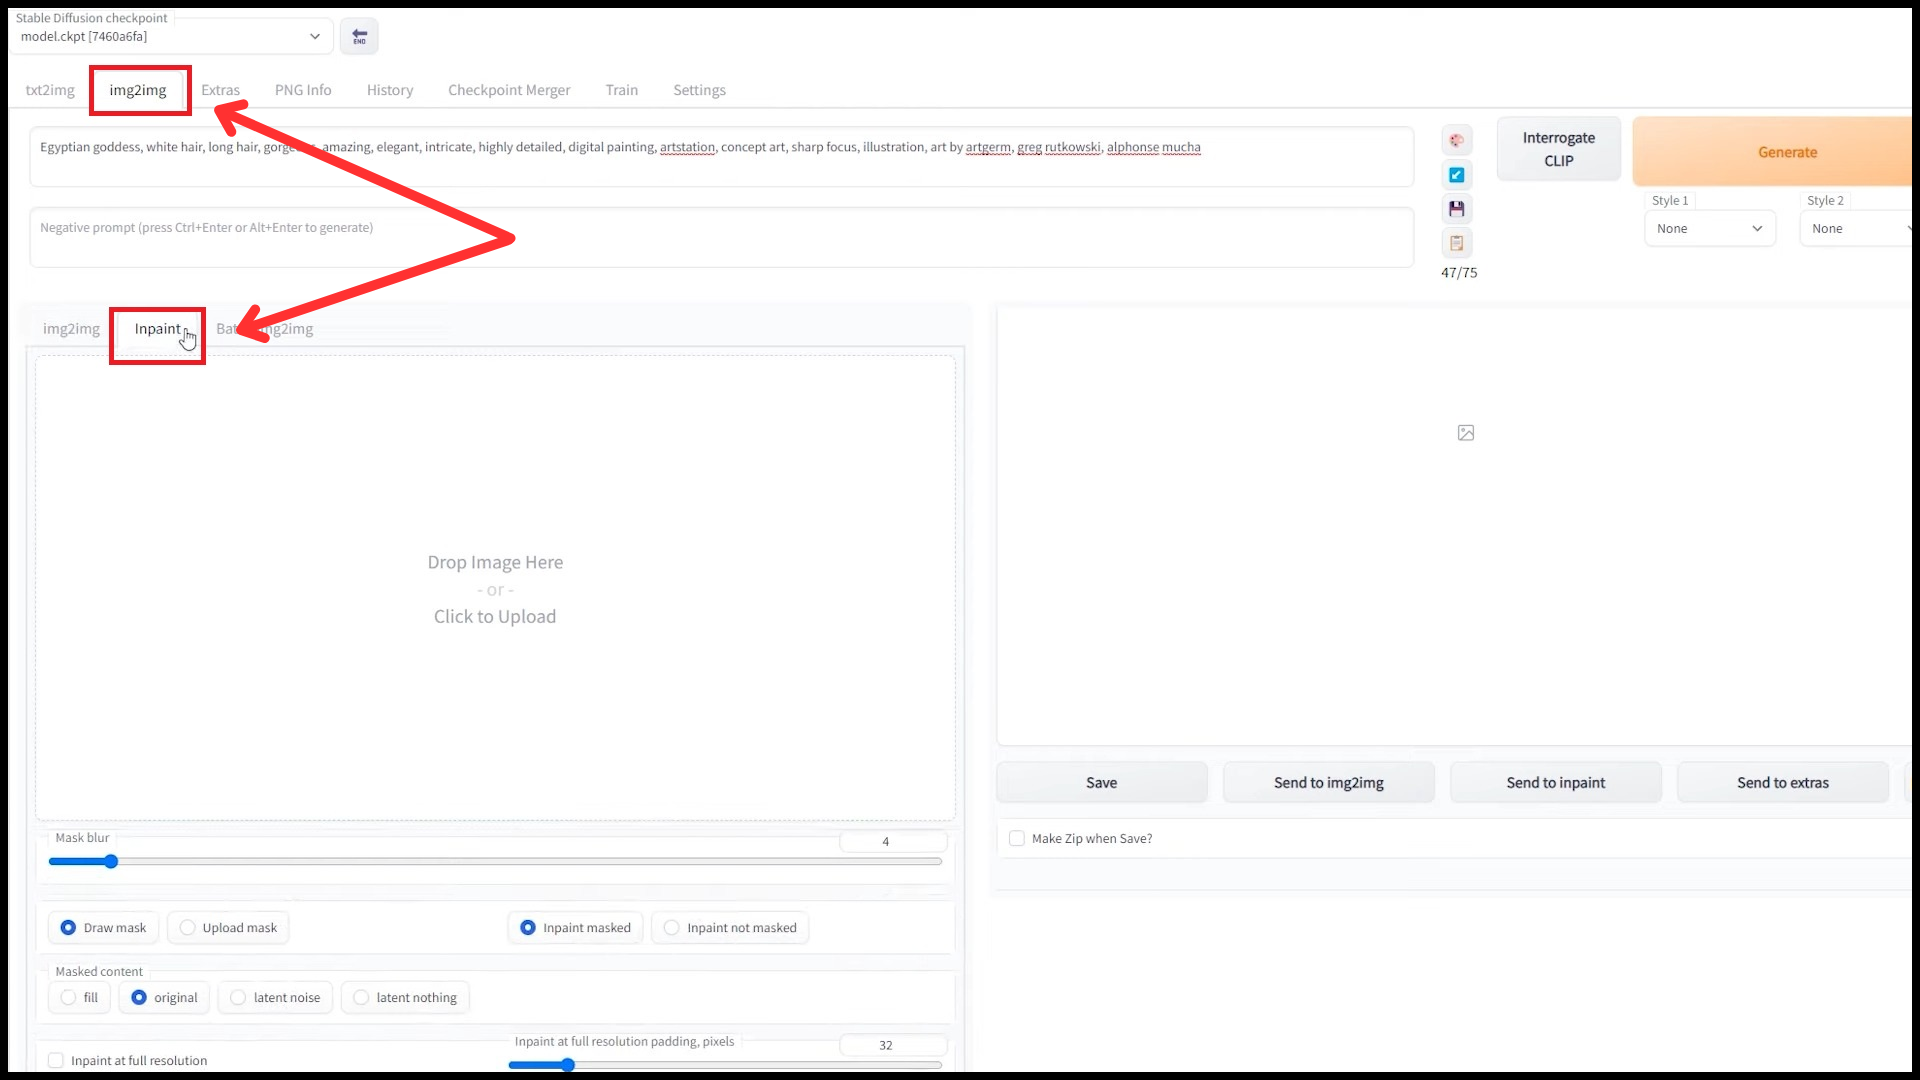
Click on the “img2img” button. Inside “img2img”, there’s an “Inpaint” option. Click it. You can use this tool to make changes to selected areas of an image.
Step 3: Import your image and mask the problematic area
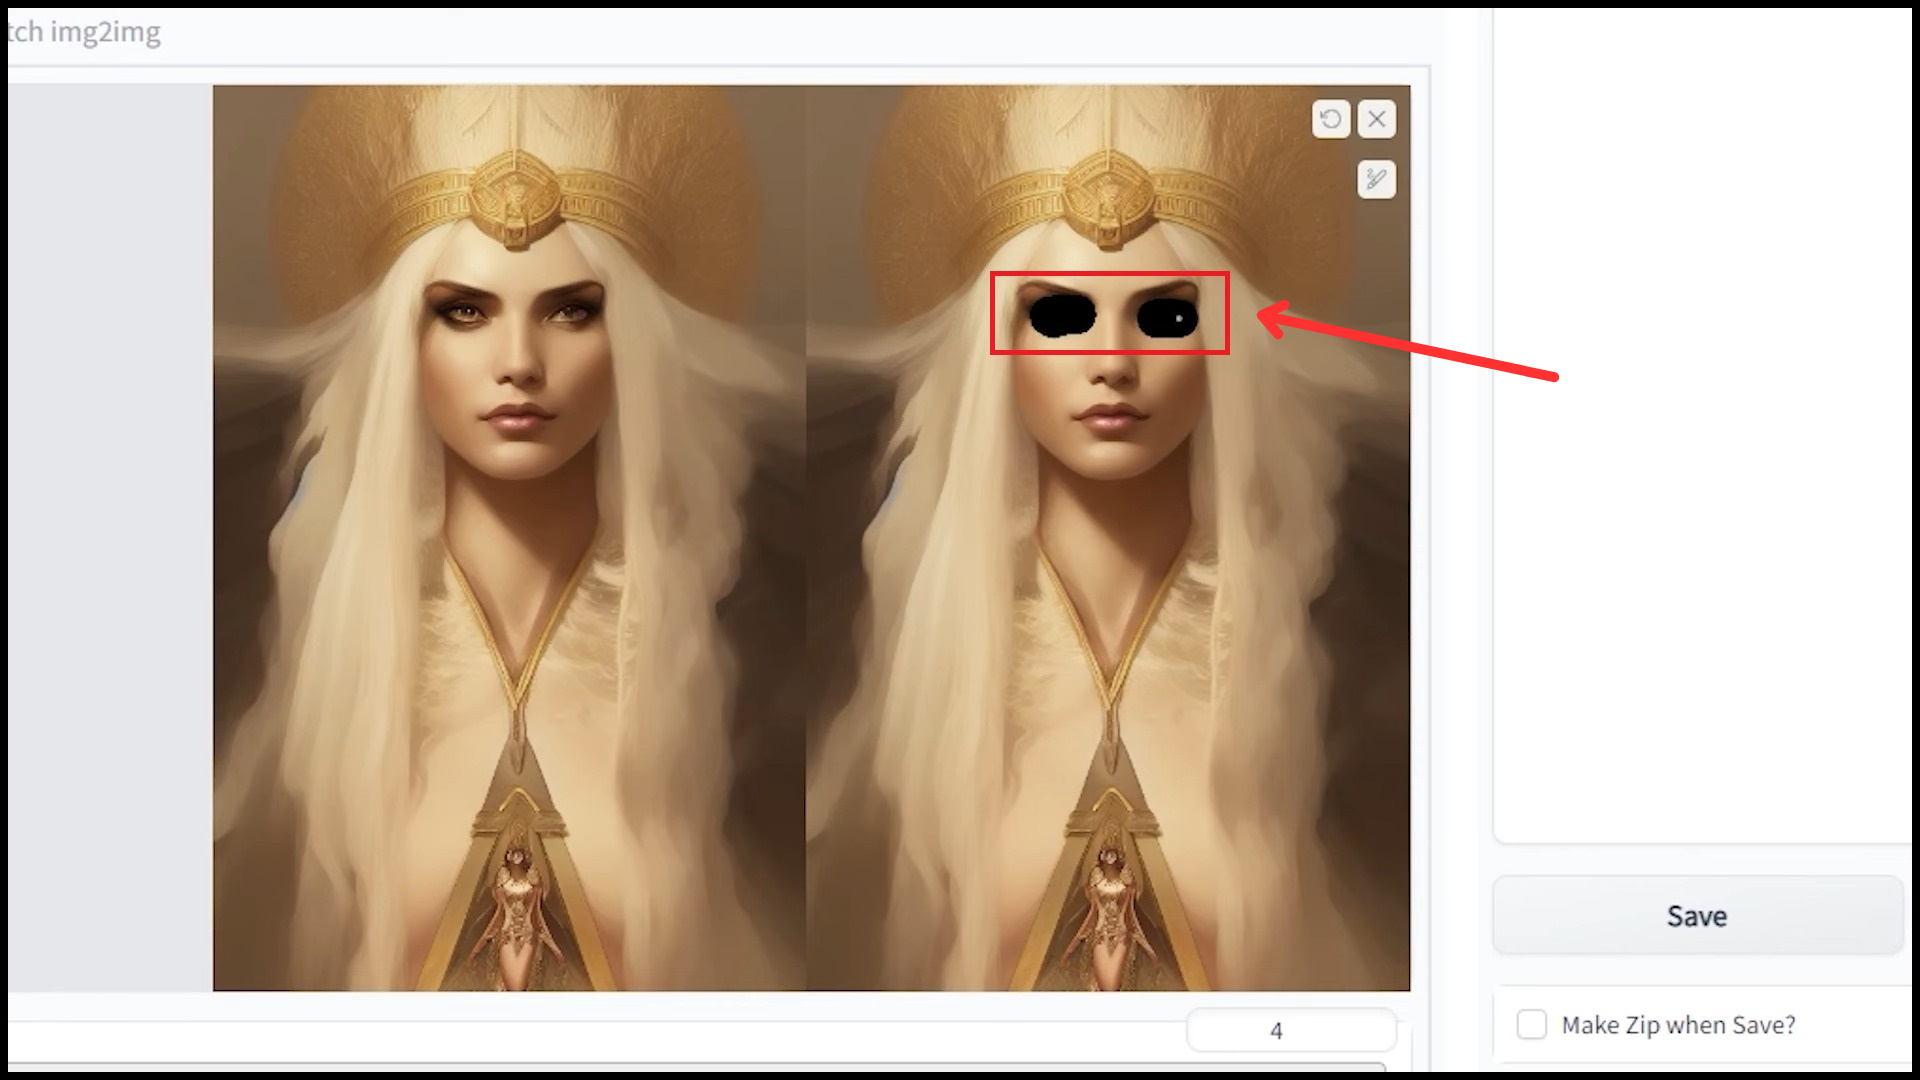
Drag and drop the image from the download folder. Use the brush or marker to highlight eyes that need fixing. This action will mark the areas that need to be modified.
Step 4: Adjust sampling steps and method
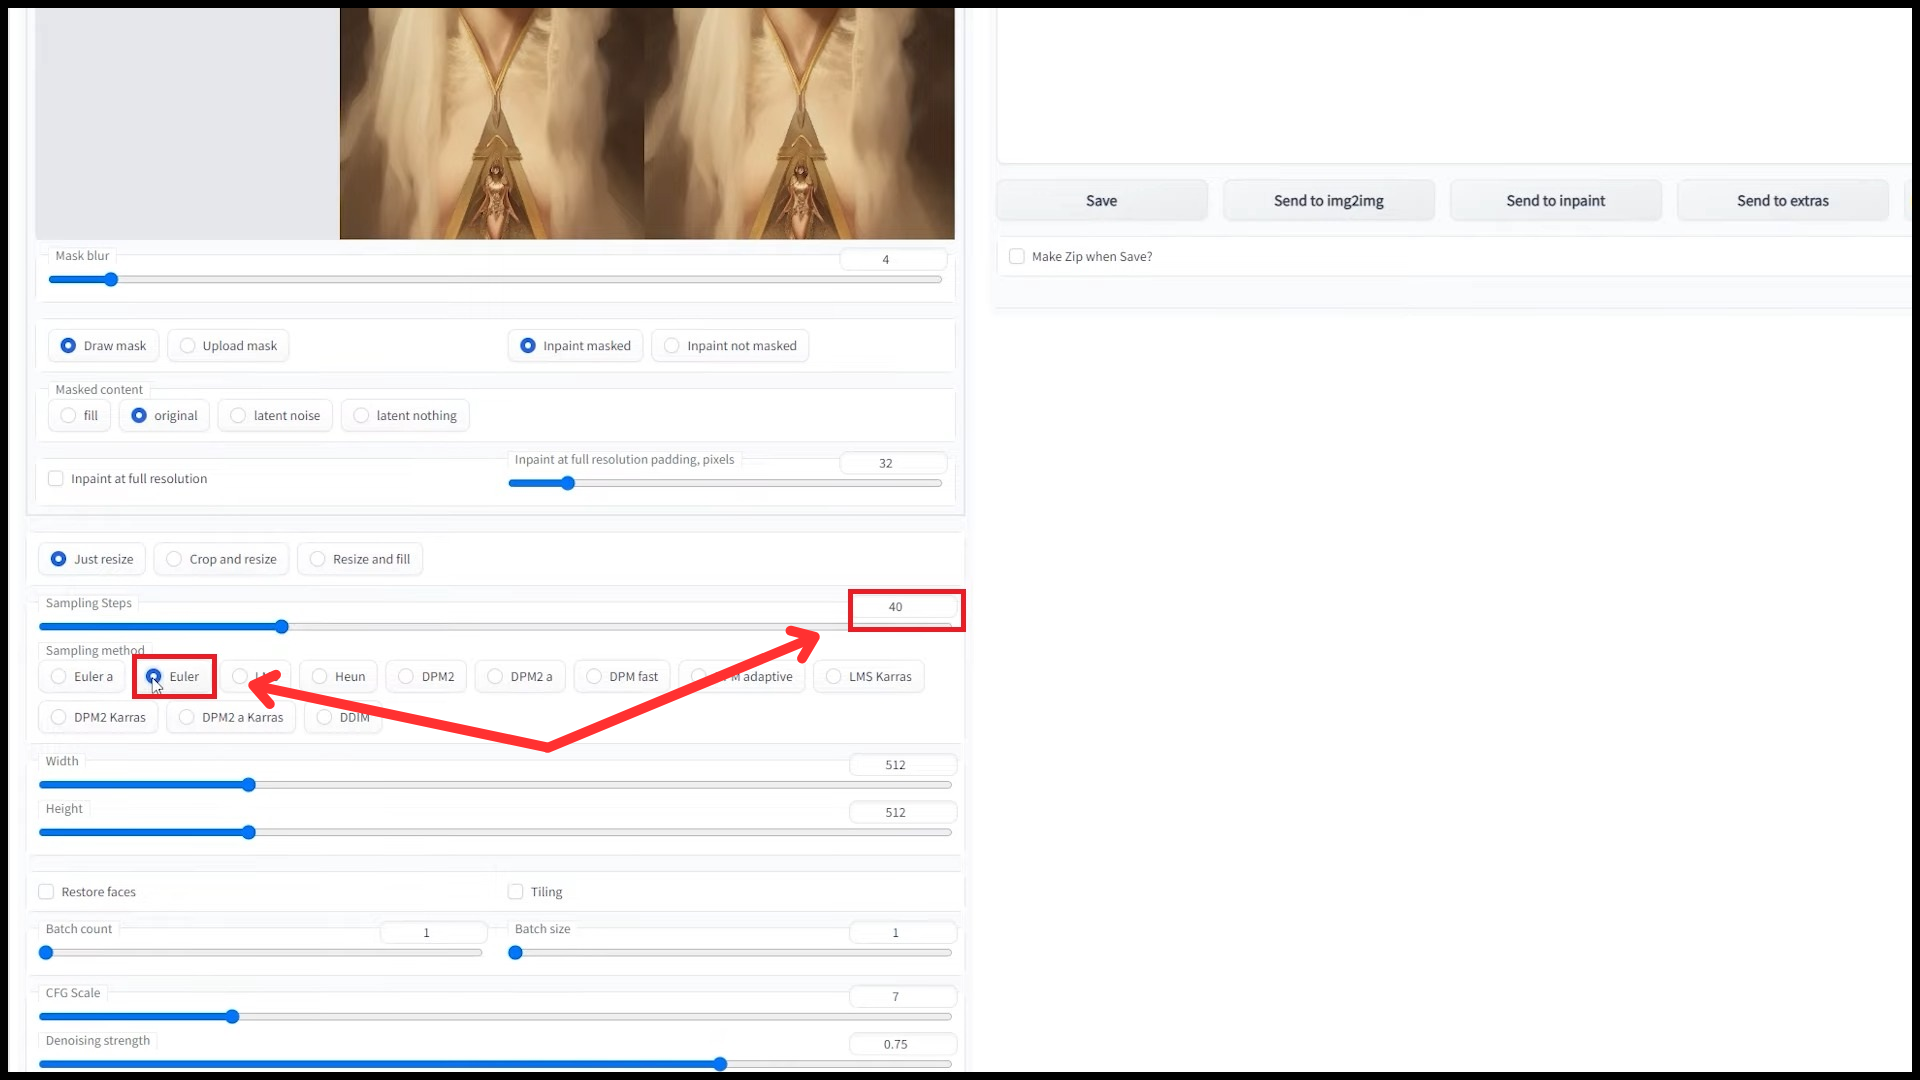
Set the sampling steps to 40. This tells the tool how many times to try and fix the eyes. Then, select the “Euler” method. Using this procedure, you can figure out the approach taken to sample and adjust the image.
Step 5: Match image dimensions
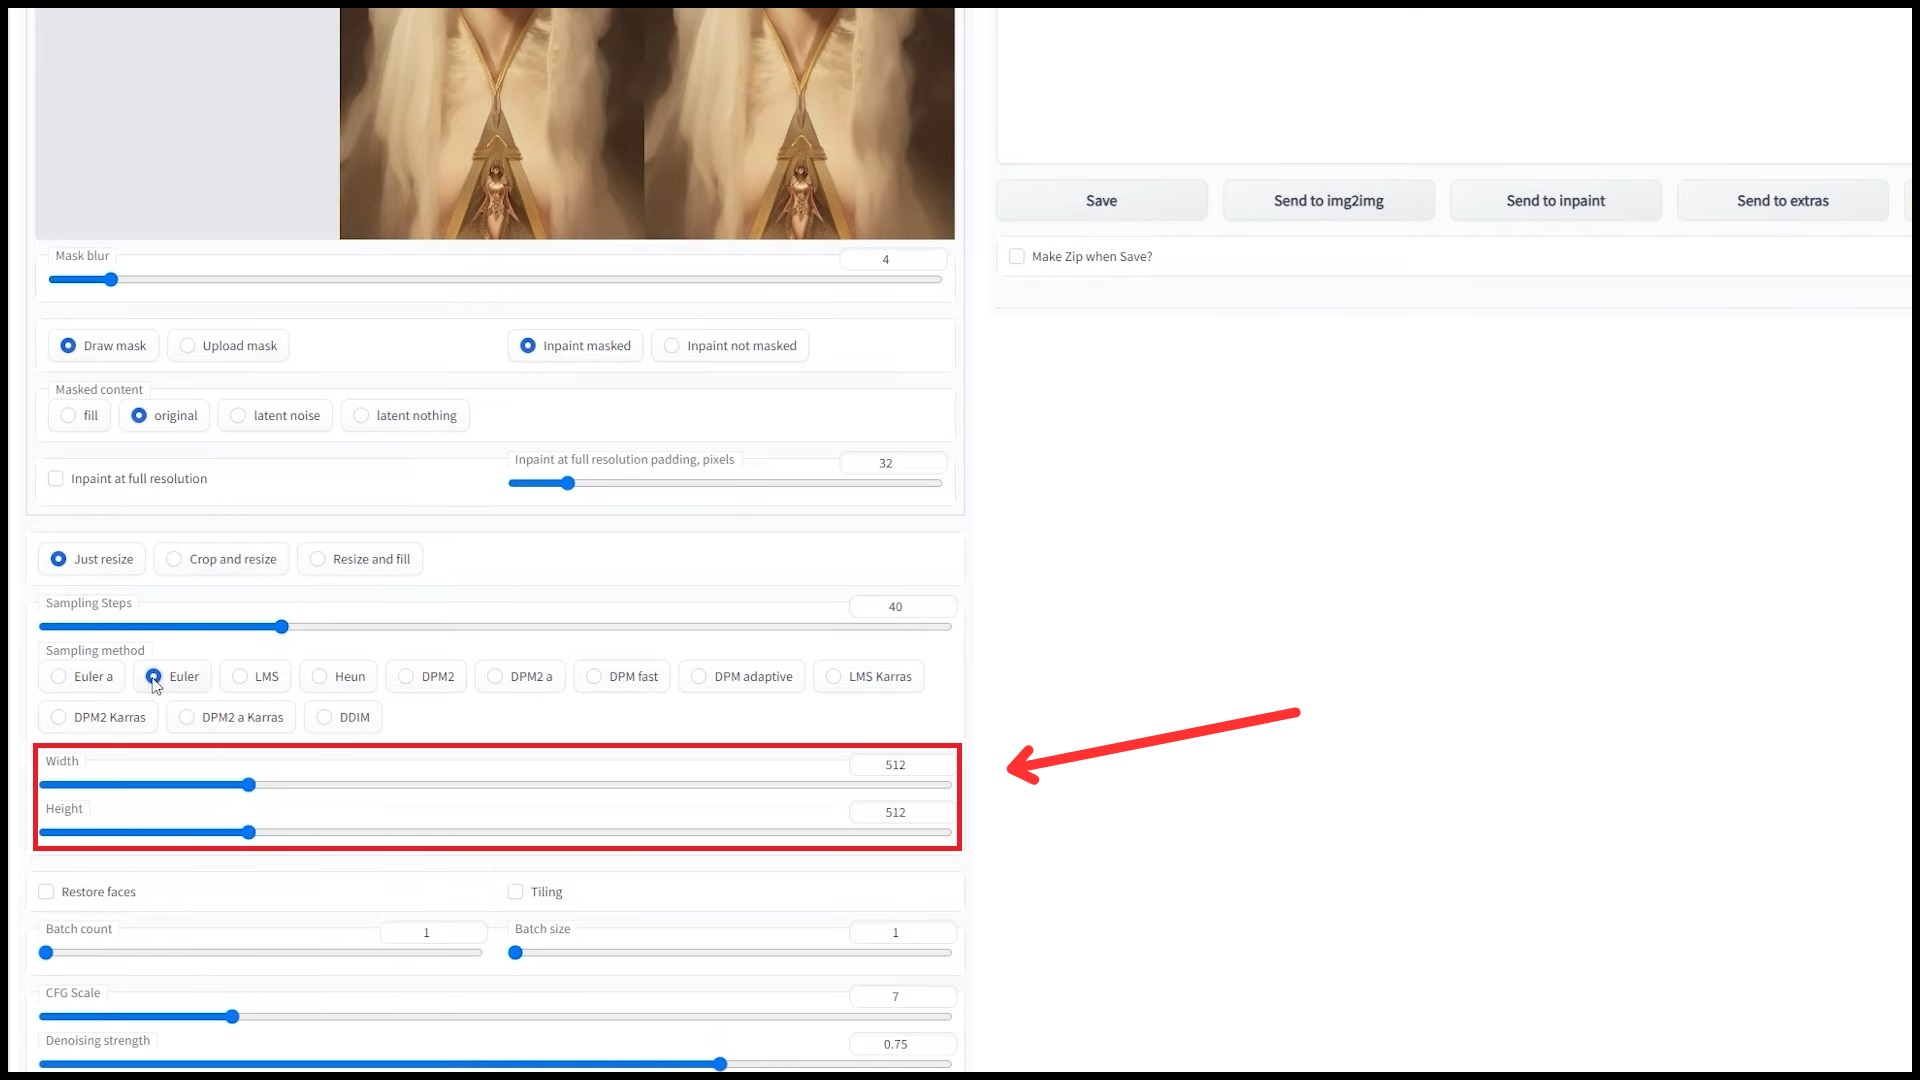
Ensure the size numbers for the width and height are identical to your original picture. This ensures your fixed picture doesn’t get too big or too small.
Step 6: Enable face restoration and increase the batch count
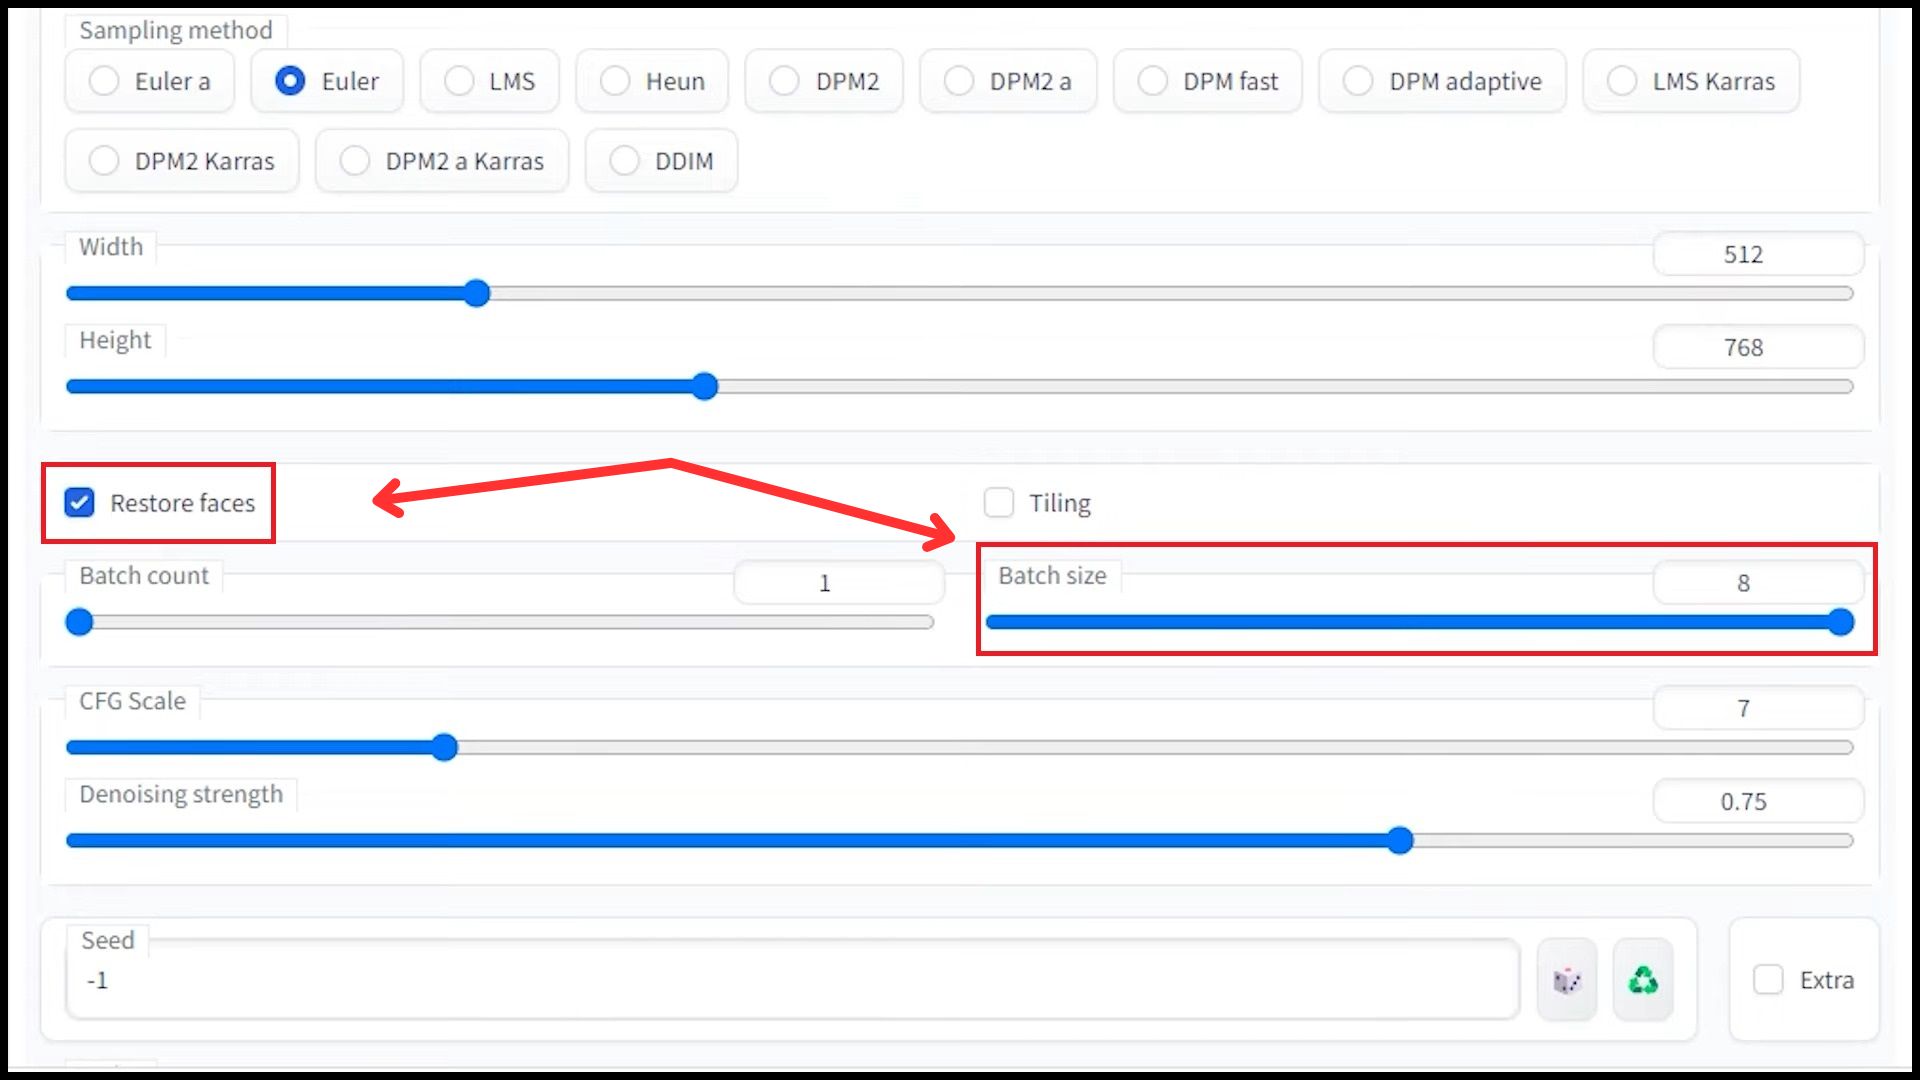
Select “Restore Faces” from the menu. This function recognizes and refines facial features, ensuring they remain consistent and realistic after corrections. Max out or increase the number of batches. This selection determines how many options or variations the tool provides for correcting the area.
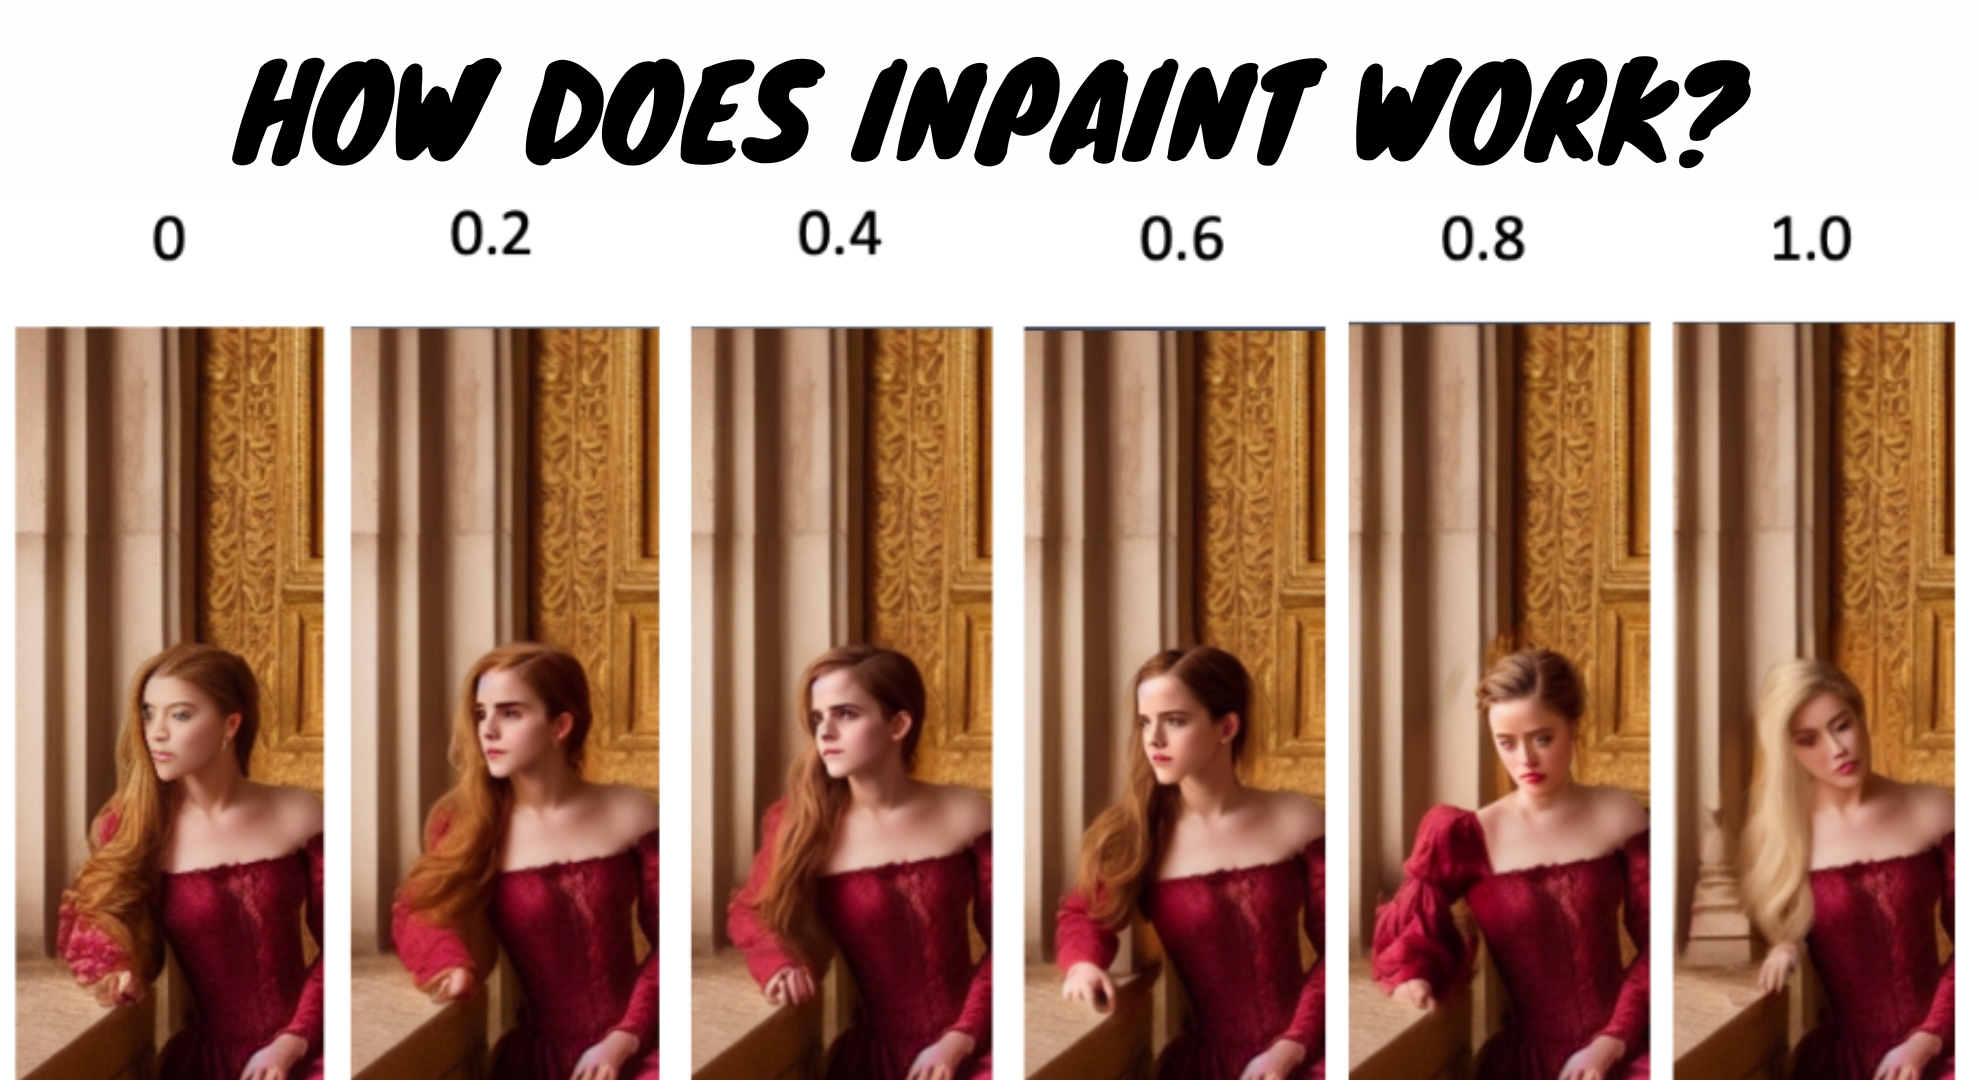
7: Set Denoising Level
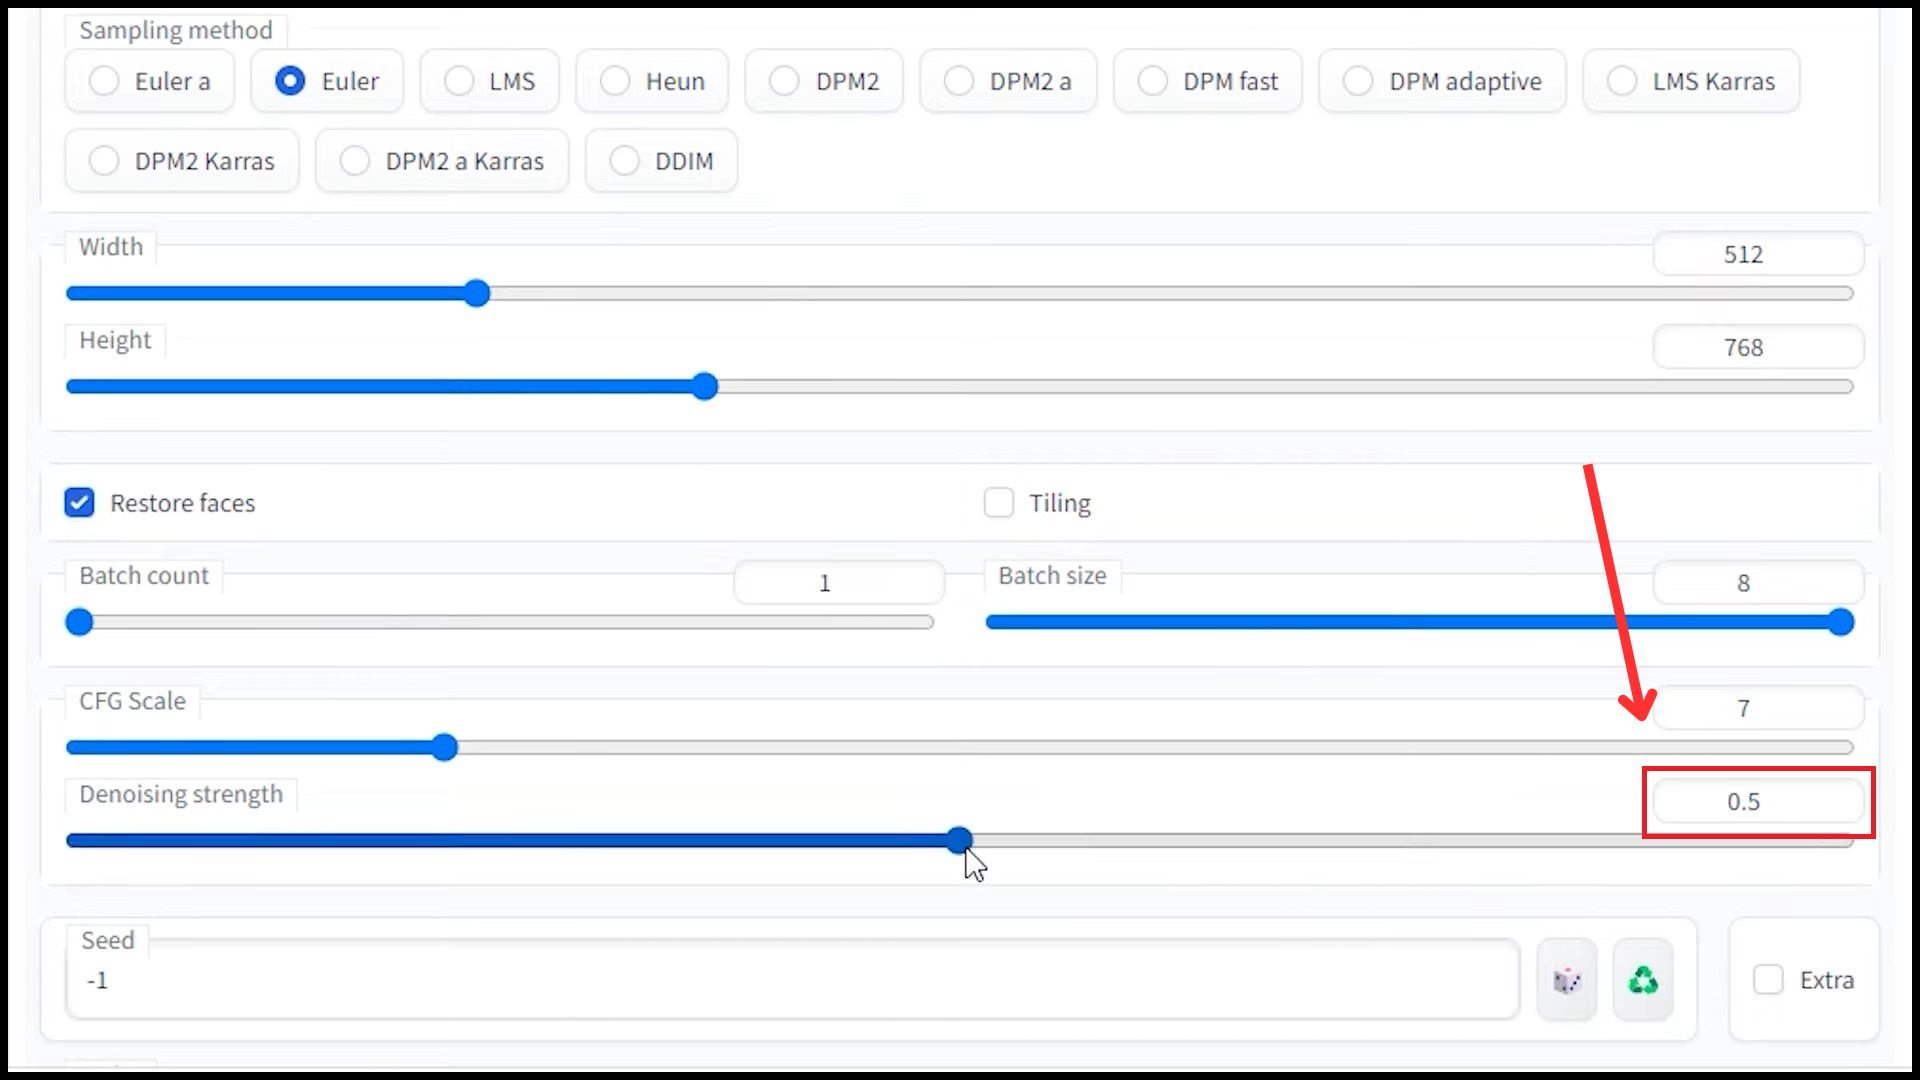
Adjust the parameter for denoise to 0.5. This setting determines the extent of noise reduction, with 0.5 providing a balance between detail retention and artifact reduction.
Step 8: Generate Corrected Images
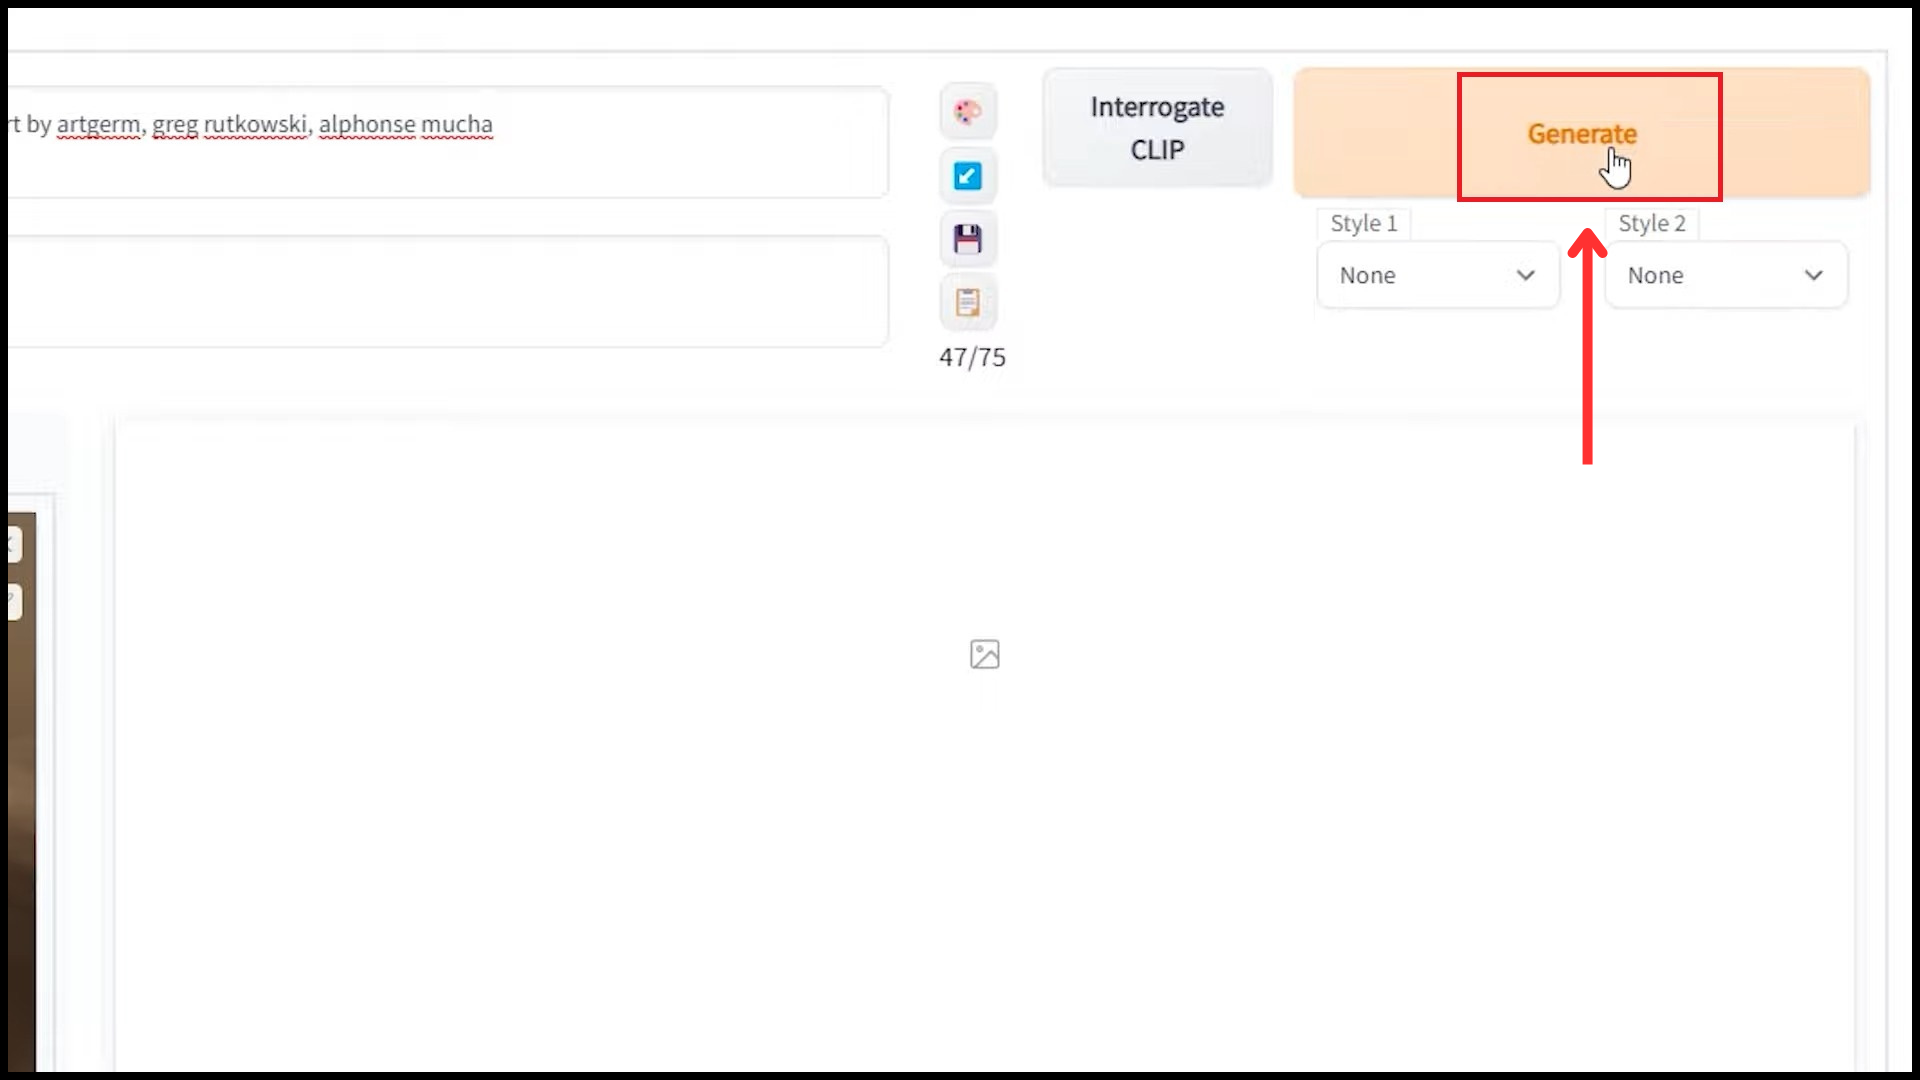
Click the “Generate” button and wait a little. The tool will produce images with fixed eyes. Look at them all and select the one you think looks best. If you are unhappy with the results, you can change the parameters and try again.
Reviewed by Huzaifa Haroon


