How to Fix Update 20H2 won’t Install on Windows 10?
Recently, Microsoft released the Windows 10 version 20H2, also known as the “October 2020 Update,” for everyone. This is a significant update that includes a number of new features, security improvements, and various bug fixes. The latest feature update version 20H2 is offered to all compatible devices via Windows Update. However, users have recently experienced issues with the Windows 10 October 2020 Update failing to install. Typically, the system reboots without completing the upgrade. Some users have reported that the update gets stuck at 50% or 75% completion and then restarts abruptly. This creates an unfavorable experience for end-users, as it directly affects their workflow.
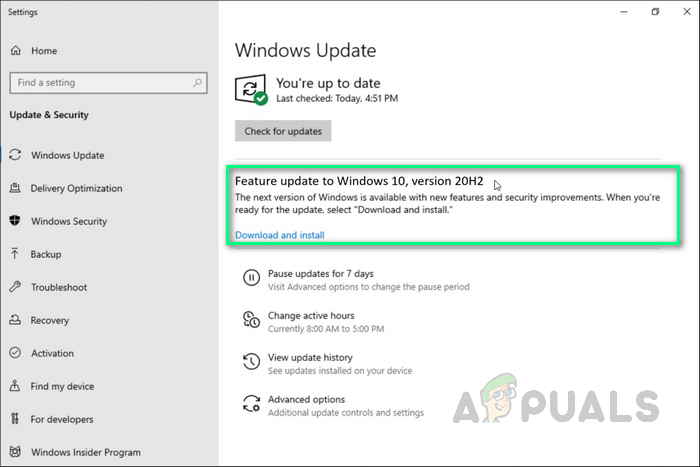
Requirements:
Before jumping into the methods for downgrading Windows, we advise you to go through these comprehensive but promising workarounds that have helped many individuals online. If you still face the issue of missing applications due to upgrading, then proceed to the outlined methods to resolve the problem effectively. Try the following troubleshooting steps to restore any missing applications:
- Ensure you have a stable internet connection to download Windows update files from the Microsoft server. Sometimes the adapter icon in the system tray may falsely indicate a working internet connection, so beware.
Note: We recommend unplugging and plugging the ethernet cable back in if you are on a LAN connection, or disconnecting and reconnecting your Wi-Fi if you are on a WAN connection. - Set the clock time and calendar date with the internet according to your exact location.
- Temporarily uninstall third-party antivirus software if installed on your device, and also disconnect from VPN if configured on your device.
- Remove external devices (if any) such as printers, scanners, audio jacks, etc., to prevent driver conflict problems.
- Ensure that the System Drive (C:) has enough free disk space to download the update files for installation or upgrade purposes.
- Make sure that all installed applications and drivers are updated and compatible with the current Windows version, especially the Display Driver, Network Adapter, and Audio Sound Driver. You can update them if needed by following these steps:
Open “Device Manager” > Select “Device” > Right-click on it > Select “Update device driver” > Search automatically from the internet. - Many Windows users reported that deleting the $WINDOWS.~BT folder in the C: drive helped them fix the Windows 10 20H2 update issue.
If none of these promising workarounds solve your problem, then proceed with our final solution, which involves upgrading to the update under discussion using the Media Creation Tool.
Install Updates Using Windows 10 Media Creation Tool
This is the best method to install feature updates to your Windows operating system, as this tool upgrades your system similarly to how Windows is installed (boot encryption). This has proven to be an effective final solution, based on a wide range of positive feedback from users online. The Media Creation Tool, as the name suggests, is used for creating the installation media of Windows 10. The Media Creation Tool offers two options:
- Downloading the installation media for later use and performing a clean install.
- An automated option allowing the PC to upgrade itself.
With this extraordinary Windows 10 creation tool, you can upgrade Windows 10 to its latest version (in this case, to October 20H2 Update) without hassle and create a Windows 10 installation USB drive/DVD disc to perform a clean install. Follow the steps below to update your Windows using the Windows 10 Media Creation Tool:
- Download the Windows 10 Media Creation Tool by simply clicking the hyperlink. Once clicked, a download prompt will appear. Click on Save File to download the file to your Windows downloads.
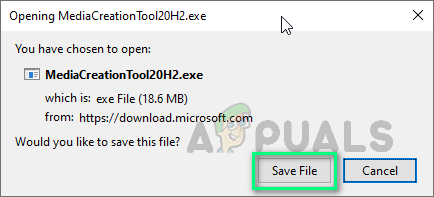
Downloading Windows 10 Media Creation Tool - After the software is downloaded, right-click on MediaCreationTool20H2 and select Run as administrator. This will open the Media Creation Tool specifically for Update 20H2 with admin privileges.
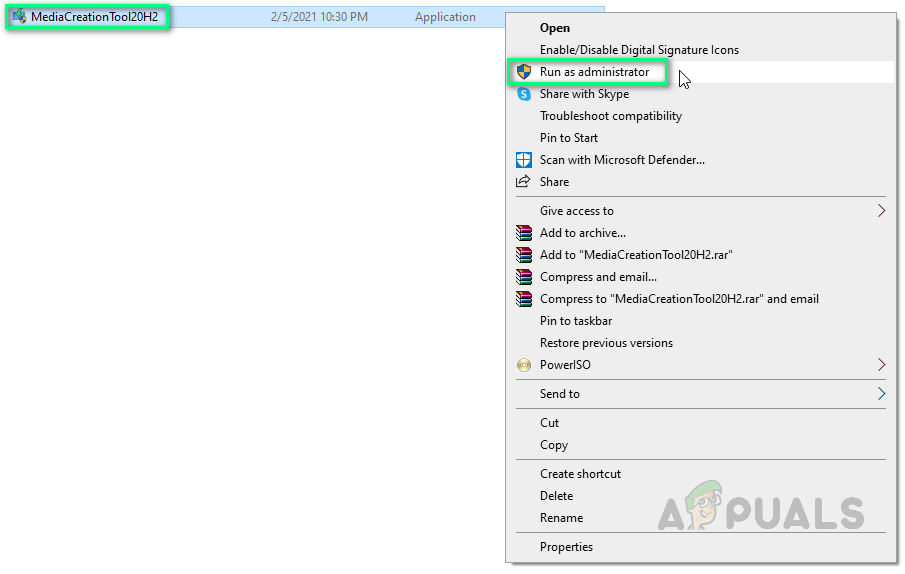
Running Windows Media Creation Tool as Administrator - A confirmation window will pop-up; select Yes to initialize the Windows 10 Media Creation Tool setup window.
- On the “Application notices and license terms” page, select Accept.
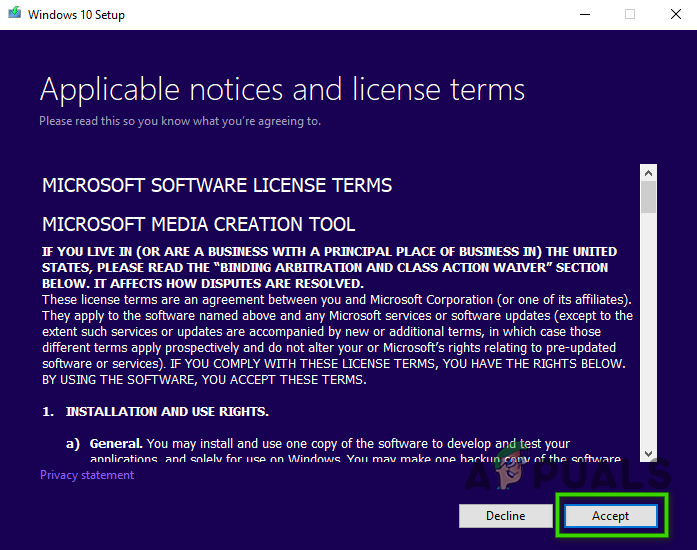
Accepting Terms and Conditions - Wait patiently for the Media Creation Tool to get a few things ready. Once done, it will take you to the “What do you want to do” page; select Upgrade this PC now, and then click Next.
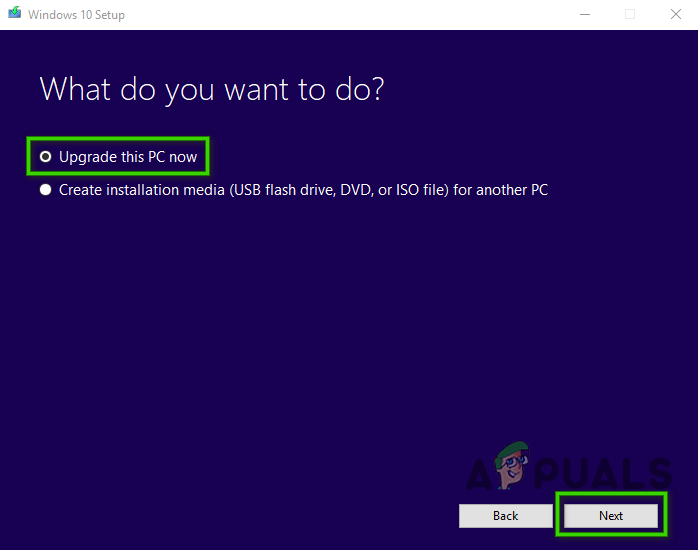
Selecting Upgrade this PC now - At this time, the Media Creation Tool will perform a scan of your PC and its Operating System and download some files for the latest updates suited for your PC. This process may take some time, depending on your PC hardware components and your network connection bandwidth. Once the downloading is complete, read the license terms and click Accept to proceed further.
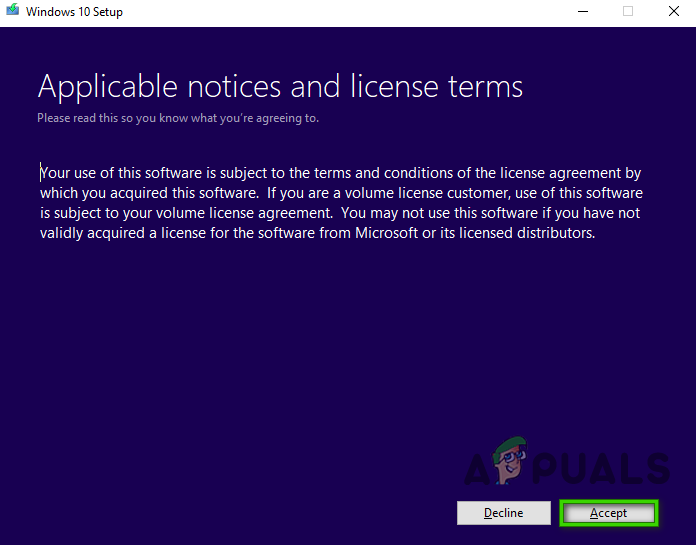
Accepting Notice and License Terms - Wait for the Media Creation Tool to check for any further updates. The Windows 10 Media Creation Tool will again perform a scan on your PC and ensure that it’s ready for the installation process. When you get this page on your screen as shown, you’ll see a recap of what you’ve chosen and what will be kept through the upgrade. Select Change what to keep.
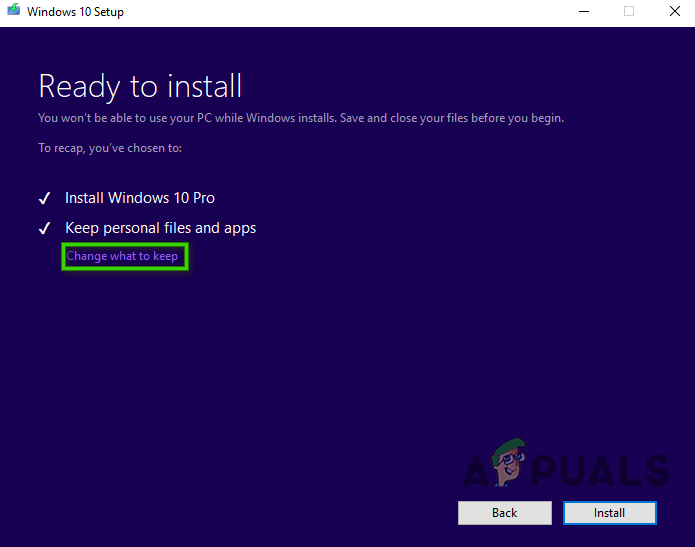
Changing what to keep - This page gives you three options to choose from: Keep personal files and apps, Keep personal files only, or Keep nothing during the upgrade. Make a selection of your choice and click Next to continue.
Note: It is recommended to select the Keep personal files and apps option to avoid losing any data.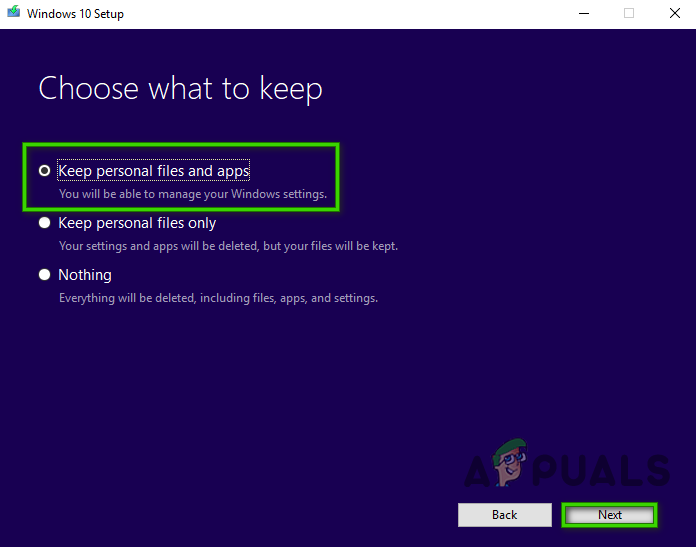
Selecting Keep Personal Files and Apps Option - Close any running applications, and when you’re ready, select Install. This will initiate the installation process. This procedure will take some time, so wait patiently and do not turn off your PC to avoid any errors.
Note: During the process, your PC will restart several times, so do not worry.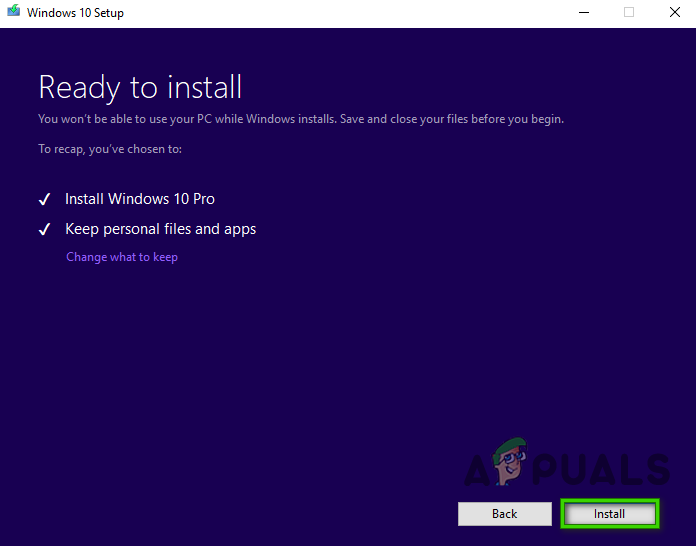
Installing Update through Media Creation Tool - Once the process is completed and Windows is normally loaded, you will find that the latest Windows Updates have been successfully installed on your PC, ultimately eliminating the error under consideration.


