How to Unlock and Root the OnePlus 3T
Note: You will need ADB installed on your computer. See this guide for how to install ADB on Windows computers. You should also have a backup of all your user settings stored somewhere, because one of these steps will involve factory-resetting your phone.
Please pay attention to the steps in this guide and follow them exactly. Do not reboot your phone or exit TWRP unless instructed.
- Download TWRP 3.0.4-1 from here and save the .img file to your platform-tools folder (located inside your ADB installation folder, example C:\android-sdk\platform-tools).
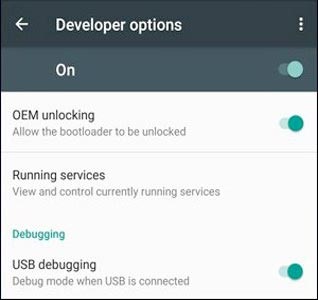
- Navigate to your phone’s Settings > About Phone > tap on “Build Number” 7 times to enable Developer Options.
- Go to Settings > Developer Options and enable “OEM Unlock”.

- Turn off your OnePlus 3T and boot into fastboot mode (Volume Up + Power). Alternatively you can hold Volume Up + Power after pressing Reboot from the power menu.
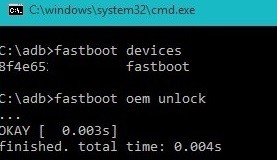
- Connect your phone to your computer via USB and open an ADB command terminal. Now run this command (WARNING: This will unlock your bootloader and completely reset your phone to factory defaults):
fastboot oem unlock

- Now we need to flash TWRP to your phone in ADB with this command:
fastboot flash twrp-3.0.4-1-oneplus3.img - Once the flash is successful, navigate to TWRP Recovery with your volume keys and select it with the power button. It will ask if you want to allow system modifications – swipe right if you intend to root your phone. If you do not intend to root, do not swipe right, it will enable DM-Verity and you will be unable to boot your device unless you continue following the steps to root. If you intend to root, DO NOT EXIT TWRP YET.
- Download the latest version of SuperSu Stable to your PC here and transfer it to your device via TWRP’S MTP connection.
- Flash the SuperSu.zip in TWRP. After it’s finished, you can now reboot your phone into the Android system.
- Make sure to download the SuperSu app from the Google Play store.
Alternative Root / Bootable System:
- Download the latest DM-Verity and Forced Encryption Disabler here
- Using TWRP’s MTP connection, transfer the above downloaded .zip to your device and flash it in TWRP.
- Now reboot your phone from TWRP’s Reboot menu (choose System Reboot).
- Leave your phone alone while it does its business, your phone will reboot a few times during the rooting process. You’ll know it’s done when your phone boots completely into Android.
- Wait 2-5 minutes for your device to finish setting itself up. (SuperSU will reboot you a few times)
How to Recover from Brick
- Download the OnePlus 3T Unbrick Tool here and extract the files to your desktop.
- You’ll now need to disable Driver Signature Enforcement in Windows. Press Windows Key+X and select “Command Prompt (Admin)” from the menu that opens.
- Type this into the command prompt:
bcdedit /set testsigning on
**If you get a message that says “The value is protected by Secure Boot policy”, you will need to disable Secure Boot in your BIOS. Refer to your BIOS manual or an online guide for that.

- If the command was successful, restart your computer. You should see a “Test Mode” watermark on the bottom-right of your desktop screen. This is a good thing.

- Turn off your phone with the power button. Now hold Volume Up for about 10 seconds while connecting your phone to your computer via USB.
- Open your Windows Device Manager and check that you can see “QHUSB_BULK” under Unknown Devices.
- Right click on “QHUSB_BULK” and choose “Update Device Software”. Select the drivers folder you previously extracted to your desktop and install it.
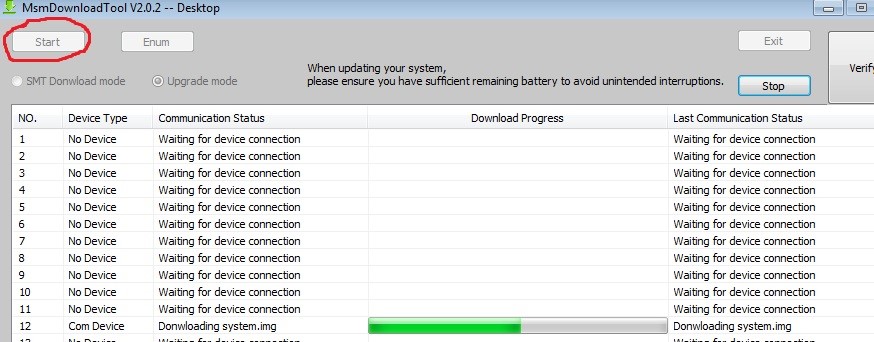
- After installing the drivers, the device should now register as “Qualcomm 9008”. Open the extracted tools folder on your desktop and run the MSM Download Tool as administrator.

- Click the Start button and wait for a bit until you see green text. Now disconnect your phone and boot into the Android system!