Fix: Netflix Error Code U7361-1253-C00D6D79 on Windows 10
Some Windows 10 users are encountering the U7361-1253-C00D6D79 Error Code when trying to stream content from Netflix using the UWP (Universal Windows Platform) app. In most cases, the error is accompanied by the following message ‘We’re having trouble playing this title right now. Please try again later or select a different title‘.
Since Microsoft has already released a series of hotfixes aimed at fixing various inconsistencies exhibited by the UWP versions of HBO GO, Netflix, and Amazon prime, you should start this troubleshooting quest by updating Windows to the latest version. Additionally, you should also try to update the Netflix UWP app manually.
In case you’re dealing with a generic issue (most likely a cache problem), you should be able to get the issue resolved by running the Windows App troubleshooter, by resetting the Netflix app or by uninstalling and reinstalling the app.
However, if you’re only encountering this issue when playing media that you’re currently downloading for offline use, wait for the download to complete or clear the download queue before trying to stream the content.
Update Windows to the latest version
As it turns out, the U7361-1253-C00D6D79 error code can also occur due to a pending Windows Store update that is not installed. Microsoft already released a series of hotfixes that fixed a lot of incompatibilities exhibited by the Netflix, Amazon Prime and HBO go apps.
Several affected users that struggled with this issue have confirmed that the issue was resolved after they installed every pending OS update via the Windows Update (WU) component.
Here’s a quick guide on installing any pending Windows Update:
- Open up a Run dialog box by pressing Windows key + R. Next, type ‘ms-settings:windowsupdate’ and press Enter to open up the Windows Update tab of the Settings app.
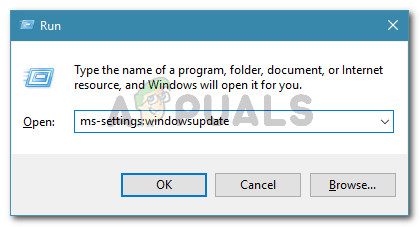
Run dialog: ms-settings:windowsupdate - Inside the Windows Update section, start by clicking on Check for Updates. Next, follow the on-screen instructions to install every pending update.

Installing every pending Windows update - Once you install every pending update, reboot your machine and see if the issue is resolved once the next startup sequence is complete.
Note: If you’re prompted to restart before every pending update is installed do so, but make sure to return to the same WU screen and complete the installation of the rest of the updates at the next startup.
In case you’re still encountering the U7361-1253-C00D6D79 error code, move down to the next potential fix below.
Update Netflix UWP to the latest version
As it turns out, this issue often occurs due to a Netflix application bug that is only present on the Universal Platform Version. In most cases, it’s reported to appear if users have previously downloaded content for offline use.
But as som affected users have reported, this issue was already resolved by Netflix via an application update. Microsoft Store should have already installed the update for you, but if you have previously modified the default updating settings on the Windows 10 store, you might need to force the update to install in order to resolve the issue.
Here’s a quick guide on updating the Netflix UWP app to the latest version:
- Open up a Run dialog box by pressing Windows key + R. Next, type ‘ms-windows-store://home’ and press Enter to open up the default dashboard of the Microsoft Store.

Opening the Microsoft store via Run box - Once you’re inside the Microsoft Store, click on the Action button (top-right corner) and click on Downloads and Updates from the list of available options.
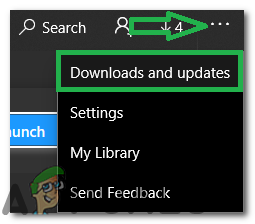
Clicking on the “Three Dots” and selecting “Downloads and Updates” - From the Downloads and updates screen, click on Get updates and wait until the Netflix app is updated to the latest version.
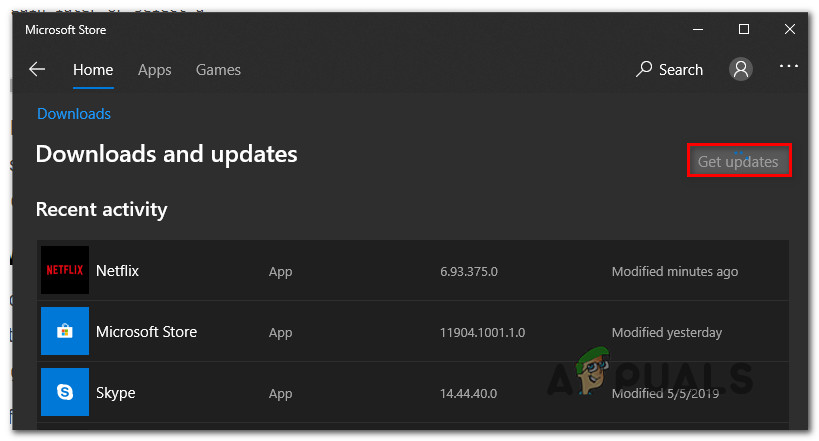
Get updates - Wait patiently until the update is installed, then restart your computer and launch the UWP app of Netflix after the next startup is complete to see if the problem is fixed.
In case you’re still encountering the same U7361-1253-C00D6D79 error code when attempting to play a Netflix title, move down to the next potential fix below.
Running the Windows App troubleshooter
Under certain circumstances, Windows 10 might be automatically capable to identify and fix the issue. The Windows App troubleshooter is robust on Window 10 and is capable of fixing a lot of scenarios in which the UWP app is malfunctioning.
If you’re encountering the U7361-1253-C00D6D79 error code due to generic issues like a corrupted cache folder, the steps below should allow you to fix the issue with minimal hassle.
Here’s a quick guide on running the Windows Apps troubleshooter in order to resolve the issue:
- Press Windows key + R to open up a Run dialog box. Next, type ”ms-settings:troubleshoot’ inside the text box and press Enter to open up the Troubleshooting tab of the settings menu.
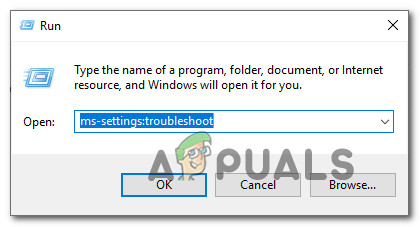
Accessing the Activation troubleshooter - Once you’ve arrived in the Windows Troubleshooting tab, move to the right-hand menu and scroll down to the Find and Fix other problems sections. From there, click on Windows Store Apps. Next, click on Run the troubleshooter to open up the utility.
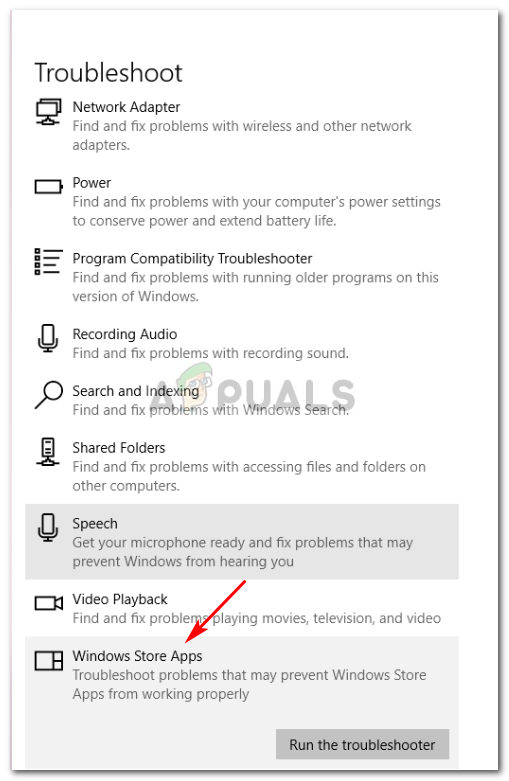
Run Windows Store Apps troubleshooter - After you manage to open up the utility, wait patiently until the initial scan is complete. Next, follow the on-screen prompts to apply the repair strategy that gets recommended (based on the type of issue that you’re dealing with). Click on Apply this fix to start the utility.

Apply this fix - After the fix is applied, restart your computer and wait patiently until the next startup is complete. Then, launch the UWP version of Netflix again and see if the issue is resolved.
If you’re still encountering the same U7361-1253-C00D6D79 error code, move down to the next potential fix below.
Clearing the download queue
As a lot of affected users have reported, the U7361-1253-C00D6D79 error code can occur whenever you’re trying to play a media that you’re currently downloading for offline use.
In case you have a title that you’re currently downloading on the UWP app, wait for the update to complete before attempting to play the title again.
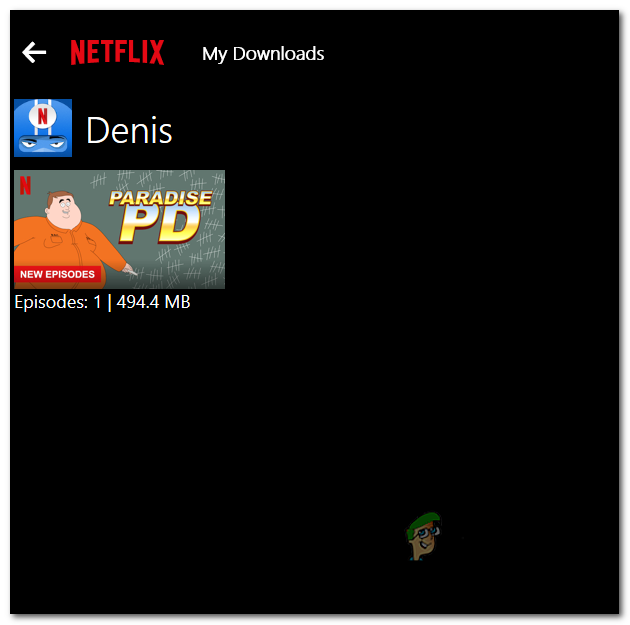
Once the download is complete, restart the Netflix UWP app and play the title again to see if the error is resolved.
In case you have a lot of media waiting to get downloaded, you can also clear the Download Queue manually from within the app. Here’s a quick guide on how to do this:
- On the main dashboard of the Netflix UWP application, click on the action icon (top-left corner) and click on My Downloads from the menu on the left.
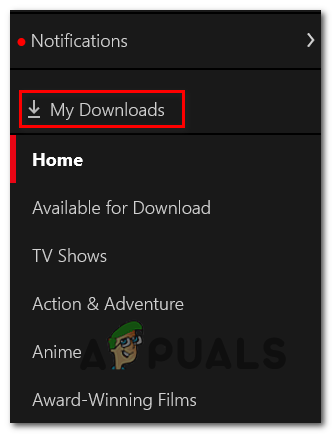
Accessing the My Downloads menu - Once you’re inside the My Downloads menu, click on Manage (top-right corner).
- Next, select the queued media that you want to get rid of and click the Delete button in the top-right corner of the screen.
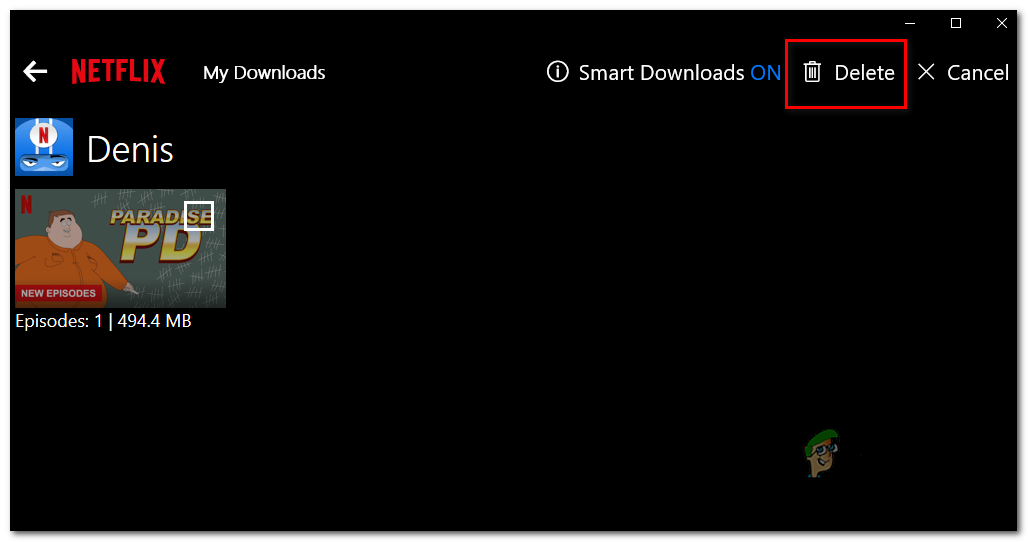
Deleting the queued media - Once every queued media is removed, restart the Netflix UWP application and see if the issue is resolved.
In case you’re still encountering the same U7361-1253-C00D6D79 error code, move down to the final potential fix below.
Resetting or Uninstalling the Netflix UWP app
If none of the methods above have allowed you to fix the U7361-1253-C00D6D79 error on Netflix UWP, you should try resetting the application in order to clear any temporary data that might cause this issue. If that doesn’t work, you should proceed by uninstalling and re-downloading the application.
Here’s a quick guide on resetting the Netflix app:
- Open up a Run dialog box by pressing Windows key + R. Next, type ‘ms-settings:appsfeatures’ and press Enter to open up the Apps & Features menu of the Settings app.
- Once you’re inside the Apps & Features menu, move down to the right-section and scroll down through the list of installed UWP applications until you find the Netflix app.
- When you see it, click on it to expand the menu, then click on Advanced Options.
- Next, scroll down to the Reset tab and click on the Reset button associated with it.
- When you’re ready to go, confirm the process by clicking on Reset once again.
Note: After you do this, the app will be reinstalled and the settings will be reverted to the default settings. - After the operation is complete, start the Netflix app again and see if the problem is resolved.
In case the same issue is still occurring, follow the instructions below to uninstall & reinstall the UWP version of Netflix:
- Open up a Run dialog box by pressing Windows key + R. Next, type ‘ms-settings:appsfeatures’ and press Enter to open up the Programs & Features tab of the Settings app.
- Next, locate the Netflix app by going to the Programs & Features tab and scrolling down through the list of applications.
- With the Netflix app selected, click on the Advanced Menu hyperlink. Next, scroll down to the Uninstall section and click on Uninstall to confirm the uninstallation process.
- Once the process is complete, reboot your computer and wait for the next startup sequence to complete.
- Press Windows key + R to open up another Run dialog box. This time type ‘ms-windows-store://home’ and press Enter to launch the home page of the Microsoft Store.
- Inside the Microsoft Store, use the search function (top-right section of the screen) to search for Netflix.
- From the list of results, click on Netflix and hit the Get button to download & install the application.
- Once the installation is complete, launch the application and attempt to play the same title that was previously filing with the U7361-1253-C00D6D79 error to see if the issue has been resolved.


