How to Troubleshoot Photoshop CC Installation Failed
Adobe Photoshop is one of the largest and most popular image editing programs out there. It has been around for some time and the latest version is known as the Creative Cloud version. Just like any other Desktop Application Photoshop users also face errors while trying to install it.
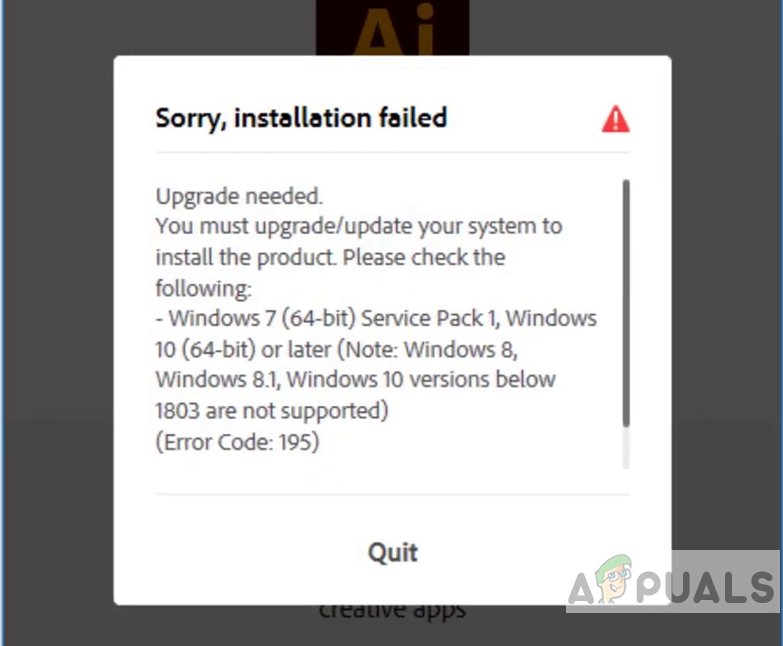
This has been reported by many users and that usually occurs during the installation phase. The common reasons are incompatibility issues, corrupt installation files, or a third-party application blocking the program installation setup. Before you proceed to the following solution make sure you downloaded the Adobe Photoshop program from the official website and that your system meets the minimum hardware and software requirements.
Method 1: Run Setup in Compatibility Mode
In this method, we will run the Adobe Photoshop installation setup file in compatibility mode. Windows allows the users to run or execute a certain program in compatibility mode for previous Windows versions. This enables the execution of applications that were meant for previous versions of Windows to run on later versions as well. This compatibility mode can also be used to troubleshoot installation errors and has been reported to work by many users.
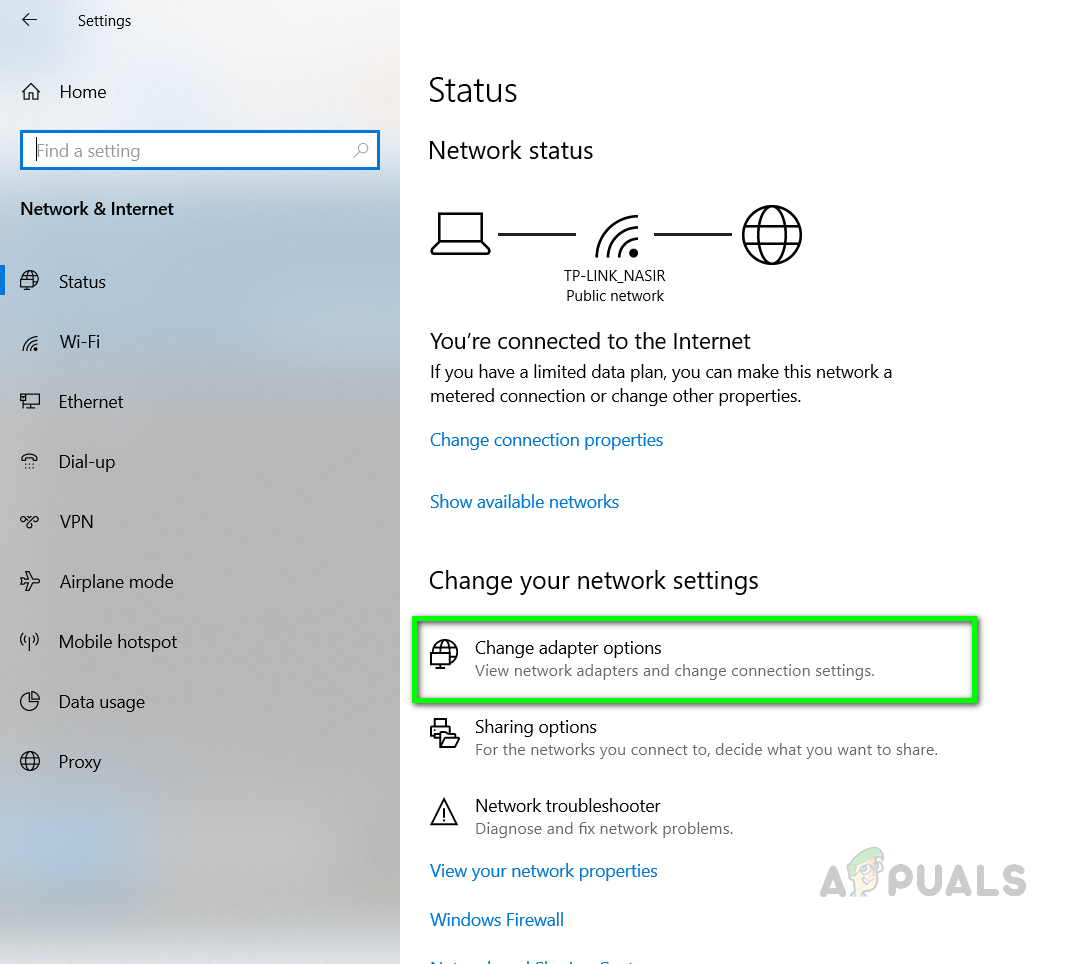
- First, you will need to disable your network adapter which will temporarily disconnect you from the internet. Go to your Network & Internet Settings and click on Change Adapter options
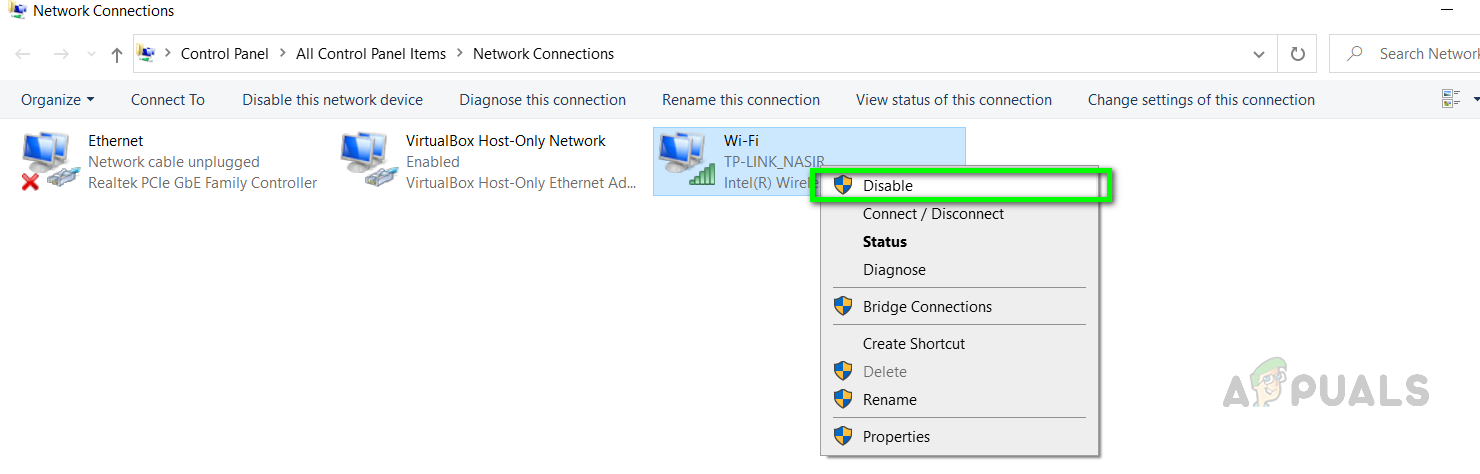
Change adapter options - Right-click on your network adapter and click disable (You will need administrator privileges to do this)
Disable internet Adapter - Now open the drive that has your Windows Files and navigate to the following folder.
C:\Program Files (x86)\Common Files\Adobe\Adobe Desktop Common\HDBox
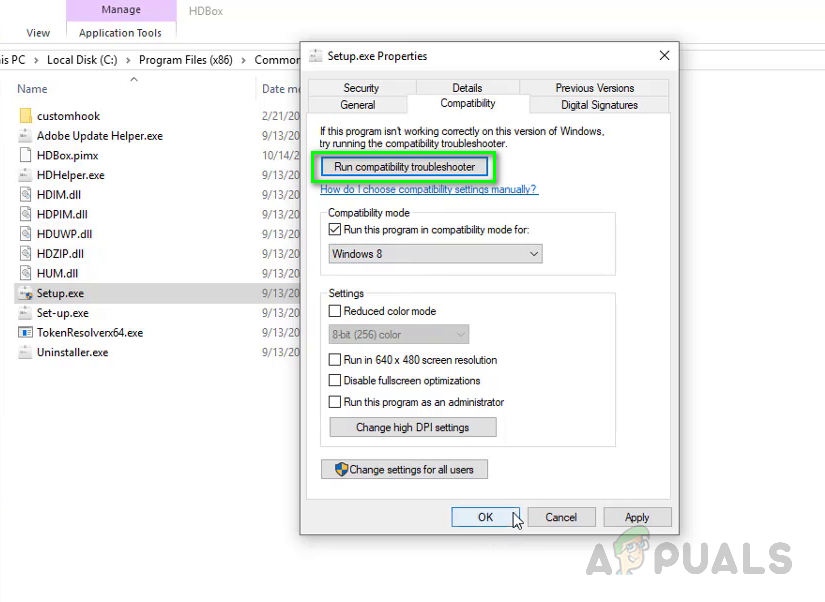
- Right-click on the setup file and open properties, under the compatibility tab, click on the check-box that says ‘Run this program in compatibility mode for’, and in the dropdown select Windows 8. Click Apply and then press Ok to apply changes. Do this for both setup.exe and set-up.exe files.
Run this program in compatibility mode for - Now go to the following folder and repeat the same step.
C:\Program Files (x86)\Common Files\Adobe\Adobe Desktop Common\ADS
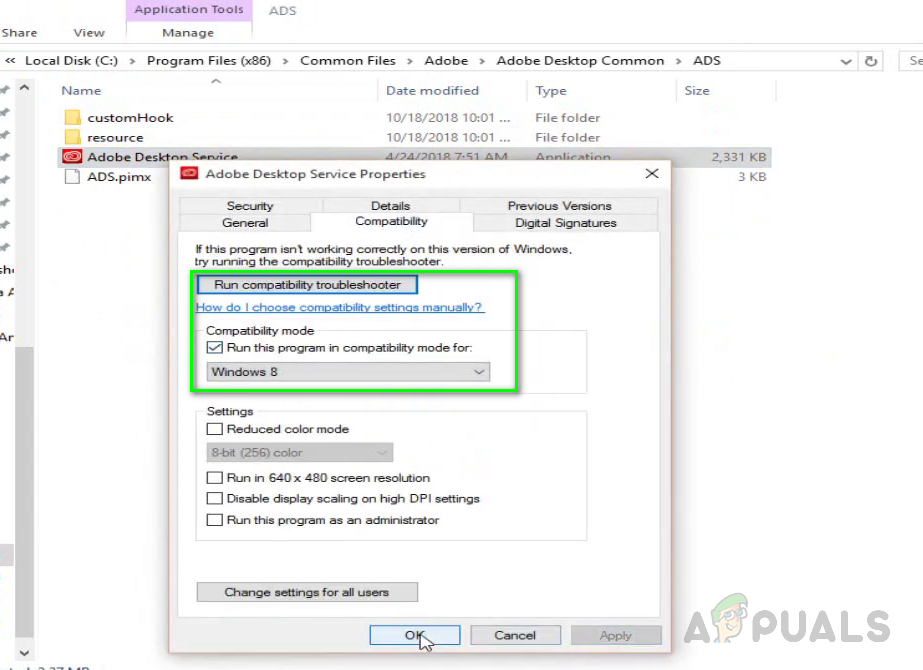
Run this program in compatibility mode for, - Now go to the folder where you downloaded the Adobe Photoshop Installation setup and right-click on it to open properties and change the compatibility mode just like in the steps above.
- Now run the setup file, it will take some time to initialise and now you should be able to install the Photoshop program.
Method 2: Change the Photoshop Installation Settings
In this method, we will change the Photoshop installation settings by changing the configuration in the application.xml file that is present in the Adobe Photoshop package which you downloaded for installation. The application.xml file contains data related to installation which also contains the minimum system requirements.
Before the setup initializes the setup file runs a background check to make sure your computer meets the minimum system requirements. Though your system might already satisfy those requirements but we will still change the Windows version in the application.xml file to the one installed on your computer. This has been reported to have solved the error by many users. Please see the steps below.
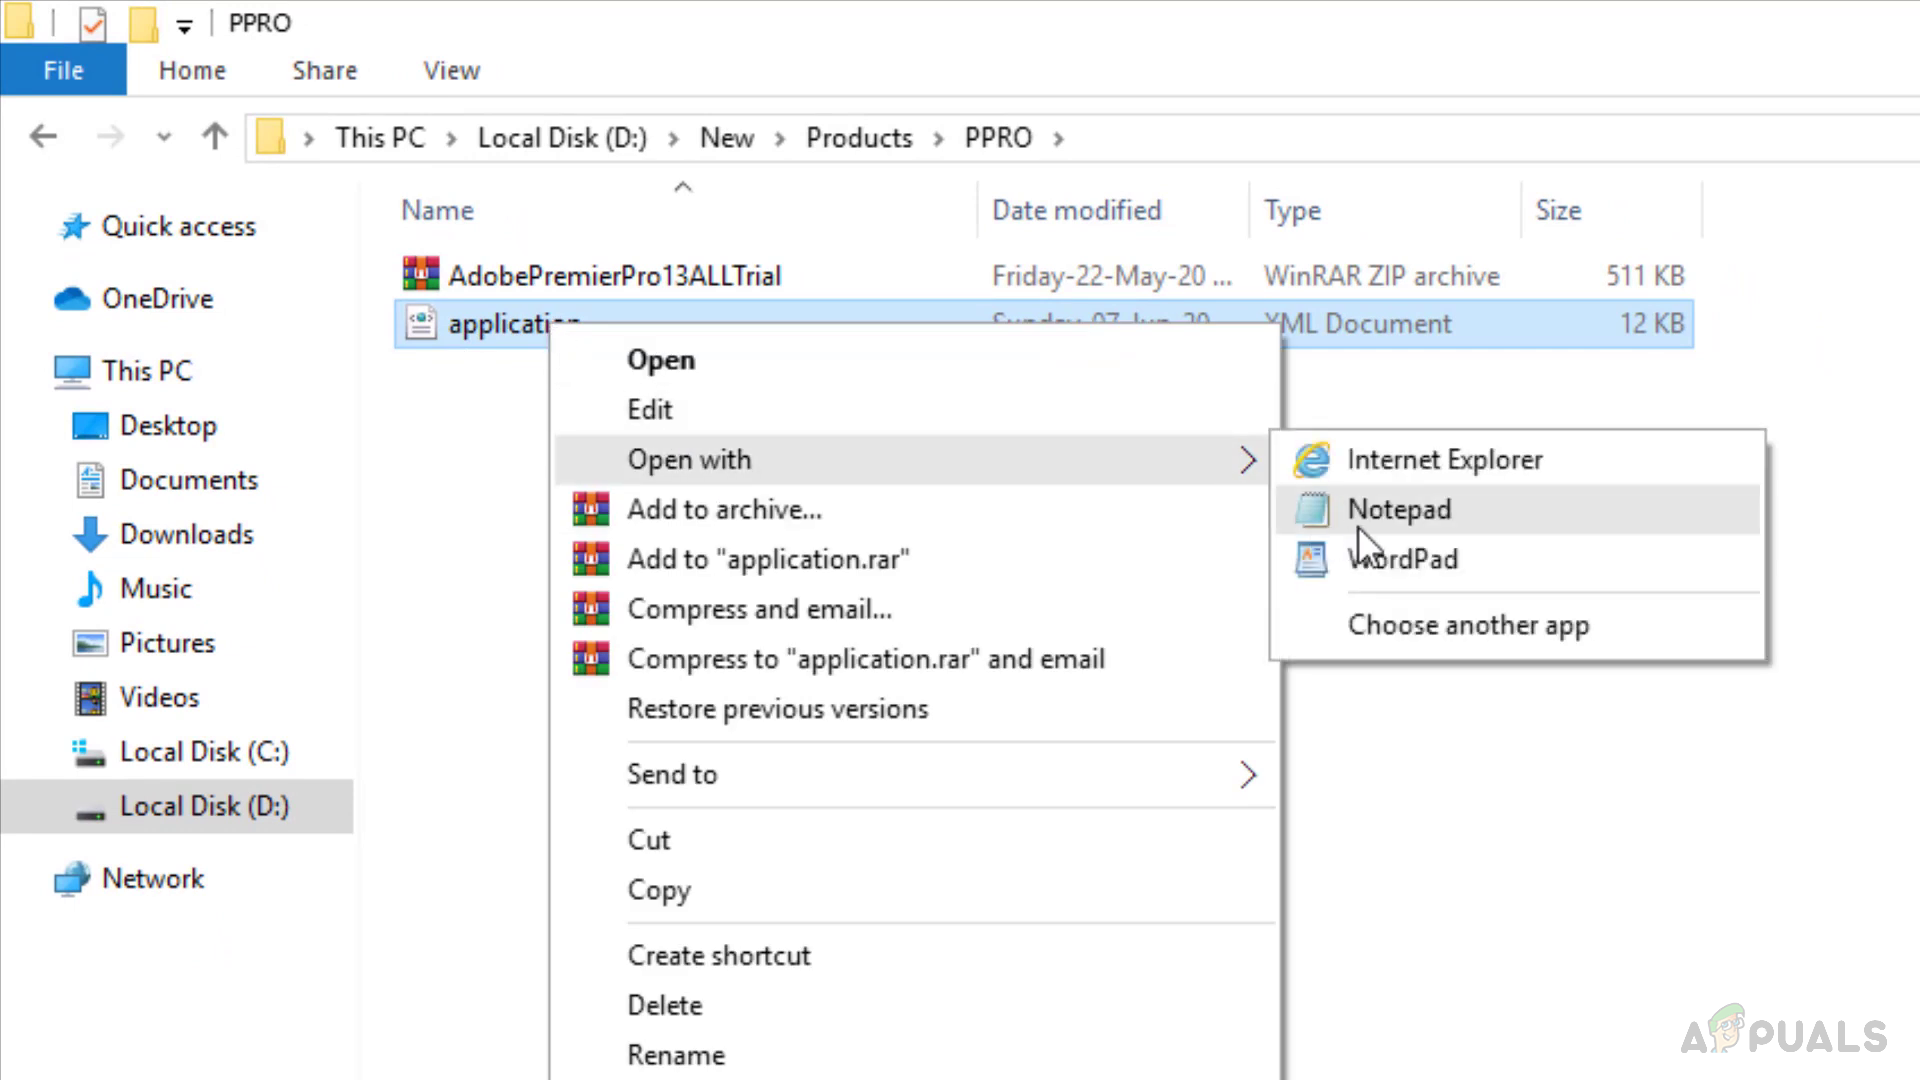
- Open the folder that contains the Photoshop installation files, you will see the Products folder, and inside there is another folder PPRO that contains the application.xml file. Right-click on the file to open it with notepad.
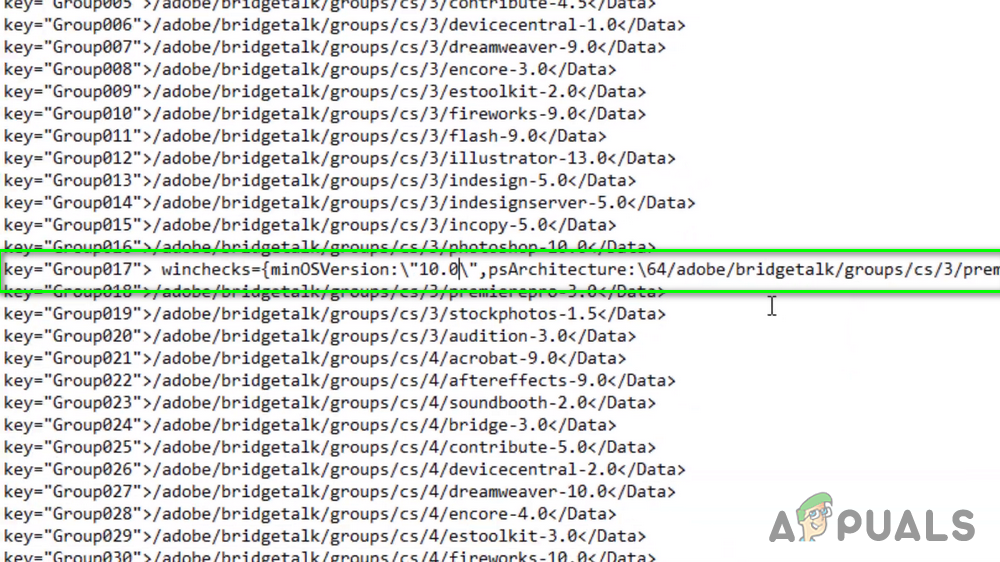
Right-click on the application.xml file to open it with a notepad. - Press Ctrl+F and search for the system and keep pressing next until you find the below line of code.

- Now press Windows Key + R, this will open the Run menu, enter winver, and press Ok to run.
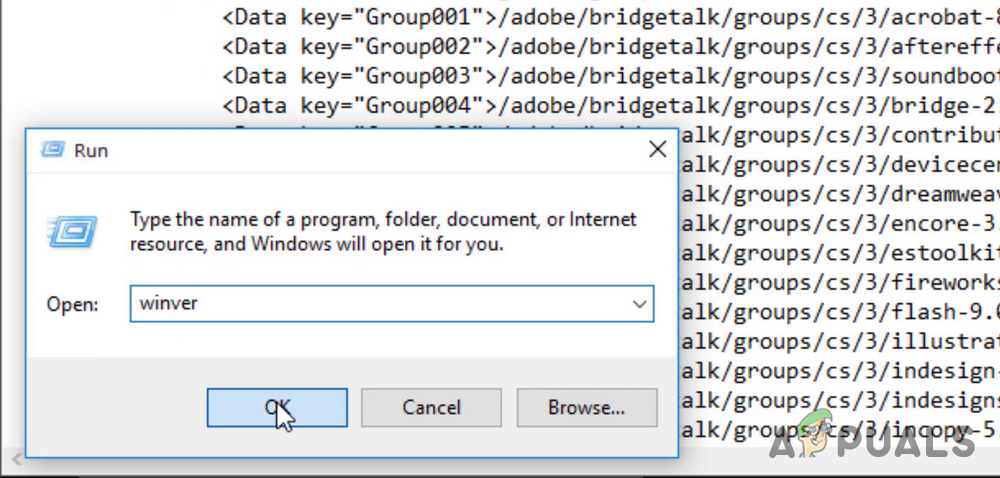
enter winver, and press Ok to run - Find out your windows version and replace it in the application.xml file with the previous version.
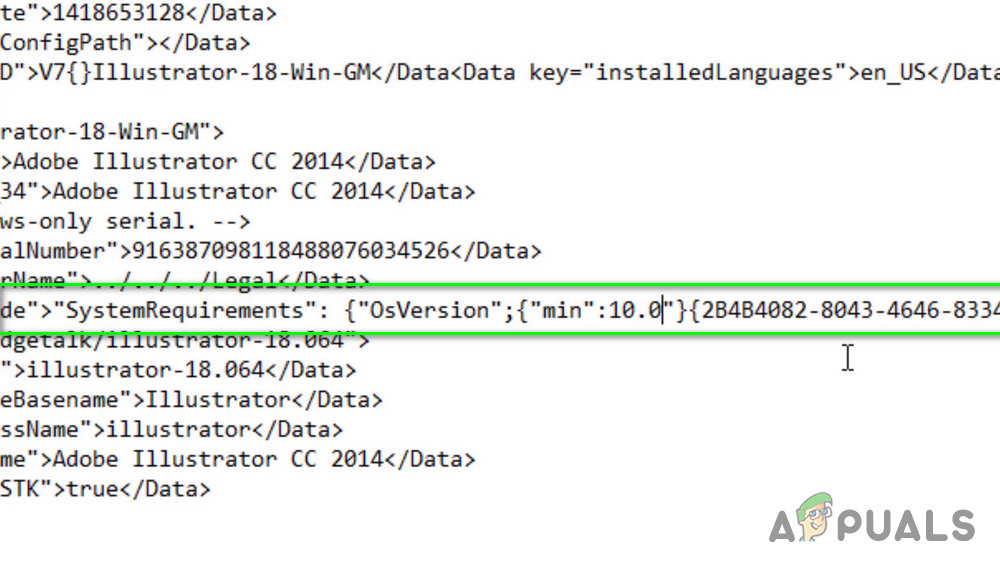
- Now scroll down search for the line of code that contains the word minOSVersion and also replace the version there as well.
- Now click on the menu bar, click File and press the Save option to save the changes.
- We are done, now try to run the Photoshop setup file.


