Fix: “To Run This Application, You Must Install .NET Framework” Error
The error message “To run this application, you first must install one of the following versions of the .NET Framework” appears when you attempt to launch a program that depends on specific .NET Framework components. This occurs when those components are missing, corrupted, damaged, or blocked within Windows. Since the .NET Framework provides essential libraries required by many applications, any malfunction can prevent the program from running correctly.

Other possible reasons include a corrupted user profile, Windows failing to load .NET components, or damage caused by incomplete Windows updates.
Now that you understand the causes, follow the reliable methods below that have helped many users fix this issue.
1. Rebuild .NET Framework through Windows Features
Even a single broken or disabled component within the .NET Framework can stop the entire environment from functioning. Re-enabling it through Windows Features and reinstalling the latest runtime packages restores missing libraries and fixes corrupted detection paths.
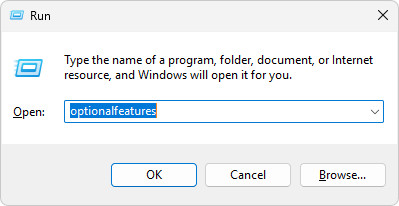
- Press Windows key + R, type optionalfeatures, and press Enter.
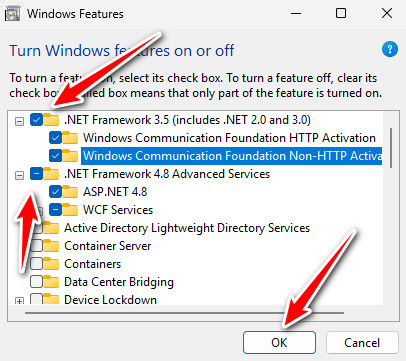
- In the Windows Features window, locate .NET Framework 3.5 and .NET Framework 4.x.
- Check both boxes (including all sub-options), then click OK and let Windows install the required components.
- After installation, download the latest .NET Framework Runtime packages from Microsoft for both 3.5 and 4.x versions, then run them.
- Restart your PC and launch the affected program again.
2. Run System File Checker (SFC) Scan through Command Prompt
If .NET Framework files are damaged or missing, Windows may falsely detect them as installed. Running the System File Checker (SFC) scan ensures all protected files, including .NET components, are verified and replaced automatically when needed.
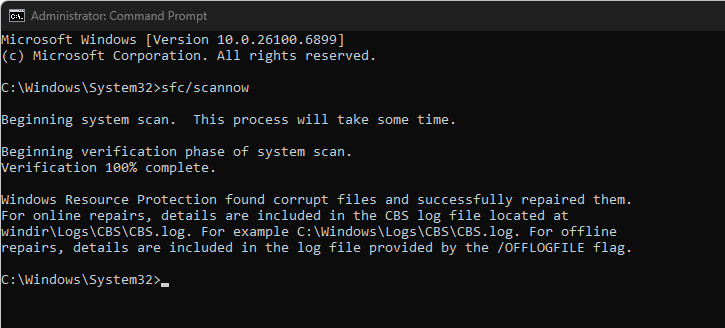
- Press Start and type cmd.
- Right-click Command Prompt and select Run as administrator.

- In the Command Prompt, type sfc /scannow and press Enter.
- Allow the scan to reach 100% and check the results.
- Once completed, restart your PC and try opening the app again.
3. Create a New Administrator Account
Sometimes, the issue lies in your current user profile, which might fail to load .NET associations correctly. Creating a new administrator account provides Windows with a clean profile that has proper permissions and registry mappings. If the program works under the new profile, the old one was likely corrupted.
- Press Windows key + I to open Settings.
- Navigate to Accounts → Family & other users (or Other users on certain Windows versions).

- Click Add account and create a new local user.

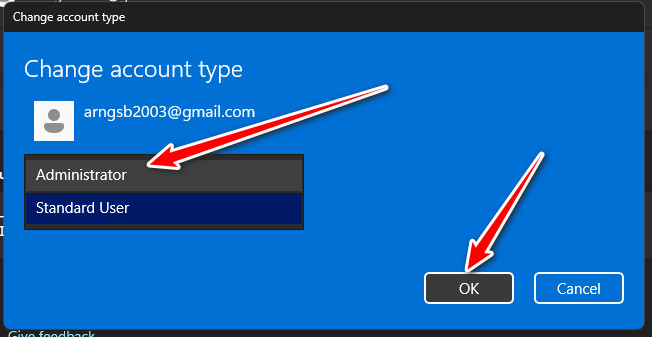
- Once created, select the new user and choose Change account type.
- Set it to Administrator, then sign out and log in using this new profile.
- Try running the same program to see if the .NET Framework error is resolved.
4. Reset Your Computer to Restore .NET Framework Functionality
If the problem persists, resetting your PC can rebuild core Windows components and reinstall .NET Framework modules automatically. This option is safer than a complete reinstall and lets you keep your personal files intact.
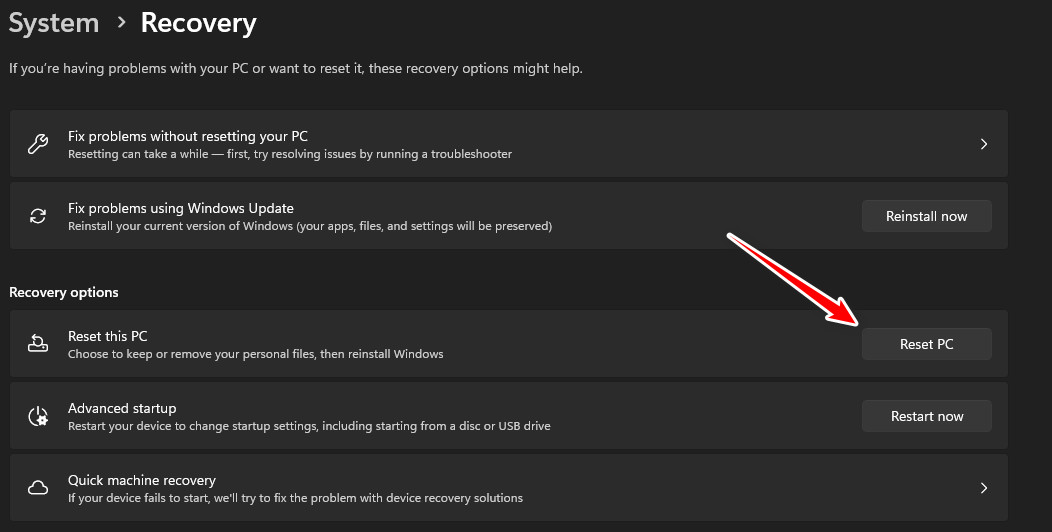
- Press Windows key + I to open Settings.
- Go to System → Recovery.

- Click Reset this PC.
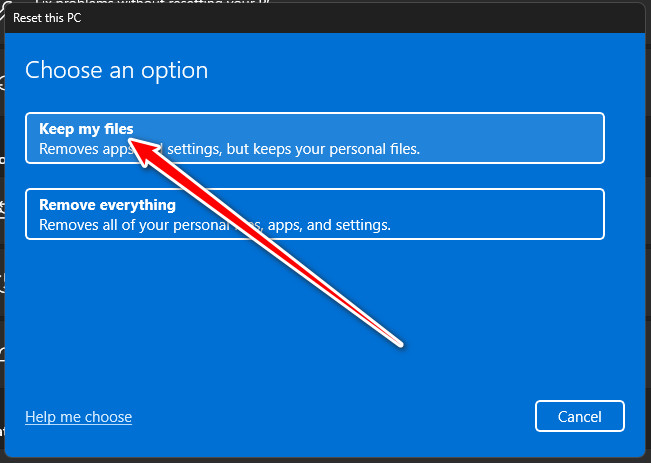
- Select Keep my files to retain your data while reinstalling system files.
- Follow the on-screen instructions to complete the process.
- After the reset, relaunch the app that was showing the .NET Framework message.


