Fix: “This unlicensed Adobe app has been disabled”
Adobe Creative Cloud apps verify your license using your Adobe account session, your plan status, and background services/components (such as Adobe Genuine Service and Creative Cloud licensing caches). If verification fails (for example, due to a stale sign-in session, payment/plan mismatch, activation/device limits, connectivity blocks, hosts-file blocks, or corrupted licensing components), you may see:
This unlicensed Adobe app has been disabled.
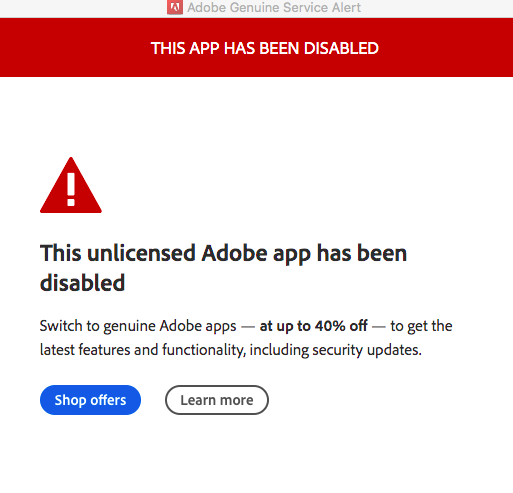
This can prevent the app from launching even when your subscription looks active in your Adobe account.
Common causes include:
- Account, Plan, Payment, or Wrong Adobe ID: Your plan is paused/expired, payment failed, you’re signed into the wrong Adobe ID, or you’re signed into the correct ID on the website but a different ID inside Creative Cloud.
- Activation / Device Limit: The plan is active, but your account has reached its activation/device limit, or old sessions/devices are still tied to the license.
- Network/Connectivity Blocks: Firewall, VPN, proxy, DNS filtering, or security tools block Adobe sign-in/licensing endpoints (so apps can’t validate your subscription).
- Hosts File / “Block Adobe” Entries: Manual entries or debloat scripts can redirect/block Adobe licensing domains.
- Damaged Licensing Components: Corrupted Creative Cloud desktop app data, licensing caches, or Genuine-related components prevent verification even when your plan is fine.
- Permission/System Issues: Services can’t start, folders aren’t writable, or security policies prevent Adobe services from running normally.
Start with account and sign-in checks first (they’re the safest and most common), then move to connectivity and repair steps. After each fix, relaunch the affected app to confirm whether the message is gone.
1. Confirm Your Plan Is Active (Account + Correct Adobe ID)
This checks whether your subscription is active, billed correctly, and linked to the same Adobe ID you’re using in Creative Cloud on this PC. It also helps you spot plan issues (Paused/Expired) or account mismatches.
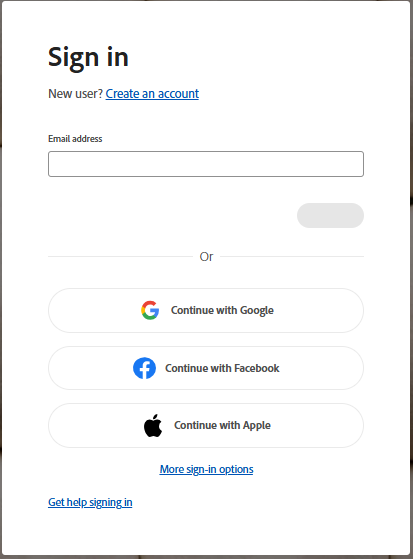
- Open Adobe’s official site and click Sign in:
https://www.adobe.com/ - Click Sign in.

- Sign in using the same Adobe ID you intend to use in Creative Cloud on this PC.
- Click the profile icon > Manage account.
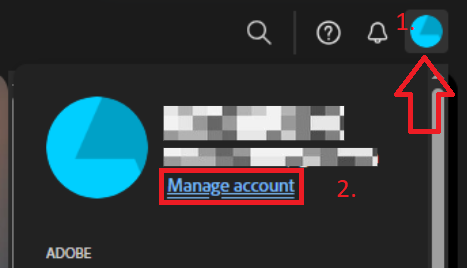
- Open Plans and payment (or Plans), then check your products/subscription status.
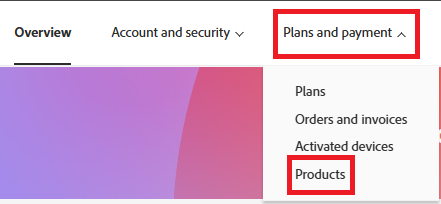
- Confirm the plan is Active and matches the Adobe app you’re opening.
- If the plan is Paused/Expired or there’s a billing/payment issue, resolve that first, then restart your PC and test the app again.
2. Verify Creative Cloud Is Signed Into the Same Adobe ID
A very common cause is being signed into one Adobe ID in the browser, but a different Adobe ID inside the Creative Cloud desktop app. Before doing anything advanced, confirm the account email shown in Creative Cloud.
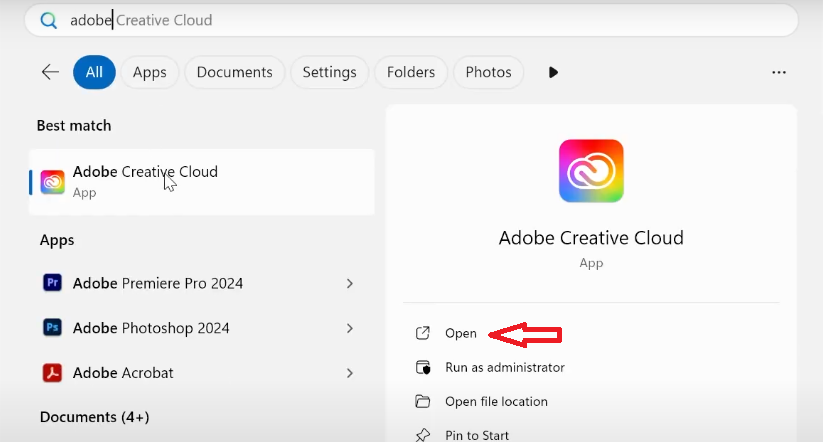
- Open the Creative Cloud desktop app.
- Click your profile icon (top-right).
- Confirm the email/Adobe ID shown there matches the account you checked in Step 1.
- If it’s the wrong Adobe ID, choose Sign out, restart the PC, then sign back in with the correct Adobe ID.
3. Refresh the Creative Cloud Session (Sign Out/In)
A valid plan can still fail verification if your Creative Cloud session is stale or stuck on cached credentials.
- Open the Creative Cloud desktop app.
- Click your profile icon and choose Sign out.
- Restart your computer.
- Open Creative Cloud again and sign back in with the correct Adobe ID.
- Launch the affected Adobe app and check if the error is gone.
4. Update Creative Cloud and the Affected Adobe App
Creative Cloud updates refresh licensing modules and fix bugs that can cause verification problems (especially after recent app/desktop updates).
- Open Creative Cloud on your computer.
- Find the app showing the warning, then click View updates (or open the Updates section).
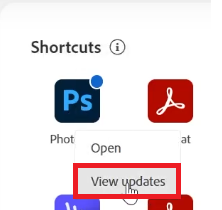
- Install any available updates.

- Restart your PC and relaunch the app.
5. Make Sure Firewall/Security Isn’t Blocking Adobe
If Adobe apps can’t reach licensing servers, they can show “unlicensed” even when your subscription is valid.
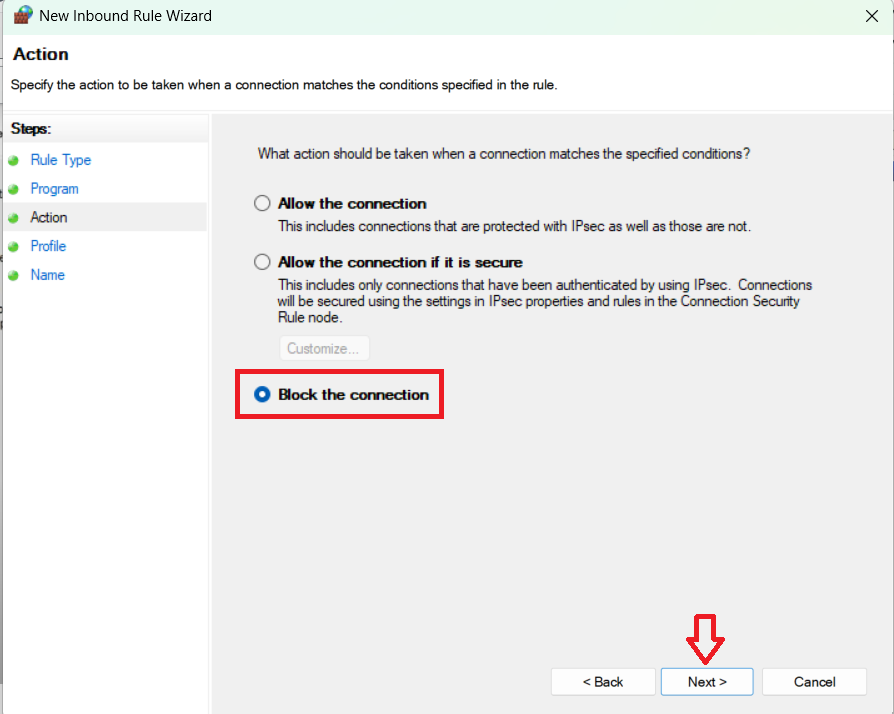
Here you’re looking specifically for rules that are set to Block.
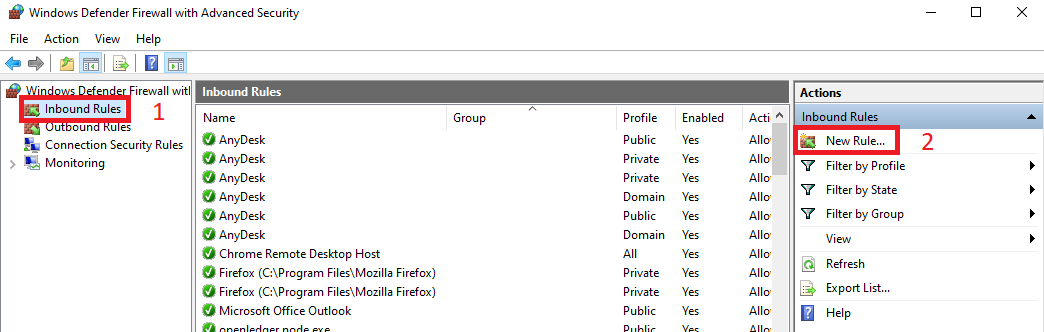
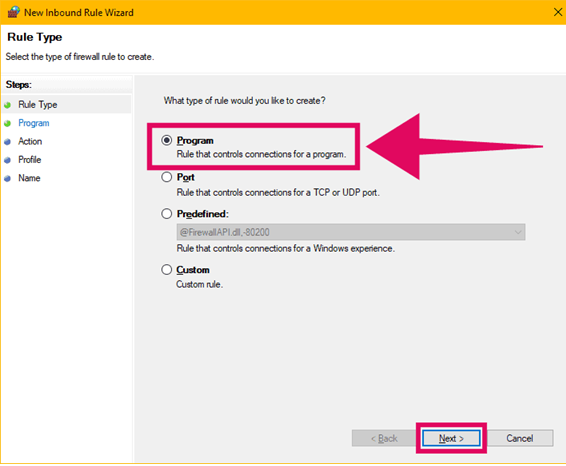
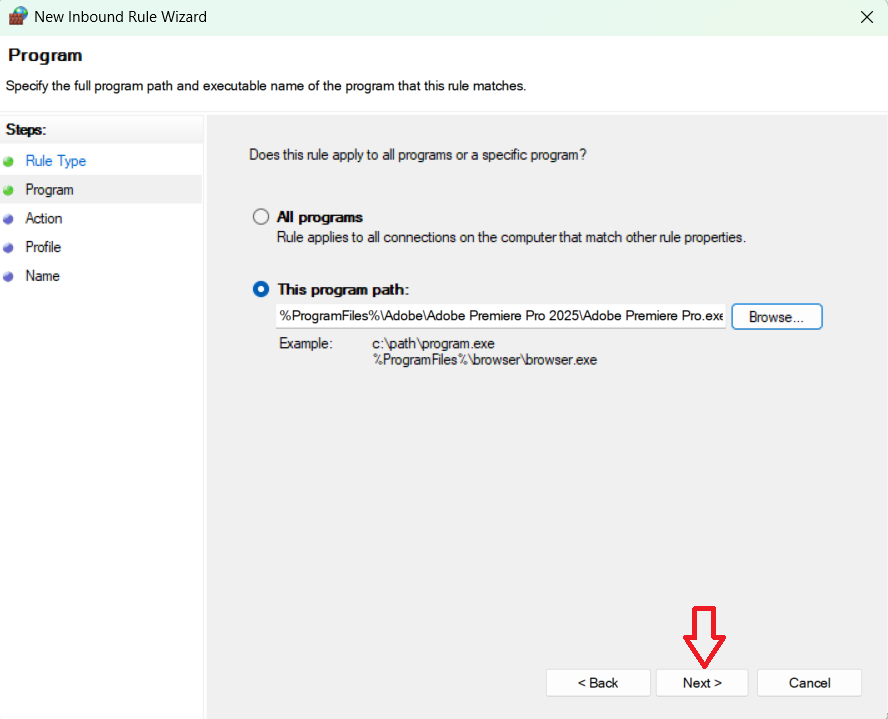
- Open Windows Defender Firewall with Advanced Security.
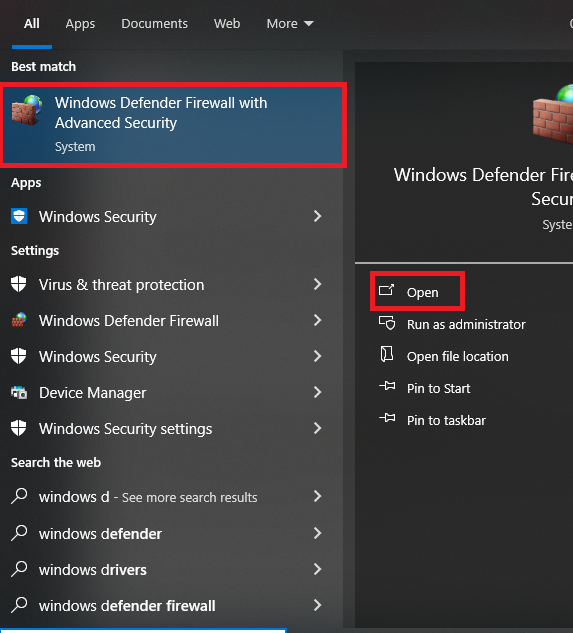
- Check Inbound Rules and Outbound Rules for any rules that mention Adobe apps (Photoshop, Illustrator, Premiere, Creative Cloud, Adobe Desktop Service, etc.).
- If you see rules set to Block (like the “block the connection” option shown below), either delete those blocking rules or edit them to Allow instead.
- Also remove duplicate or conflicting Adobe rules (especially old Block rules).
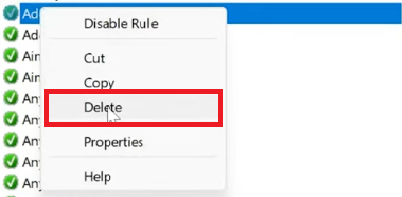
- Restart your PC and try launching the Adobe app again.
5. Repair Adobe Genuine / Licensing Components
Adobe Genuine Service and Creative Cloud licensing components help validate license status. If they’re corrupted, disabled, or failing to start. Adobe apps may incorrectly report your installation as unlicensed. Instead of disabling them, make sure they’re running normally and repair them if needed.
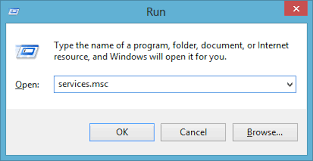
- Press Win + R, type services.msc, and press Enter.
- Find Adobe Genuine Service.
- If it’s Stopped, right-click it and choose Start (or Restart if available).
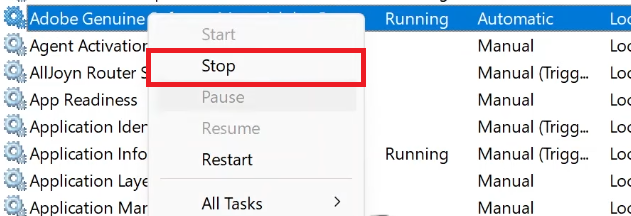
- Double-click it and set Startup type to Automatic, then click Apply.
- Restart your PC and test the Adobe app.
If the service won’t start, is missing, or keeps stopping: licensing components may be damaged or restricted by policy (common on managed PCs). The safest repair is usually to reinstall/repair Creative Cloud (next step).
- Open Settings > Apps > Installed apps (or Apps & features).
- Locate Adobe Genuine Service.

- If Adobe Support specifically advised it, uninstall it, then restart your PC.
- Immediately reinstall/repair by installing the latest Creative Cloud desktop app from Adobe’s official site, then try launching the affected app again.
6. Reinstall Creative Cloud (Clean Refresh)
If none of the above works, Creative Cloud itself may be corrupted. A clean reinstall often fixes broken license caches, stuck background services,
and damaged sign-in components.
- Uninstall Adobe Creative Cloud from Windows Settings.
- Restart your PC.
- Install the latest Creative Cloud desktop app from Adobe’s official site, then sign in.
- Launch the affected app again and check if the message is gone.
If a normal reinstall does not help: Adobe’s Creative Cloud Cleaner Tool (official) can remove leftover Creative Cloud/licensing components more thoroughly.
Use it only as a last resort and reinstall Creative Cloud immediately afterward.
If It Still Says “Unlicensed,” Contact Adobe Support (or Your IT Admin)
If your plan is active and local fixes don’t help, the account may be flagged, device activation may be blocked, or there may be a billing/region/enterprise licensing mismatch that only Adobe (or your organization) can clear.
When you contact support, include the details below to avoid back-and-forth.
- Your Adobe ID email (and whether it’s Personal, Teams, or Enterprise/SSO)
- The exact Adobe app name and version showing the message
- Whether this happens on one device or multiple devices
- Whether you recently changed PCs, reinstalled Windows, changed network/VPN/DNS, or ran “debloat/block” tools
- Whether the issue changes on a different network (home vs work vs hotspot)