How to Fix Taskbar Icons Not Working on Windows 10/11?
Microsoft is dealing with a surge of user reports complaining that they can no longer use their taskbar icons after installing the latest pending update. Whether they click on Start or any other taskbar icons, nothing happens. This issue is confirmed to occur on both Windows 10 and Windows 11.
After investigating this issue, we realized that there are several different underlying causes why this type of issue would occur. Here’s a shortlist of potential reasons you might expect to deal with this issue:
- Faulty Windows update – A faulty windows update that just got installed on your system is the most likely cause of this issue. Uninstalling the update means that your Windows installation won’t run on the latest available build, but doing so will also undo any modifications that led to the taskbar’s non-responsiveness.
- Corrupted icon cache – A potential corruption that might be indirectly crashing the icon cache is also a likely culprit for this issue. If the icon cache is to blame, you should be able to resolve the issue by either recreating the whole icon cache using a customized.BAT file or refreshing the icon cache using Windows Terminal.
- Taskbar glitch (Windows 11) – Most user reports complaining about this problem are operating on the most recent Windows 11 release. According to several community users dealing with this issue, you should be able to fix it by going to Taskbar Settings and changing the default Taskbar Behavior to essentially re-load every taskbar icon that is now present in your Windows 11 edition. Additionally, you can create a .reg file and restore your entire taskbar icon fleet.
- Date & Time syncing issue – If you de-sync the time and date on the Windows 11 or Windows 10 computer having a taskbar problem, you may force the taskbar items to reset and return to normal functionality. Many impacted users have reported that doing this would restore your taskbar’s normal functioning.
- Corrupted Windows account – Most taskbar-related problems may usually be fixed by establishing a new user account. Well, this most recent Windows taskbar issue is very similar to previous cases in the past. Try to resolve this issue by creating a new account and seeing if your taskbar starts to respond.
- Interference by IrisService – Many Windows Insider Dev and Beta channel participants experienced this issue as a result of a faulty update that Microsoft was able to deliver. To terminate this service in this situation, you must enter the expert interface and create a unique Command Prompt task.
Now that we have gone over every potential reason why this issue appears, let’s go over all the confirmed fixes that other users experiencing this issue with the taskbar icons have successfully deployed to resolve the taskbar problem on Windows 10 and 11.
1. Uninstall the latest Windows update
Uninstalling the faulty update that caused this odd malfunction in the first place should be your first line of defense.
Uninstalling the update means that your Windows installation won’t run on the latest available build, but doing so will also undo any modifications that led to the taskbar’s non-responsiveness.
To remove the most recent update and resolve the Windows taskbar issue, follow the steps below:
Note: Both Windows 10 and Windows 11 should be compatible with the procedures below.
- To bring up the Run dialog box, press Windows key + R. To reach the traditional control panel menu with admin access, enter “control” and press Ctrl + Shift + Enter.
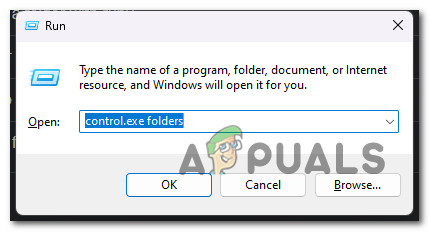
Open the control menu - When the User Account Control window appears, select Yes to give admin access.
- In the traditional Control Panel, select Uninstall an application (under Programs).
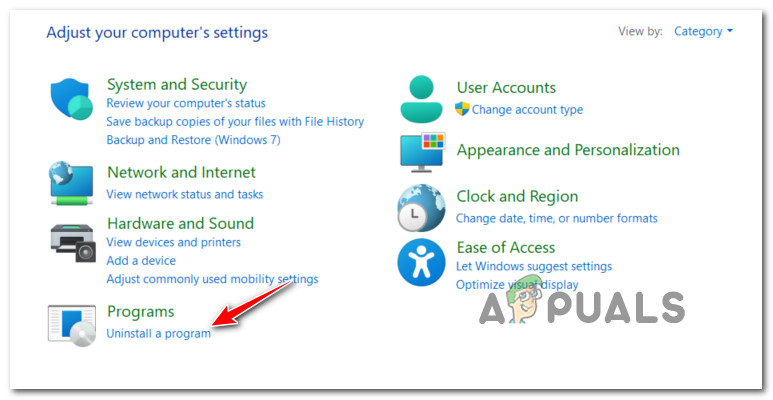
Access the Program uninstallation screen - After entering the Programs and Features page, click View installed updates from the left vertical menu. When the User Account Control (UAC) prompt appears, select Yes.
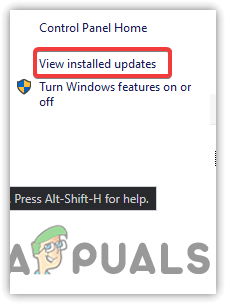
Access the View updates screen - Once you’re on the Installed Updates page, search through the list of installed updates for the most recent Microsoft Windows update.
- Once you find it, right-click it and select Uninstall from the context menu. When prompted, accept the action.
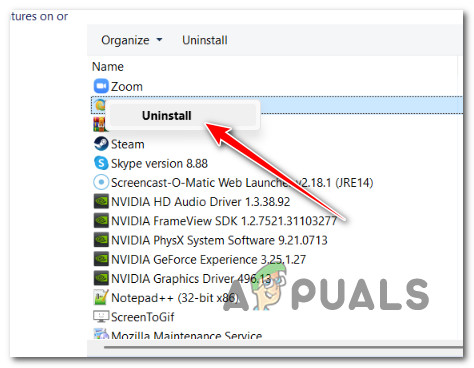
Uninstall the problematic update - Restart your computer after the update has been successfully removed to determine if the issue has been resolved.
- Uninstalling the issue update that caused this strange malfunction in the first place is another viable solution that many impacted customers have tried and found to work.
Note: Uninstalling the Update for Microsoft Windows will not only reverse any modifications that caused the taskbar to become unresponsive, but it will also stop the impacts of this update from impacting your computer.
Continue to the next possible solution below if the same issue is still present and your Windows 11 taskbar is still not functioning.
2. Refresh the icon cache
If the approach above does not work for you, you should investigate a potential corruption that may harm the icon cache.
Note: If you notice that several File Explorer icons and taskbar icons also fail to appear, an issue with the icon cache is much more likely.
If the icon cache is to blame, you should be able to resolve the issue by either recreating the whole icon cache using a customized .BAT file or refreshing the icon cache using Windows Terminal.
Although we’ve written separate guidelines for each strategy, it’s best to start by deploying an icon cache refresh (as it’s the simpler approach) and go on to rebuilding the complete icon cache should the first approach fail.
2.1. Refresh the icon cache via WT
Only the icon cluster will be forced back on after refreshing the icon cache. If the problem is rooted in a tiny display glitch, this should solve it, but if the icon cache is corrupted in any way, it won’t work.
Here’s how to use Windows Terminal to clear the icon cache:
- To bring up the Run dialog box, press the Windows key + R. The Windows Terminal interface with admin access will open once you input “wt” in the text field and hit Ctrl + Shift + Enter.
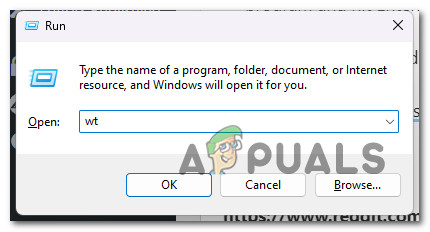
Open a Windows Terminal app - Click Yes to provide admin access when the User Account Control prompts you.
- To update your current icon cache, use the following command within the elevated Windows Terminal program and hit Enter:
ie4uinit.exe -show
- Exit the elevated Windows Terminal application and check whether the issue has been resolved.
Follow the subsection below if your Windows 11 installation still doesn’t lets you interact with the taskbar icons.
2.2. Rebuild the icon cache via .BAT file
To efficiently rebuild the cache linked with each Windows icon, you must create a custom BAT file that will automatically perform a sequence of actions.
Although we’ll provide you with the code lines, you’ll be responsible for making the BAT file.
What you must do is as follows:
- To bring up the Run dialog box, press Windows key + R. To launch Notepad with admin access, put “notepad” in the text box and then press Ctrl + Shift + Enter.
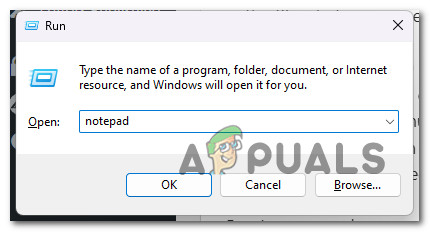
Open a notepad window - To allow admin access, select Yes when prompted by User Account Control (UAC).
- Paste the next block of code into the blank space of the raised Notepad window:
@echo off
set iconcache=%localappdata%\IconCache.db
set iconcache_x=%localappdata%\Microsoft\Windows\Explorer\iconcache*

echo.
echo The explorer process must be temporarily killed before deleting the IconCache.db file.
echo.
echo Please SAVE ALL OPEN WORK before continuing.
echo.
pause
echo.
If exist "%iconcache%" goto delete
echo.
echo The %localappdata%\IconCache.db file has already been deleted.
echo.
If exist "%iconcache_x%" goto delete
echo.
echo The %localappdata%\Microsoft\Windows\Explorer\IconCache_*.db files have already been deleted.
echo.
exit /B


:delete
echo.
echo Attempting to delete IconCache.db files...
echo.
ie4uinit.exe -show
taskkill /IM explorer.exe /F
If exist del /A /F /Q "%iconcache%"
If exist del /A /F /Q "%iconcache_x%"
start explorer.exe
echo.
echo IconCache database files have been successfully deleted.
goto restart


:restart
echo.
echo.
echo You will need to restart the PC to finish rebuilding your icon cache.
echo.
CHOICE /C:YN /M "Do you want to restart the PC now?"
IF ERRORLEVEL 2 goto no
IF ERRORLEVEL 1 goto yes

:yes
shutdown /r /f /t 00

:no
exit /B
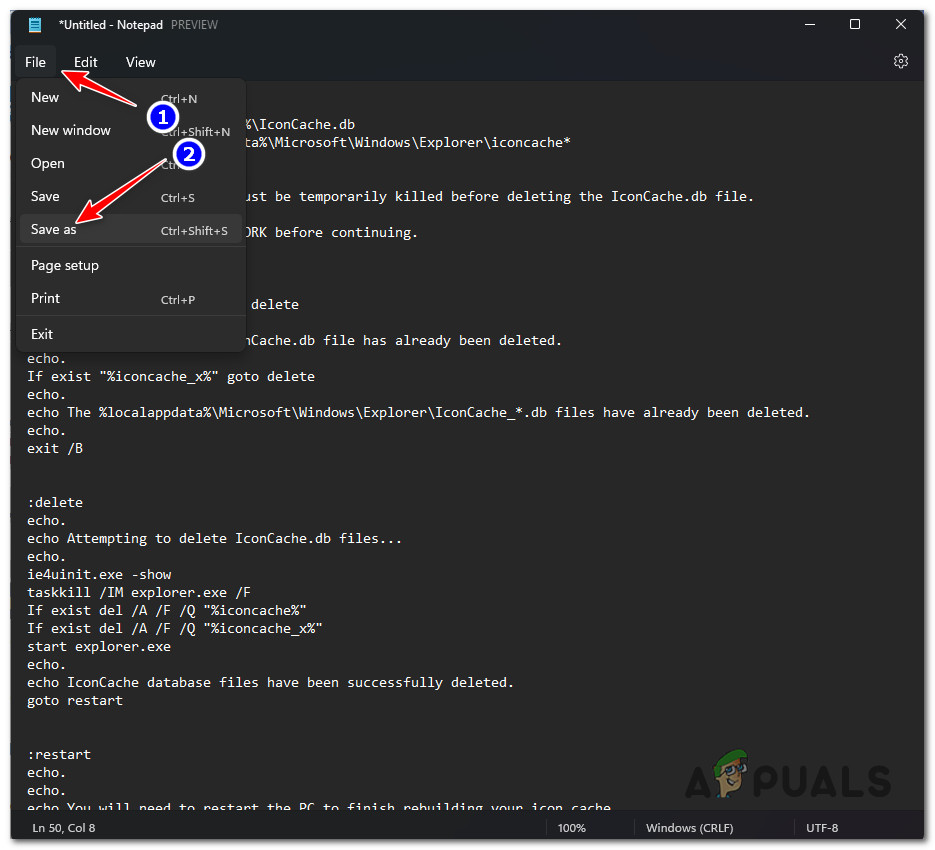
- Select Save As from the context menu that just appears after clicking File from the top ribbon menu.
Rebuilding the icon cache - Select a place to store the BAT file from the Save as option, then switch the Save as type to All Files. Next, give the file whatever name you choose, but remember that it must have the “.bat” extension. See the screenshot below.
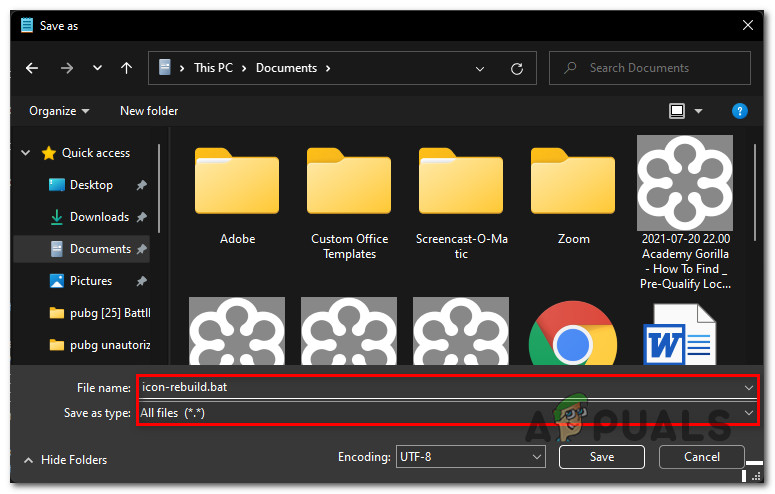
Rebuilding the icon cache - After creating the file, click Save, and then close Notepad.
- From the context menu, select Run as administrator after right-clicking on the freshly created .bat file.
- After the file has been completed, restart your computer and check to see if your Windows installation’s desktop icons have been restored.
Continue on to the next potential solution below if the issue is still not resolved.
3. Modify the default Taskbar behavior
Most user reports complaining about this problem are operating on the most recent Windows 11 release. The majority do not need to update to the newest OS version.
There is a straightforward fix for this problem, according to several community users who have been having it, which includes going to Taskbar Settings and changing the default Taskbar Behavior to essentially re-load every taskbar icon that is now present in your Windows 11 edition.
Here’s what you need to do:
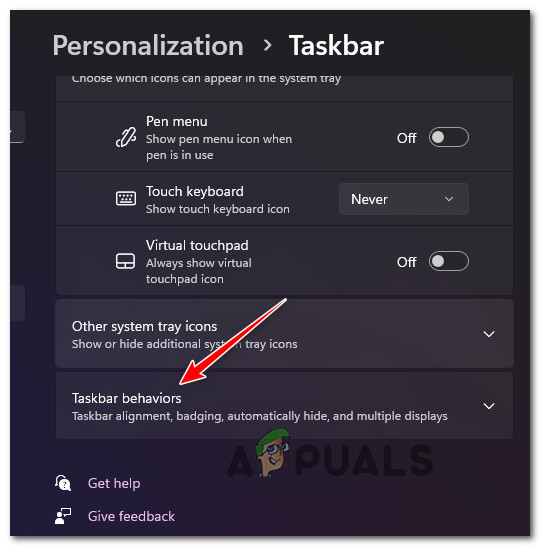
- Start by performing right-clicking on your taskbar and selecting Taskbar Settings from the context menu that just appears.
- Scroll to the bottom of the right-hand section of the newly displayed Settings menu by moving to the bottom of the screen.
- From the right-hand menu, select Taskbar Behaviors.
Accessing the Taskbar Behavior - After that, choose the box next to Automatically hide the taskbar by swiping down under Taskbar actions.
- Once the taskbar is hidden for a moment, wait a few seconds before clicking the same box again to bring it back.
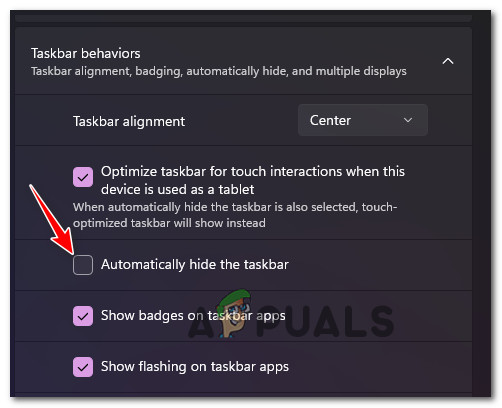
Accessing the Taskbar icon automatically Note: The action will successfully reset every taskbar icon (including icons), successfully resolving every cache-related issue (unless it’s rotten in a more severe case of system corruption).
Moving on to the next suggested solution below should the issue still not be resolved.
4. De-Sync the Date & Time
If you de-sync the time and date on the Windows 11 or Windows 10 computer having a taskbar problem, you may force the taskbar items to reset and return to normal functionality. Many impacted users have reported that doing this would restore your taskbar’s normal functioning.
Note: Altering the system’s date and time may impact other system parts.
If you choose to do this, use a Task Manager task to deactivate the system clock synchronizing to the internet as shown below:
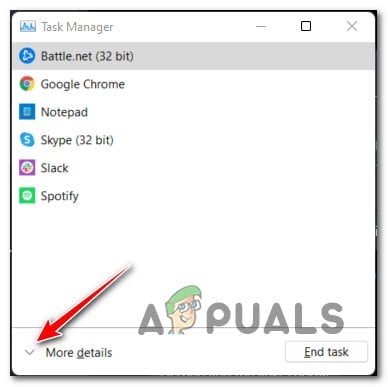
- Press Ctrl + Shift + ESC to launch Task Manager. Click on More Details at the bottom of the screen if the basic interface is already open.
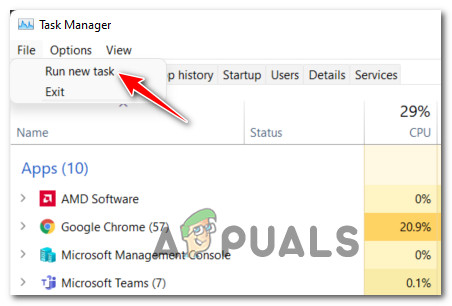
Open the Expert interface of Task Manager - After entering the expert interface, select Run new task in the File section of the top ribbon bar.
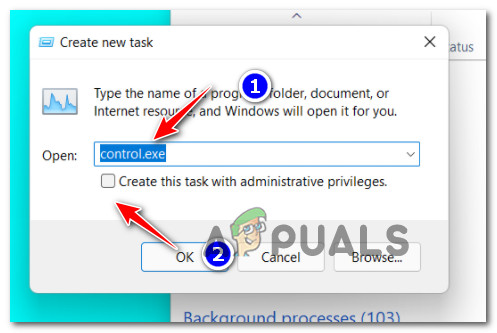
Run a new task inside Task Manager - Type “control.exe” into the text box of the newly opened Create new task window, click the box next to Create this task with administrator capabilities and click OK to save the changes.
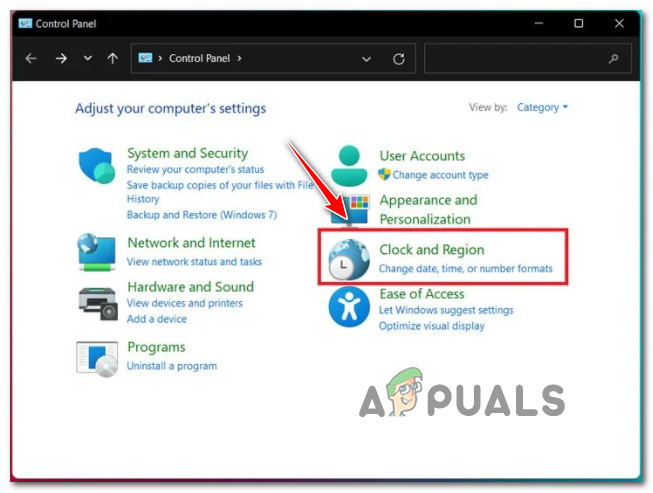
Accessing the Control Panel menu - Select Clock and Region after entering the Classic Control Panel.
Accessing the Clock & Region tab - Next, select the Set the time and date hyperlink from the dedicated Date & Time menu.
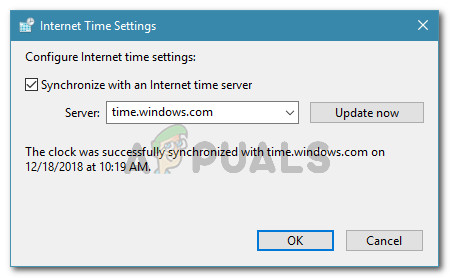
- Navigate to the Internet Time tab after entering the Date and Time window. Uncheck the box next to “Synchronize with an Internet Server” when you’re inside, then click “OK” to preserve the changes.
Desyncing the date and time - Afterward, return to the Date and Time tab and select Change date and timezone from the menu.
- Select a calendar date a few days ahead of the current date from the dedicated Date and Time settings menu, then click OK to save the adjustments.
- Restart your computer to see if the issue has been resolved.
Scroll down to the final potential solution below if your Windows taskbar is still not functioning.
5. Create a new user account
Most taskbar-related problems may usually be fixed by establishing a new user account. Well, this most recent Windows taskbar issue is very similar to previous cases in the past.
The next thing you should try to do is to establish a new user account by using an elevated CMD window if none of the other ways mentioned above have worked for you.
Note: If you choose this option, you will lose any unique user preferences and settings of your existing user account.
If you’re willing to take this step and accept the implications, then proceed as directed below:
- To access the Task Manager interface, press Ctrl + Shift + Esc.
Note: If Task Manager’s straightforward interface appears when you click on it, more details will be displayed. - After entering Task Manager’s expert interface, select File using the ribbon bar up top. Next, select Run a new task from the context menu that has just been displayed.
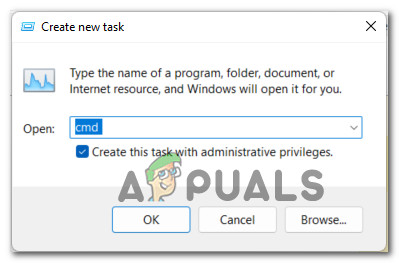
Run a new task inside Task Manager - Once you’re in the Create New Task window, click the Open button and input “cmd”; then, check the box next to Create This Task With Administrative Privileges; and last, click OK to save the changes.
Creating a CMD task - After updating the placeholders, type the following command and press Enter once you’ve reached the elevated Command prompt:
net user username password /ADD
Note: The placeholders for username and password are your responsibility to change with appropriate values. For example, enter net user kevin appuals/ADD.
5. The following step is to provide the same essential permissions to this newly established account as you did to your prior one. To accomplish this, after changing the placeholder, type the following command and press Enter:net localgroup administrators username /ADD
Note: Enter the real name of the user account you just established in the username placeholder.
6. To switch users, click the Switch users button and choose the newly established account after pressing Ctrl + Alt + Delete to bring up the fast action panel.
7. Play about with your taskbar to see if it begins to work.
Go to the next step below if you still can’t click on the taskbar icons.
6. Remove the IrisService Reg. key (Beta and Dev channels only)
It turns out that Microsoft was rather quick to identify this problem; they began compiling evidence for it as soon as the upgrade was issued to the Dev and Beta Channels.
Microsoft must test it with various setups and integrate it in a cumulative update before an official hotfix is available.
Fortunately, you don’t necessarily have to wait if this problem impacts you. Microsoft has addressed this problem without waiting for the official update.
Use Task Manager to create a CMD task to remove the registry keys that likely break the Windows 11 Taskbar on your Windows 11 installation.
To restore your Windows 11 taskbar’s responsiveness, adhere to the steps below:
- To launch Task Manager, press Ctrl + Shift + Enter.
- If this operation launches the Task Manager window that has been minimized, click on More Details at the bottom of the window to reveal all of the available options.

Access the More Details screen - From the expert Task Manager interface, select File from the ribbon at the top of the screen. Then, select Run a new Task from the context menu that is just displayed.
Run a new task inside Task Manager - The next box you encounter is the Create a new task interface. Once inside, click the Save Changes button and enter “cmd” in the Open area. After that, check the box next to Create this task with administrative capabilities.
Creating a CMD task - When you have at last reached the elevated CMD prompt, write (or paste) the next command there and press Enter to execute it:
delete in reg IrisService at HKCUSOFTWAREMicrosoftWindowsCurrentVersion /f && shutdown -r -t 0
- After the command has been properly executed, restart your computer and wait for the subsequent startup to finish before determining whether the taskbar problem has been fixed.


