3 Ways to Remove Outdated Drivers from Your Windows
Even though the old drivers gets overwritten by the new version of the driver, some drivers remain in the system even after updating or uninstalling, which can lead to a conflict between drivers and cause startup problems. Therefore, you should remove them permanently from your system.
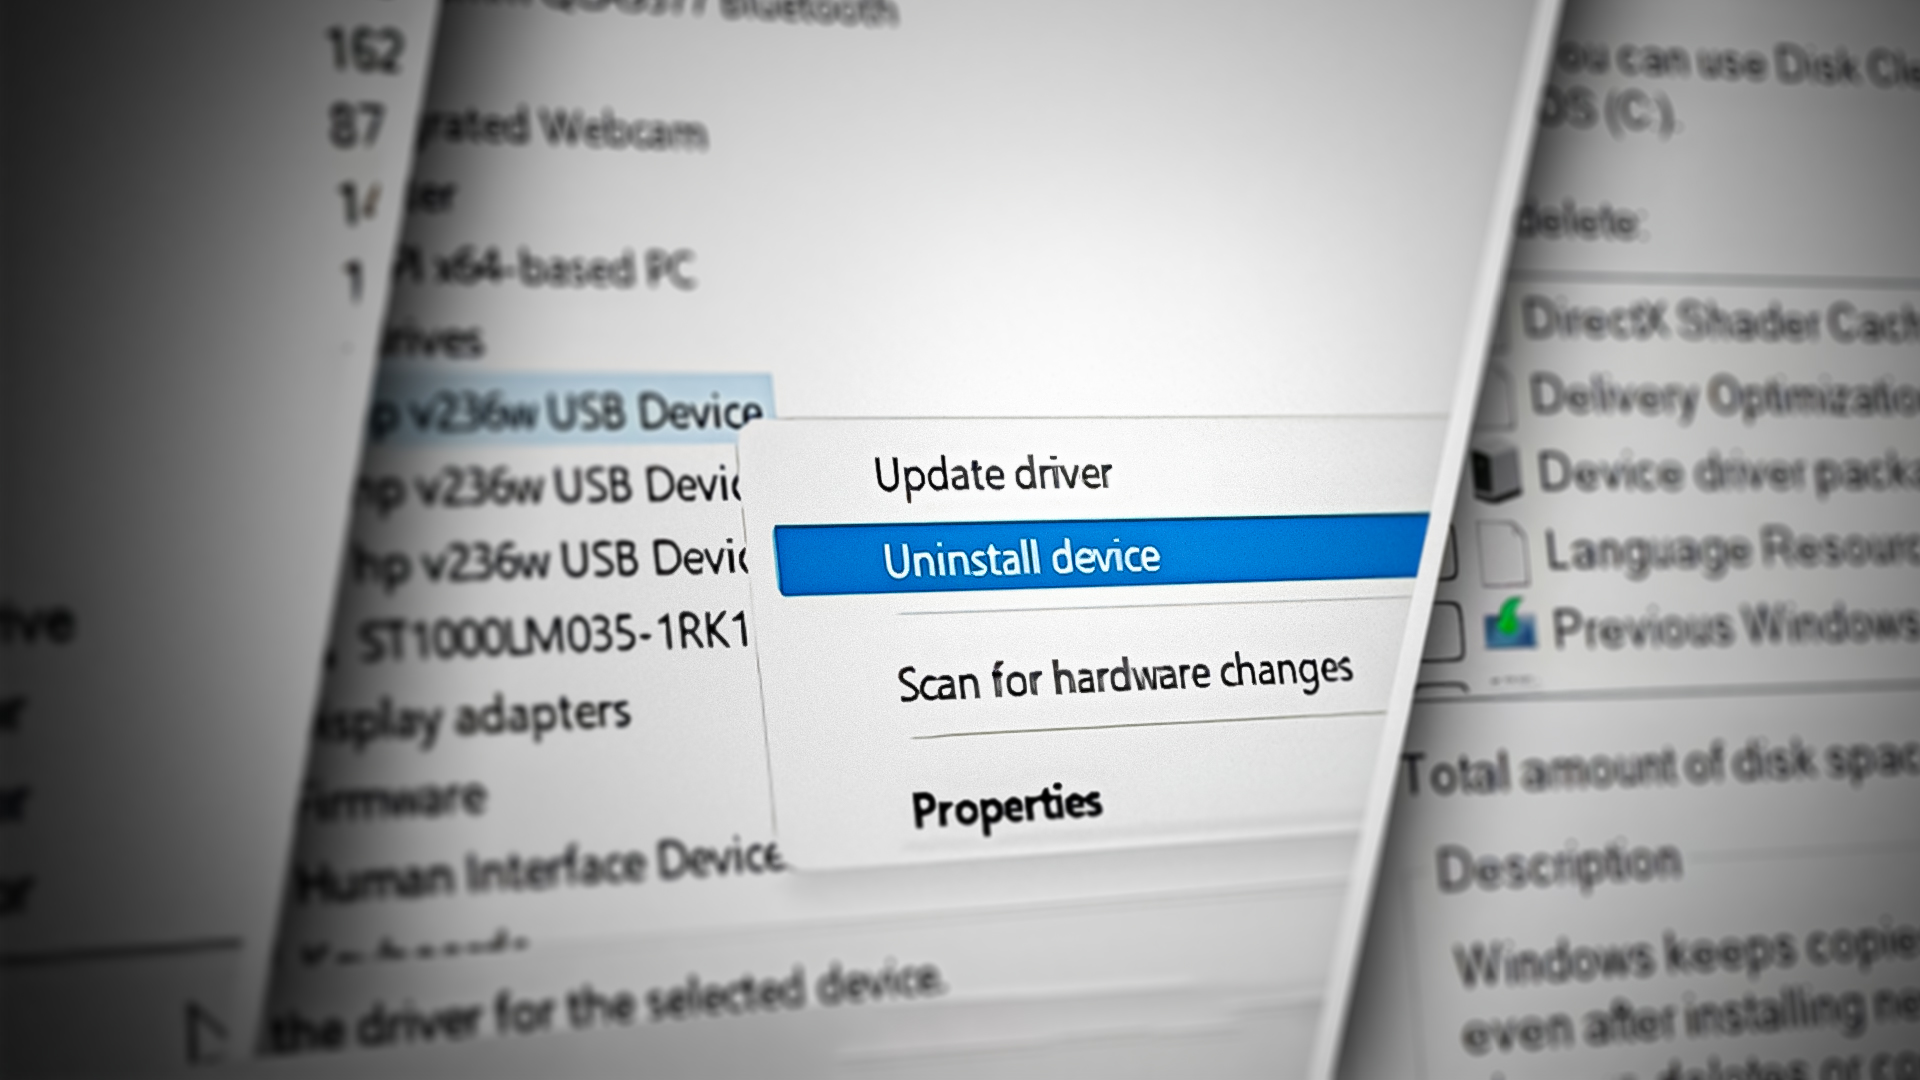
Additionally, when we plug a new hardware device into our computer, the Windows update utility automatically downloads its driver from the server. However, when we are done with that device, we unplug it from the computer, but its driver remains on the computer and takes up space on the system drive.
To avoid these issues and free up space, we will provide some methods for removing old or unused drivers from Windows.
1. Uninstall old drivers from Device Manager
You will be able to remove the drivers that are not being used by the hardware, as the hardware device is not connected to your computer.
If you plugged many hardware devices into your computer and then unplugged them, you will need to remove their drivers to clean your disk, as they are not required unless you plug the hardware device again.
However, it does not matter, as the Windows update utility will again install it from its server if you need to use that device again.
- Press the Windows key and type Command Prompt.
- Right-click on it and select Run as administrator.
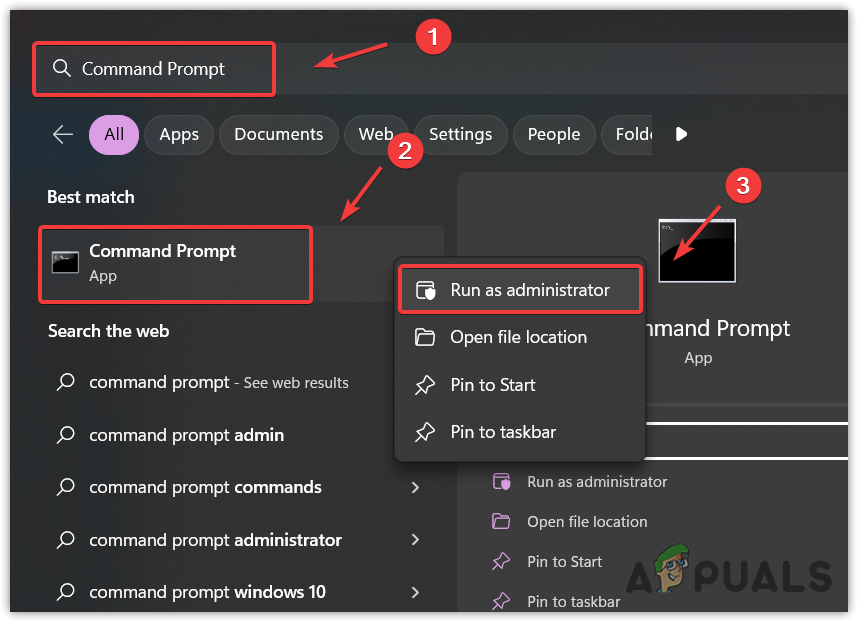
Running command prompt as administrator. - Once it is launched, paste the following command to see the unused devices in the device manager. This means the devices that were connected to your computer and have been removed will be displayed on the device manager.
SET DEVMGR_SHOW_NONPRESENT_DEVICES=1
devmgmt.msc
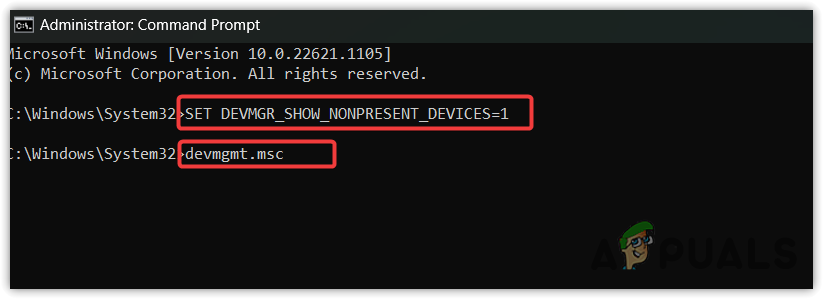
Opening device manager using command prompt - Once done, again, enter the following command to open the device manager.
- Once the device manager is opened, click View and then select Show hidden devices.
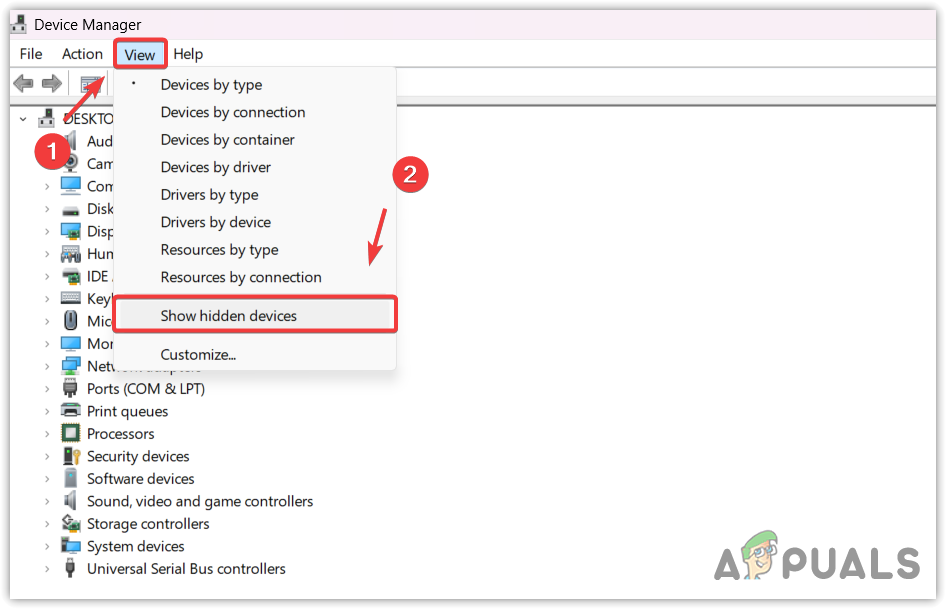
Enabling the device manager to show hidden devices - Expand the devices menu one by one to find the transparent or highlighted drivers. If you can find it, right-click on it and select Uninstall device.
Note: Be careful while removing the drivers, don’t remove the drivers that are currently in use, as it will stop that hardware device until you reinstall the driver again.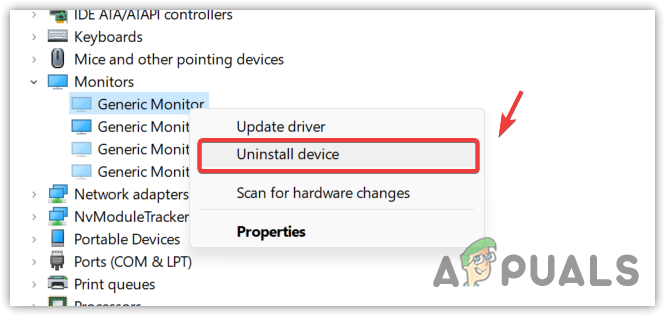
Uninstalling drivers from the device manager - Click Uninstall to confirm the action.
2. Uninstall old drivers using the disk cleanup utility
You can also remove the depreciated drivers using the disk cleanup utility to free up some space on a system drive as it removes the temporary files, unused drivers, cache data, and the files that end up in recycle bin. However, it is now shifted to the Windows Settings, but in the previous version of Windows, you can find this utility on disk properties settings.
- To use a disk cleanup utility, click Start Menu and search for Settings.
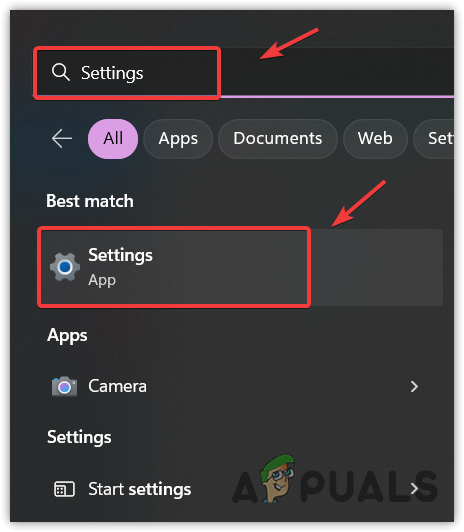
Opening Windows Settings - Open Settings and navigate to Storage.
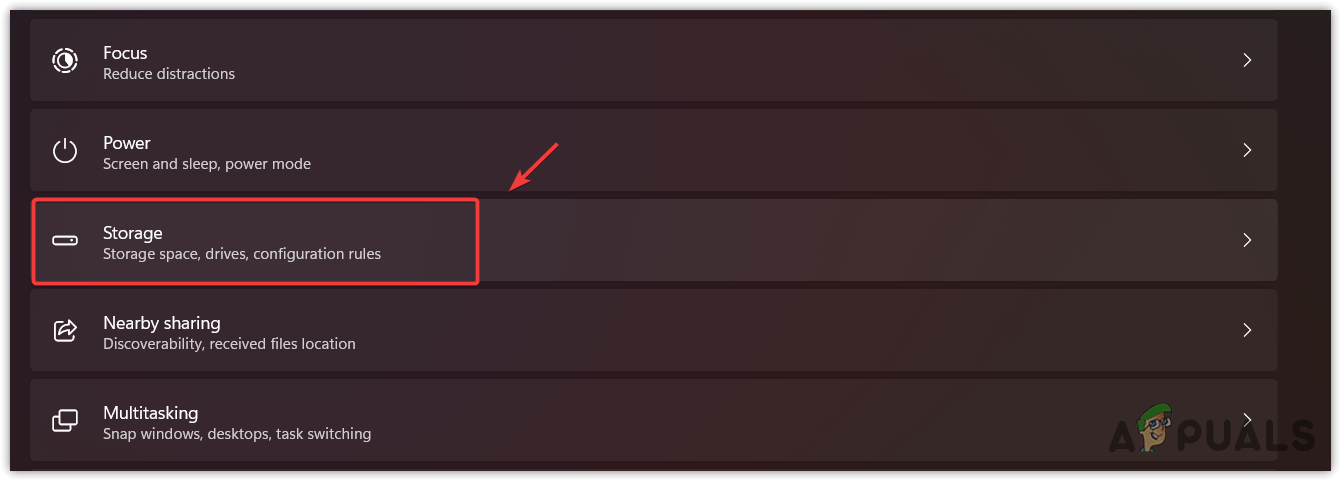
Navigating to Storage settings - Then, go to Temporary Files and then click Remove Files.
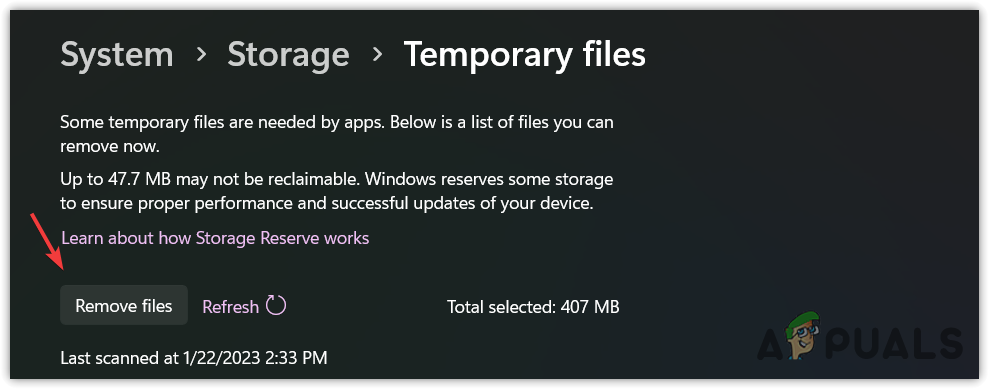
Clearing temporary files - Click Continue and wait for the utility to remove the data.
- Once done, the old or unused drivers are permanently deleted from your Windows.
3. Uninstall old drivers using third-party software
This method will automatically remove the old drivers not being used by the hardware, as there is an already updated version of that driver currently being used by the system. Hence, to remove the old drivers automatically, you will have either use third-party software or uninstall the driver manually before updating to the new one.
There are various free applications available on the internet that allows users to remove old or unused drivers automatically from the system.


