How to Stop Windows from Terminating Applications when Shutting Down?
Most of the time users try to shut down their system without terminating all of the running applications. Windows 10 by default terminate the running applications when shutting down. However, users can change this and stop Windows from terminating applications. This will help the users in saving their ongoing work progress and closing the applications safely. In this article, we will provide you with methods that can help you in changing these settings through different methods.
The Group Policy Editor is not available on Windows 10 Home Editions; therefore we have included a registry Method which you can use to modify the setting.
Stop Windows from Closing Applications before Shutting Down
We have two methods that will stop the Windows 10 from terminating applications when shutting down. One of the methods is done by using the Local Group Policy Editor and the other is by using the Registry Editor. Both will have the same outcome; however, it depends on what the user has access to and is familiar with.
Turning Off Automatic Termination of Application when Shutting Down through Local Group Policy Editor
The Local Group Policy Editor is a Windows feature through which users can manage and configure their Windows operating system. This provides almost all of the options that the users can modify for their system. Follow the below steps to enable the turning off automatic termination of applications when shutting down:
Note: The Local Group Policy Editor is only available on Windows 10 Enterprise, Windows 10 Pro, and Windows 10 Education editions. If you have a different Windows 10 version, then directly jump to method 2.
- Press Windows key + R to open Run box. Type “gpedit.msc” in the Run box and press Enter to open the Local Group Policy Editor. Choose Yes at the UAC (User Account Control) prompt.
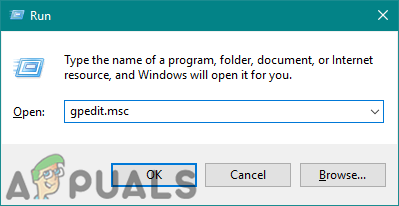
Opening Local Group Policy Editor - In the left pane of the Local Group Policy Editor, navigate to the following location:
Computer Configuration \ Administrative Templates \ System \ Shutdown Options
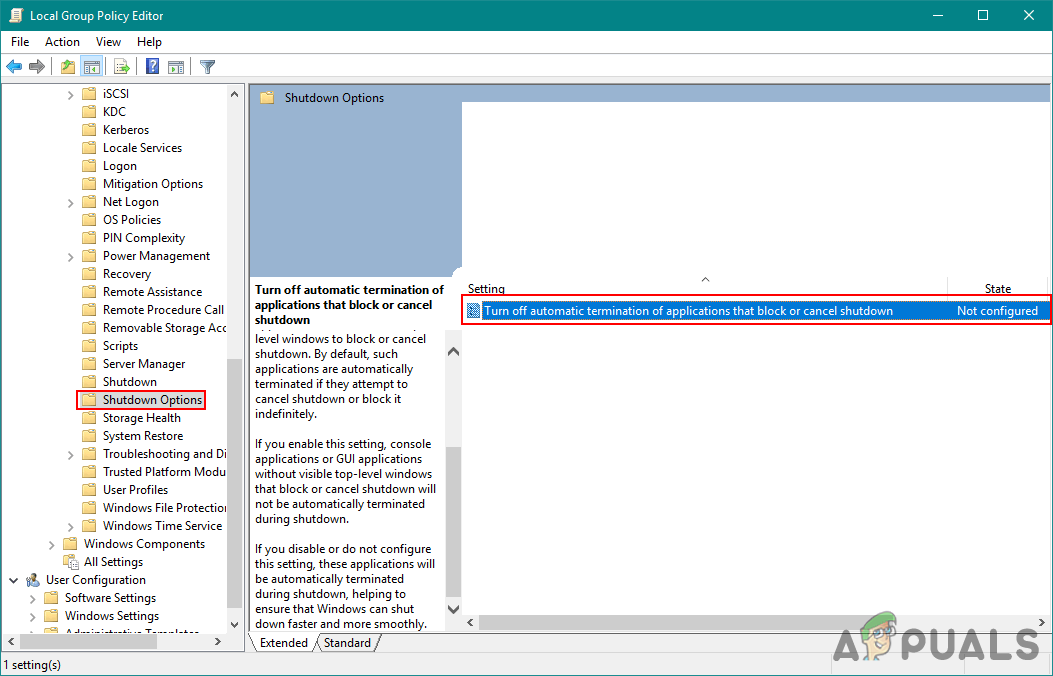
Opening the settings - Double-click on the Turn off automatic termination of application that block or cancel shutdown option in the right pane. A new window will appear, now modify the toggle from Not Configured to Enabled. Click on the Apply and Ok button to save the changes.
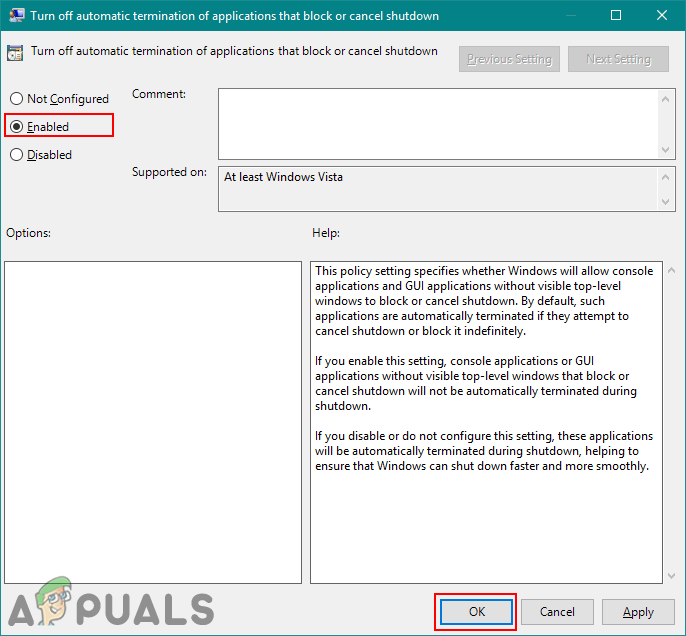
Enabling the settings - Now the Windows will not terminate the application when shutting down.
Turning Off Automatic Termination of Application when Shutting Down through Registry Editor
This other method is by modifying these settings through Registry Editor. Most of the users are much more familiar with the registry editor. However, the registry editor will have fewer customization options than the first method. There may be keys or value missing and the user needs to create them manually. Follow the below steps to try it out:
- Press Windows key + R to open a Run box. Now type “regedit” and press the Enter key to open Registry Editor. Also, click Yes at the UAC (User Account Control) prompt to open it with administrative privileges.
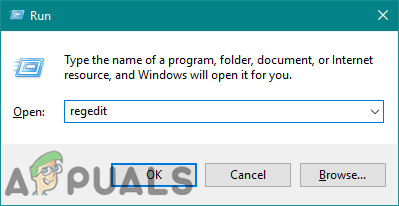
Opening the Registry Editor - In the Registry Editor windows, use the left pane to navigate to the following key:
HKEY_LOCAL_MACHINE\SOFTWARE\Policies\Microsoft\Windows\System
- Now on the right pane look for AllowBlockingAppsAtShutdown value. If it doesn’t exist, then right-click anywhere on the right pane and choose New > DWORD (32-bit) value to create a new one and name it AllowBlockingAppsAtShutdow.
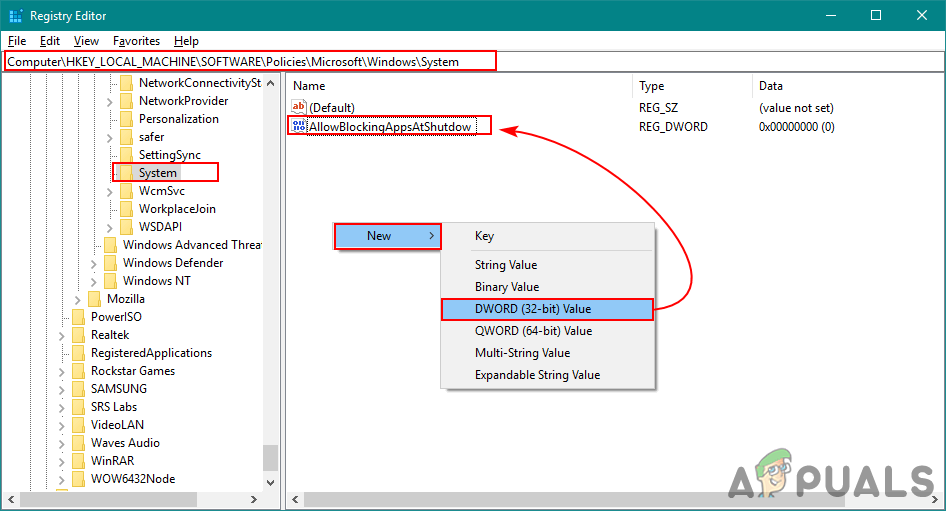
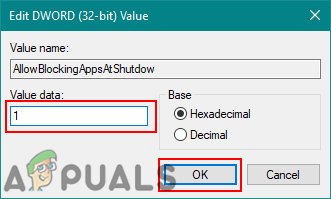
Creating new value for specific settings - Double-click on the value and change the value data to 1. Click on the Ok button to apply changes.
Changing the value - After the modifications have been made, make sure to restart your computer so that the changes will take effect.


