How to Fix SrtTrail.txt BSOD Error in Windows?
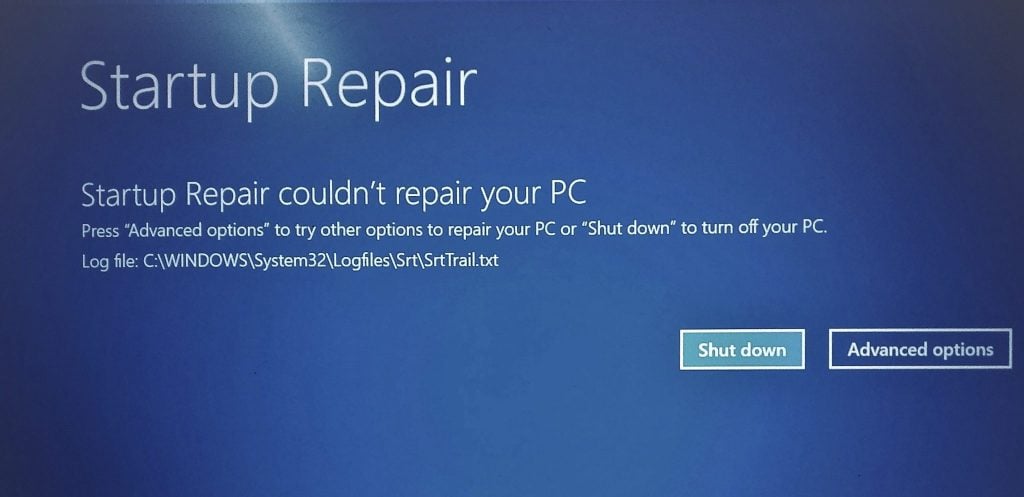
The SrtTrail.txt Error is caused by incomplete hardware, outdated drivers, or any corrupt file present on your system. In this error, the system reboots repeatedly. Since Windows has an automatic repair utility, it starts to repair itself. However, during the process, the SrtTrail.txt Error appears, and the users are left with two alternatives: completely Shutdown their entire system or change the Advanced options settings.
There are many methods that you can try to fix this issue.
1. Restore your System from System Restore Point
Your system may have downloaded a corrupt software due to which it faced some sort of malfunction, resulting in a shutdown loop. This can cause your Windows to come across the SrtTrail.txt BSOD Error. The easiest method to fix this issue is to simply perform a system restore.
When such an error occurs on your system, you cannot directly restore your system from the Desktop and can only perform the action from the boot menu (Advanced Options). In the Boot Menu, you must perform a System Restore and visit a particular Restore point to
Follow these steps to restore your computer.
- Press the “Advanced Options” button alongside the “Shutdown” button in Error Screen.
- Select the “Troubleshooting” button from Boot Menu.
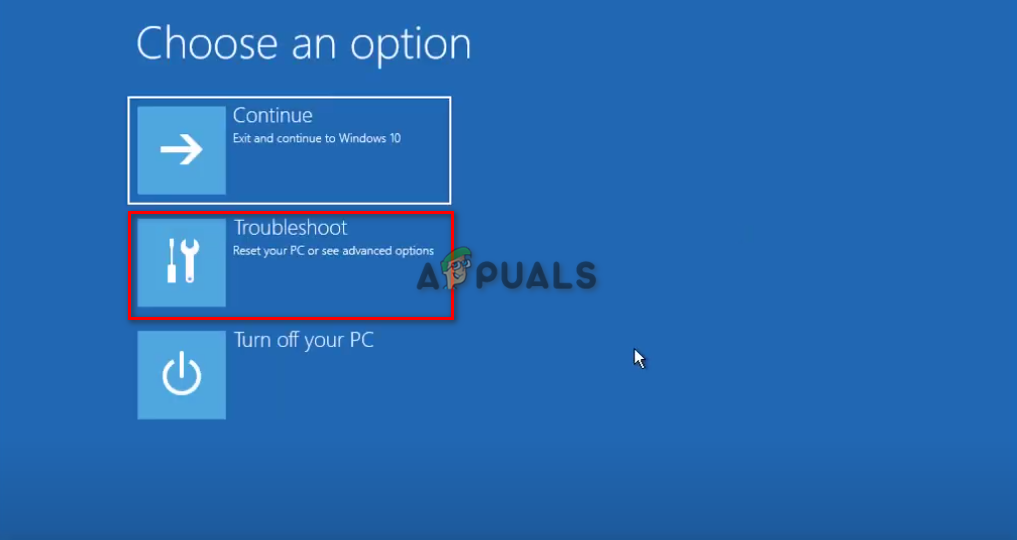
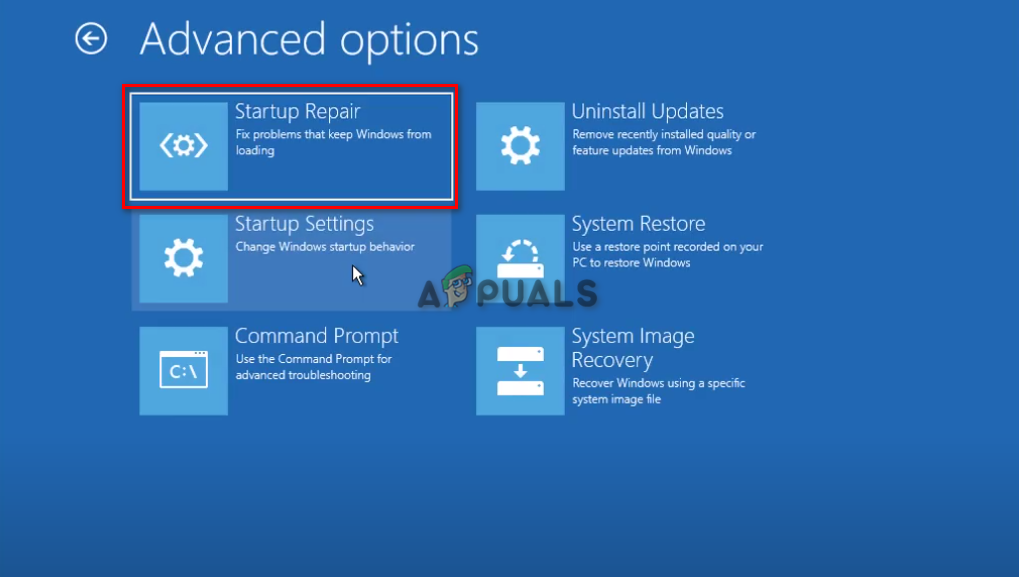
Opening the Troubleshoot Page from the boot menu. - Now Select the “Advanced Options” button again.

Visiting the Advanced Options. - Click on the System Restore Option
Clicking on System Restore to initiate the process. - Select the Restoration Time.
- Click Next and Restore your Device to your Desired Restoring Point.
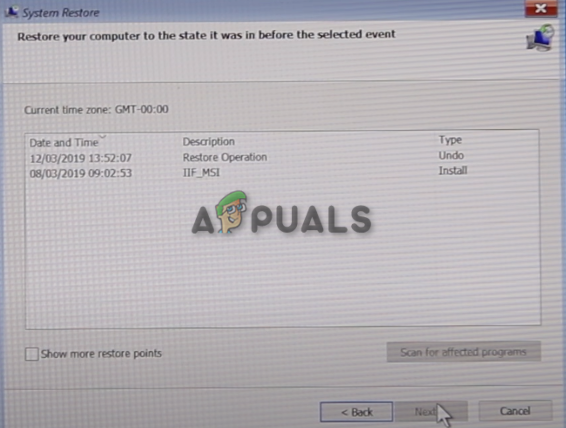
System Restore Point. - Press Next & follow the on-screen instructions to restore your computer.
2. Repair the Boot Files on your device
SrtTrail.txt BSOD Error also occurs due to damaged boot loader files within the system drive. In this case, we will have to use Commands to repair boot files.
Follow the steps we have listed below to repair your boot files:
- Click on “Advanced Options” button from error page.
- Select the Troubleshoot option on the Boot Menu.
Opening the Troubleshoot Page from the boot menu. - Click on the Advanced Options
Selecting the Advanced Options. - Select the Command Prompt from this menu.
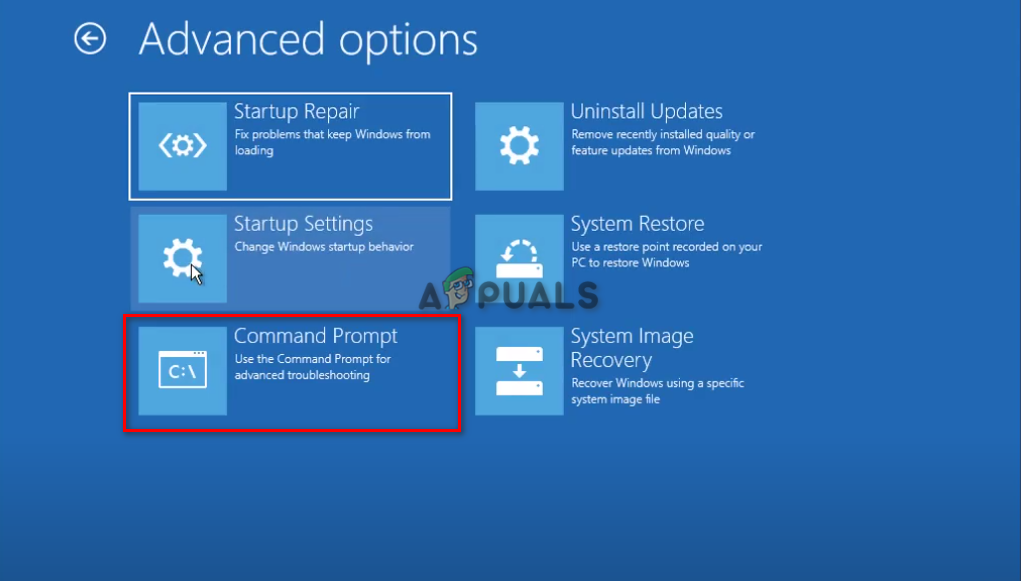
Opening the Command Prompt. - Enter these commands one-by-one:
bootrec /fixmbr
bootrec /fixboot
bootsect /nt60 sys
bootrec /fixboot
bcdedit / export c:\ bcdbackup
attrib c:\boot\bcd - h - r- s
ren c:\boot\bcd bcd.old
bootrec / rebuildbcd
- Now close Command Prompt and click ‘Continue with Windows’.
3. Reboot the System in Safe Mode with Networking
One of the major causes of the SrtTrail.text BSOD error is the corrupted drivers installed on your system. The best fix for this is to enter your system in Safe Mode with Networking and try to update your drivers, and perform a Health Restore from the Command Prompt.
From the system startup page, restart your system.
To reboot the System from Safe Mode on Windows, follow the steps mentioned below:
- Click the “Advanced Options” button from the Error page.
- Select the Button “Troubleshooting.”
Opening the Troubleshoot Page from the boot menu. - Click on “Advanced Options”
- Select “Startup Settings”
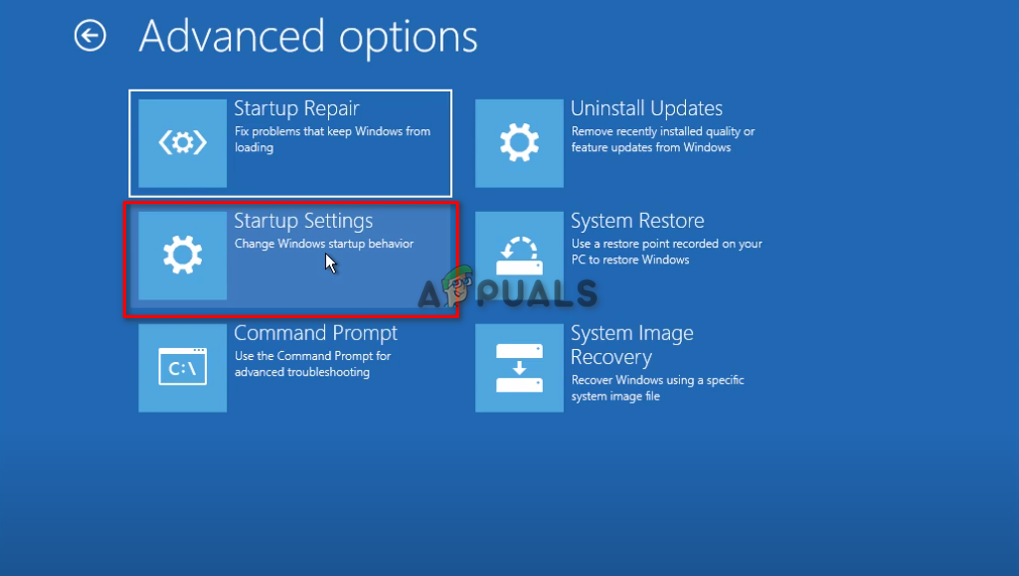
Opening the Startup Settings. - Click on the Restart Button
- Press #5 on your Keyboard will start your system on Safe Mode with Networking.
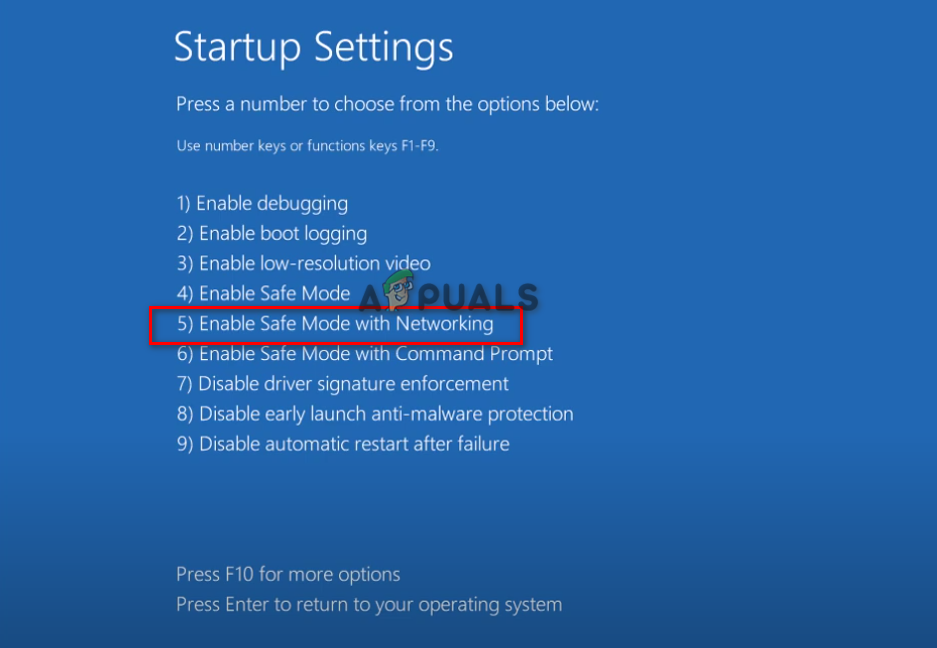
Press 5 on your keyboard to Boot into Safe Mode with Networking - Now once the system is restarted.
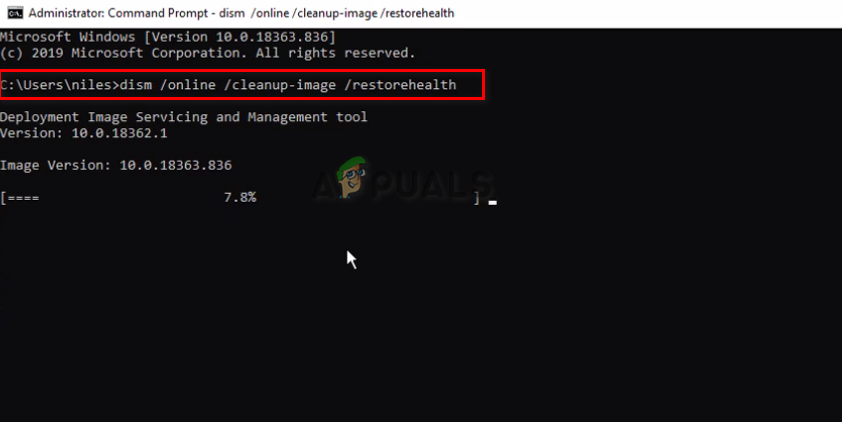
One you are booted into Safe Mode Successfully, Use the Windows Search option next to the start menu and type “cmd” and run the Command Prompt as Administrator. Once the Command Prompt page is opened, enter the following command:
DISM /Online /Cleanup-Image /RestoreHealth
Once the command is executed successfully, Restart your PC and check if the issue is resolved.
4. Reset your System
Resetting your system allows you to re-install Windows thoroughly, with all your files and data in the backup as per your choice. You will also get an option to remove all files if you are looking forward to starting clean. This will improve your Windows overall performance and, as a result, will eliminate the SrtTrail.txt Error from your device.
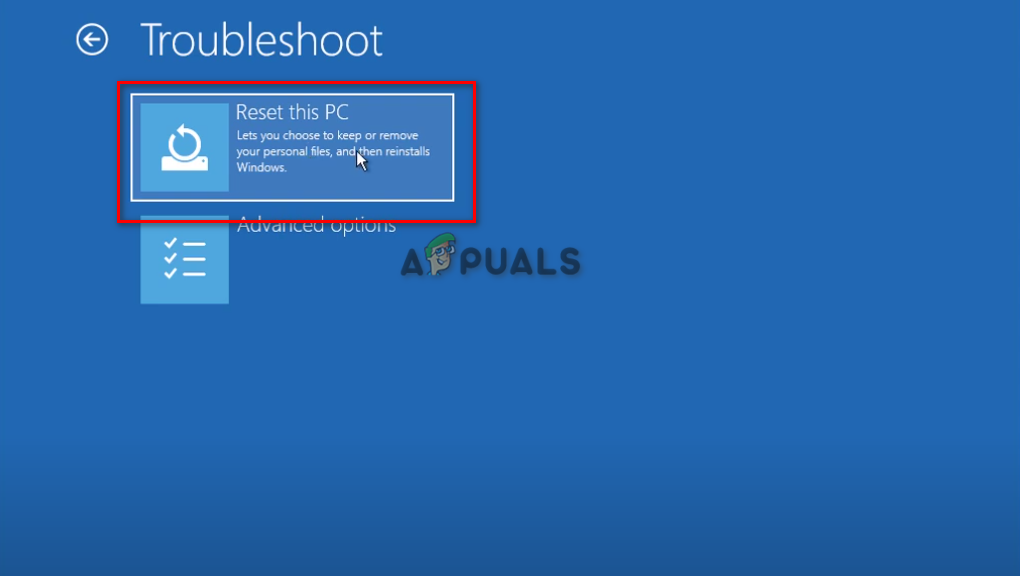
On the Troubleshoot page, clicking on the Reset This PC option will lead you to an options page where you can either keep or remove your files. Removing your files will completely wipe out your system’s data, and you will start your system from scratch.
Whereas selecting the other option will let you keep all user data you have on your system. It’s highly recommended to remove all your files since any file may be corrupted and can cause other bugs in the system. Therefore, it is best to have all your data on your backup before choosing this method to fix the error.
Follow the steps given below to perform a complete system Reset for Windows:
- Click the Troubleshoot page.
- Select the “Reset this PC” option.
Resetting the Personal Computer. - Press Reset and wait for the system to reset itself.
5. Disable the Early Launch Anti-Malware Protection
Antiviruses will eventually interfere with your Windows from starting and, as a result, will become one of the major causes of the Srt.Trail.txt error. To find the solution to this bug, you must disable the Early Launch Anti Malware Protection from your Boot Menu Startup Settings.
Open the Trouble Shoot Page and click on Advanced Options, where you can select the Startup Settings and get a list of options to select from. Below you will find the option to Disable the Early Launch Anti-Malware Protection. Once it is selected, restart and re-boot your system to enter your Desktop.
Follow the steps given below:
- Click on Troubleshoot on the Boot Menu.
- Click Advanced Options
Selecting the Advanced Options. - Open Startup Settings.
Opening the Startup Settings. - Select Disable the Early Launch Anti-Malware Protection.
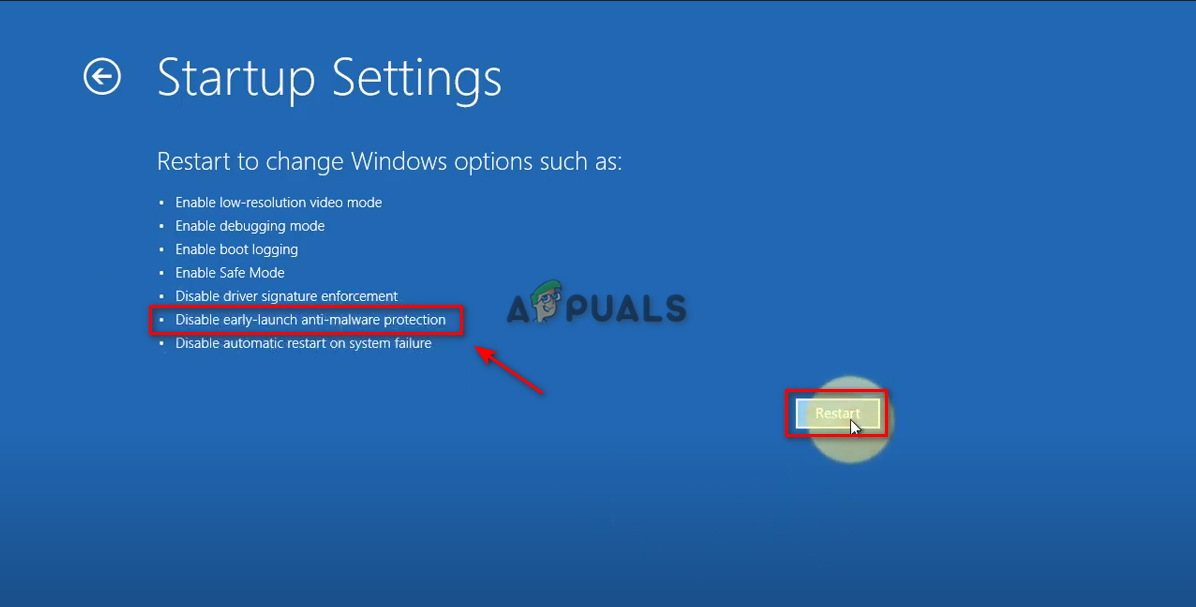
Disabling the Early Launch Anti Malware. - Restart your PC.
Note: In case this method doesn’t work out for you, we have prepared another way to access your Desktop by disabling the Anti-Malware Protection services on Windows. Go to the advanced options page from the troubleshooting menu and open the command prompt to disable the Early Launch Anti-Malware Protection.
Follow the steps given below:
- Open the Command prompt from the Advanced options page.
Opening the Command Prompt. - Enter the following command on the command prompt
bcdedit /set {current} disableelamdrivers yes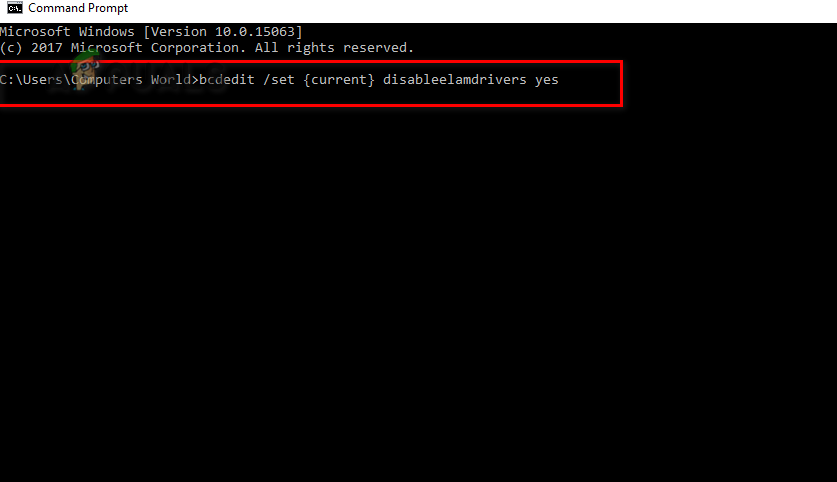
disableelamdrivers yes. - Restart your PC
6. Run a CHKDSK Command on your Windows OS
Running the Chkdsk command on your system will allow a scanning operation to take place on your device that scans through each file to detect the presence of an error. To repair your system from any error, such as the Blue Screen of Death, you must follow the steps given below to run the Chkdsk command on your Windows Operating System.
Follow these steps to perform a Chkdsk process on your device:
- Open Command Prompt from the Trouble Shoot page.
Opening the Command Prompt. - Execute a Chkdsk scan.
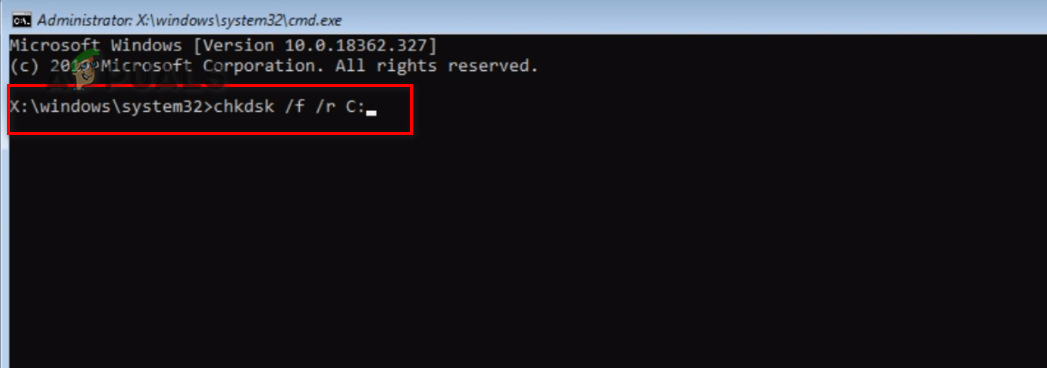
Performing a chkdsk scan.
The Chkdsk scan is a long procedure that may take several minutes to execute. Start off by typing chkdsk /f /r C: on the Command Prompt page and press Enter.
7. Disable Automatic Repair
Since the error you are facing is directly connected to the Windows automatic repair utility, arguably, the best option to fix the error is to disable the Windows automatic repair feature. Doing so will terminate the access of your Windows from repairing your system without your permission, and you will be able to access your desktop easily.
Simply visit the troubleshooting page from the boot menu and open the Command Prompt and open the Windows Boot Loader section. On the Windows Boot Manager section, scroll down a bit to see the recoveryenabled option, which is set to YES since the Windows Settings is running on default. You must set it as NO.
In order to Disable your Windows Automatic Repair feature, follow each step we have listed below:
- Open the Command Prompt from the Advanced
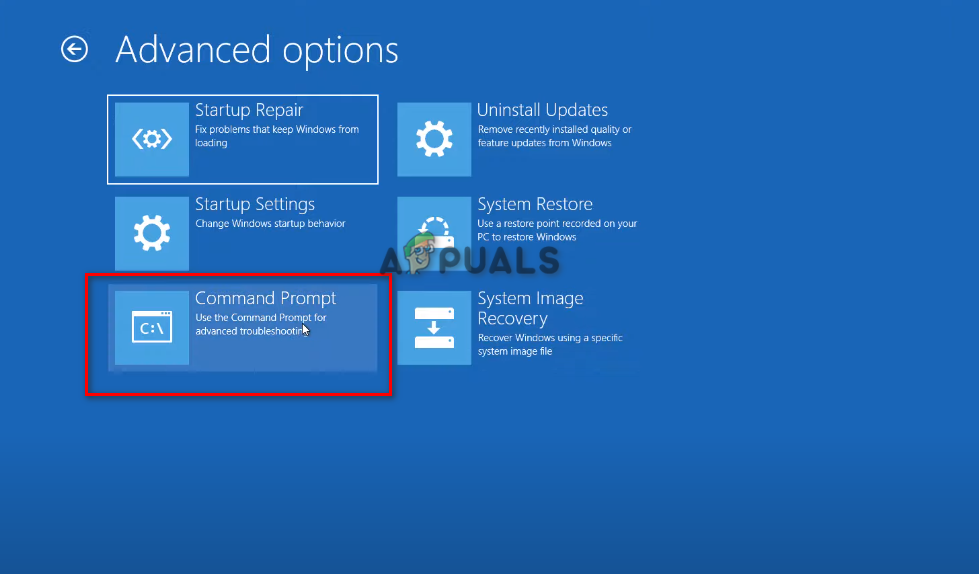
Opening Command Prompt. - Type the following command to open the Windows Boot Manager and Windows Boot Loader sections.
bcdedit
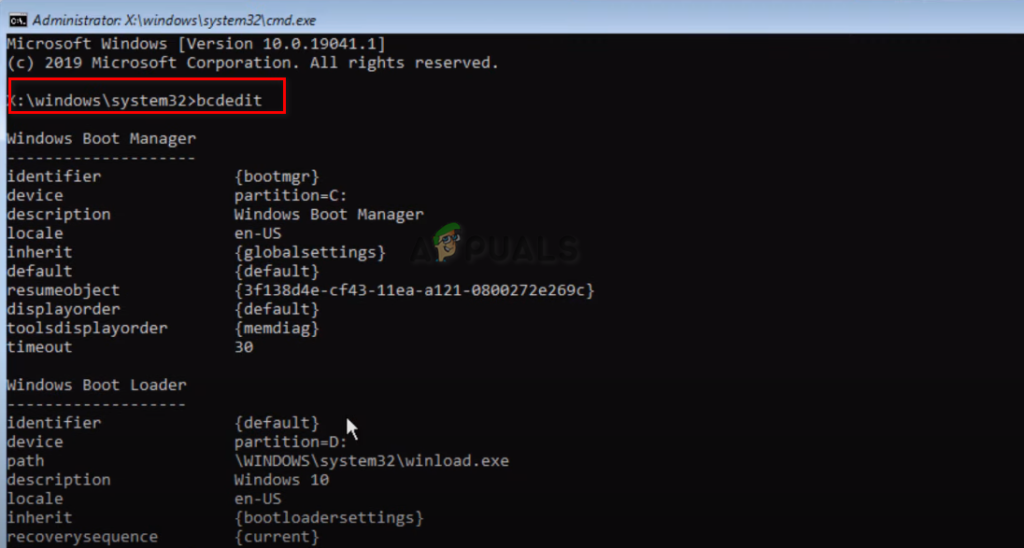
Type the command here. 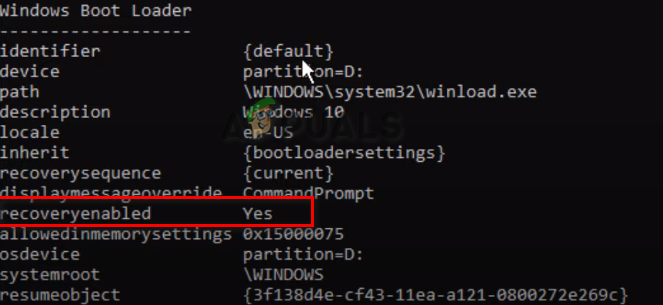
Recovery enabled is set as Yes. - Type the following command and press Enter to Disable the Automatic Repair feature on your system.
bcdedit / set {default} recoveryenabled no
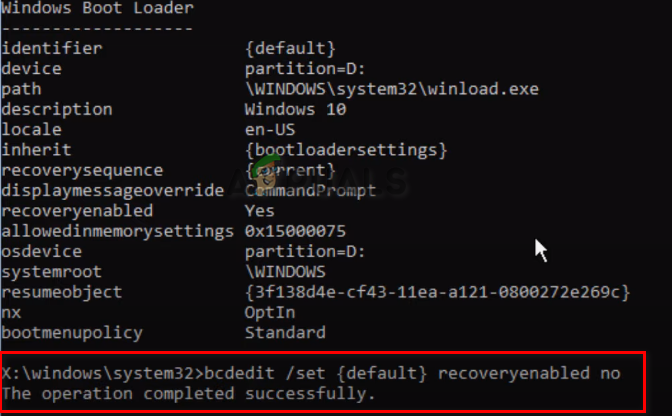
To verify if your system has adapted the new changes made to it, you can go over to the Windows Start menu and type in “cmd” to open the Command Prompt and type bcdedit again to open the Windows Boot section, where you can verify the changes at the Windows Boot Loader section. If the recoveryenabled option is set to No, you successfully disabled the Automatic Repair feature on Windows 10.
Method 2: If you are still facing the error, then you can use an alternate method from the Windows Boot Loader. Use the bcdedit tool to Enter and manage the Boot Configuration Data. Once the Windows Boot Loader is opened, verify if your os-device partition is set to C or not.
If not, then set the partition to C using the bcdedit /set {default} device partition=c: command and press Enter. Lastly type bcdedit /set {default} osdevice partition=c:, Hit Enter to end the process. Restart your PC to resolve the error.
Follow the steps given below:
- Click on the Troubleshoot page.
- Open the Advanced Options
Selecting the Advanced Options. - Click on the Command Prompt
Opening the Command Prompt. - Once you have entered the Command Prompt on your Windows, you must type in the following commands to enter the Windows Bood Loader page and fix the SrtTrail.txt Error.
bcdedit and press Enter
bcdedit /set {default} device partition=c: bcdedit /set {default} osdevice partition=c: 8. Run a System File Checker
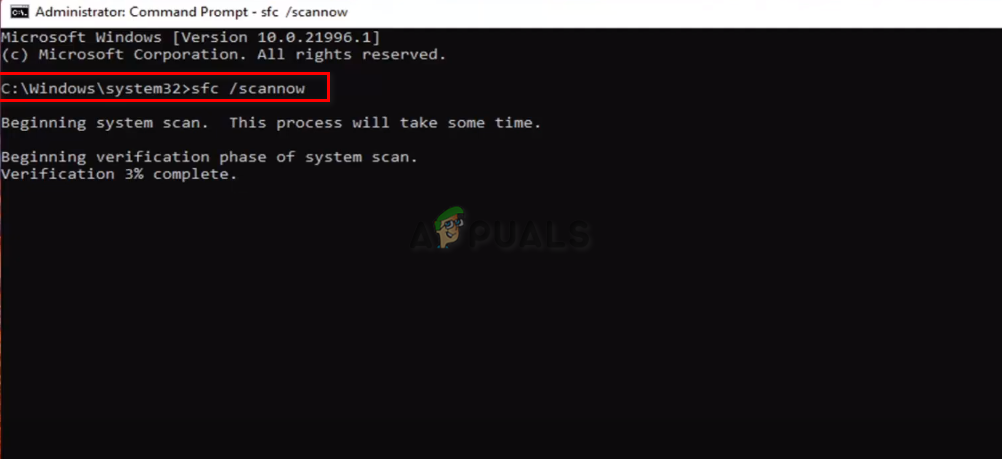
Windows System File Checker (SFC) is a built-in tool on Windows that helps you repair corrupted Files. Since the root cause of the SrtTrail.txt error occurs once your system files have been corrupted, running a System File Checker can be the best option to perform. On the Command Prompt, run a complete verification process and
Note: The system scan will take several minutes to complete since it verifies each file on your hard drive. Therefore, do not shut down your system.
Once the system scan is completed, continue passing a command using chkdsk /r c: to perform a Check Disk Scan on your system. However, when performing both scans, make sure to go in a sequence where the SFC is scanned first, then perform the Check Disk Utility in case the first command did not fix your error.
- Open Command Prompt from the Advanced options.
Opening Command Prompt. - Enter These Commands and then Restart the PC to enter your Desktop
sfc /scannow.
9. Disable Secure Boot on Windows
Secure Boot prevents your device from booting in case a corrupted file is detected. It will most likely interfere with your Windows startup and cause the Blue Screen of death on the system startup. The best solution to this is disabling the Secure Boot.
From the Troubleshooting page, click on the UEFI Firmware Settings and Restart your PC. Doing so will allow your system to adapt the firmware settings when restarted. Enter the security settings to disable the Secure Boot.
Follow the steps we have listed below:
- Open the Troubleshoot page.
- Click on Advanced Options.
Selecting the Advanced Options. - Open the UEFI Firmware Settings
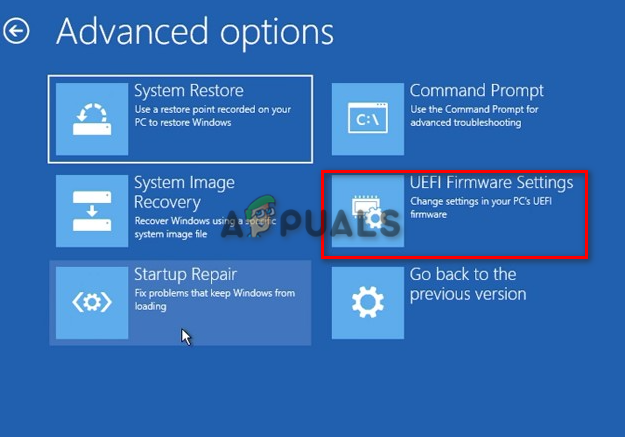
Click on the UEFI Firmware Settings. - Restart your PC by clicking the Restart button.
- Open Boot Options next to Configuration.
- Disable Secure Boot and click on Exit.
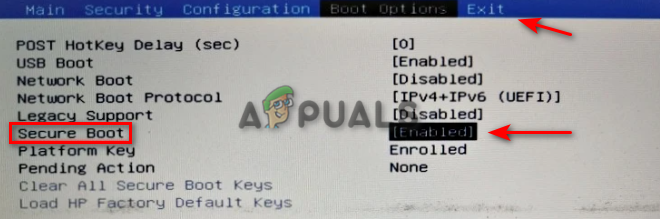
Disabling Secure Boot. - Save Changes and Exit.


