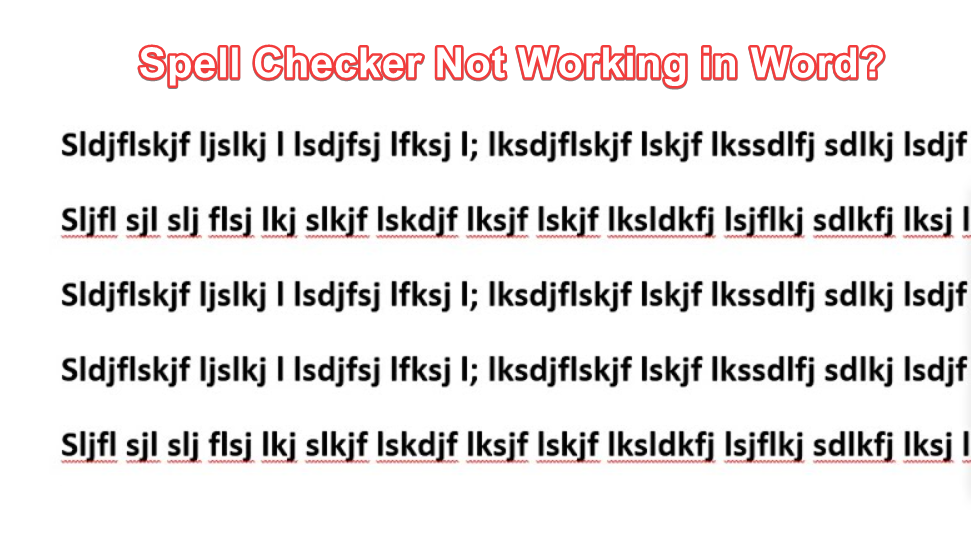
Fix: Spell Check Not Working in Microsoft Word (365 or 2016+)
If the spell checker isn’t working in Microsoft Word (Microsoft 365 or 2016 and later), it might be because the settings are configured to ignore spelling and grammatical errors. A common cause is the “Do not check spelling or grammar” option being enabled for the document or specific text, especially after copying content from another document or external source.
To fix the issue, you’ll need to verify and adjust proofing, language, and document-specific settings. One common cause is the use of proofing exceptions, which you’ll check later in this guide.
In some cases, proofing exceptions or incorrect language settings may also interfere with the spell checker. Checking these settings can help resolve the issue.
1. Configure the Proofing Language Settings
Configuring the proofing language settings involves selecting the correct proofing language {e.g., English (US) or English (UK)} and ensuring the “Do not check spelling or grammar” option is disabled. These settings allow Word to detect and underline spelling and grammar mistakes, assuming the correct language pack, its associated proofing tools are installed and the document isn’t in a protected state.
Note: This method applies to the desktop version of Microsoft Word on Windows. Some features may differ slightly on macOS or Word Online.
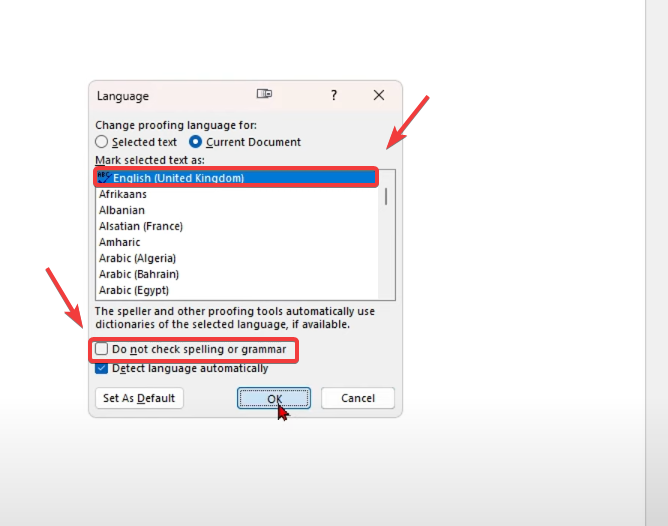
- Click the Review tab at the top of the screen, then select Language > Set Proofing Language.
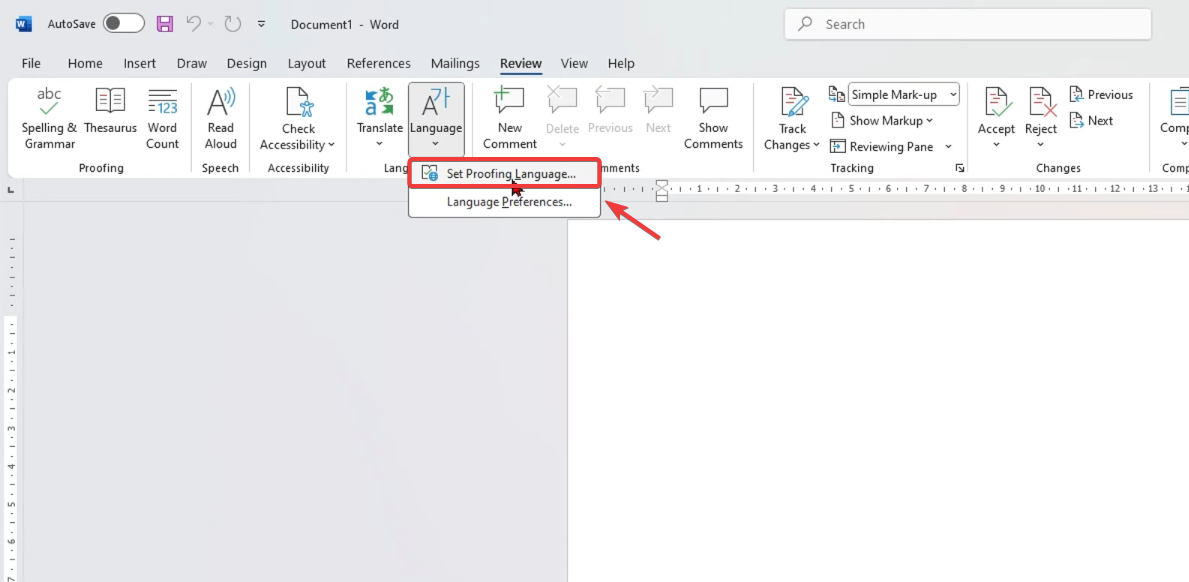
- In the dialog box that appears, select the correct language for your document.
- Ensure that the Do not check spelling or grammar option is unchecked.
Tip: If you only see this issue in a specific paragraph, select the affected text first before applying the language setting. Word allows different proofing settings for different parts of the document. - Click OK to save your changes.
- Test the spell checker to confirm it’s working properly.
Note: If some proofing options appear greyed out or unavailable, your organization may have restricted them via group policies. In such cases, contact your IT administrator.
2. Check Proofing Exceptions
Proofing exceptions are document-level settings in Microsoft Word that override normal spelling and grammar checks. These exceptions may apply to individual sections or the entire document and are often enabled unintentionally—especially in files copied from other sources or templates.
- Hide errors (e.g., squiggly underlines) without disabling the spell checker entirely.
- Skip checking specific sections or documents altogether.
If these settings are misconfigured, Word may appear to ignore errors because they’re hidden from view, even though spell and grammar checking remains active in the background.
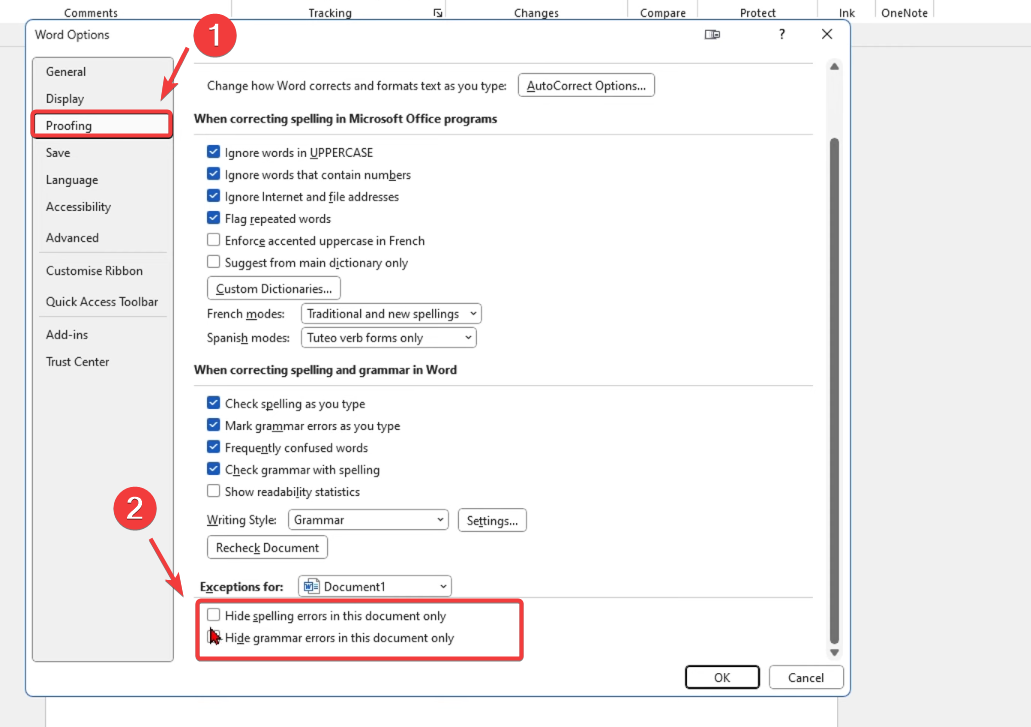
- Open Microsoft Word, click on File in the top-left corner, then select Options.
- In the Word Options window, choose Proofing from the left-hand menu.
- Scroll down to the Exceptions for section.Tip: Use the dropdown menu carefully—it should match your currently open document. If another file or template is listed, switch it to your current document.Ensure the following options are unchecked:
- Hide spelling errors in this document only
- Hide grammar errors in this document only
Now, enable global spell check features:
- Still in the Proofing section, scroll up to the When correcting spelling and grammar in Word section.
- Ensure these options are checked:
- Check spelling as you type
- Mark grammar errors as you type
- Check grammar with spelling
Note: This option may not appear for certain languages or Word versions unless the correct language pack is installed.
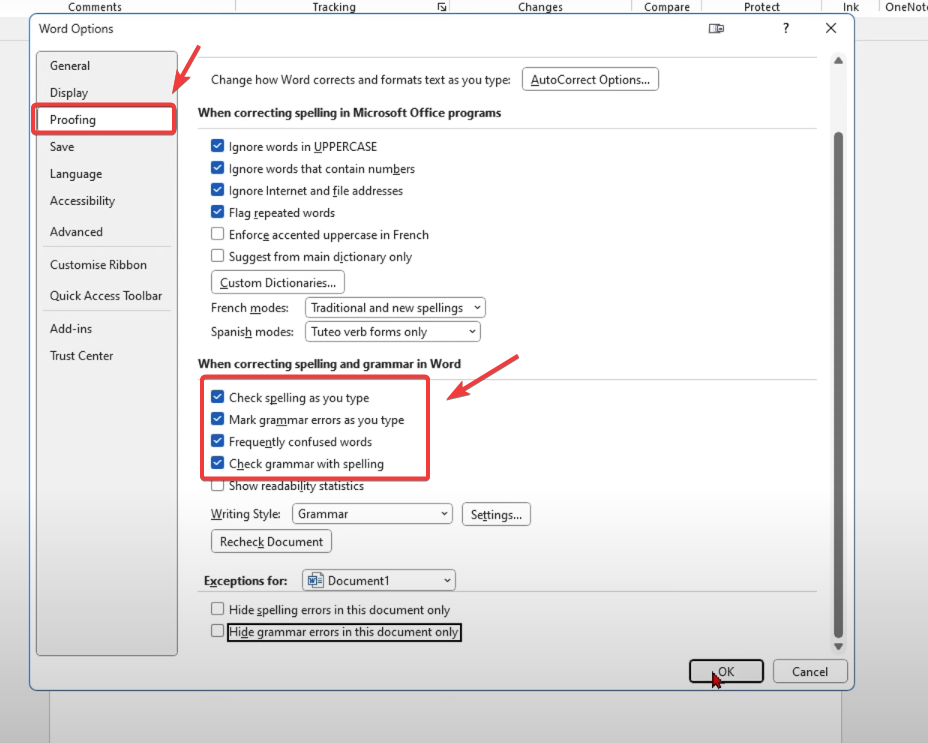
- Click OK to save your changes, then test the spell checker in your document.
3. Start Microsoft Word in Safe Mode
If the issue persists, it’s likely caused by add-ins, template corruption, or custom settings interfering with the spell checker. Starting Microsoft Word in Safe Mode temporarily disables these elements and helps diagnose whether they are responsible. If the spell checker works in Safe Mode, continue with the steps below to apply a permanent fix.
- Hold down the CTRL key and launch Microsoft Word. If this doesn’t work (e.g., from a pinned taskbar shortcut), press Win + R, type
winword /safe, and press Enter. - A prompt will appear asking if you want to open Word in Safe Mode.
- Click Yes to proceed.
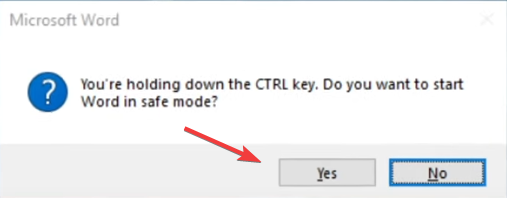
- Check if the spell checker works properly in this mode.
Note: If the spell checker works in Safe Mode, the issue is likely caused by a third-party add-in, corrupted user template (Normal.dotm), or a custom Word setting.
Next steps:
- To disable add-ins, go to File > Options > Add-ins. At the bottom, choose COM Add-ins from the drop-down and click Go. Uncheck all listed add-ins and click OK.
- If the issue persists, advanced users can try renaming or deleting the
Normal.dotmfile to regenerate it. It’s usually located at:
C:\Users\[YourName]\AppData\Roaming\Microsoft\Templates.
After performing these steps, restart Microsoft Word (or your computer, if needed) and test the spell checker again.


