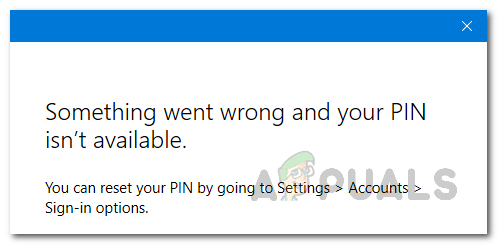
Something went wrong and your PIN isn’t available? Here’s how to fix
Some users have been reporting an issue with the Windows Hello sign-in feature where the computer refuses the PIN that the user provides. Upon entering the PIN, the “Something went wrong and your PIN isn’t available” error message appears on the screen. This can usually happen when your access control lists on the NGC folder are corrupted, in which case you will have to reset the list to make the PIN work again. In this article, we will take you through this whole process and show you how to resolve the error message mentioned above quite easily so just follow through.
As it turns out, Windows Hello is a feature that allows users to be able to access their Windows devices quite easily and instantly. This includes biometrics, facial recognition, and more. PINs are supposed to make signing into an account easy and they serve as another login method. In essence, a four-digit pin is the easiest way to sign in to your Windows machine, however, when it stops working and prompts you an error message instead, that can be frustrating. Like we have mentioned, the error message that we have mentioned above can sometimes occur when the ACLs are damaged, however, that is not the only case. On top of that, the problem can also surface when you do not have permissions over the Ngc folder in which case you will have to alter the permissions of the folder to resolve the issue. With that said, let us get started and show you how to fix the problem in question without any further delay.
Change NGC Permissions
As it turns out, the first thing that you should do when you come across the issue in question is to go ahead and change the permissions of the NGC folder. Like we have mentioned, the issue in some cases can arise in the NGC folder where the biometrics and everything else is stored.
In such a scenario, giving yourself owner permissions over the folder will fix the problem for you. Now, to do this, you will be needing an administrator account as the folder resides inside the Windows directory and you need an admin account to access that. With that said, follow the instructions down below to do this:
- First of all, go ahead and open up Windows Explorer. You can do this by pressing Windows key + E on your keyboard.
- Now, if your system drive is C: paste the following path in the address bar to navigate to it:
C:\Windows\ServiceProfiles\LocalService\AppData\Local\Microsoft
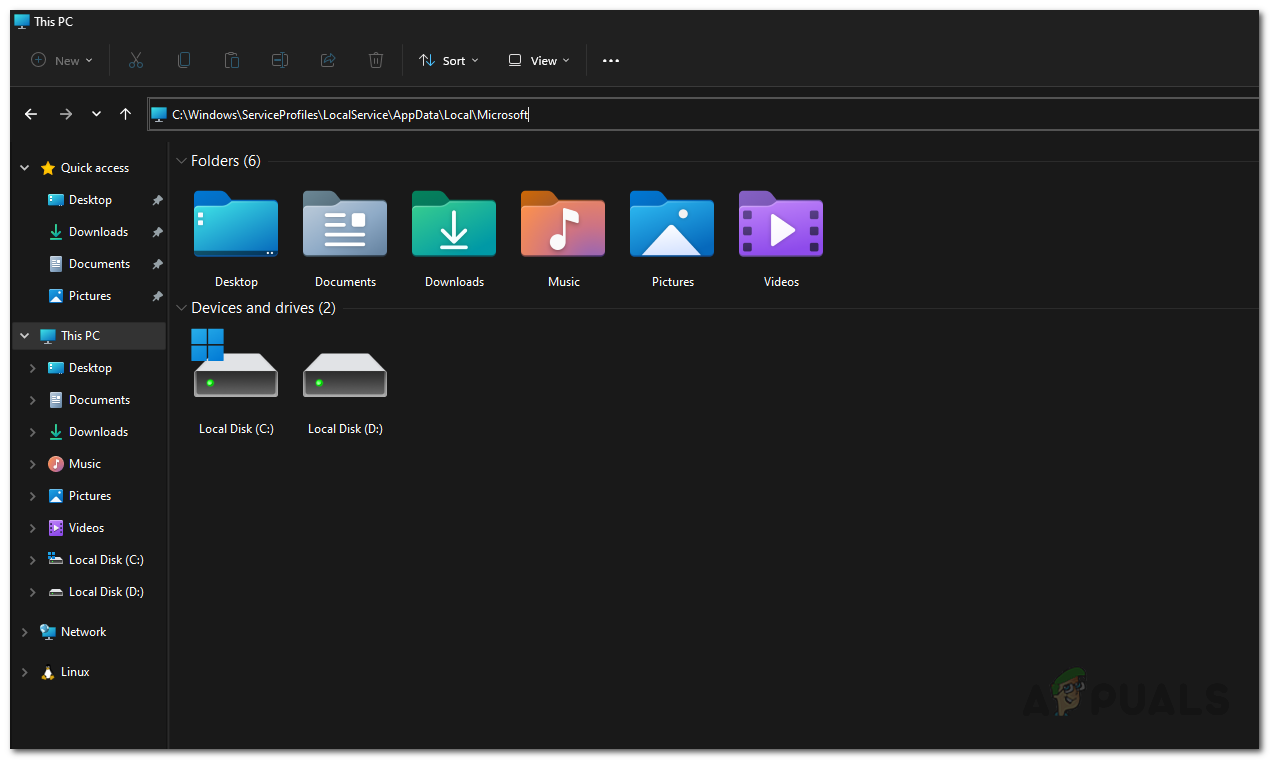
Navigating to Ngc Folder - In case your system drive is different, change C: in the above path appropriately.
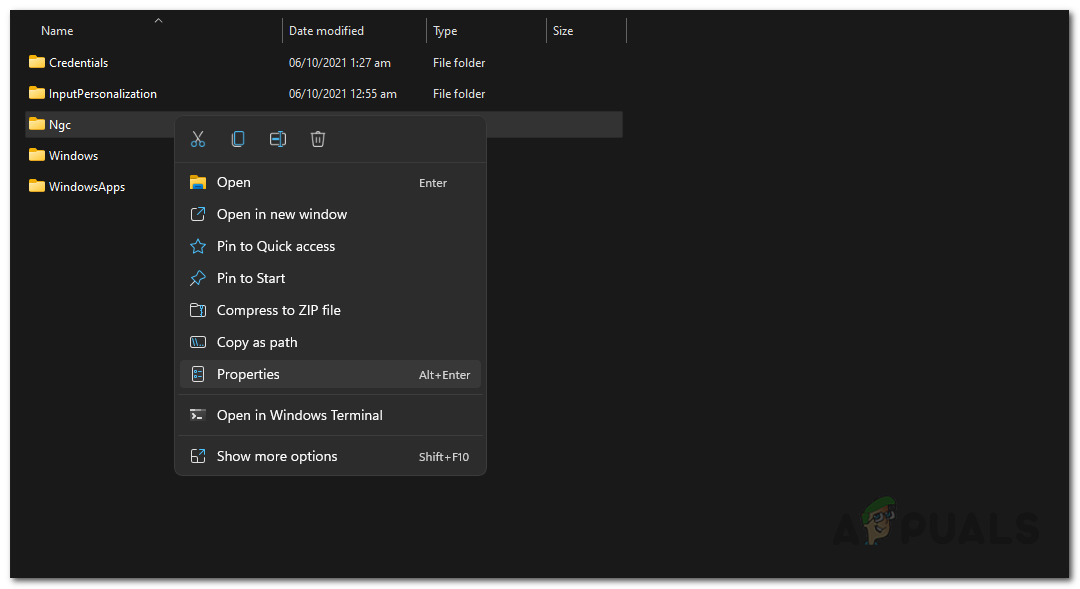
- Once you are there, right-click on the Ngc folder, and from the drop-down menu choose Properties.
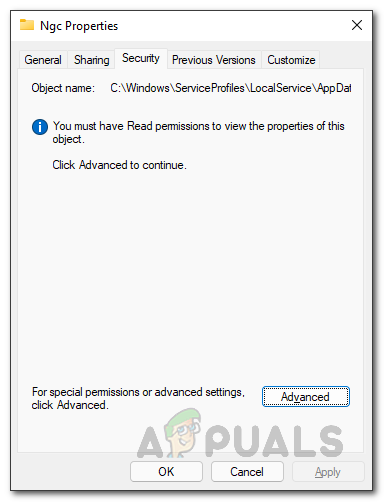
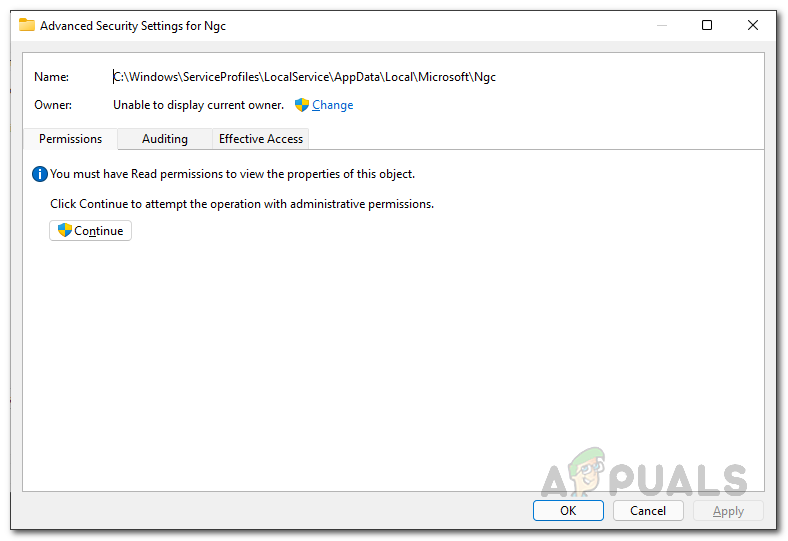
Opening up Ngc Folder Properties - On the Properties window, switch to the Security tab and then click the Advanced button at the bottom.
Ngc Security Tab - Now, on the Advanced Security Settings for Ngc window, click the Change option next to Owner.
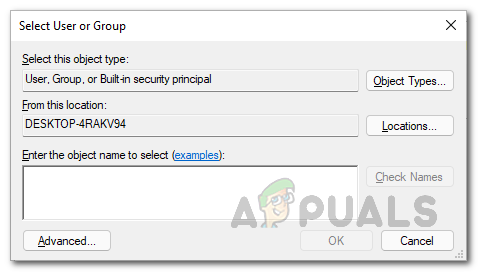
Ngc Advanced Security - On the Select User or Group window, click the Advanced button.
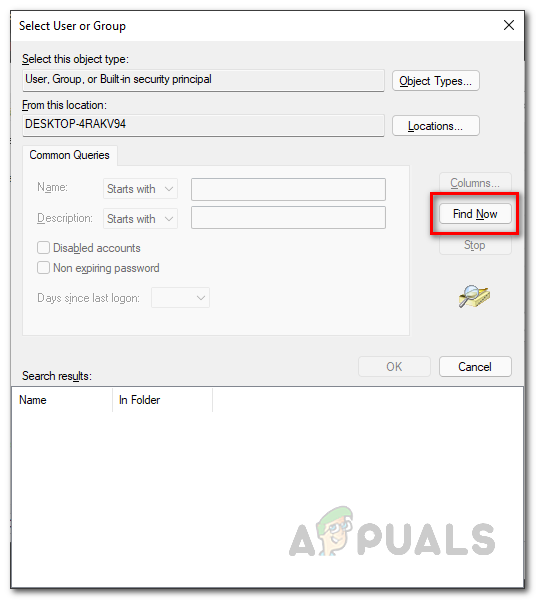
Looking for User and Group - After that, click the Find Now button to the left.
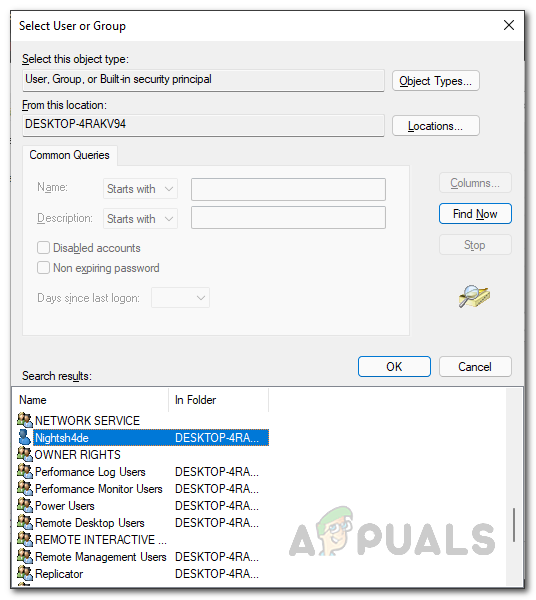
Finding Users - This will show you the list of accounts on the computer under Search results.
- Look for your user account and then click on it. Then, click the OK button. After that, click OK on the Select User or Group window as well.
Selecting User - Once you have done that, go ahead and click the “Replace owner on subcontainers and objects” checkbox. Click the Apply button.
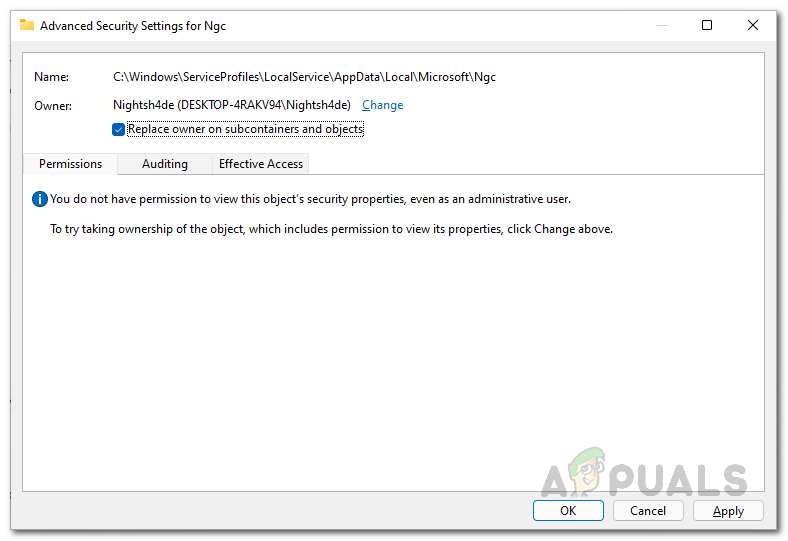
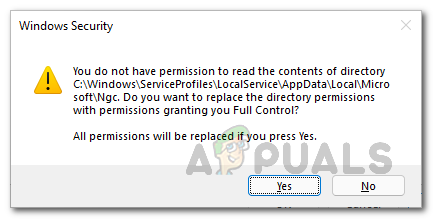
Replacing Owner on all Subcontainers and Objects - When you do that, a Windows Security dialog box will appear asking you if you wish to change the permissions by granting yourself Full Control over the object. Click Yes. Then, on the follow-up dialog box, click OK.
Changing NGC Directory Permissions - After doing that, go ahead and close the Properties window.
- Then, right-click on the Ngc folder again and go to Properties.
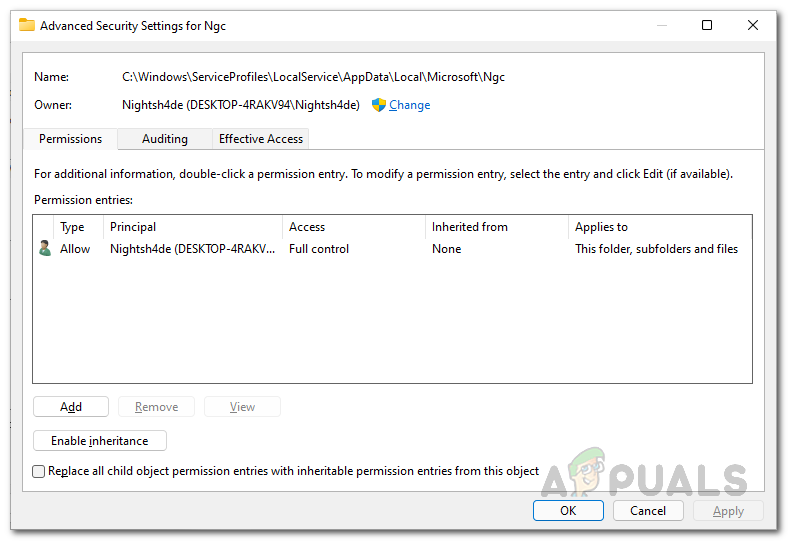
Opening up Ngc Folder Properties - Switch to the Security tab and then click Advanced.
Ngc Security Tab - After that, click on the “Replace all child object permissions with inheritable permissions from this object” checkbox. Then, click the Apply button.
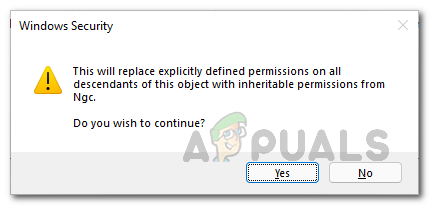
Replacing Child Objects Permissions - On the Windows Security dialog box that appears, click Yes.
Replacing Child Permissions - After taking ownership of the folder, click the Change permissions button.
- Follow it up by clicking the Add button. If you don’t see a Change permissions button, click the Add button provided instead.
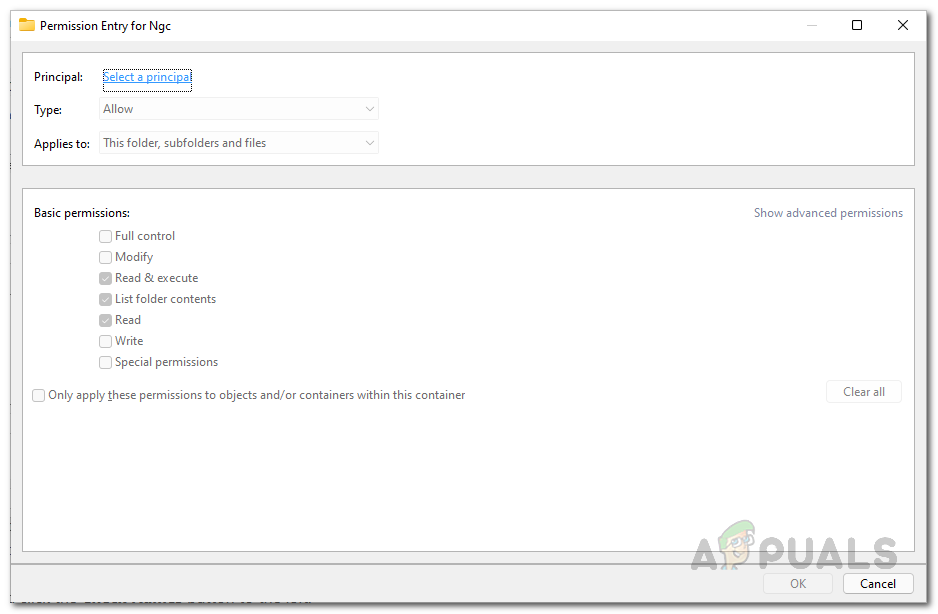
Replacing Child Objects Permissions - This will take you to the Permission Entry for Ngc window.
- There, click on the Select a principal option provided at the top.
Selecting a Principle - On the Select User and Group window that appears, type in SYSTEM in the Enter the object name to select box.
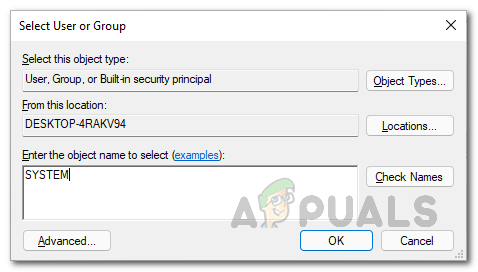
Selecting SYSTEM User - Once you have done that, go ahead and click the Check Names button to the left.
- Click the OK button.
- Once you are back to the Permission Entry for Ngc window, go ahead and click the Full control checkbox under Basic permissions.
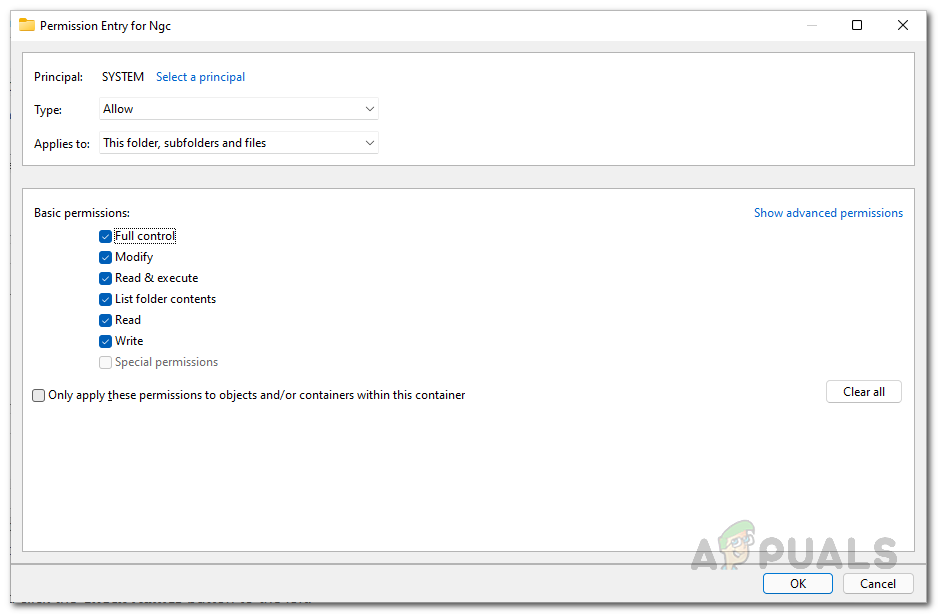
Changing Basic Permissions - After that, click the OK button. Then, click OK on the advanced security window and follow it up by clicking OK on the Properties window.
- With this, you have given full control to yourself. With that done, go ahead and check if the problem still appears.
Reset Access Control Lists
Another reason that the problem in question may surface is due to the access control lists or ACLs. This can happen when the ACLs are corrupted in the Ngc folder in some cases.
If this case is applicable, you will be able to resolve the problem by simply resetting the Access Control Lists. Doing this is pretty simple so just follow the instructions that are given down below:
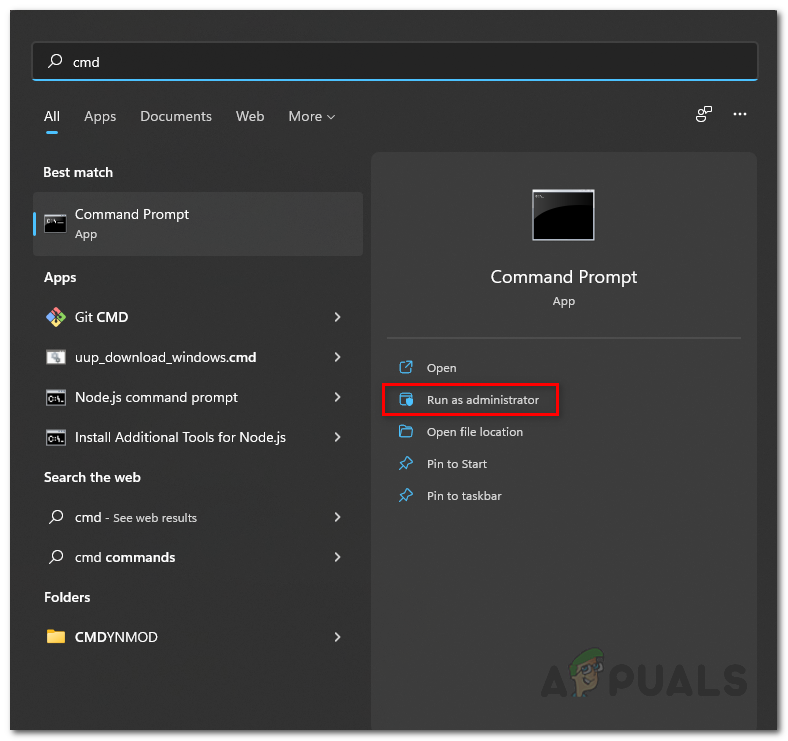
- First of all, go ahead and open up an elevated command prompt. To do this, open up the Start Menu and search for cmd. Right-click on the result shown and click Run as administrator from the drop-down menu.
Opening up Command Prompt as an Admin - Now, in the command prompt window, copy and paste the following path and then hit the Enter key:
icacls C:\Windows\ServiceProfiles\LocalService\AppData\Local\Microsoft\Ngc /T /Q /C /RESET
- If your system drive is different, replace C: in your case appropriately.
- Once you have done that, you will need to add a new PIN.
- After that, the problem should no longer be there.
Delete Ngc Folder
Finally, if the solutions have not resolved the problem for you, then the problem may be due to corruption in the Ngc folder on your system. In such a case, your last resort to fix the issue would be to delete the Ngc folder.
When you delete the Ngc folder, all the previous biometrics, PINs that are attached to the user account will be gone and thus you will be able to configure from the start again. Once you do that, the problem should no longer be there and you will be good to go.
Note: If you are facing a problem on a domain, then we would recommend removing the computer that is facing the problem on the domain. After doing that, rename the computer that was being problematic and then join the computer to the domain. Once you have done that, you can move the computer object to its respective organization unit and the problem should go away.


How do you do any of this when you can’t get past the pin window to begin with? Safe mode isn’t an option either.