Fix: Something Went Wrong “0x80049dd3” on Windows
The ‘Something went wrong: 0x80049dd3’ error code is related to the voice recording feature of Windows. Users encounter this issue when they attempt to use the recording/speech-to-text feature in the applications.
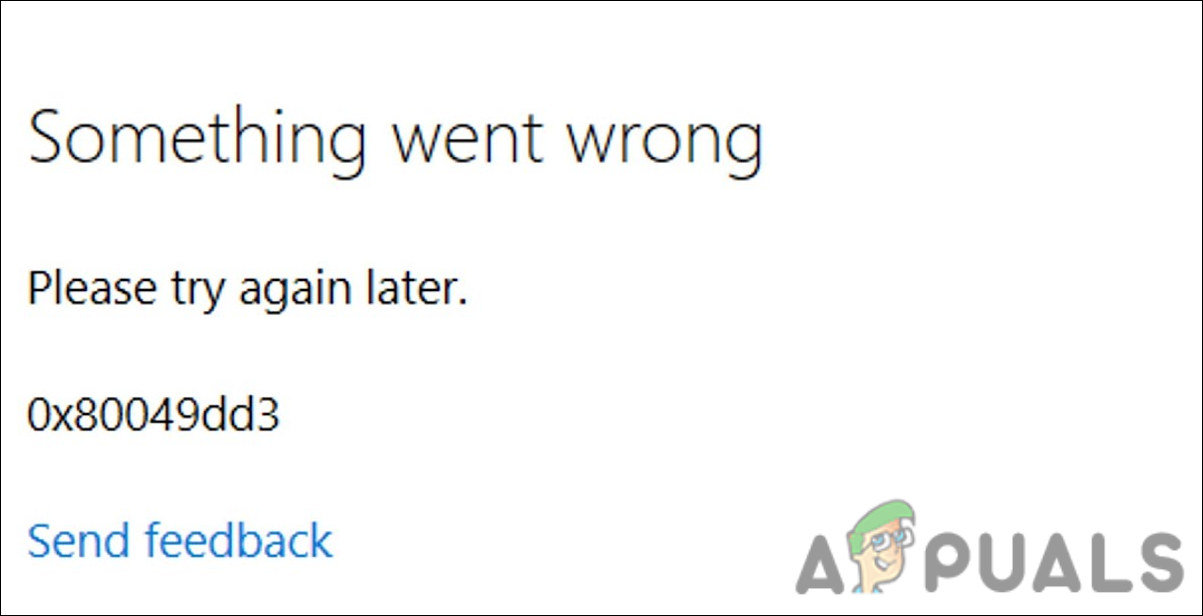
We had a look into the issue and discovered that it can be caused by several reasons such as:
- Outdated Windows operating system – if you haven’t installed the pending system updates in a while, you will likely run into minor errors like the one at hand due to incompatibility.
- The audio feature is infected with a corruption error – the recording audio feature can be dealing with some kind of corruption error, preventing you from using the service properly.
- Insufficient permissions – If you try to use the voice recording feature in an application that allows voice access by the system, you will face the error code 0x80049dd3. The best way to counter this problem is by providing the appropriate permissions to the application if it is trustable.
- Audio drivers are corrupt or outdated – the driver required by the recording feature is not working due to being outdated or corrupt. In this case, you can try updating the drivers or reinstalling them to fix the problem.
- Generic corruption error in the user account – the user account can deal with an inconsistency causing the problem. In this case, you can try switching to another account and check if the issue is resolved.
Now that we know about the potential causes of the error let’s look at the troubleshooting methods that will help you resolve the issue for good.
Read through the troubleshooting methods first to identify the issue that you might be facing. Once that is done, you can proceed with the relevant solution to fix the problem.
1. Install the Pending Updates
We advise installing the pending system updates before proceeding with any complicated troubleshooting methods. As we mentioned earlier, the problem might be caused by a lack of recent system updates.
Here is how you can proceed:
- Press Win + I keys together to open Windows Settings.
- Choose Windows Update from the context menu.
- Click the Check for updates button in the right pane and wait for Windows to display any pending updates.
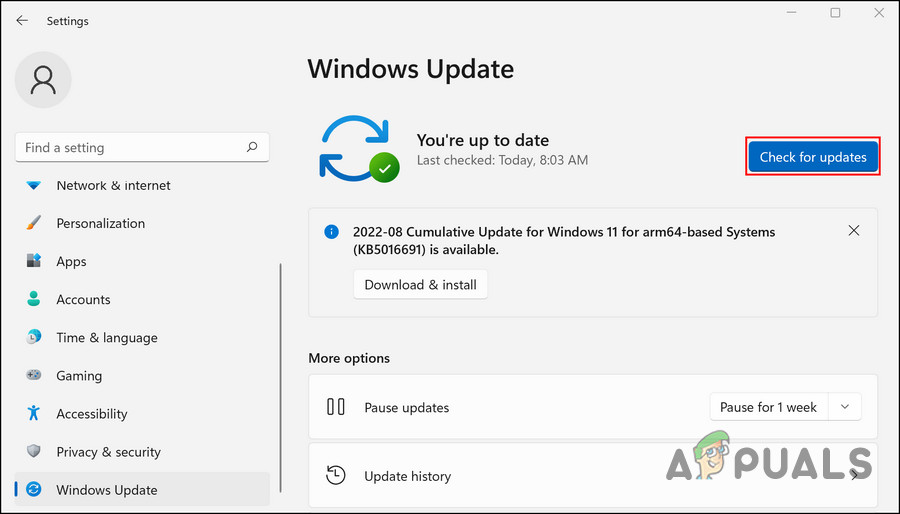
Click on the Check for updates button - Install the pending updates and check if the issue is resolved.
2. Run the Recording Audio Troubleshooter
Another thing that you can do is run the Recording Audio troubleshooter, which comes built into Windows by default. It works by scanning the system for potential errors that might prevent you from using the voice feature in Windows. If it finds any problems, it will resolve them without requiring significant input from your side.
If it finds any problems, it will also suggest relevant fixes that can be applied using the troubleshooter.
Here is how you can run it:
- Type Settings in Windows search and click Open.
- Choose System and then click on Troubleshoot on the right side of the window.
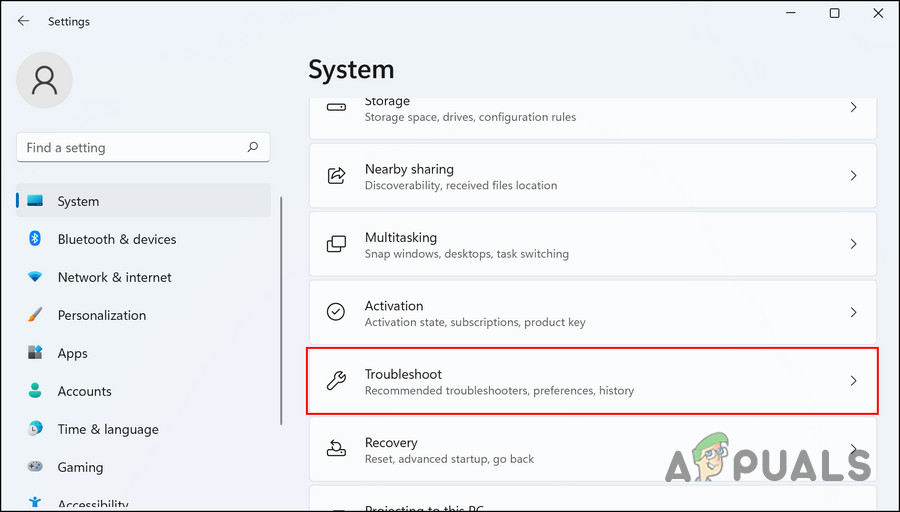
Choose Troubleshoot in the Settings app - Select Other troubleshooters.
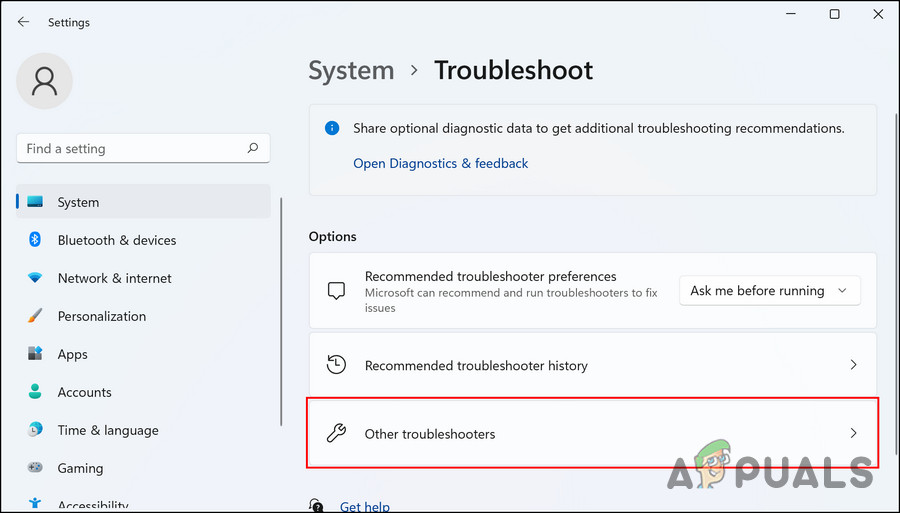
Access the Other troubleshooters option - Now, locate the Recording Audio troubleshooter and click on the Run button for it.
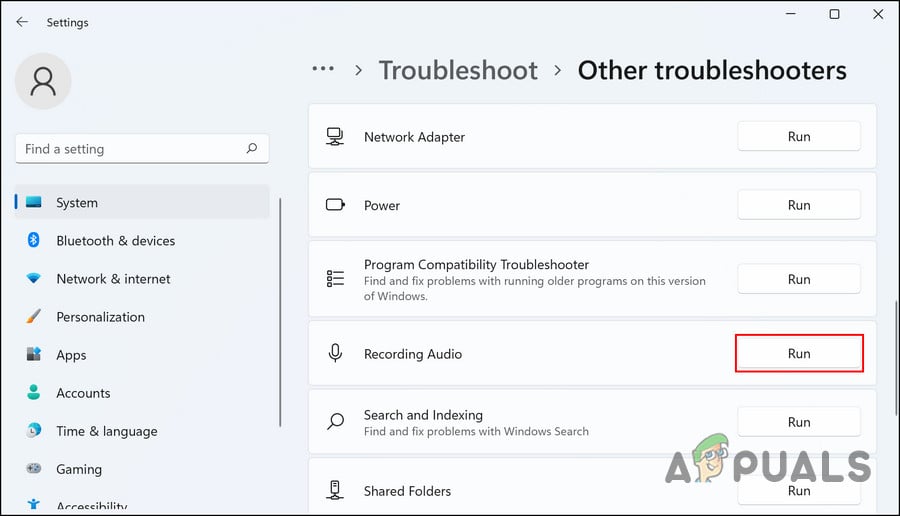
Hit the Run button - If any problems are identified, click on Apply this fix to proceed. Hopefully, running the troubleshooter will solve the issue.
- If the troubleshooter fails to identify the problem, click on Close the troubleshooter and move to the following method below.
2. Ensure Microphone Access
You might also face this error if the app you try to use with the voice recording feature does not have the required permissions to access the microphone/speaker.
In Windows, only a particular set of apps are provided with these permissions due to security reasons. If you want to use another application for this purpose, you must manually provide it with the required permissions.
Here is how to proceed:
- Press the Win + I keys together to open Windows Settings.
- Access Privacy & security > Microphone in the following window.
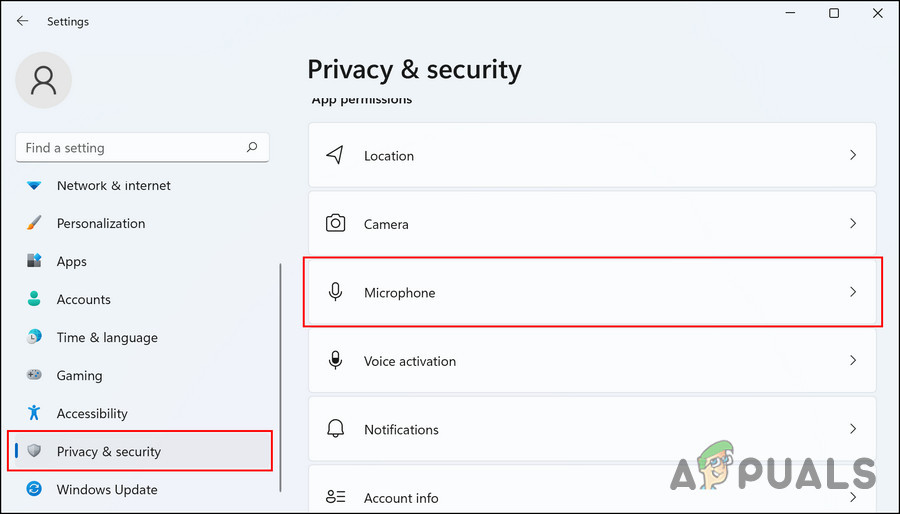
Access the Microphone settings - Turn the toggle on for Microphone access.
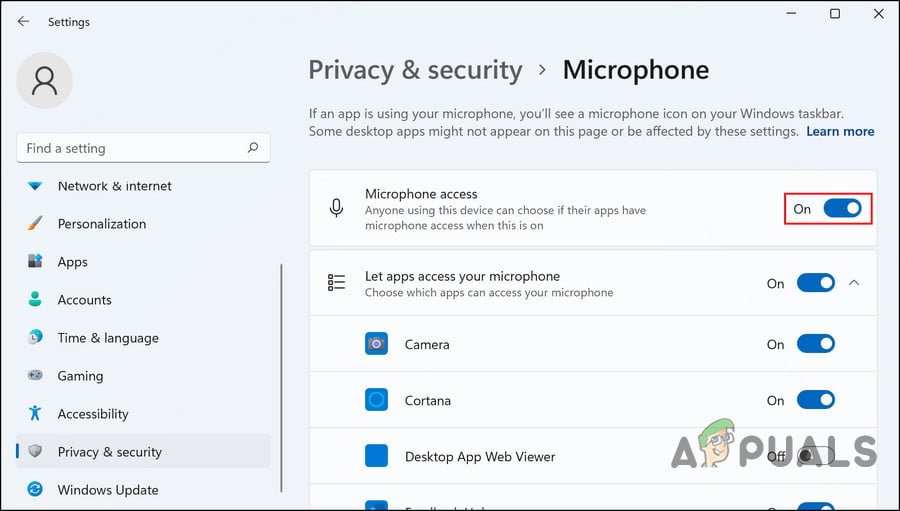
Allow the system to access the microphone
Additionally, while you are at it, check if the app you use for voice typing has microphone access. You can enable this by turning on the toggle for Let apps access your microphone. Then, check if the app you are trying to use has access to your microphone. If it does not, turn the toggle on associated with it.
3. Update Microphone Drivers
Drivers are what connect the hardware components, like a microphone, to the system. If the relevant drivers aren’t working correctly, you will also likely face issues using the voice feature in Windows.
The best to counter problems related to the drivers is by updating them. In most cases, updating the driver will solve the issue. If that does not work, you can install a new driver manually.
Here is how to proceed:
- Type Device Manager in Windows search and click Open.
- In the Device Manager window, look for the Audio inputs and outputs section and double-click on it.
- Locate your microphone driver and right-click on it.
- Choose Update driver from the context menu.
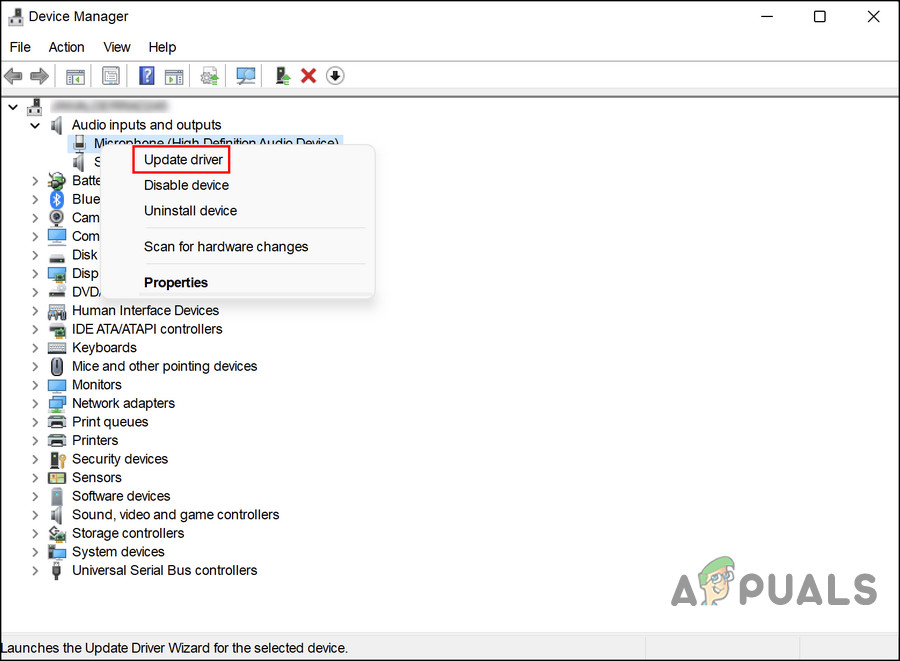
Update the audio driver - Now, choose Browse my computer for drivers and pick an old driver available.
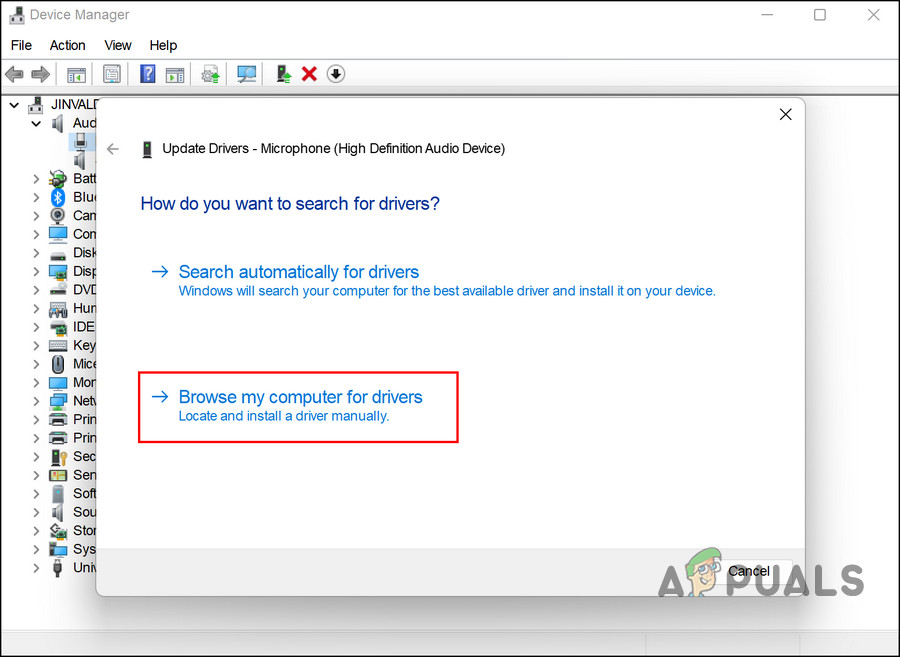
Check your system for updated driver versions - You can also choose Search automatically for drivers if an old driver isn’t available. By doing this, the system will automatically select a driver for you.
Once done, check if the issue is resolved.
Reinstalling the driver software from scratch may be necessary if the above doesn’t resolve the issue. To do this, visit the manufacturer’s official website and install the latest compatible driver.
4. Switch to Another User Account
There can also be an issue within your user account, preventing you from properly using the voice recording feature.
Usually, these issues are caused by viruses and corruption errors within the system. In this method, we will first determine if the user account is faulty by switching to another account. If that fixes the voice recording problem, we will take further steps to ensure that the corruption errors are resolved in the problematic account.
Here is how you can proceed:
- Press Win + I to open Settings.
- Choose Accounts from the left pane.
- Click on Family & other users, and click on the Add account button in the following window.
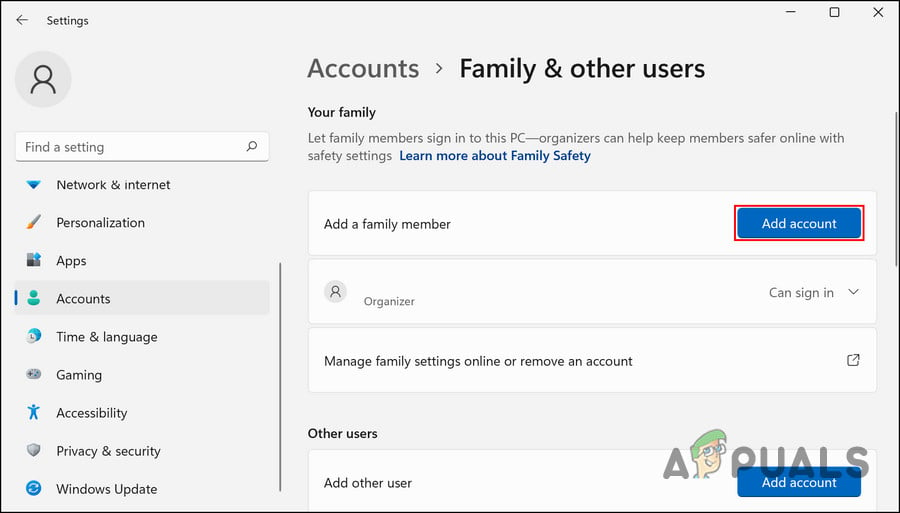
Click on the Add account button - Choose I don’t have this person’s sign-in information and click on Add a user without a Microsoft account.
- Enter all the required information and then sign in using that account.
If the issue does not appear in the new account, the error is caused due to a corruption error within the old user account. In that case, you can run the SFC or DISM utility to fix the problem.


