How to Fix Socket Error Occurred on SpeedTest
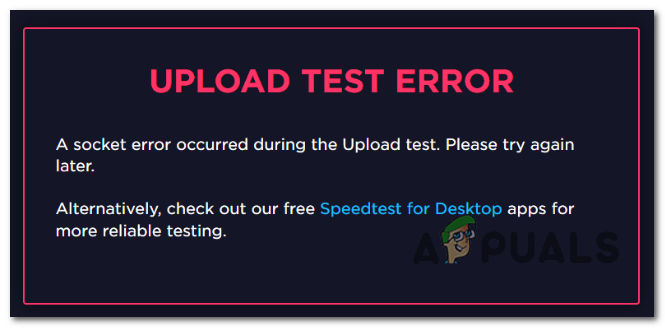
Some Windows users are trying to run a speed test on their Internet connection, but every online tool that they try to use will end up displaying the ‘Socket Error‘ message. In most cases, this issue is reported to occur with SpeedTest.
As it turns out, one of the most common instances that will produce the Socket Error is an outbound rule (Connected Devices Platform – Wi-Fi Direct Transport (TCP-Out)) belonging to Windows Firewall. If it’s disabled, you AV might not allow connections with speed test utilities. In this case, you can resolve the problem by enabling the outbound rule from the Advanced settings of the Windows Firewall.
But if you’re using a 3rd party AV or Firewall, you might need to whitelist the domain of the SpeedTest tool that you’re using in order to allow the test to complete. Additionally, you should look to disable the real-time protection or uninstall the 3rd party suite altogether.
However, cloud solutions like Onedrive or Google Drive are also reported to trigger the ‘Socket Error‘. If this scenario is applicable, disable the real-time syncing feature of your cloud solution and see if the issue is resolved.
If all else fails, you should consider using a different speed testing tool that is more permissive with your Internet connection.
Method 1: Enabling Connected Device Platform rule in Windows Firewall
As it turns out, the ‘socket error’ when running an Internet speed test with your browser can be caused by your firewall – even if you’re using the built-in firewall (Windows Firewall). This scenario is most encountered on a Wi-Fi connection.
According to some affected users, this particular issue can occur due to an Outbound rule called ‘Connected Devices Platform – Wi-Fi Direct Transport (TCP-Out)‘.
Some affected users have managed to fix the issue by accessing the Advanced Security suites of Windows Firewall and enabling the problematic outbound rule. But keep in mind that the outbound rule that needs to be enabled will be different if you’re encountering the issue with an ethernet connection.
Here’s a quick step by step guide that will allow you to access the Advanced built-in Firewall settings and enabling the correct outbound rule:
- Press Windows key + R to open up a Run dialog box. Next, type ‘firewall.cpl’ inside the text box and press Enter to open up the Windows Firewall settings window.
- Once you’re inside the Windows Defender Firewall settings, click on the Advanced settings menu from the left-hand side menu bar.
- After you manage to land inside the Windows Defender Firewall and Advanced Security, click on Outbound Rules from the menu on the left.
- With the Outbound Rules menu selected, move down to the right-hand section and scroll down through the list of available Outbound Rules and locate ‘Connected Devices Platform – Wi-Fi Direct Transport (TCP-OUT)‘. Once you see it, double-click on it.
Note: If you’re encountering the issue with an ethernet connection, access the Connected Devices Platform (TCP-Out) outbound rule instead. - Inside the Properties screen of the outbound rule that you want to modify, select the General tab from the menu at the top, then ensure that the box associated with Enabled is checked.
- Click on Apply to save the changes, then close every window and restart your computer.
- Once the next startup is complete, repeat the speed test once again and see if the issue is now resolved.
Enabling the problematic outbound rule
In case the same ‘Socket Error‘ is still occurring, move down to the next potential fix below.
Method 2: Pause OneDrive or Drive Syncing (if applicable)
If you’re using OneDrive or the desktop version of Google Drive as the primary cloud solution, keep in mind that these two can be huge Internet bandwidth hoggers if you’re they are actively syncing files while you are trying to run a speed test.
Several affected users have reported that they got this error consistently until they realized that their cloud solution (Onedrive or Google drive) was uploading files in the background, effectively taking up all the available bandwidth.
If this scenario is applicable, you can fix this issue by pausing the syncing sequence of Ondrive or Google Drive – depending on the tool that you’re using.
Since we don’t discriminate, we created two separate guides that will help you disable active syncing regardless of the cloud application that you’re using.
Pausing Active Syncing on OneDrive
- Right-click on the taskbar icon associated with OneDrive (an icon resembling a cloud).
- Next, from the OneDrive context menu, click on More, select Pause Syncing and select 2 Hours from the list of available options.
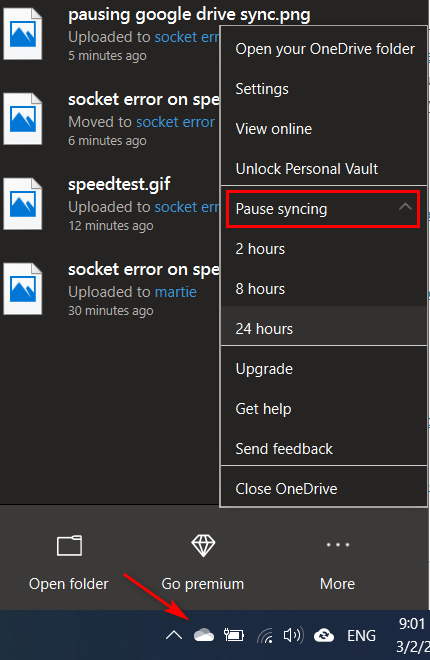
Pausing Syncing on OneDrive Note: Two hours is more than enough to complete the speed test – no need to stop the active syncing feature indefinitely.
- Once the OneDrive syncing feature is disabled, repeat the speed test and see if the ‘Socket Error‘ has been resolved.
Pausing Active Syncing on Google Drive
- Go to your taskbar and look for the icon associated with Google Drive.
- If you see that the utility is actively syncing files, click on the action button (top-right corner) and click on Pause from the newly appeared cotext menu.
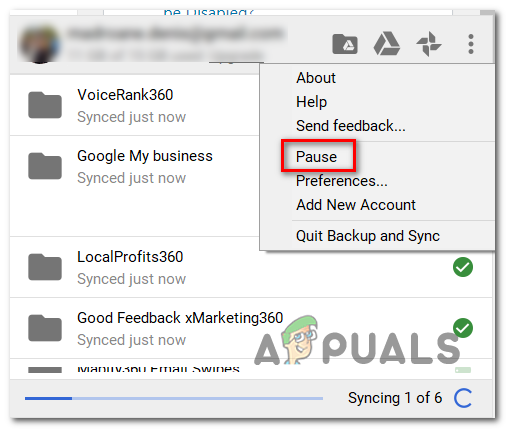
Pausing Google Drive Sync - Now that the active syncing is disabled, repeat the speed test and see if the problem is resolved.
- Once the operation is completed, return to the same Google Drive menu and click on Resume to reestablish real-time syncing.
In case you’ve already done this with no success or this scenario was not applicable, move down to the next potential fix below.
Method 3: Whitelist Speedtest domain (if using 3rd party AV)
As it turns out, there are some overprotective suites that will simply flag the speed test as a suspicious activity – which will end up triggering the ‘Socket Error‘. Avast Antivirus, Kaspersky and Comodo AV are commonly signaled out for blocking communications between computer and Speedtest server.
If this scenario is applicable, you should be able to resolve the issue by whitelisting the domain in order to allow the speed test to run. But keep in mind that this operation will be different depending on the AV suite that you’re using.
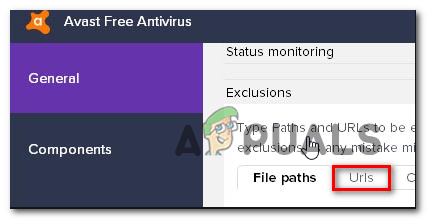
In Avast, you can establish a whitelisting rule by going to Settings > General > Exclusions > URL. Once you get there, simply paste ‘https://www.speedtest.net/‘ and save the modifications.
Note: Keep in mind that these steps will be different depending across multiple 3rd party suites.
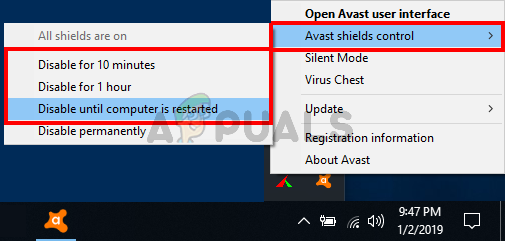
Additionally, you can simply disable the real-time protection while you perform the speed test. In most cases, you can do this directly from the taskbar menu. Simply right-click on the icon associated with your AV and look for an option that will disable the real-time protection.
In case the same problem is persisting and you’re using a 3rd party security suite, move down to the next potential fix below.
Method 4: Uninstalling 3rd party suite (along with remnant files)
If the method above didn’t resolve the issue but you are using a 3rd party suite that you suspect might be causing this problem, the only way to test the theory out is to uninstall the 3rd party suite and ensure that you’re not leaving behind any leftover files that might still cause the same type of behavior.
In case you suspect that a false positive triggered by your 3rd party AV is causing the issue, here’s a quick step-by-step guide on uninstalling the 3rd party suite or firewall and ensuring that you’re not leaving behind any remnant files that might still produce the error:
- Press Windows key + R to open up a Run dialog box. Next, type ‘appwiz.cpl’ and press Enter to open up the Programs and Features menu.

Type appwiz.cpl and Press Enter to Open Installed Programs List - Once you manage to get inside the Programs and Features menu, scroll down through the list of installed applications. Do so until you locate the 3rd party A/V or firewall that you suspect might be causing the issue.
- When you see it, right-click on it and choose Uninstall from the newly appeared context menu.
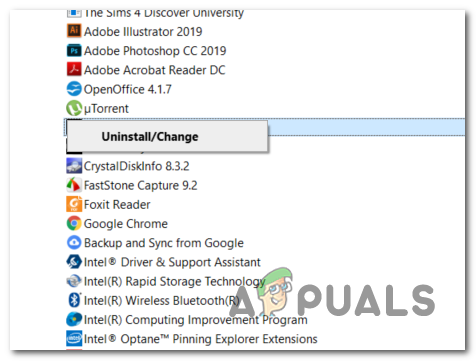
Uninstalling Avast Firewall - Inside the uninstallation wizard, follow the on-screen prompts to complete the process of uninstalling the 3rd party AV app.
- Once the uninstallation is complete, restart your computer and follow this article (here) once the next startup is complete in order to ensure that you also remove any leftover files that might still produce this type of behavior.
- Run the speed test again and see if the issue is still resolved.
In case the same problem is still occurring, move down to the next potential fix below.
Method 5: Using a Different Testing Tool
If none of the methods below have allowed you to fix the ‘Socket Error’ and perform a SpeedTest, it’s time to consider the alternatives. Keep in mind that SpeedTest.net is not the only reliable tools that will allow you to test your Internet connection.
We’ve created a list with 5 Alternatives that you can use in case Speedtest.Net is consistently showing the same error message:
Feel free to use any of the alternatives featured above. They are just as reliable as the most popular option (SpeedTest.Net) and will most likely not trigger the same ‘Socket Error’.


no help ! on my router 4c