How to: Use Snipping Tool in Windows 10
The Snipping Tool is a free, small utility developed by Microsoft, used to capture screen shots in a variety of forms: free-form snip, rectangular snip, window snip, and full-screen snip. You can take almost any type of screenshot with it. My favorite is the rectangular snip, which allows me to snip a custom area needed for my work. It’s the one tool I use heavily on this site to add images to my guides. These snips can be annotated using your mouse, and can be saved in numerous formats, including PNG, GIF, and JPEG. Once a snip is taken, it is automatically copied to the clipboard.
In this guide, I will walk you through the steps to create a snipping tool shortcut on the Windows 10 desktop.
The Snipping Tool is a feature in Windows 10.
There are many ways to run the Snipping Tool in Windows 10, but the easiest of all is to create a shortcut on the desktop, allowing you to access it anytime you want.
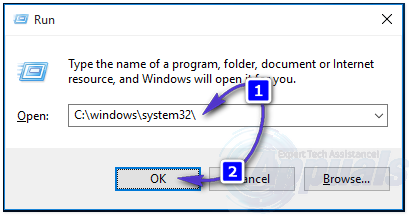
Hold the Windows Key and press R. Then, type the following file location into the run dialog.
C:\windows\system32\

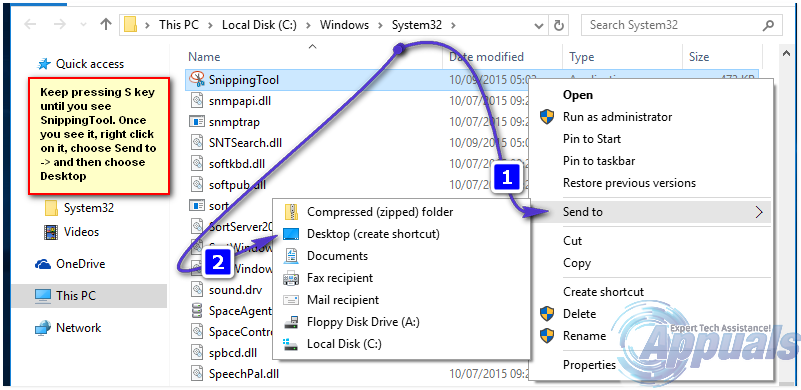
Then, click or press OK. Once done, it will take you to Windows Explorer, listing all the files in C:\windows\system32\. From here, click on any file once to highlight it and then repeatedly press the ‘S’ key until you see the file called SnippingTool.exe.

You should now have the snipping tool visible on your Desktop. You can use it by double clicking on it.