How to Fix Sleep Mode Not Working in Windows 10/11
According to several users, the sleep mode in Windows fails to work, preventing the system from going to sleep after a certain time. In some cases, the PC does not also go into standby mode.

The issue can typically be caused by a number of reasons but is mostly seen occurring after the installation of the KB5019509. Below, we have listed different troubleshooting methods that can fix the problem for you. Get started to resolve the issue!
1. Uninstall the Update (If Applicable)
As we just mentioned, the issue is typically caused after installing the KB5019509 update. If you too recently installed this update, then try uninstalling it to resolve the issue.
In case the issue started occurring after installing another update other than the one under discussion, you can uninstall that as well.
Here is how you can proceed:
- Open a Run dialog by pressing Win + R.
- Type control in the search area of the taskbar and click Open.
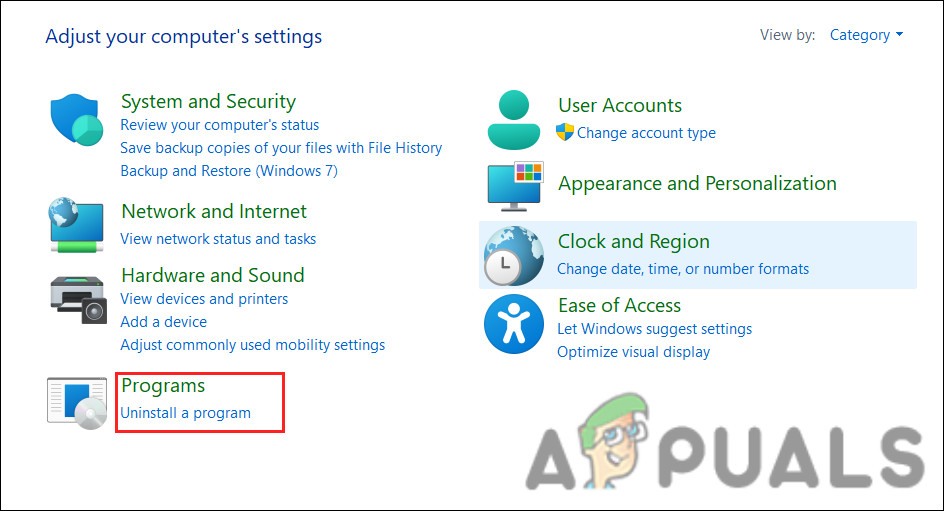
- Now, navigate to Programs and Features > Uninstall a program.
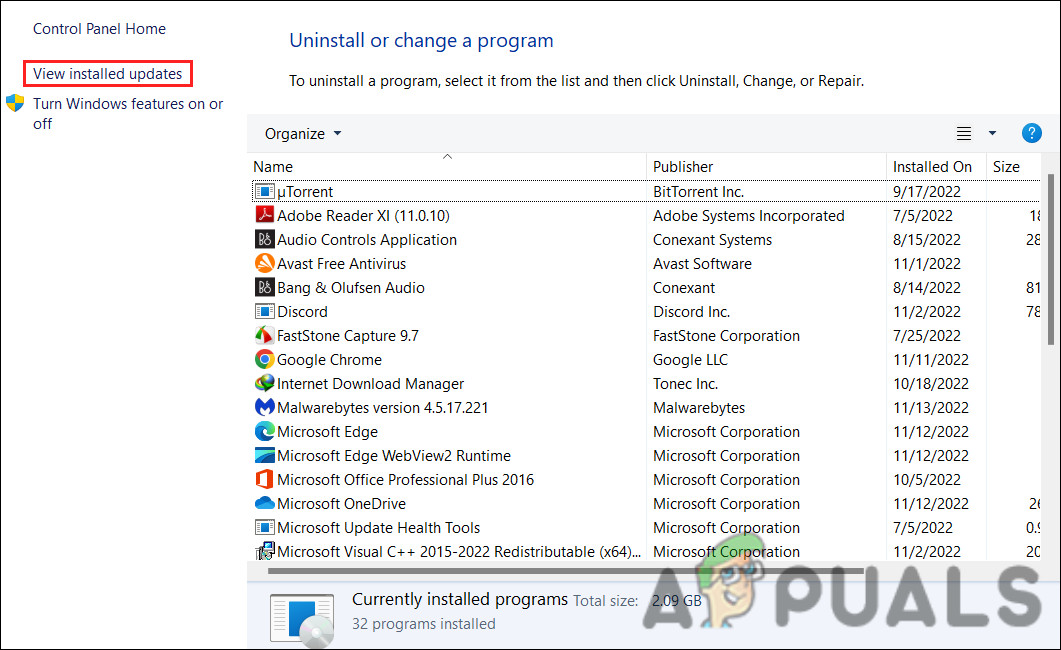
Click on Uninstall a program option - Choose View installed updates from the left pane.
View the installed updates on the system - Next, locate the targeted update (KB5019509 in this case) and right-click on it.
- Choose Uninstall from the context menu.
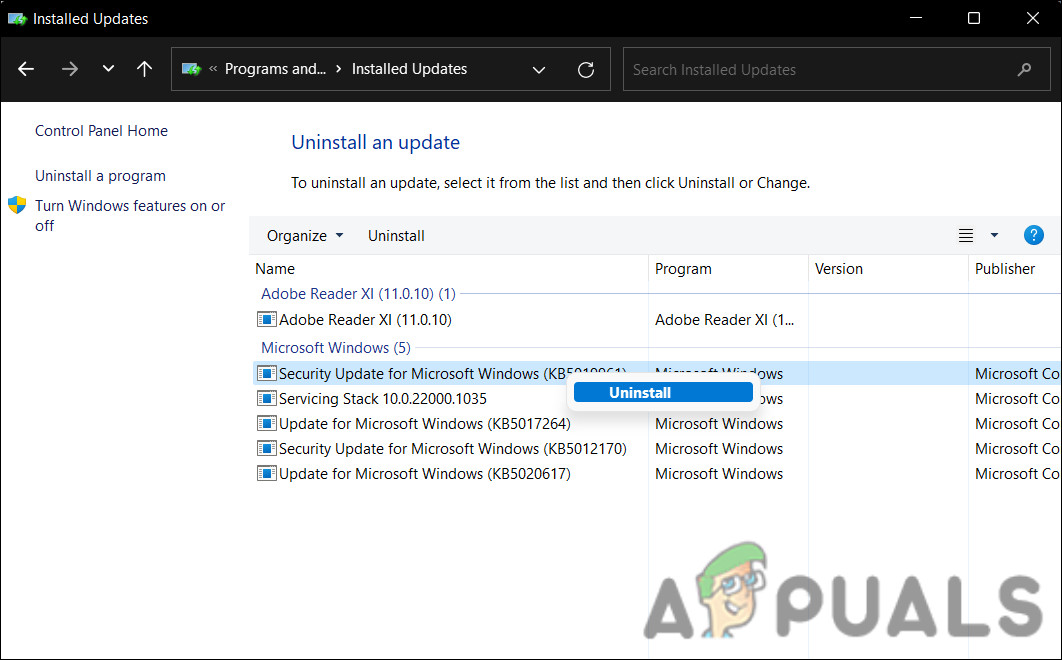
Uninstall a Windows update - Follow the on-screen instructions to proceed.
- Once done, check if the issue is resolved.
2. Remove External Peripherals
Another reason why you might be facing the problem is because of corrupt external devices interrupting the system’s processes. If this scenario is applicable, then try removing all the external peripherals that are not essential for the PC.
For instance, you can try removing the USB or joysticks, if attached, and then check if the system can go into sleep mode successfully.
3. Check the Sleep Settings
There is also a chance that the sleep settings of your computer are configured incorrectly. Power and sleep buttons can be affected by hardware, power options, and configuration. If you’re using a shared or non-owned computer, it’s possible someone has tweaked the power settings.
Here is how you can check the sleep settings and re-adjust them:
- Open a Run dialog by pressing Win + R.
- Type control in the search area of the taskbar and click Open.
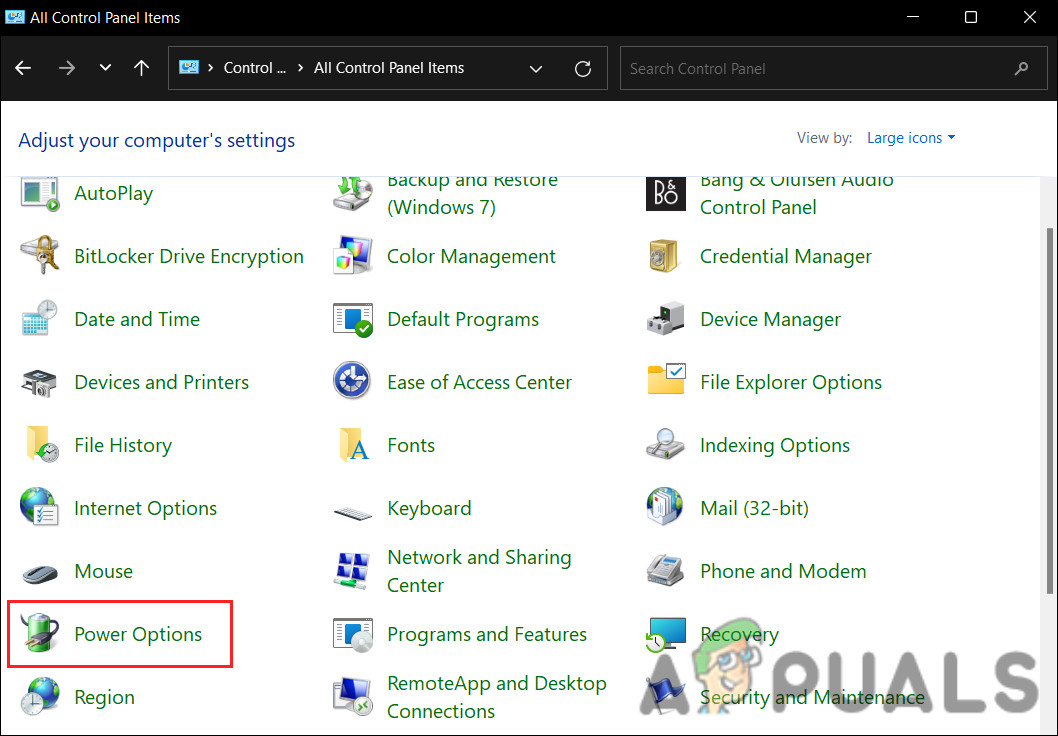
- Expand the View by category and choose Large icons.
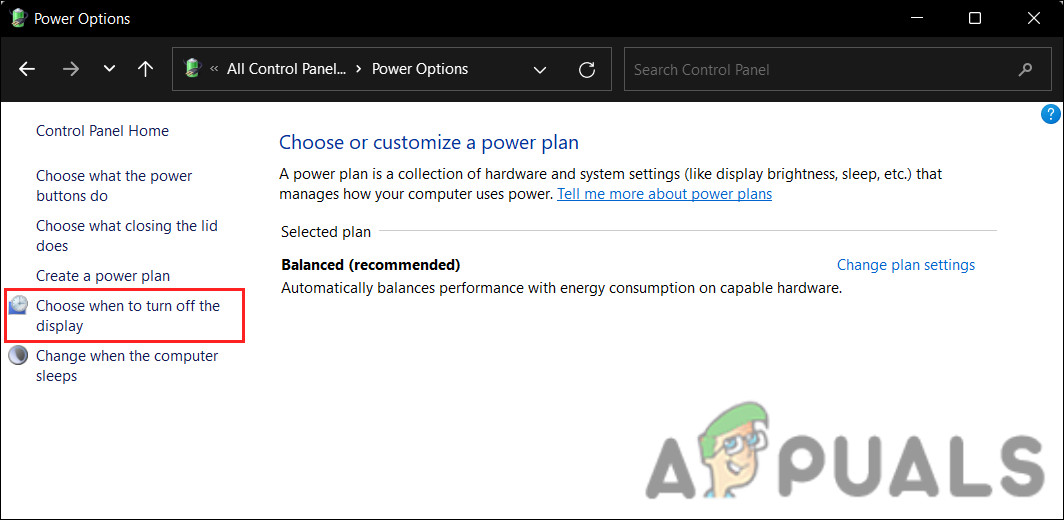
- Now, locate Power options and click on it.
Click on Power options - Click on Choose when to turn off the display.
Choose when to disable the display - Make sure the values next to Put the computer to sleep are set up properly.
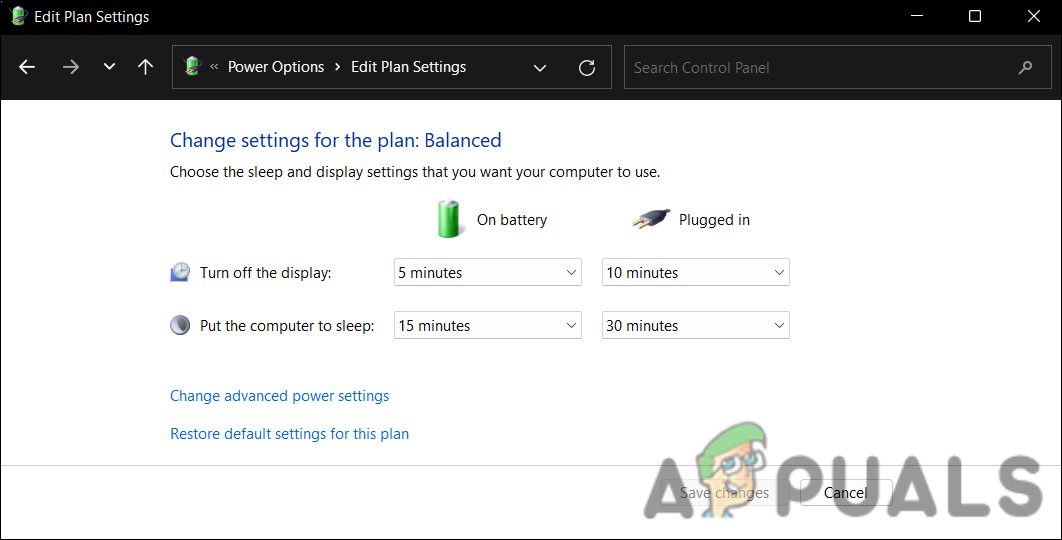
Edit the power plan settings - Next, access the Change advanced power settings and expand the sleep settings to ensure they are set according to your preferences.
4. Run powercfg Command
In addition, you may wish to run the powercfg command from an elevated Windows Command Prompt, which is a command-line utility which allows you to control every configurable power system setting, including hardware-specific settings that can’t be customized through the Control Panel for each user.
Follow these steps to proceed:
- Press Win + R to open Run.
- Type cmd in Run and press Ctrl + Shift + Enter keys together to open Command Prompt with administrative rights.
- Click Yes in the User Account Control prompt.
- Now, type the following command in Command Prompt and hit Enter to execute it:
powercfg -requests
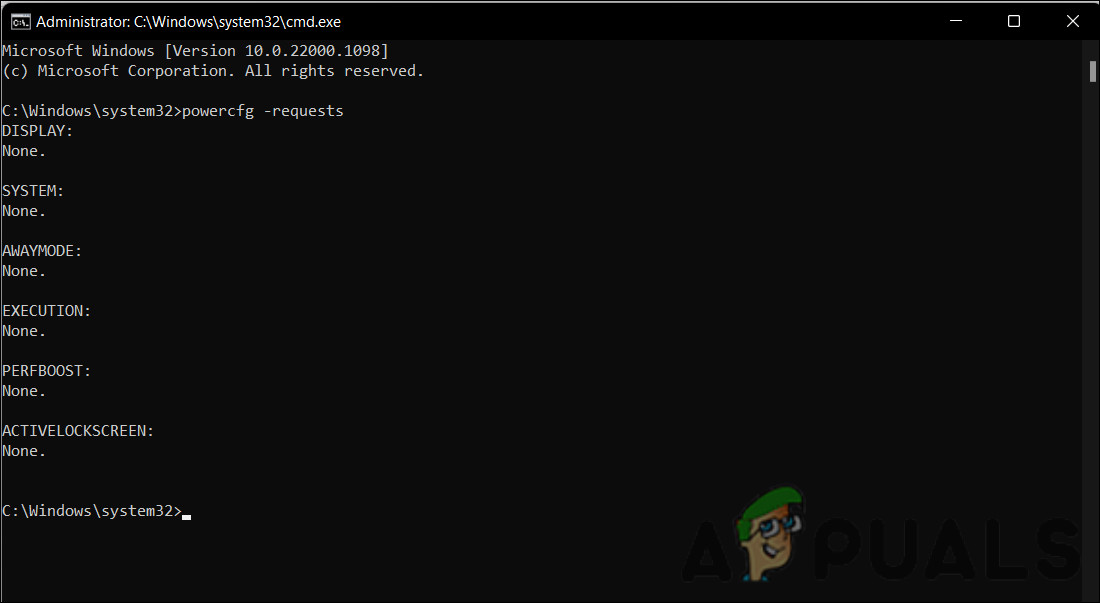
Execute the powercfg command - The fields should all read None. Any active power requests that have been made by applications or drivers can be cancelled to allow the computer to fall asleep. Replace the CALLER_TYPE as PROCESS, NAME as the application name under execution, and the REQUEST to EXECUTION.
powercfg -requestsoverride <CALLER_TYPE>“<NAME>”<REQUEST>
5. Run the Power Troubleshooter
Another easy way to fix the problem is by running the power troubleshooter. This utility is designed by Microsoft to scan for any power-related issues in the system and then fix them without requiring much input from your side.
Here is how you can proceed with running the troubleshooter:
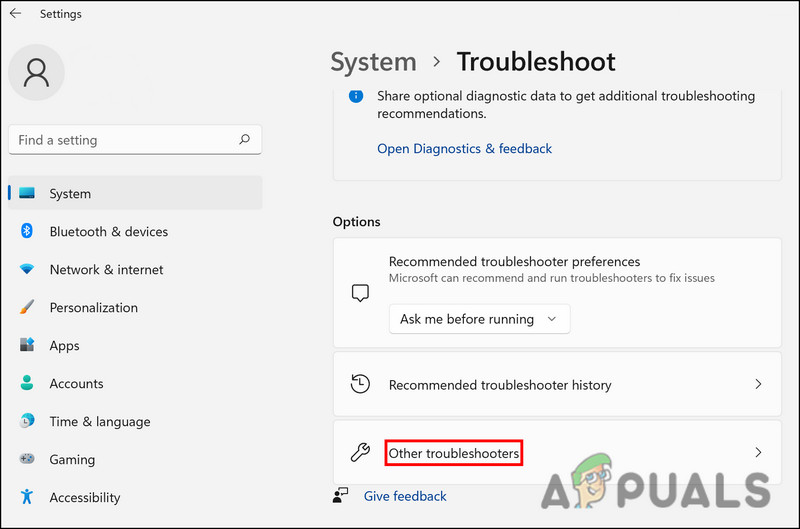
- Open Windows Settings by pressing Win + I keys simultaneously.
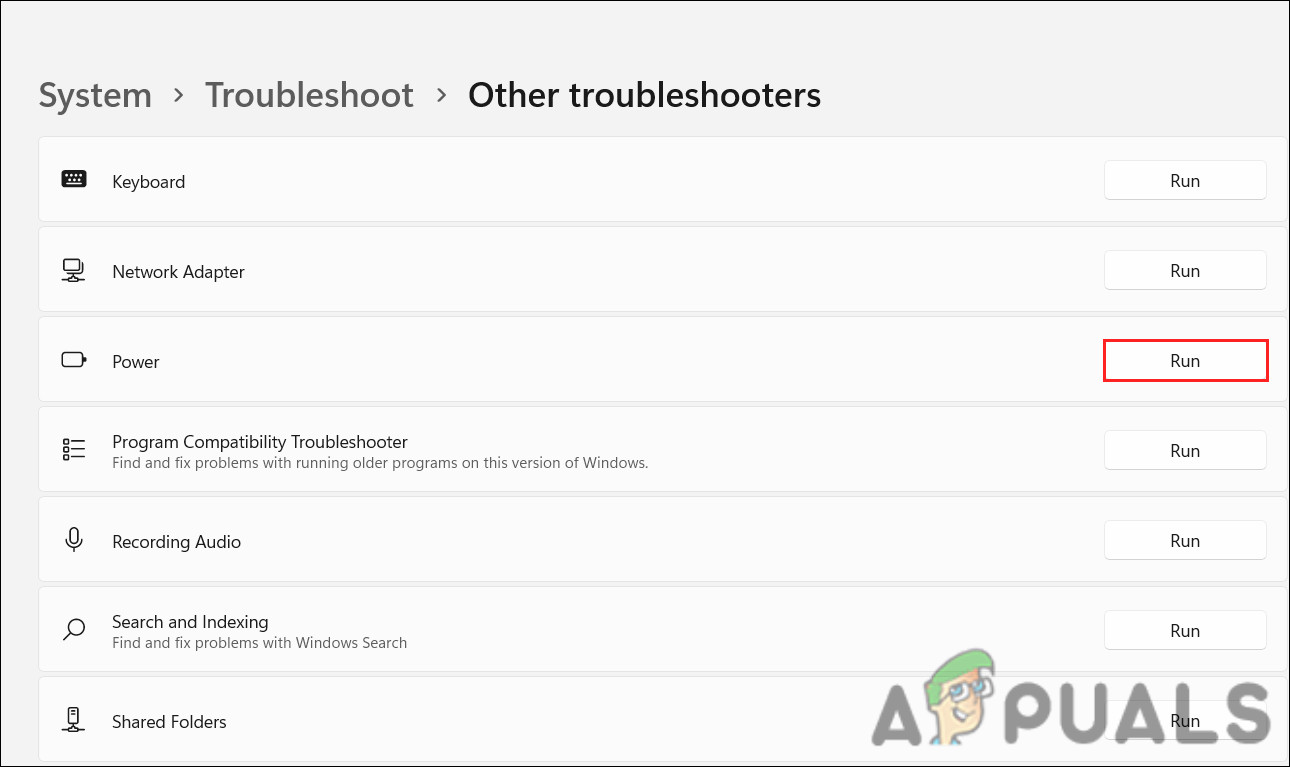
- Choose System > Troubleshoot > Other troubleshooters in the following window.
Access the other troubleshooters - Now, click on the Run button of the Power troubleshooter. This will let the troubleshooter find errors in the system.
Run the Power troubleshooter - As soon as the troubleshooter has completed its work, check whether any problems have been found.
- Depending on the results, click either Apply this fix or Close the troubleshooter.
6. Update Drivers
In some cases, you may also be facing the issue because of incompatible software or outdated drivers.
It would be a good idea to check the Device Manager for any outdated drivers in order to make sure this is not the case in your scenario. We have listed the steps of how to check if you have an outdated driver and then update it in this method.
Here is how you can proceed:
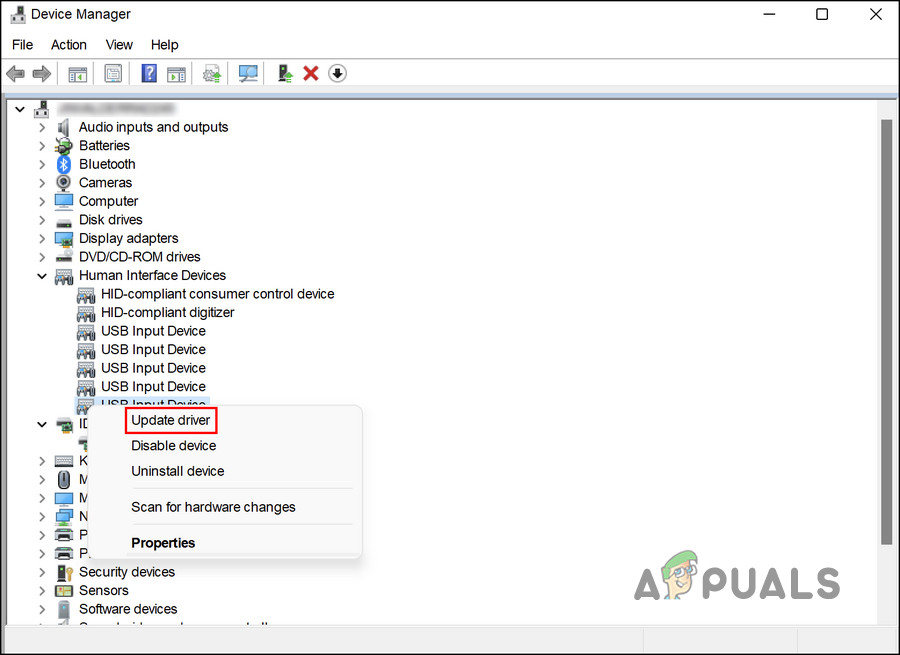
- Type Device Manager in Windows search and click Open.
- Find any drivers who have a yellow warning sign. The presence of it indicates that the driver is either outdated or corrupt.
- Right-click on the targeted driver and choose Update driver from the context menu.
Update the outdated driver - Once that is done, click on Search automatically for drivers, and the system will bring up the latest driver version.
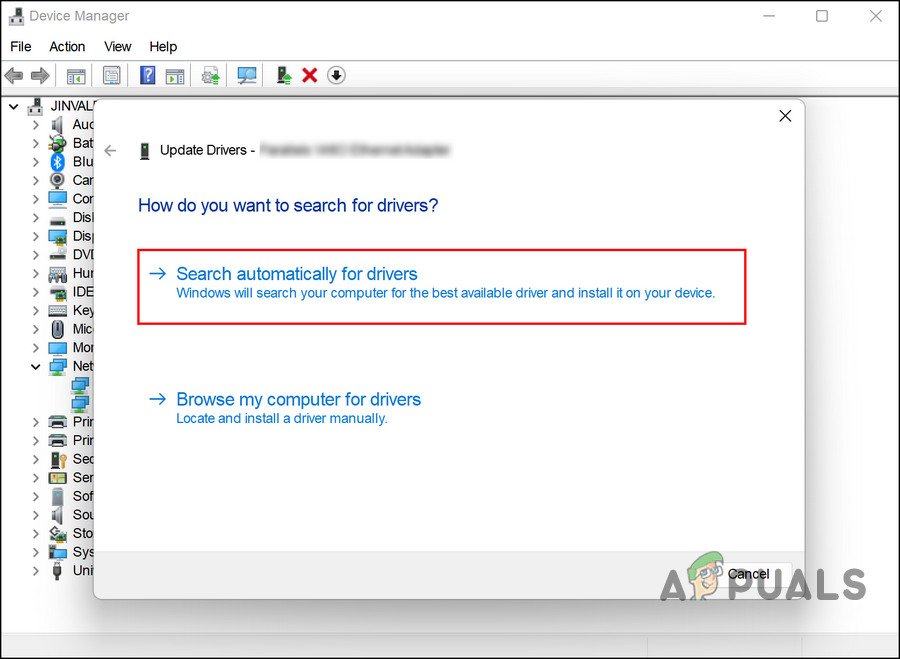
Let the tool search the system for updated drivers - Follow the on-screen steps to proceed.
It is also possible to download and install the latest drivers directly from the manufacturer’s website. Check if the issue has been resolved once all the drivers have been updated.


