Skype for Business is being Discontinued: How to Migrate to Microsoft Teams
There are two different versions of Skype available for use – Skype, the communications program for use by individuals that provides instant messaging, audio and video calling, and file transfer services, and Skype for Business (formerly known as Microsoft Lync Server), a collaborative tool for businesses that offers everything Skype does, but with added features that allow for seamless and effective collaboration within teams and organizations tacked on.
While Skype for Business is far from perfect, the unprecedented suite of collaborative features and services it offers quickly made it the communications platform of choice for workplaces across the globe. However, all good things must come to an end – Microsoft recently announced July 31, 2021 as the official End of Life date for Skype for Business.

Come July 31, 2021, Skype for Business Online will no longer be available, and Microsoft will end support for the desktop client. Taking over for Skype for Business is Microsoft Teams – a piece of dedicated groupware that has all the same functionalities as Skype for Business but also extends its capabilities with the addition of features such as app integration and in-house file storage.
While Skype for Business’ demise may seem like a ways away, its days are most definitely numbered. Making the switch from Skype for Business to Microsoft Teams isn’t just a simple matter of uninstalling Skype for Business on every employee’s work computer and installing Microsoft Teams. So if you are an IT administrator or responsible for managing Skype for Business within a workplace, now is the time for you to put in effect a plan to move your workplace over from Skype for Business to Microsoft Teams.
Phase 1: Inform your workplace of the upcoming transition
Before you actually move any employees over to Microsoft Teams, you must first make your workplace and everyone in it aware of the upcoming transition and its importance. Skype for Business and Microsoft Teams can, for now, be used simultaneously as Microsoft perfects Microsoft Teams and businesses slowly transition their teams and departments from the former to the latter. Take advantage of this to familiarize everyone in your workplace with Microsoft Teams and how it works; even though both are programs that facilitate collaboration within the workplace, Microsoft Teams is a new and different environment.
Be sure to appraise every employee of how Microsoft Teams’ most basic features work and why it is important for the workplace to make the move. Once that’s done and taken care of, you can start actually moving people over to Microsoft Teams as employees explore the program on their own and learn the ropes.
Phase 2: Move users over to Microsoft Teams using the Skype for Business Control Panel
Note: To actually move users over from Skype for Business to Microsoft Teams, you need to be in charge of managing Skype for Business in your workplace and/or have the credentials required to access the Skype for Business Control Panel.
- Launch an internet browser of your choice, type the following into the Address Bar (replacing <your pool FQDN> with the pool Fully Qualified Domain Name for your workplace), and press Enter:
https://<your pool FQDN>/macp
- Log in to the Skype for Business Control Panel with your admin credentials. Your account must be SIP-enabled and have CsAdministrator role privileges for you to be able to access the Skype for Business Control Panel.

Log in to the Skype for Business Control Panel - In the left pane of the Skype for Business Control Panel, click on Users.
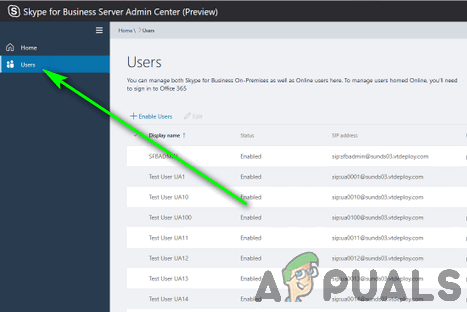
Click on Users in the left pane - One by one, locate and select the users you would like to move over to Microsoft Teams.
- Once all of the users have been selected, click on Action above the list of users.
- In the context menu that appears, click on Move selected users to Teams.
- A migration wizard should now launch. Click on Next within the wizard.
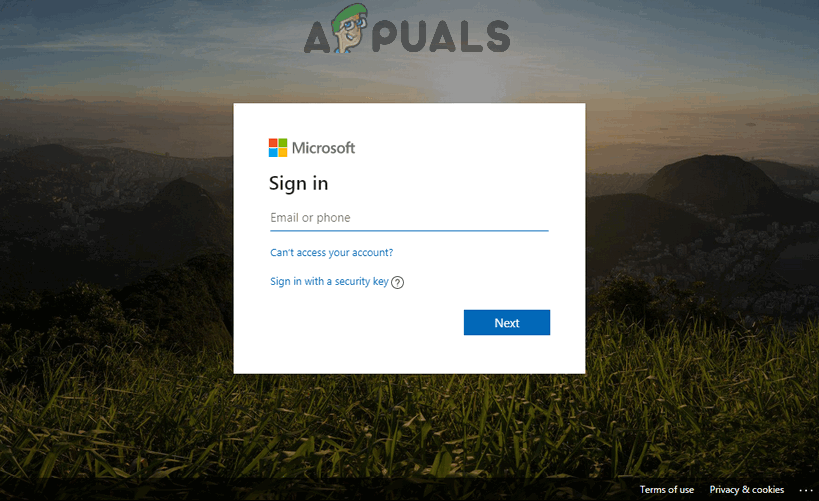
- If you are prompted to log in to Office 365, log in with an account that has all the required permissions and ends in .onmicrosoft.com. If you are met with no such prompt, simply skip this step.
- Click on Next.
- Click on Next once again to move all of the selected users from Skype for Business to Microsoft Teams and close the wizard.
Phase 3: Notify users of the impending upgrade and get them to start using Teams
Once you have moved Skype for Business users to Microsoft Teams, you can use the Microsoft Teams Admin Center to make it so every time these users log in to the Skype for Business client, they see a notification informing them of the upcoming upgrade to Teams and encouraging them to try the program out.
- Make your way to the Microsoft Teams Admin Center.
- Log in with your admin credentials.
Log in to the Microsoft Teams Admin Center - In the navigation pane on the left side of your screen, click on Org-wide settings > Teams upgrade.
- On the Teams upgrade page, locate the Notify Skype for Business users that Teams is available for upgrade option and enable it.
- Click on Save to save the changes you have made and close the Microsoft Teams Admin Center.
With the Notify Skype for Business users that Teams is available for upgrade option enabled, users who have been moved to Teams will see the following notification in their Skype for Business clients:
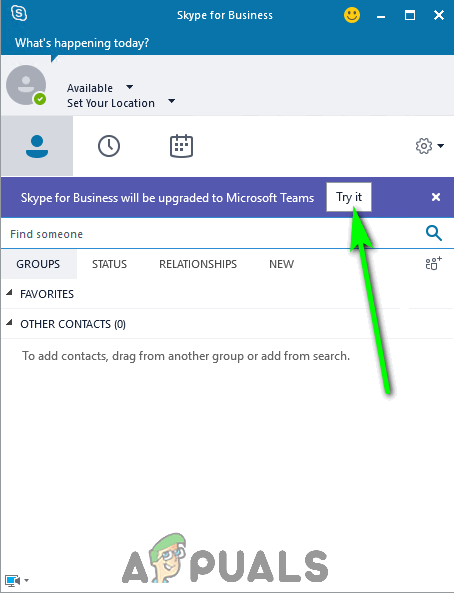
When a user clicks on the Try it button, their computer will launch the Microsoft Teams client (if it is installed) or launch an internet browser and take them to the Microsoft Teams web client (if the desktop client is not installed). In the event that the Teams desktop client is not installed on the user’s computer, Skype for Business will proceed to silently download the Teams client in the background, install it and apply all of the org-wide settings and preferences you have configured to it. From then on, the user can simply use Microsoft Teams for their communication and collaboration needs alongside Skype for Business as other users go through the same upgrade. Once your entire workplace has upgraded to Teams and become accustomed to it, you can, from the Microsoft Teams Admin Center, disable Skype for Business for all in-house users and complete the migration to Microsoft Teams.


