How to Setup Military Time in Windows 8/10
24-hour clock format, or the military time as it is commonly referred to, is a useful method to tell time – without the need for AM or PM suffix. However, the default time format in Windows 8 and Windows 10 is the 12-hour format with AM and PM suffix. If you prefer the military time, you can easily change the time from 12-hour to 24-hour military time format by following the steps below.
In order to change the time format to military time, you need to access the Region settings in Windows 8 and Windows 10. There are two easy ways to access these settings. Following are the both ways to access the same Region settings.
Method 1: Through Notification Area
Click the time and date in the notification area of your taskbar in the lower right corner of your Windows. In the Date and Time window, click Change date and time.
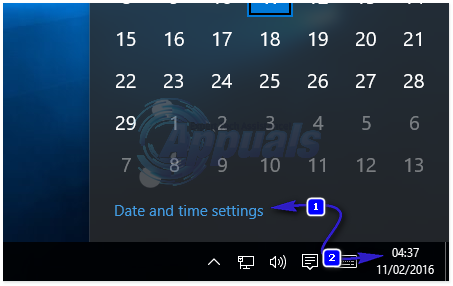
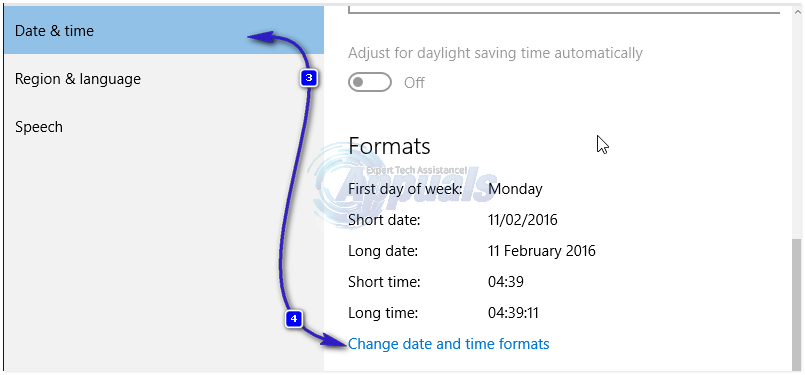
In the Date and Time Settings window, click Change calendar settings OR Change date and time formats under Formats. A Region window will appear.
Change the both Short time and Long time settings. Choose any format with capital “H” in the start from the drop-down.
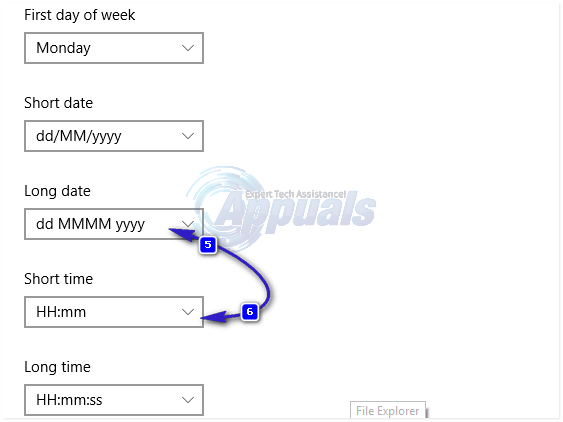
Note: You will see a preview of your selected time format in the Examples section in the lower part of the window.
Click Apply and then click OK. Click OK in the Date and Time Settings window. Click OK in the Date and Time window.
Method 2: Through Control Panel
Go to the Control Panel in Windows 8 or Windows 10. Hold the Windows Key and Press X. Choose Control Panel.
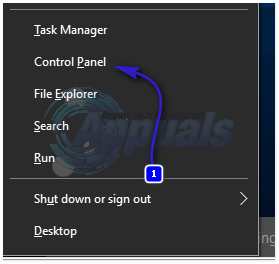
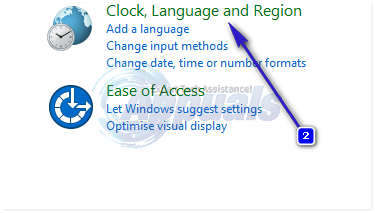
In category view, click Clock, Language, and Region. And then click Region.
This is the same Region window as described in the method 1 above. Change the both Short time and Long time settings. Choose any format with capital “H” in the start from the drop-down
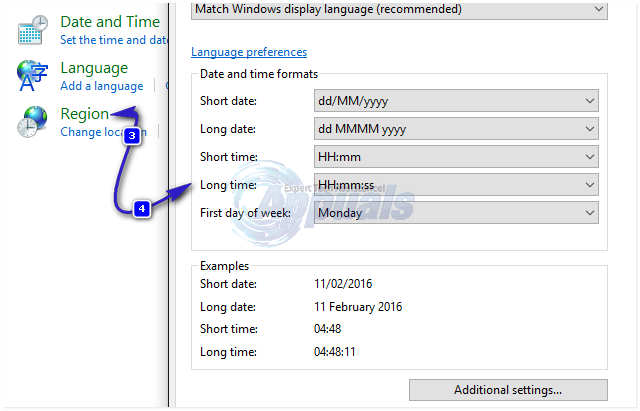
Check the preview in Examples section, and Apply and then OK.