How to Fix Sea of Thieves Lavenderbeard Error?
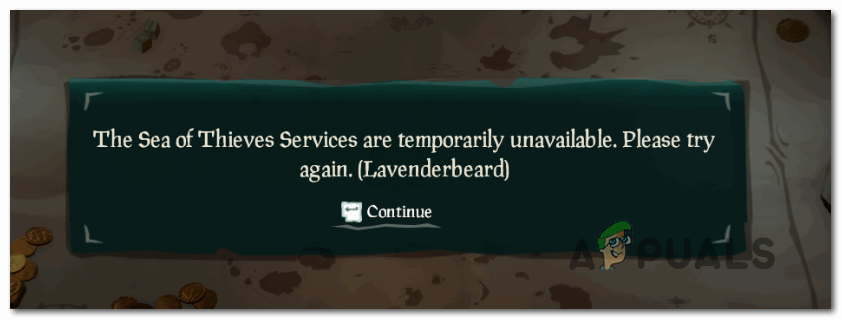
The **Lavenderbeard error** code is encountered by PC and Xbox users in Sea of Thieves whenever they try to host or join a game. This problem is either caused by a server issue or facilitated by a connection interruption that’s occurring locally.
As it turns out, there are several different causes that might contribute to the appearance of this error code:
- Server issue – Looking at past occurrences, this error code can also be caused by server issues (either with Rare’s server or with the Xbox Live infrastructure). If this scenario is applicable, the problem is entirely beyond your control. All you can do is confirm that you’re dealing with a server issue and wait for the developers to fix it.
- A new client version is available – You might see this error code if you are actively in the Sea of Thieves menu and a new game version was just deployed. The servers will detect a version mismatch and refuse the connection. In this case, you can fix the problem by installing the pending update from Microsoft Store (on PC) or by performing a hard restart and installing the missing updates at the next console startup.
- Antivirus interference – An overprotective AV suite can also be responsible for blocking the connection between the game launcher and the Sea of Thieves server. In this case, you can either whitelist the game’s executable or uninstall the overprotective antivirus to circumvent the LavenderBeard error.
- Game server rejects proxy server – If you’re filtering your connection through a proxy server, chances are the game server rejects the connection due to security concerns. This is mainly reported to occur with users that are actively using 2 different proxies (the second connection is commonly facilitated by a Proxy Malware).
- Corrupted Xbox Live Tokens – If you’re launching the game through Steam, certain actions might cause the Xbox Live tokens to become corrupted, leading the game server to refuse your connection. In this case, you should be able to fix the issue using the Credentials Manager to clear the corrupted tokens.
Method 1: Verify the server status
Before you try any fix that is proven to work locally, you should start by investigating to see if the problem is not being facilitated by a server issue. In case the problem is widespread and occurring for a lot of users in your area, chances are none of the local fixes below will allow you to fix the issue – In this case, the only viable fix is to wait until Rare’s developers manage to fix the issue.
If you’re dealing with a server issue, it’s either caused by a problem with the Xbox Live infrastructure or a problem with the game’s server.
If you think you might be dealing with a server issue, visit DownDetector and IsTheServiceDown and see if there are other users in the same situation.
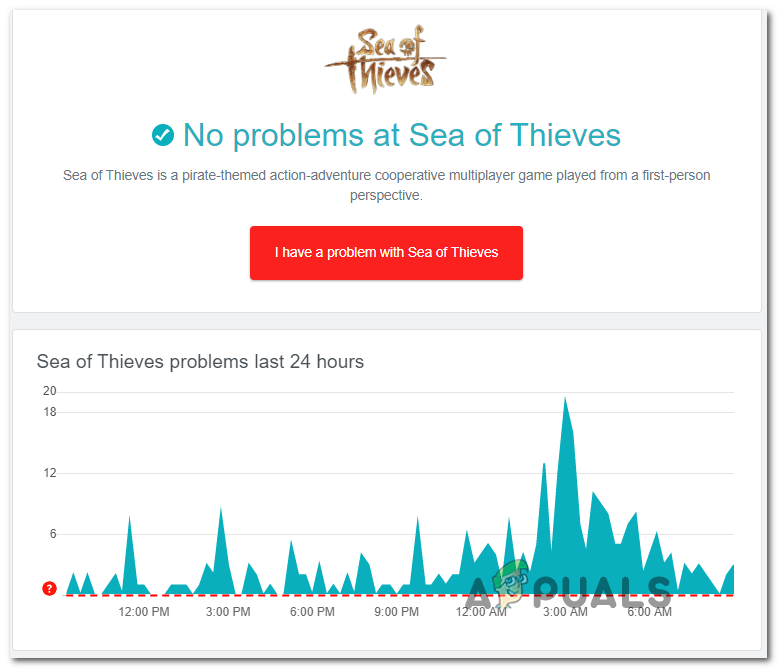
In case you discover that other users are reporting the same type of problem, you should go over to the official Twitter account of Sea of Thieves and look for official announcements on the status of the problem.
If there are no announcements on the Twitter page, you should also verify the status of the Xbox Live infrastructure, since Sea of Thieves’ entire multiplayer component is built around Xbox Live. If Xbox Live is down (or a sub-service) so will Sea of Thieves.
To verify the status of the **Xbox Live infrastructure**, visit the **Xbox Live Status** page and see if there are currently any problems with any of the Xbox Live services. Also, check to see if Sea of Thieves is mentioned under **Games & Apps.**
In case this investigation did NOT reveal any underlying server issues that might end up causing the **Lavenderbeard error** code in Sea of Thieves, move down to the next fixes below for instructions on troubleshooting the issue if it’s only occurring locally.
Method 2: Install the Newest Game Version
The most common reason that will cause the Lavenderbeard error code to occur locally with Sea of Thieves is when the client version of the game has become out of sync with the server. In the majority of documented cases, this problem will occur when a newer game version is being deployed while you are actively playing the game.
The resolution of this problem will be different depending on the platform that you’re playing on. If you’re on Xbox One, a hard restart followed by the installation of the pending update should take care of the problem. On PC, you can fix it simply by going to the Microsoft Store and installing the latest update available for Sea of Thieves.
A. Doing a hard restart on Xbox One
- With your console turned on, make sure that your console is idle.
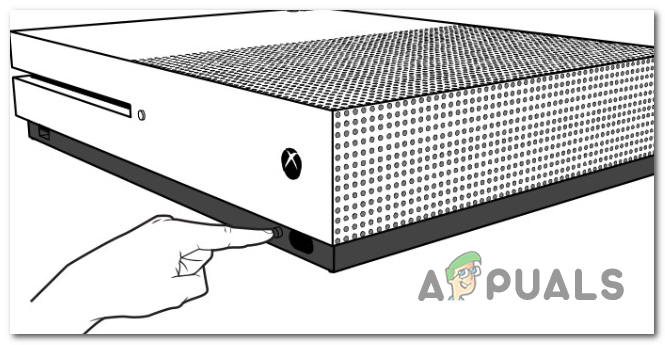
- Press and hold the Xbox button (on the front of your console) and keep it pressed for about 10 seconds. Release the button once you see the front LED turn off and you can hear your console fans shutting down.
- Once your console no longer shows any signs of life, physically unplug the power cable from the power source and wait for 30 seconds or more to ensure that the power capacitors are completely drained.
- After this time period has passed, press the power button once again to power up your Xbox One console conventionally and wait for the next startup to complete.
Note: If you noticed that the startup animation is longer than usual, that’s a good thing. It means that the hard restart procedure was successful. - After the startup is complete, check to see if a new update for Sea of Thieves is available. If it is, install it conventionally, then launch the game to see if the problem is now fixed.
B. Install the Pending Updates from MS Store
- Ensure that the main Sea of Thieves game and its launcher are completely closed (and not running in the background).
- Press Windows key + R to open up a Run dialog box. Next, type ‘ms-windows-store://home’ inside the text box and press Enter to open up the Microsoft Store.
- Inside the main Microsoft Store interface, click on the update icon in the upper right section.
- Inside the Downloads and Updates screen, look for the update for Sea of Thieves and click on the download icon to download & install it individually or simply click Get Updates to install them all at once.
- Once the latest update is installed, restart your computer and launch the game at the next startup to see if the problem is now fixed.
Method 3: Whitelist Sea of Thieves executable / Disable security suite
As it turns out, this error code can also be facilitated by an overprotective Antivirus suite that ends up blocking the connection between the game launcher and the Sea of Thieves server. If this scenario is applicable, you should be able to fix this issue either by whitelisting the game’s executable or by uninstalling the overprotective 3rd party suite.
If you are using Windows Defender, follow the first guide below (sub guide A) to whitelist the Sea of Thieves executable and prevent the built-in security from interfering. On the other hand, if you’re using a 3rd party AV, follow the second guide (sub guide B) to uninstall the overprotective antivirus suite.
A. Whitelist Sea of Thieves executable
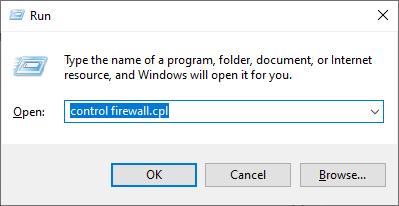
- Open up a Run dialog box by pressing Windows key + R. Next, type ‘control firewall.cpl’ and press Enter to open up the classic interface of Windows Firewall.
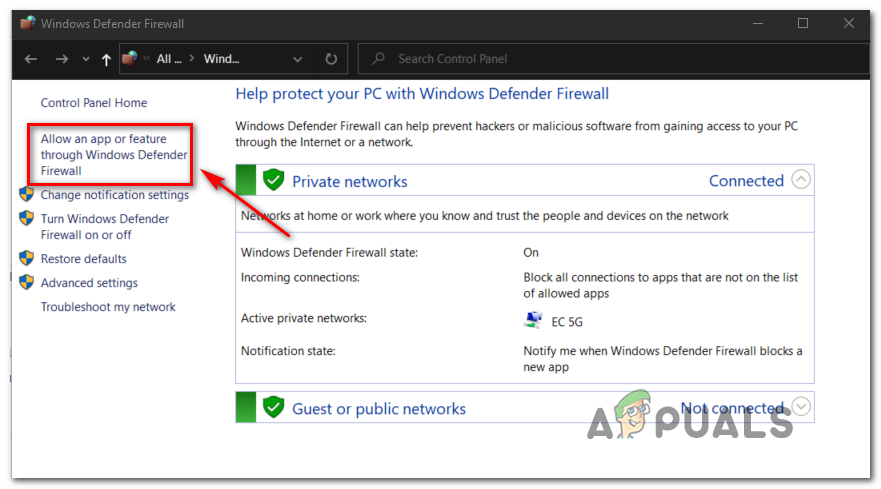
- Once you’re inside the main menu of Windows Defender Firewall, click on Allow an app or feature through Windows Defender Firewall from the left-hand side menu.
- Once you’re finally inside the Allowed apps menu, click on the Change settings button, then click Yes at the User Account Control prompt.
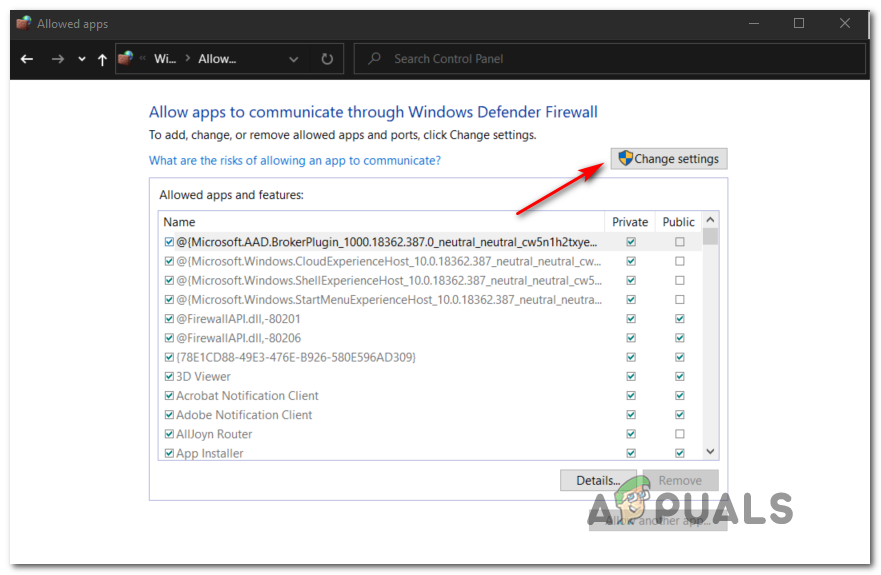
- Once you have successfully opened the Allowed apps list with admin access, scroll down through the list of items and locate the entry associated with Sea of Thieves. In case it is not present in this list, click on the Allow another app button, then click Browse, navigate to the location of the game executable, and add the entry manually.
- Next, ensure that the two boxes (Private and Public) associated with Sea of Thieves are both checked, then click Ok to save the changes.
- After you have successfully whitelisted the game’s executable, launch it once again and see if the problem has now been resolved.
B. Uninstall 3rd Party Suite
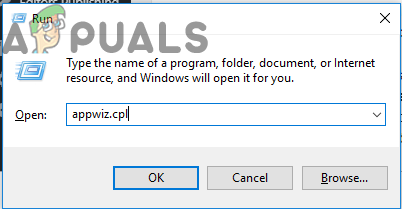
- Press Windows key + R to open up a Run dialog box. Next, type ‘appwiz.cpl’ inside the text box and press Enter to open up the Programs and Features menu.
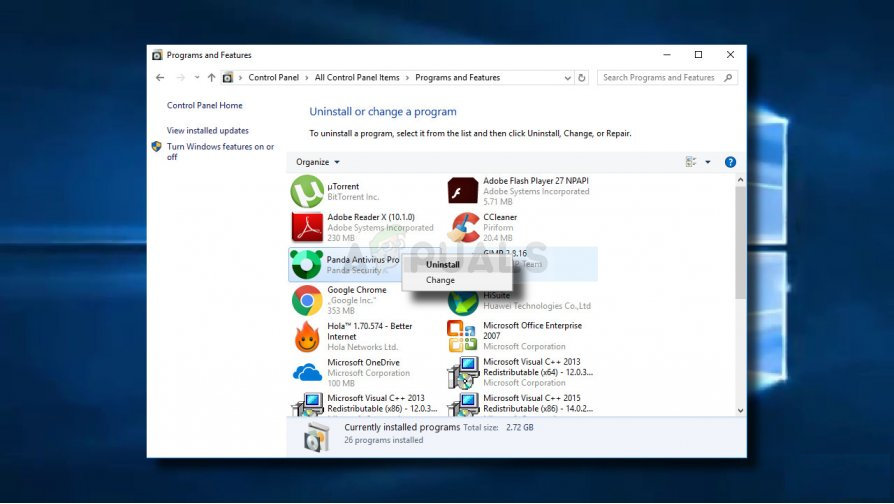
- Once you’re inside the Programs and Features, move down to the section on the right and scroll down through the list of installed programs to locate the 3rd party AV suite that you want to uninstall.
- When you manage to locate it, right-click on it and choose Uninstall from the newly appeared context menu.
- Once you get past the uninstallation screen, follow the on-screen prompts to complete the uninstallation of your 3rd party AV suite.
- After the uninstallation is complete, restart your computer and launch Sea of Thieves once the next startup is complete to see if you are able to connect to the game’s servers without encountering the **Lavenderbeard** error code.
Method 4: Disable Proxy Server
If you currently have a proxy server enabled in your Local Area Network (LAN) settings, the game server might refuse to allow the connection. This is commonly reported by users that were unknowingly using two proxy solutions at the same time.
In this case, you should be able to fix the issue by disabling the built-in proxy server from the Internet Properties tab (Windows 7, Windows 8.1) or Proxy tab (Windows 10).
If you’re using Windows 10, follow sub-guide A and if you’re using Windows 7 or Windows 8.1, follow sub-guide B.
A. Disable Built-in Proxy Server on Windows 10
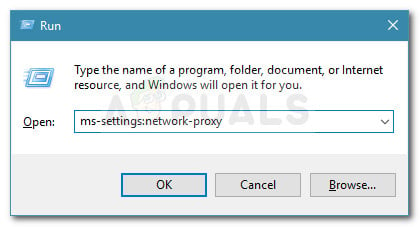
- Press Windows key + R to open up a Run dialog box. Next, type ‘ms-settings:network-proxy’ and press Enter to open up the Proxy tab of the Settings menu.
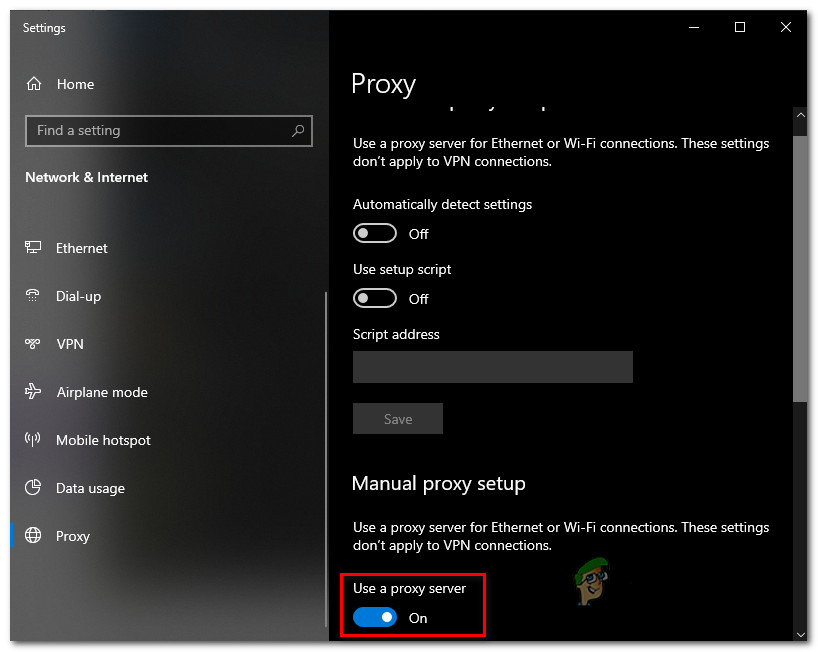
- From the Proxy tab, move to the right section of the screen, then scroll down to the Manual Proxy setup and disable the toggle associated with Use a proxy server.
- After this modification has been made, restart your computer to enforce the changes and see if the error code has been fixed.
B. Disable Built-in Proxy Server on Windows 7 and Windows 8.1
- Open up a Run dialog box by pressing Windows key + R. Next, type ‘inetcpl.cpl’ inside the text box and press Enter to open up the Internet Properties tab.
- From the Internet Properties tab, click on the Connection tab from the horizontal menu at the top, then click on LAN Settings (under Local Area Network (LAN) settings).
- Inside the LAN Settings menu, uncheck the box associated with Use a proxy server for your LAN.
- Once you successfully manage to disable the Proxy server, reboot your computer and see if the problem is fixed at the next computer startup.
Method 5: Release Xbox Credentials (PC Only)
If you are encountering the Lavenderbeard error code while trying to play the game through Steam, chances are you’re dealing with an Xbox credential issue (especially if you receive a crash during the launching sequence).
Several affected users that encountered the same problem have reported that they managed to fix the issue by releasing the Xbox Credentials and the rest of the Xbox Live tokens using Credential Manager.
- Close Sea of Thieves completely.
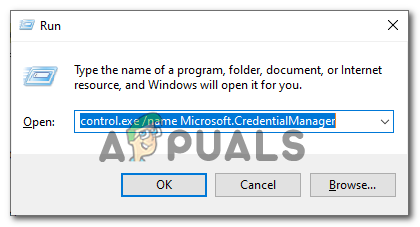
- Press Windows key + R to open up a Run dialog box. Next, type ‘control.exe /name Microsoft.CredentialManager‘ inside the text box and press Enter to open up Credential Manager.
Note: If you’re prompted by the UAC (User Account Control), click Yes to grant admin access.
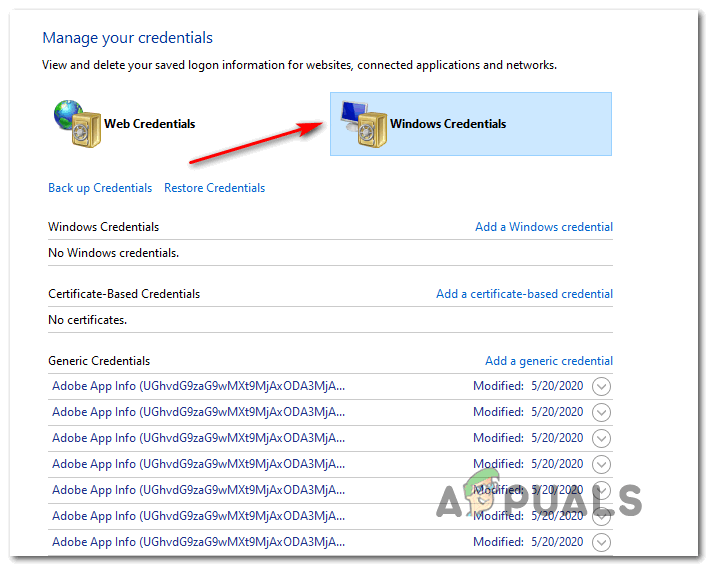
- Once you’re inside Credential Manager, click on Windows Credentials.
- Inside Windows Credentials, scroll down through the list of Windows credentials and find the entries labeled Xbl_Ticket.
- Next, go ahead and right-click every entry named Xbl_Ticket and choose Remove from the context menu.
- Sign back into Sea of Thieves, attempt to join a game server, and see if the problem is now fixed.