How to Fix Schedule I Stuck on Loading Screen (Steam Version)
When Schedule I gets stuck on the loading screen, it’s usually caused by issues like running the beta version, missing or corrupted game files, or using a mismatched game version. In some cases, existing configuration or cache files may interfere with proper loading. Compatibility issues—such as API mismatches (e.g., DirectX, Vulkan) or unsupported system components—can also contribute to the problem.
Now that we’ve covered the possible causes, let’s quickly walk through the most effective solutions to get the game working again.
1. Opt Out of the Beta Branch
Beta versions often include experimental features or early updates that may not be fully compatible with your system configuration. These builds can introduce instability or bugs that aren’t present in the stable release. If you’re currently using the beta version of the game, try opting out of it to see if that resolves the loading issue.
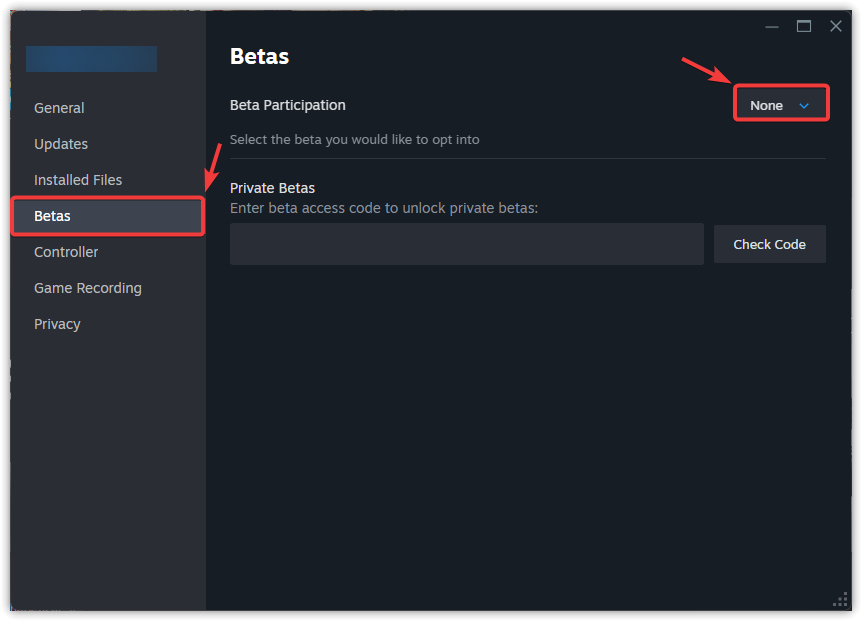
- Launch the Steam client and navigate to your Library tab.
- Right-click the problematic game and choose Properties from the context menu.
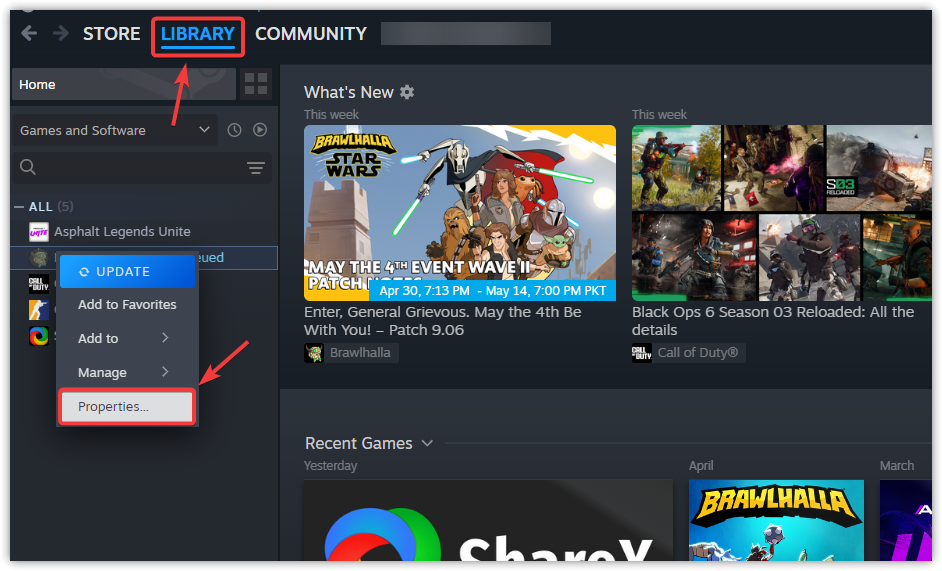
- Select the Betas tab from the left sidebar, then choose None – Opt out of all beta programs from the dropdown.
- Completely exit Steam (via Steam > Exit in the menu bar), then relaunch it and test the game.
2. Verify Integrity of Game Files
The game may get stuck on the loading screen if there are corrupted or missing files in its installation directory. Verifying the integrity of game files checks for these issues and automatically replaces damaged files with fresh copies from the server. If you haven’t verified the game files yet, doing so could help resolve the problem.
- Launch Steam and click on Library in the top navigation.
- Right-click the affected game and select Properties from the context menu.
- Navigate to the Installed Files tab and click Verify integrity of game files.
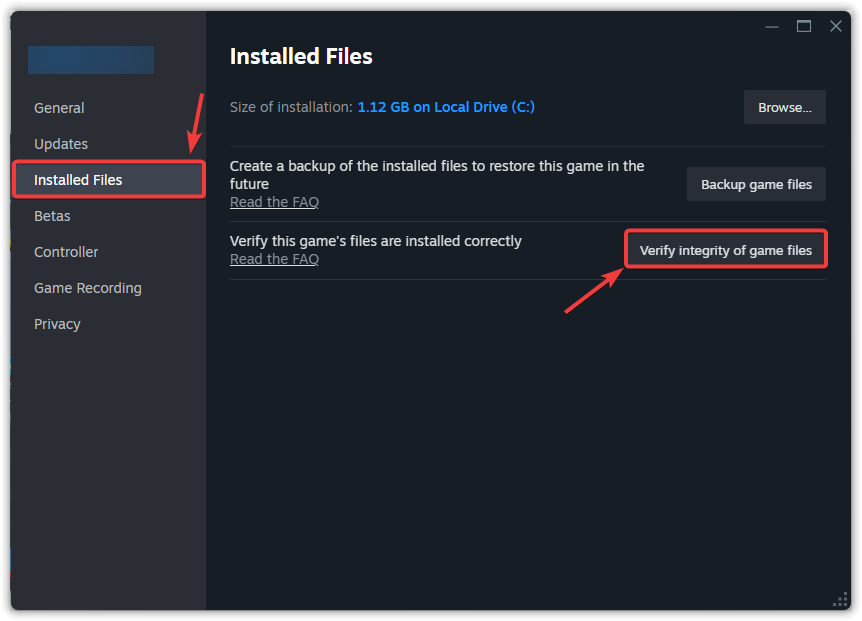
- Wait for the verification to complete (may take several minutes), then launch the game normally to test if the issue is resolved.
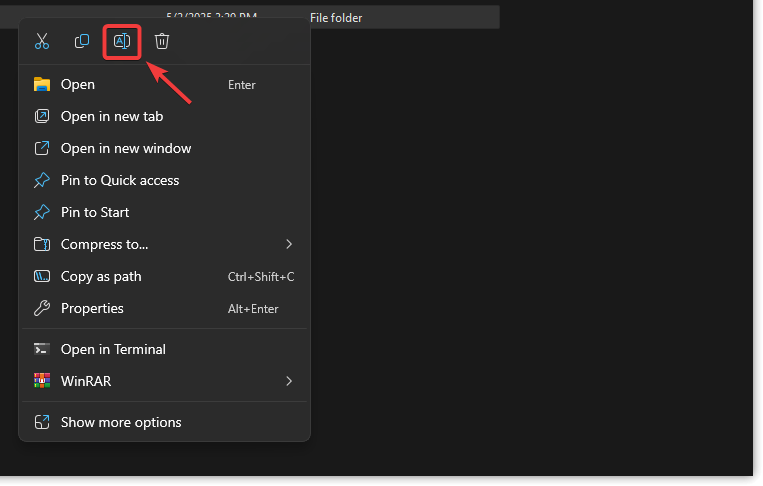
3. Rename or Delete the Save Data Folder
The save data folder stores user-specific configurations, cached data, and progress files that the game relies on during startup. If any of this data becomes invalid—due to an interrupted save, a crash, or a version mismatch—it can prevent the game from loading properly. Renaming or deleting the folder forces the game to generate fresh default data, which can often fix issues like getting stuck on the loading screen.
Important: Before renaming or deleting the save data folder, it’s a good idea to back it up. Simply copy and paste the folder to another location on your drive, such as your Desktop, so you can restore your progress later if needed.
- Open File Explorer (Windows key + E) and navigate to:
C:\Program Files (x86)\Steam\userdata\[Your Steam ID]\[Game ID]\
Note: Find your Steam ID in Steam > Settings > Account > Account Details
- Locate the save data folder, right-click it, and select Rename (e.g., add “_old” to the folder name).
- If the issue persists after renaming, right-click the folder again and choose Delete.
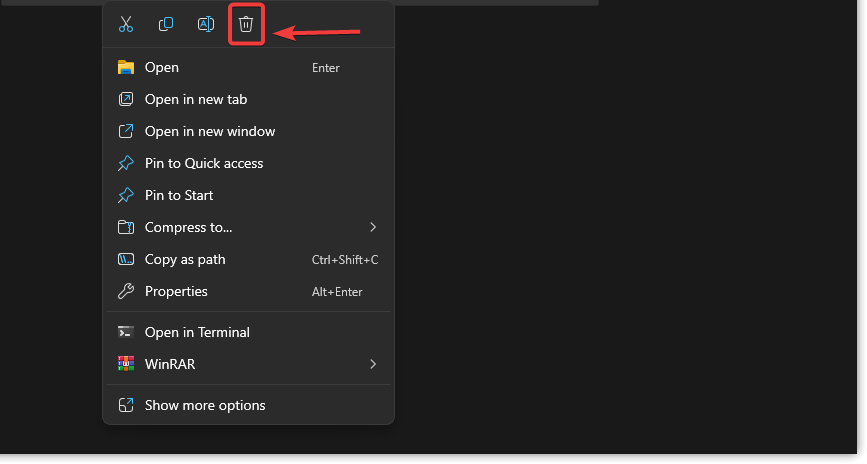
- Launch the game – it will automatically create fresh save files, potentially resolving loading issues.
4. Add Launch Options
Launch options let you start the game using specific graphics APIs. In some cases, the default API may be unstable or unsupported on your system. To work around this, you can try adding launch options like -force-d3d12, -force-d3d11, or -dx11 to force the game to use a different version of DirectX. These options force the game to run on a specific version of DirectX (12 or 11), which can help if your system struggles with the default API due to driver issues, hardware limitations, or known engine bugs.
- Launch Steam and navigate to your Library (top menu).
- Right-click the game experiencing issues and select Properties.

- In the General tab, locate the Launch Options field and enter:
-dx12to force DirectX 12 mode- Or
-dx11to force DirectX 11 mode
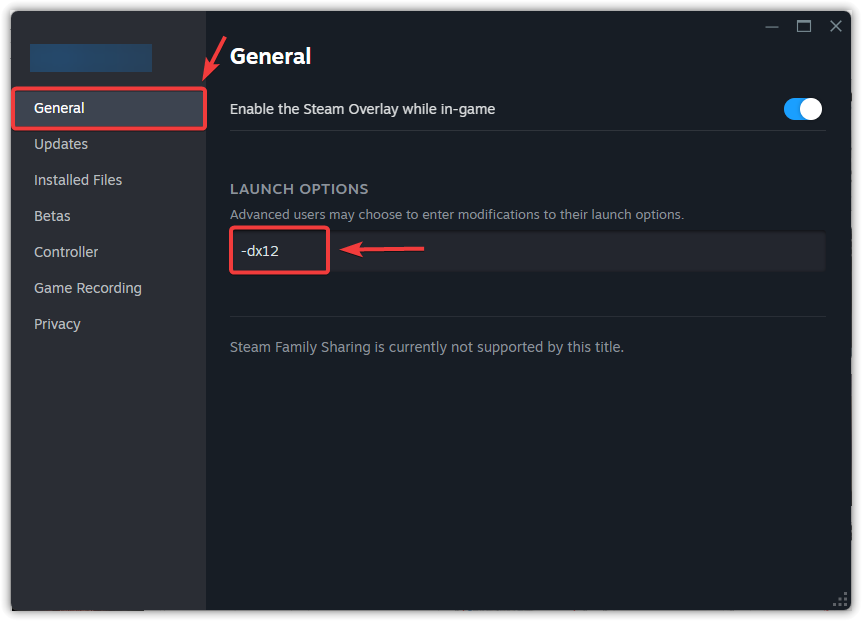
- Close the properties window and launch the game to test if the graphical issues are resolved.
If the problem persists, the final option is to reinstall the game. Reinstalling removes any corrupted or misconfigured files that might be causing the issue. Since none of the methods worked, a complete reinstallation may be the most effective solution.