How to Fix Reshade Not Working with Games?
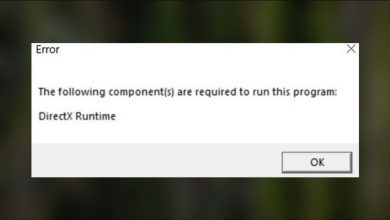
If Reshade stops working in your games, it is typically due to compatibility issues or an incorrect DirectX version. This often happens after updating the game, which could cause Reshade to stop functioning. Furthermore, if you have not installed Reshade previously, the issue might be due to incorrect installation. Additionally, the game may have blacklisted Reshade, preventing its use.
With the causes discussed, let’s explore solutions from public discussion forums that have worked for affected users.
1. Reinstall Reshade With an Older DirectX Version
Since this issue often results from incompatibility between the game and Reshade, it is strongly recommended that you reinstall Reshade with an older DirectX version, such as 11. This will ensure compatibility and proper shader performance, allowing Reshade to function without any issues.
- Download the latest version of Reshade from the official site.
- Once the setup is downloaded, run the setup.exe.
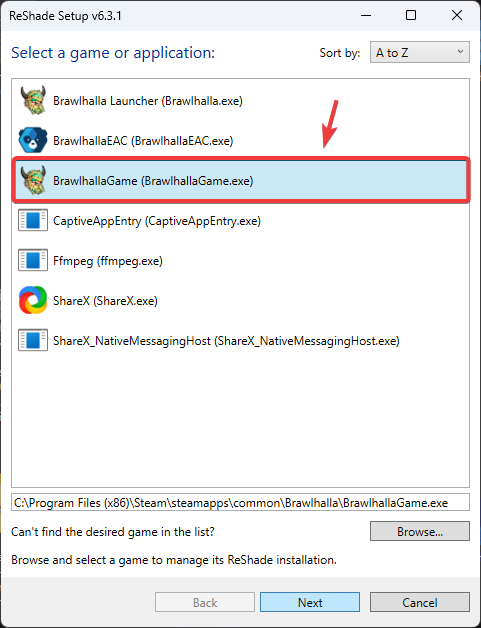
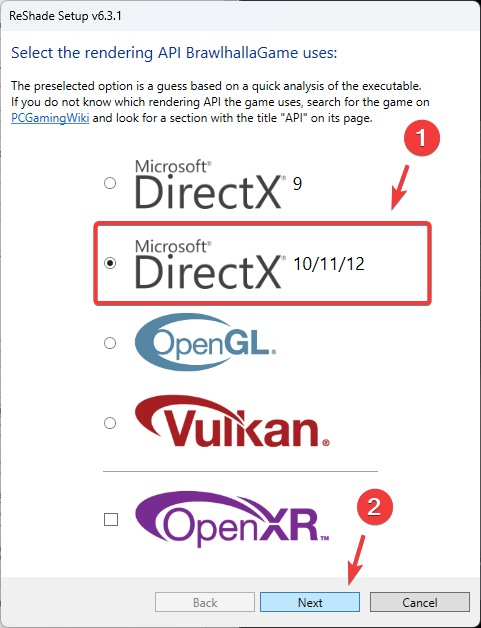
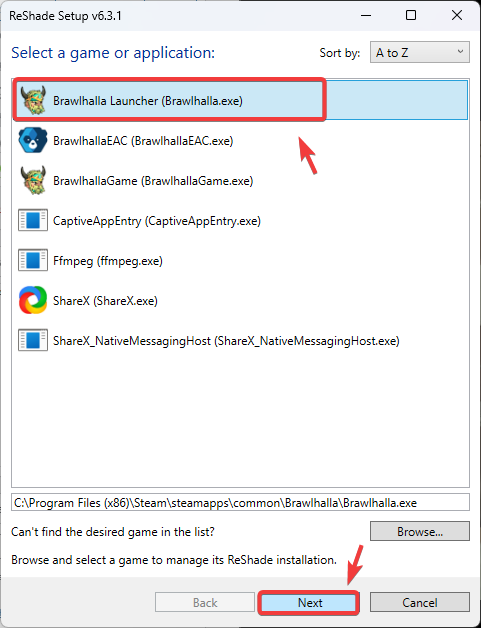
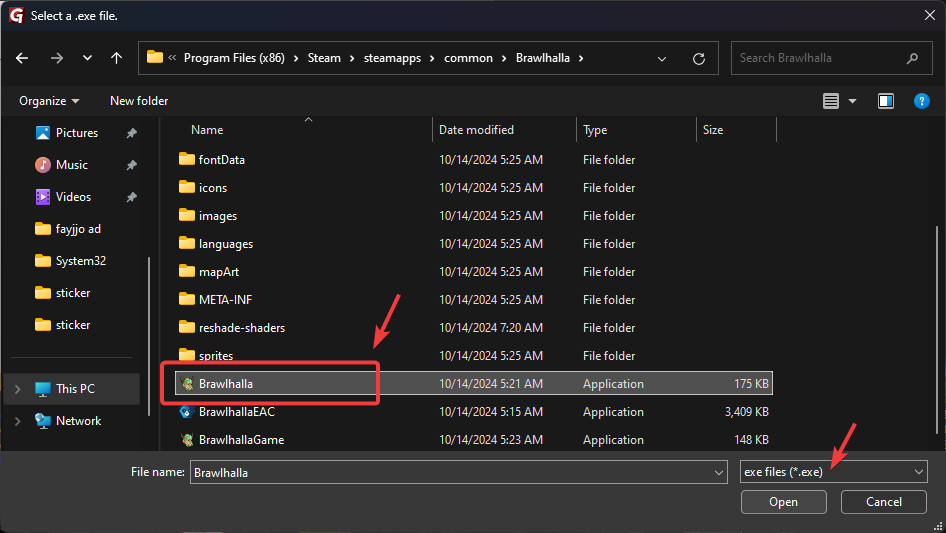
- Select the game executable file, then select DirectX 10/11/12.
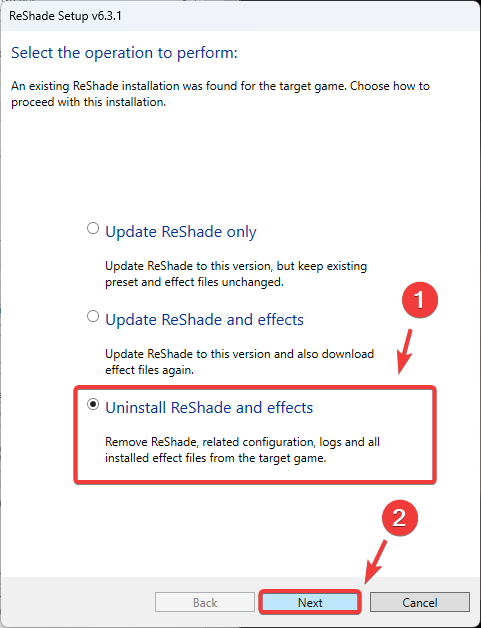
- Click Uninstall Reshade and Effects and click Next.
- Once done, click Back, then again select the game executable file.
- Select DirectX 10/11/12 and then click Next to install Reshade.
- Once done, launch the game and check if it’s working now.
- If this still does not work, try installing Reshade with DirectX version 9.
2. Install Reshade on Launcher.exe Instead of Game.exe
Installing Reshade on launcher.exe instead of the game’s executable can also help resolve the issue. This has worked for many affected users; therefore, it might work for you as well.
- Run the Reshade setup.exe and select the launcher executable file.
- Click Next and select DirectX 10/11/12.
- Click Uninstall Reshade and Effects, then click Next.
- Now, go back and again select DirectX 10/11/12, then click Next to install Reshade.
- Once done, verify if this resolved the issue.
3. Switch to Gshade
Gshade is an enhanced version of Reshade. It is designed for better performance and compatibility with games like Final Fantasy XIV and The Sims 4. It uses custom shaders to optimize visual effects while offering the easiest setup. It’s not different from Reshade, so you can install it, especially if the issue still persists.
- Download the GShade installer from the official site.
- Once it is downloaded, run the installer and select the appropriate language.
- Click I Agree. Locate the game’s executable file by clicking the Browser button, then click Next.
- Select the latest DirectX version and executable architecture, such as 64-bit or 32-bit.
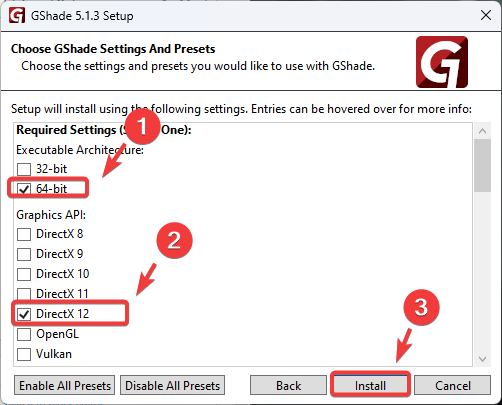
- Finally, select the hooking method as Normal Mode and click Install to proceed.
- Once the installation is finished, verify if GShade is working properly.
4. Rename the d3d9.dll (The Sims 4)
The Sims 4 stopped working with Reshade after recent updates to DirectX due to mismatched files. Renaming the d3d9.dll to dxgi.dll ensures that Reshade uses the correct DirectX version, allowing it to render shaders functionally with the updated game version.
- Open the directory where you have installed The Sims 4.
- Find the DLL file named d3d9.dll and rename it to dxgi.dll.
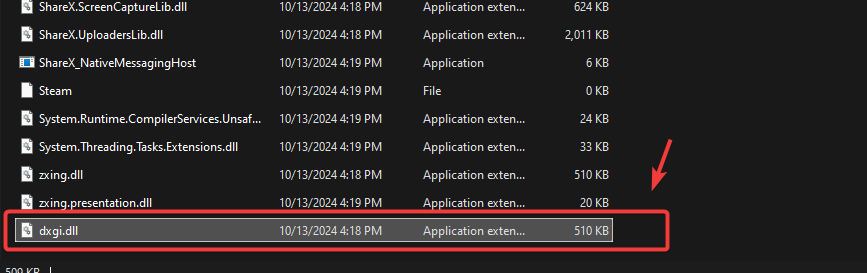
- Once done, launch The Sims 4 to see if Reshade is working.
If you are still encountering the issue, try reinstalling the game to check whether corrupted files are causing the problem. If this does not work, you can use GShade instead of Reshade, as mentioned in method 3.