How to Completely Turn Off Microsoft Recall in Windows 11
Note: Recall is currently being rolled out gradually. Some features may only be available on specific Windows 11 builds (e.g., 24H2 preview or newer).
Microsoft’s Recall feature, introduced as part of Copilot AI, has raised significant privacy concerns, prompting many users to disable or remove it entirely. This AI-powered tool quietly captures snapshots of your screen, including visible on-screen content such as private messages, open documents, and potentially sensitive information that appears during regular use, all under the label of “helpful recall.” It creates serious risks such as data exposure, unauthorized access by third parties, and unwanted system resource usage.
Recall also uses background resources, which can slow down your PC especially on devices with limited storage or processing power. If not disabled, these snapshots can accumulate over time, occupying disk space and leaving a trail of your digital activity.
In this guide, we’ll walk you through multiple ways to permanently disable or remove Recall. Let’s get started.
1. Pause Recall through Settings
The easiest way to manage Recall is through the Windows Settings menu, where you can pause its screen capture feature. While this won’t uninstall Recall, it will stop it from actively capturing screen data in the background. This reduces unnecessary background activity and helps protect your sensitive information.
- Click the Start menu.
- Search for “Settings” and open it.
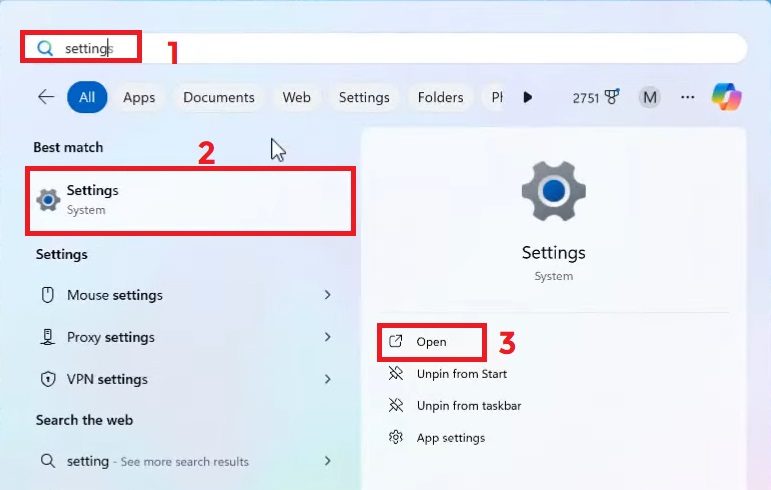
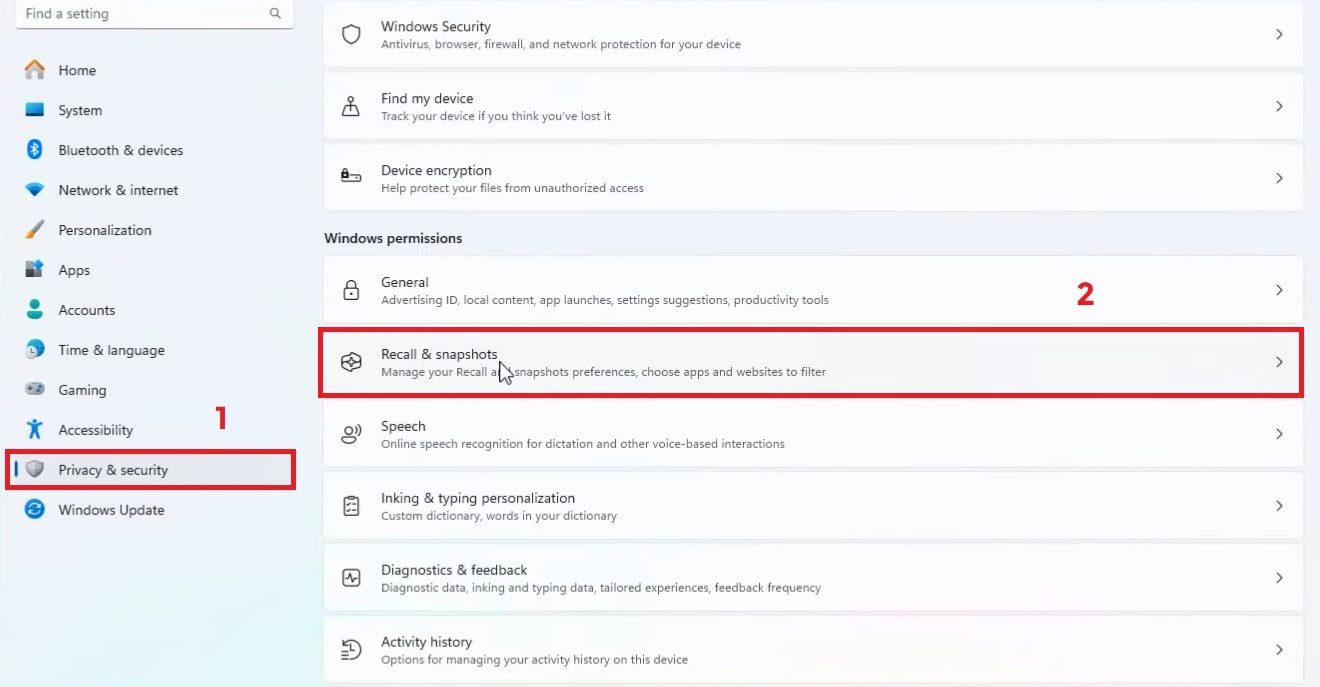
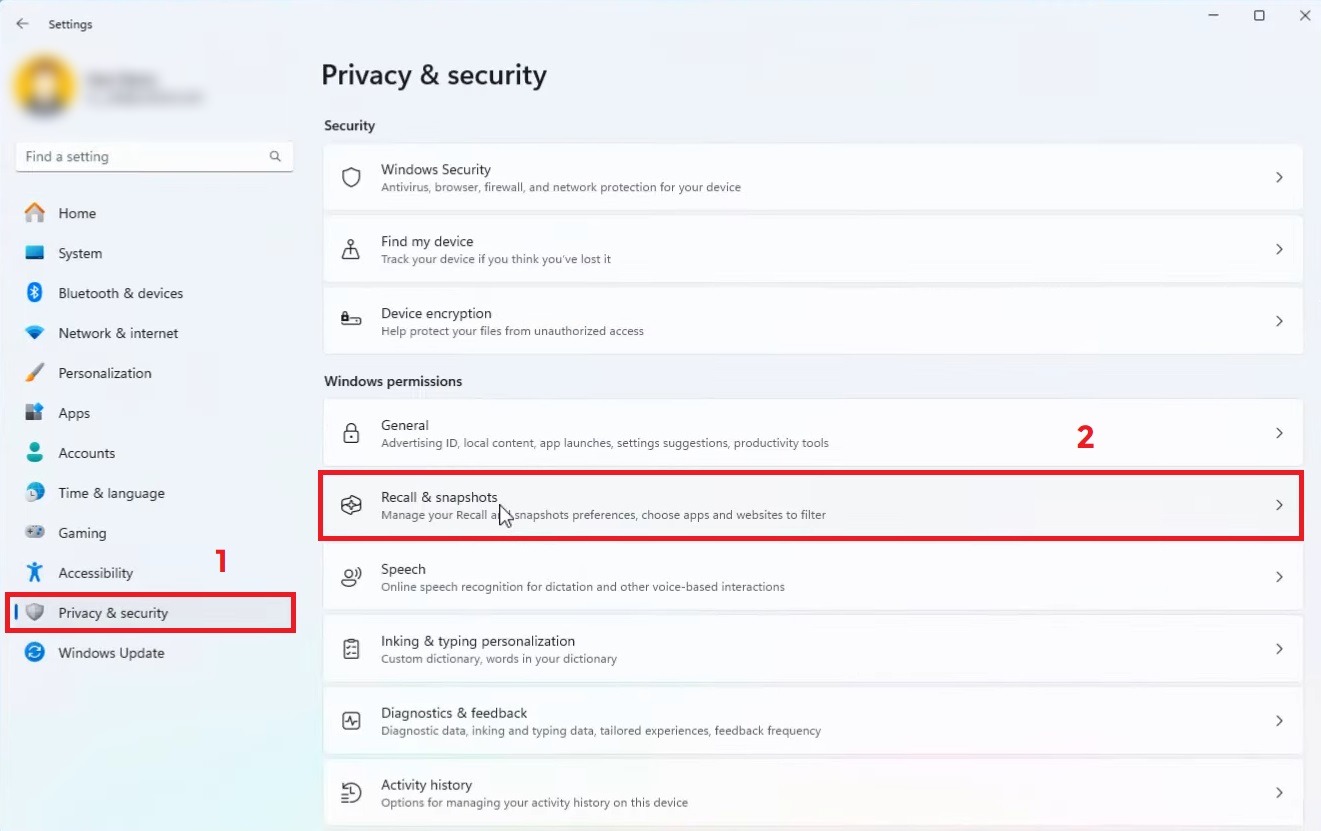
- Go to the “Privacy & Security” section and click “Recall snapshots.”
- Toggle off the option to save snapshots.
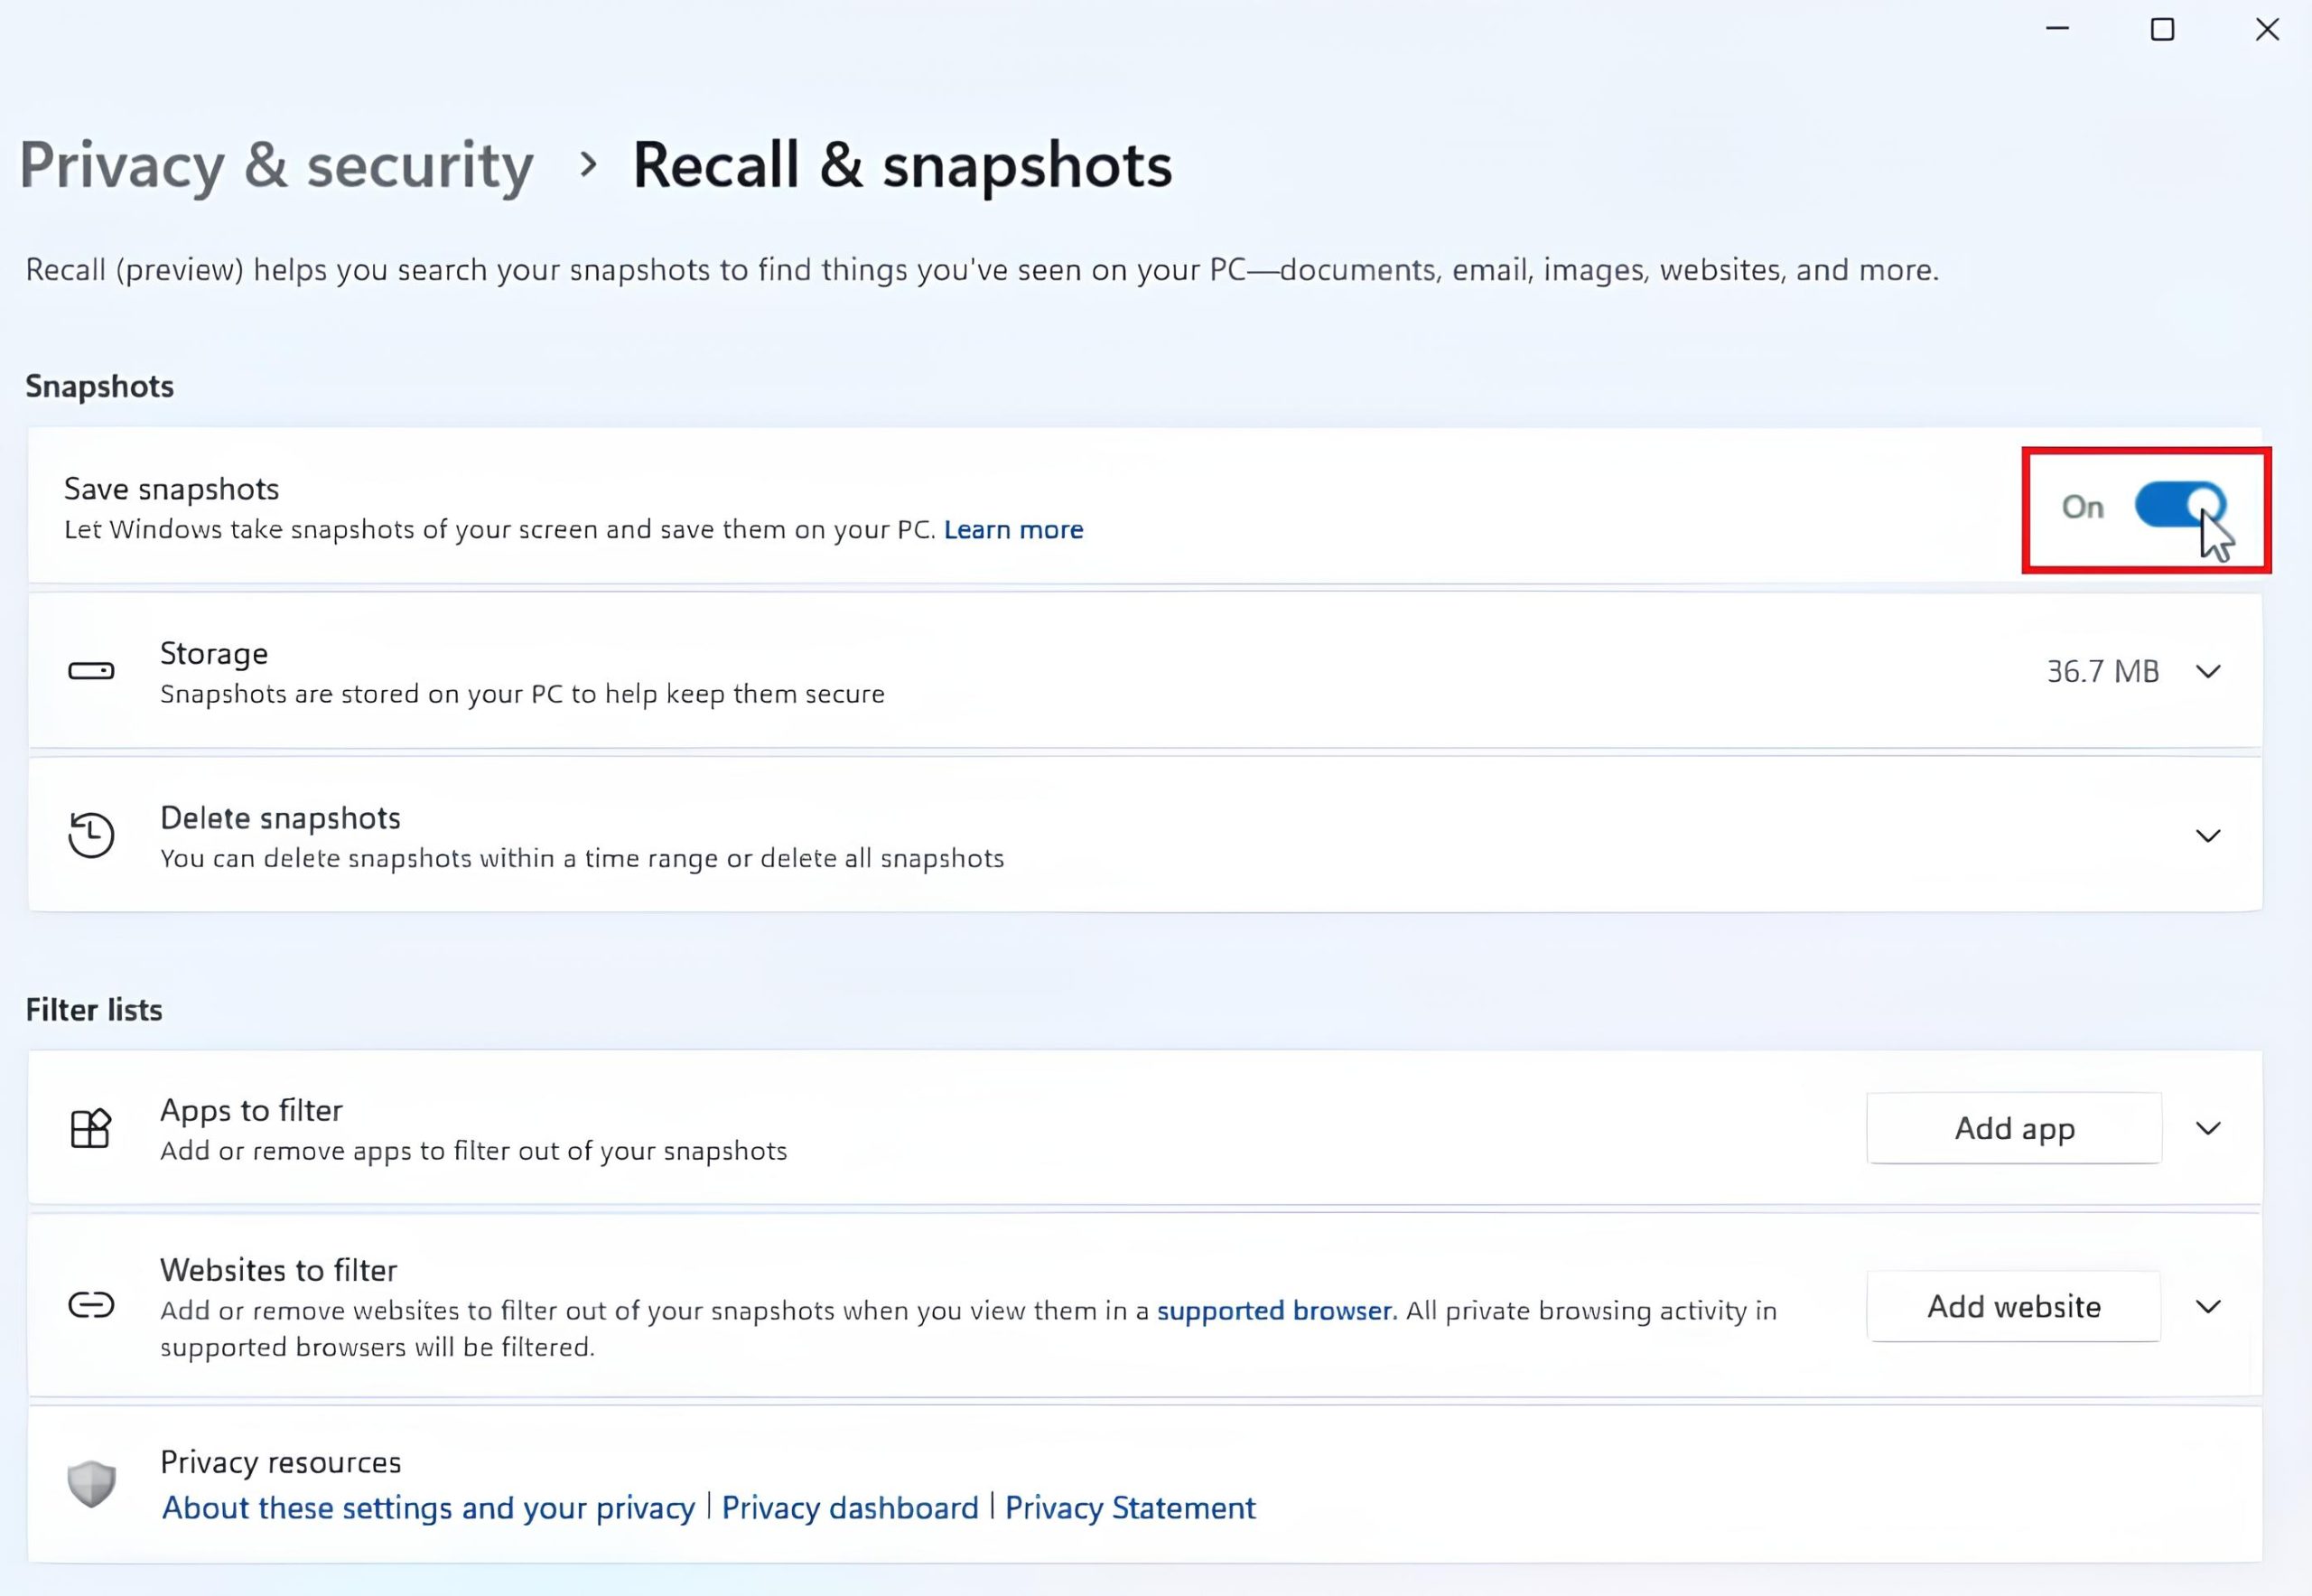
- This will pause Recall from taking screenshots.
2. Disable Recall using Group Policy
If you’re using Windows 11 Pro, Enterprise, or Education, the Group Policy Editor offers a more permanent solution. Disabling Recall here tells the system to block it at the operating system level, ensuring it won’t re-enable even after a restart or update.
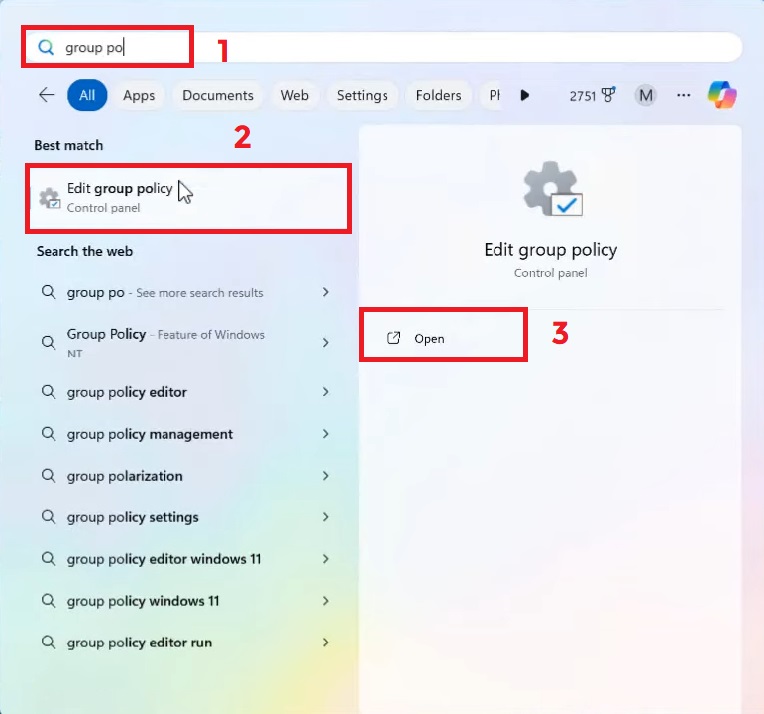
- Click the Start menu, search for Group Policy, and open it.
- Under User Configuration, go to Administrative Templates > Windows Components > Windows AI.
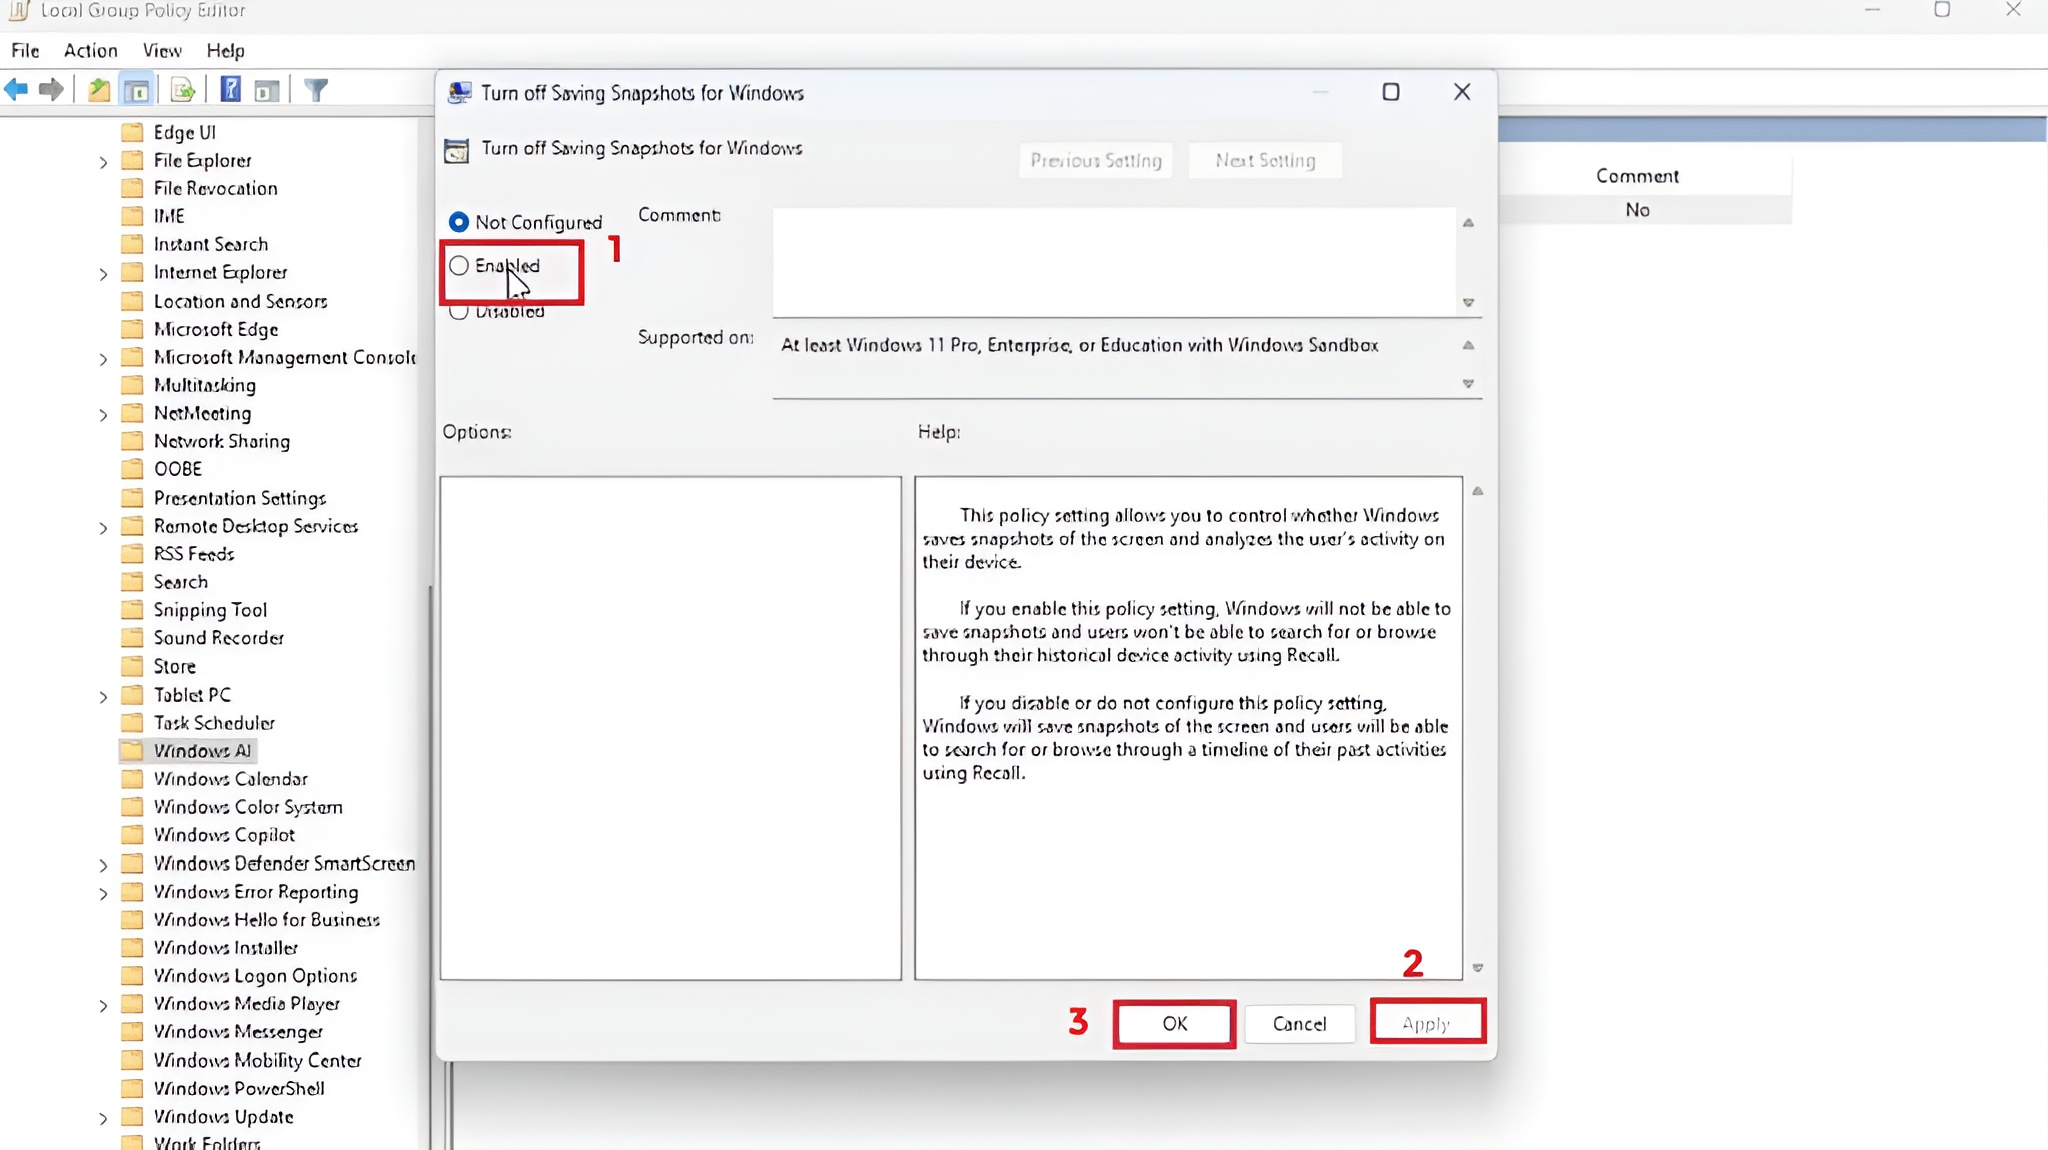
- Right-click “Turn off Saving Snapshots for Windows” and select “Edit.”
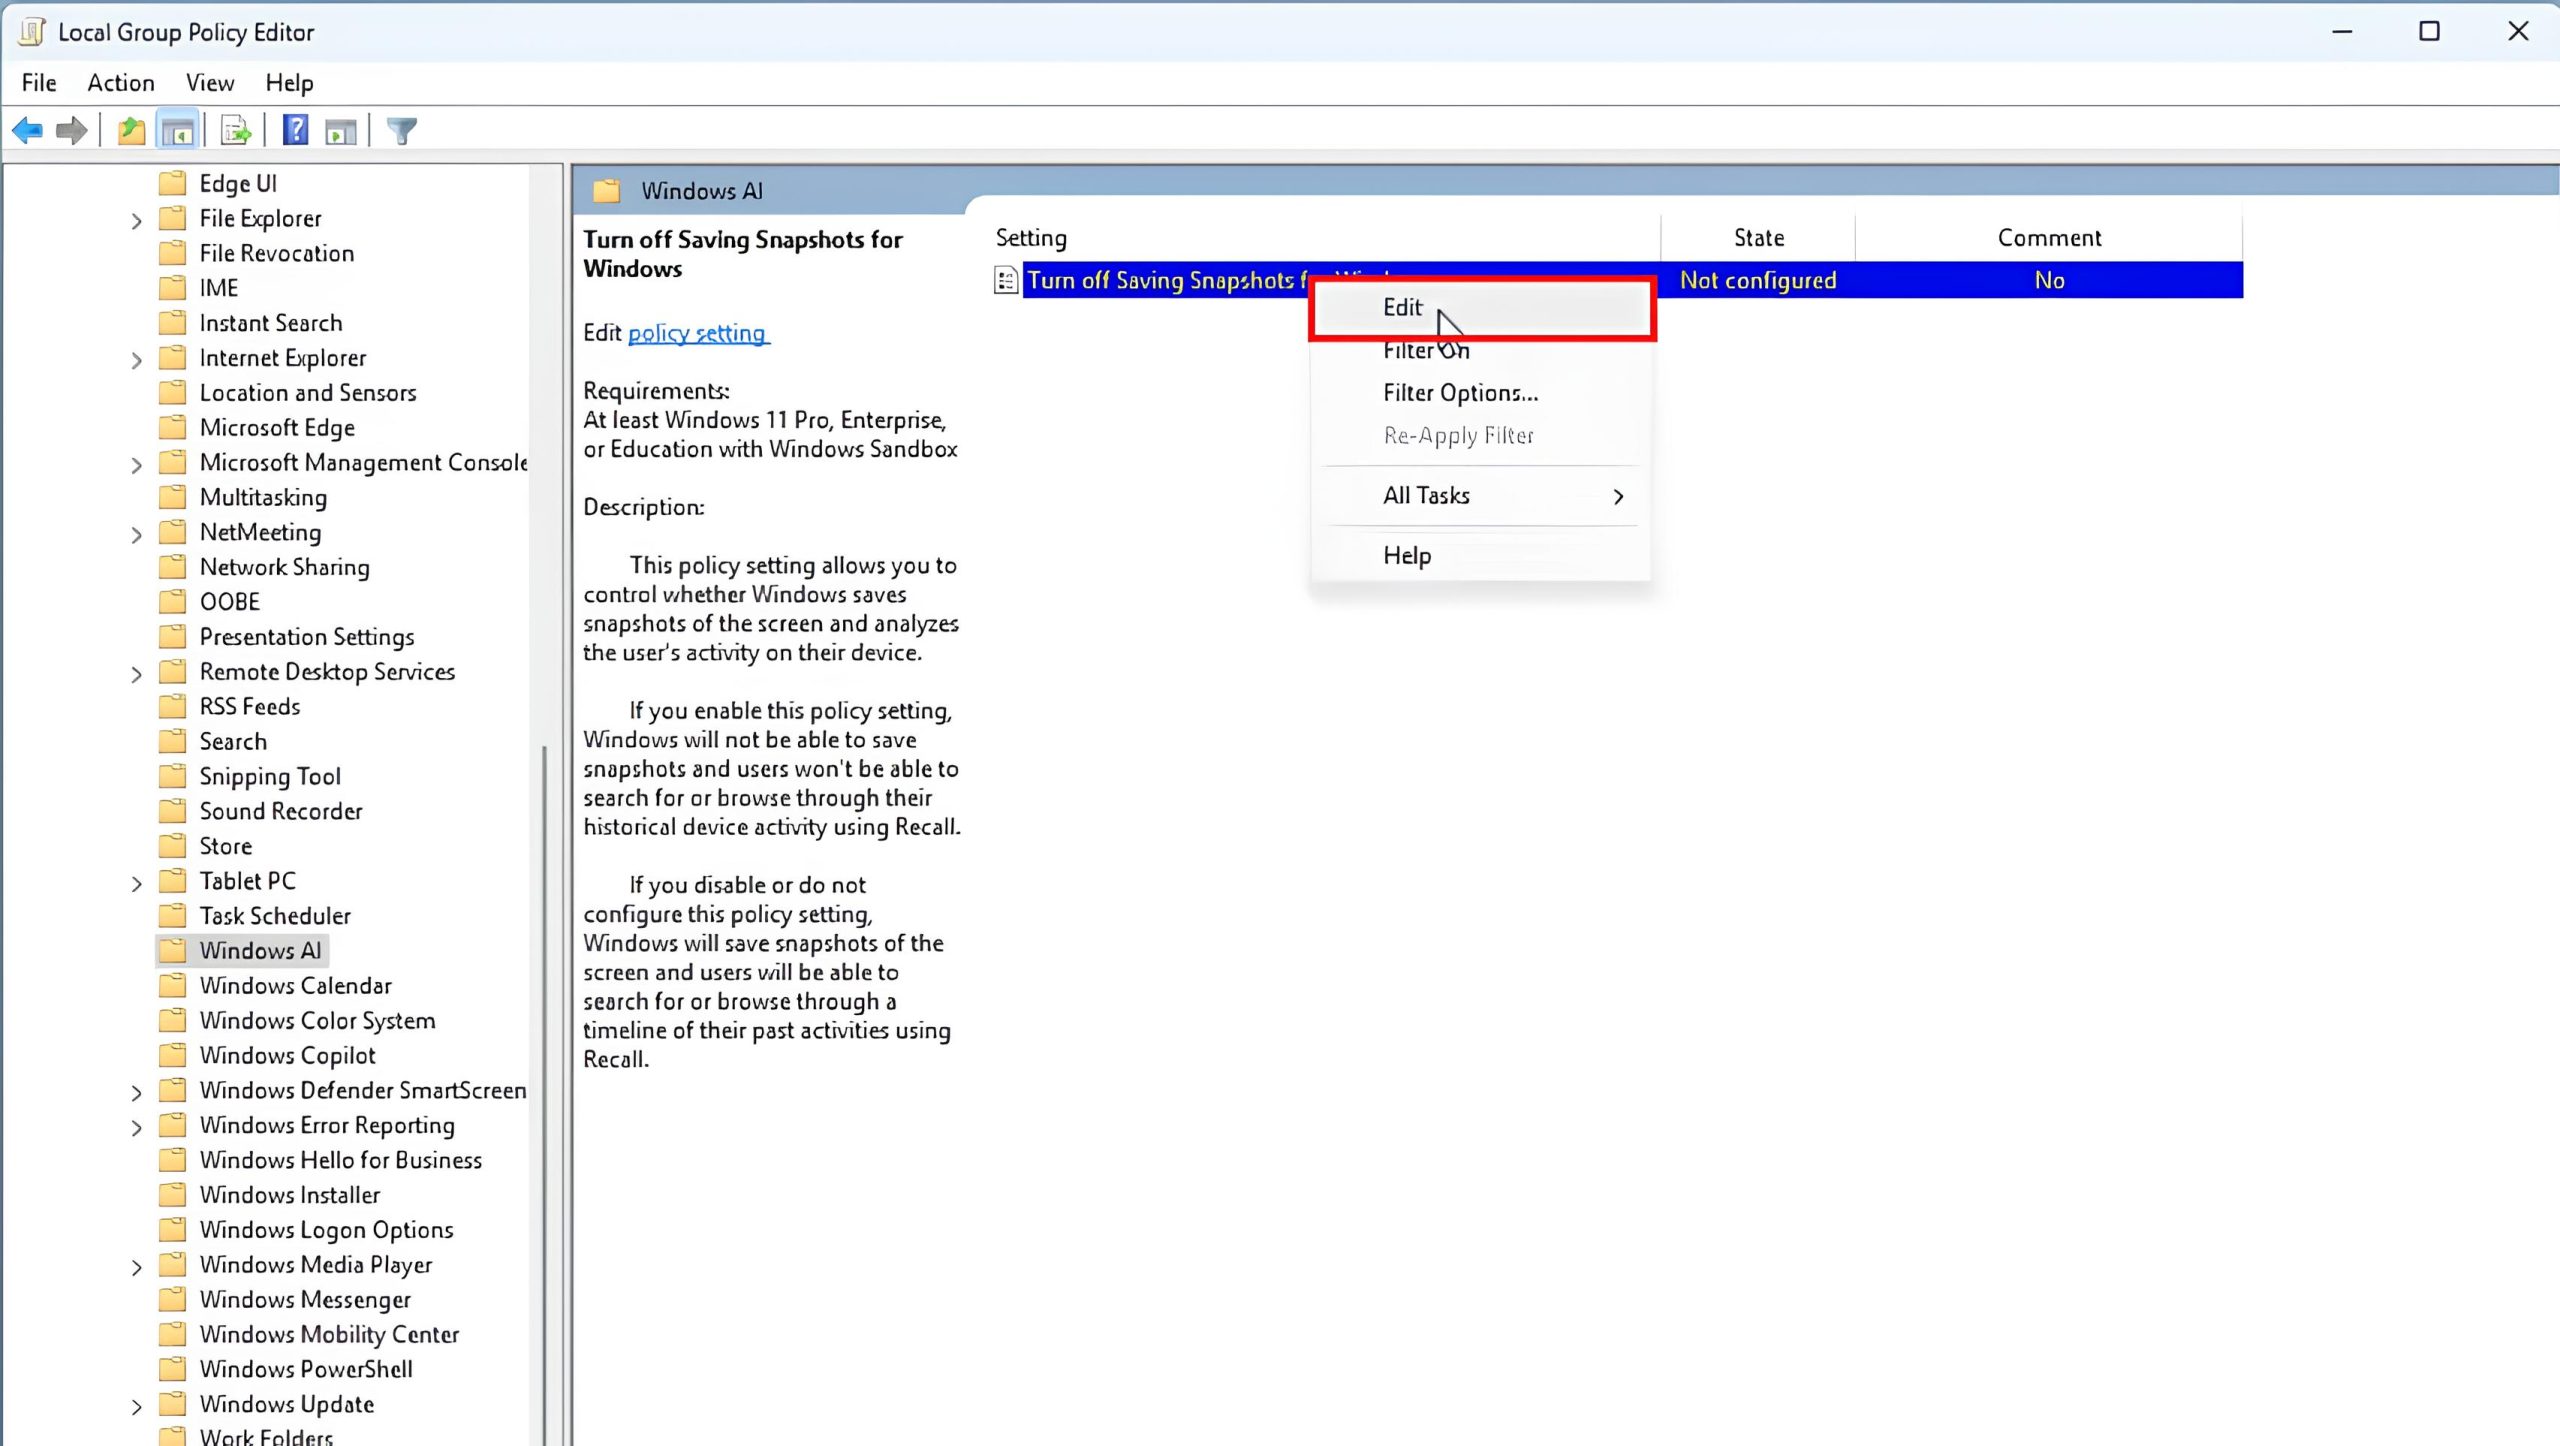
- Select “Enabled” and apply the changes.
On Windows 11 Home, where Group Policy is not available, you can use the Registry Editor. This method blocks Recall by modifying system behavior at a deeper level. Windows checks these registry keys on startup, allowing you to take full control over hidden settings and enforce your privacy preferences.
⚠️ Important: Always back up your registry before editing. In Registry Editor, go to File > Export to save a backup.
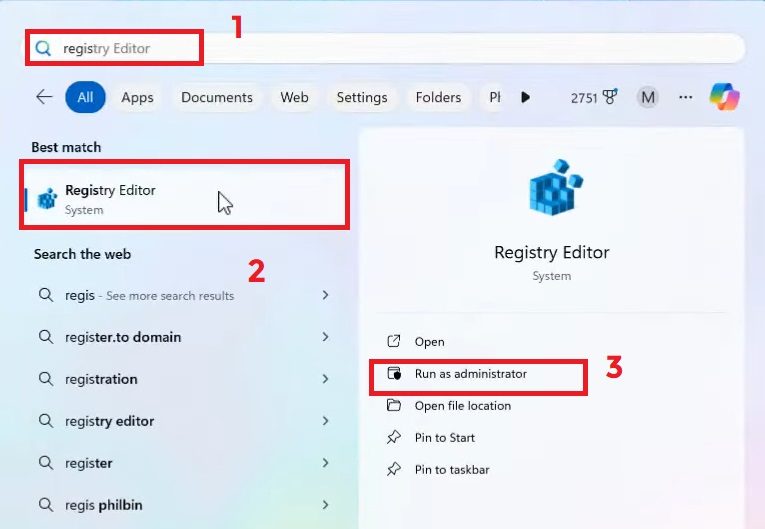
- Open the Start menu, search for Registry Editor, and run it as administrator.
- Go to the following path: HKEY_CURRENT_USER > Software > Policies > Microsoft > Windows
- Right-click on Windows AI → New → DWORD (32-bit) Value to create a subkey.
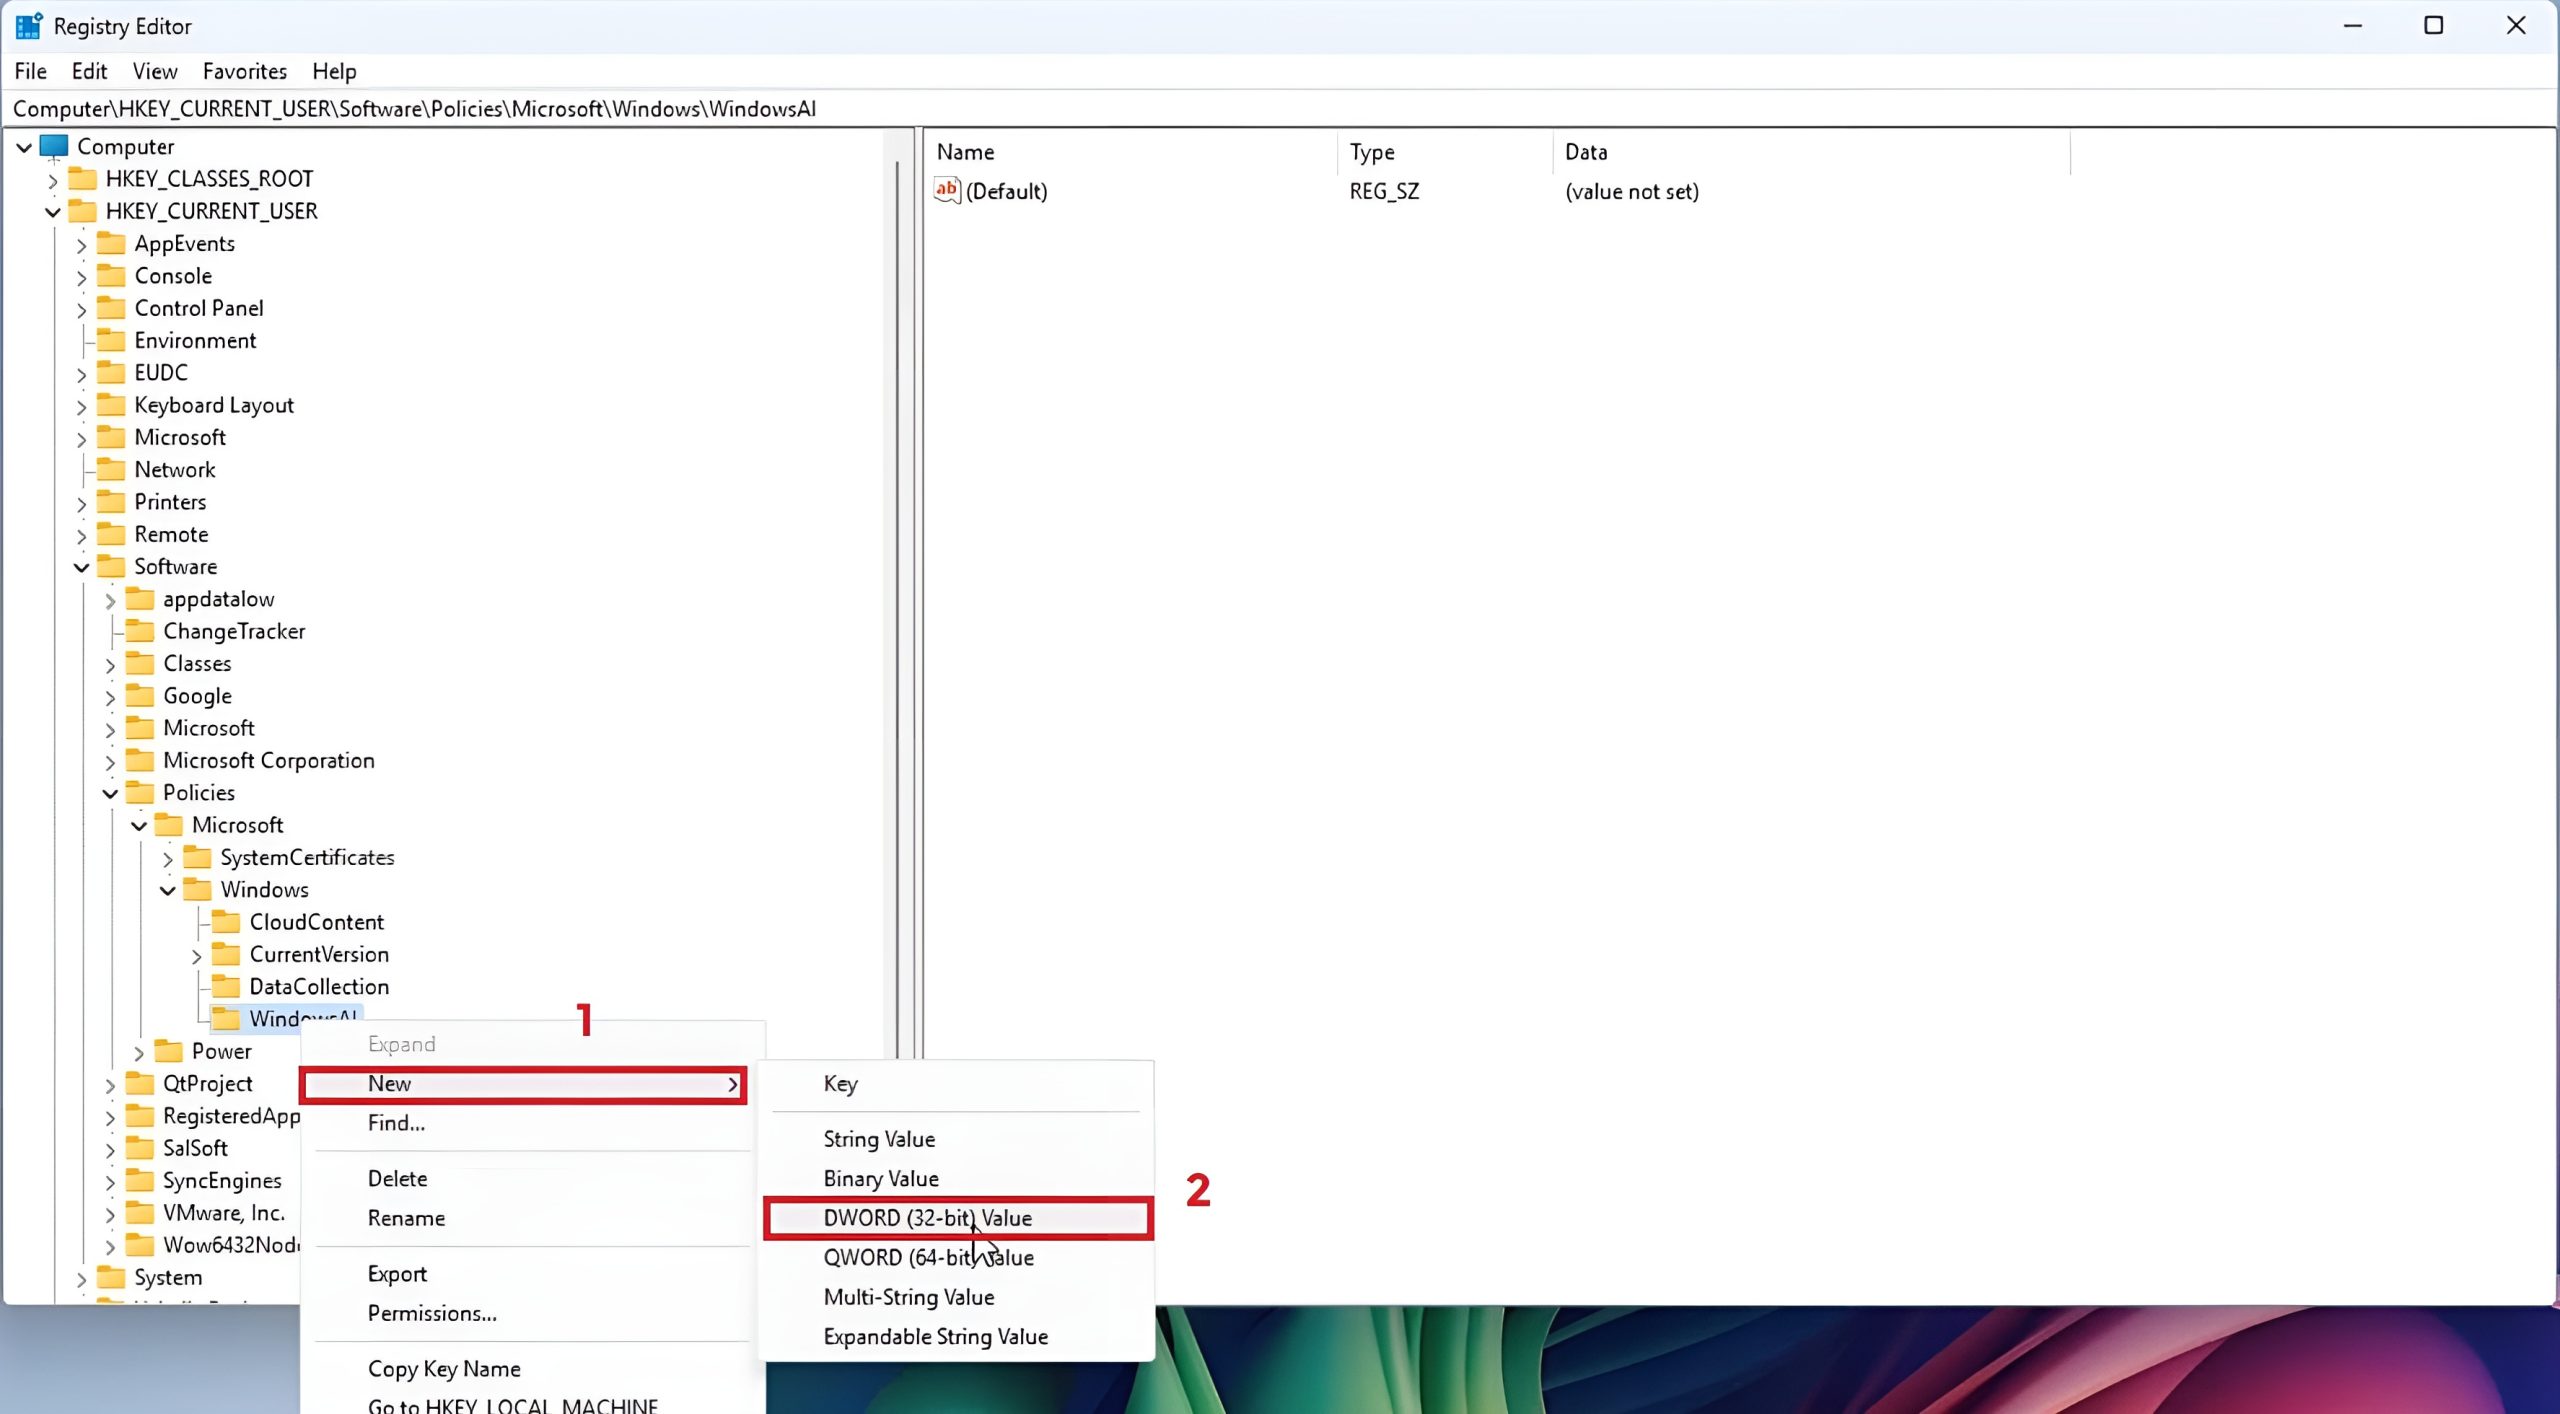
- Name the new value: DisableAIDataAnalysis.
- Right-click the created key and select “Modify.”
- Enter “1” as the Value Data and click OK.
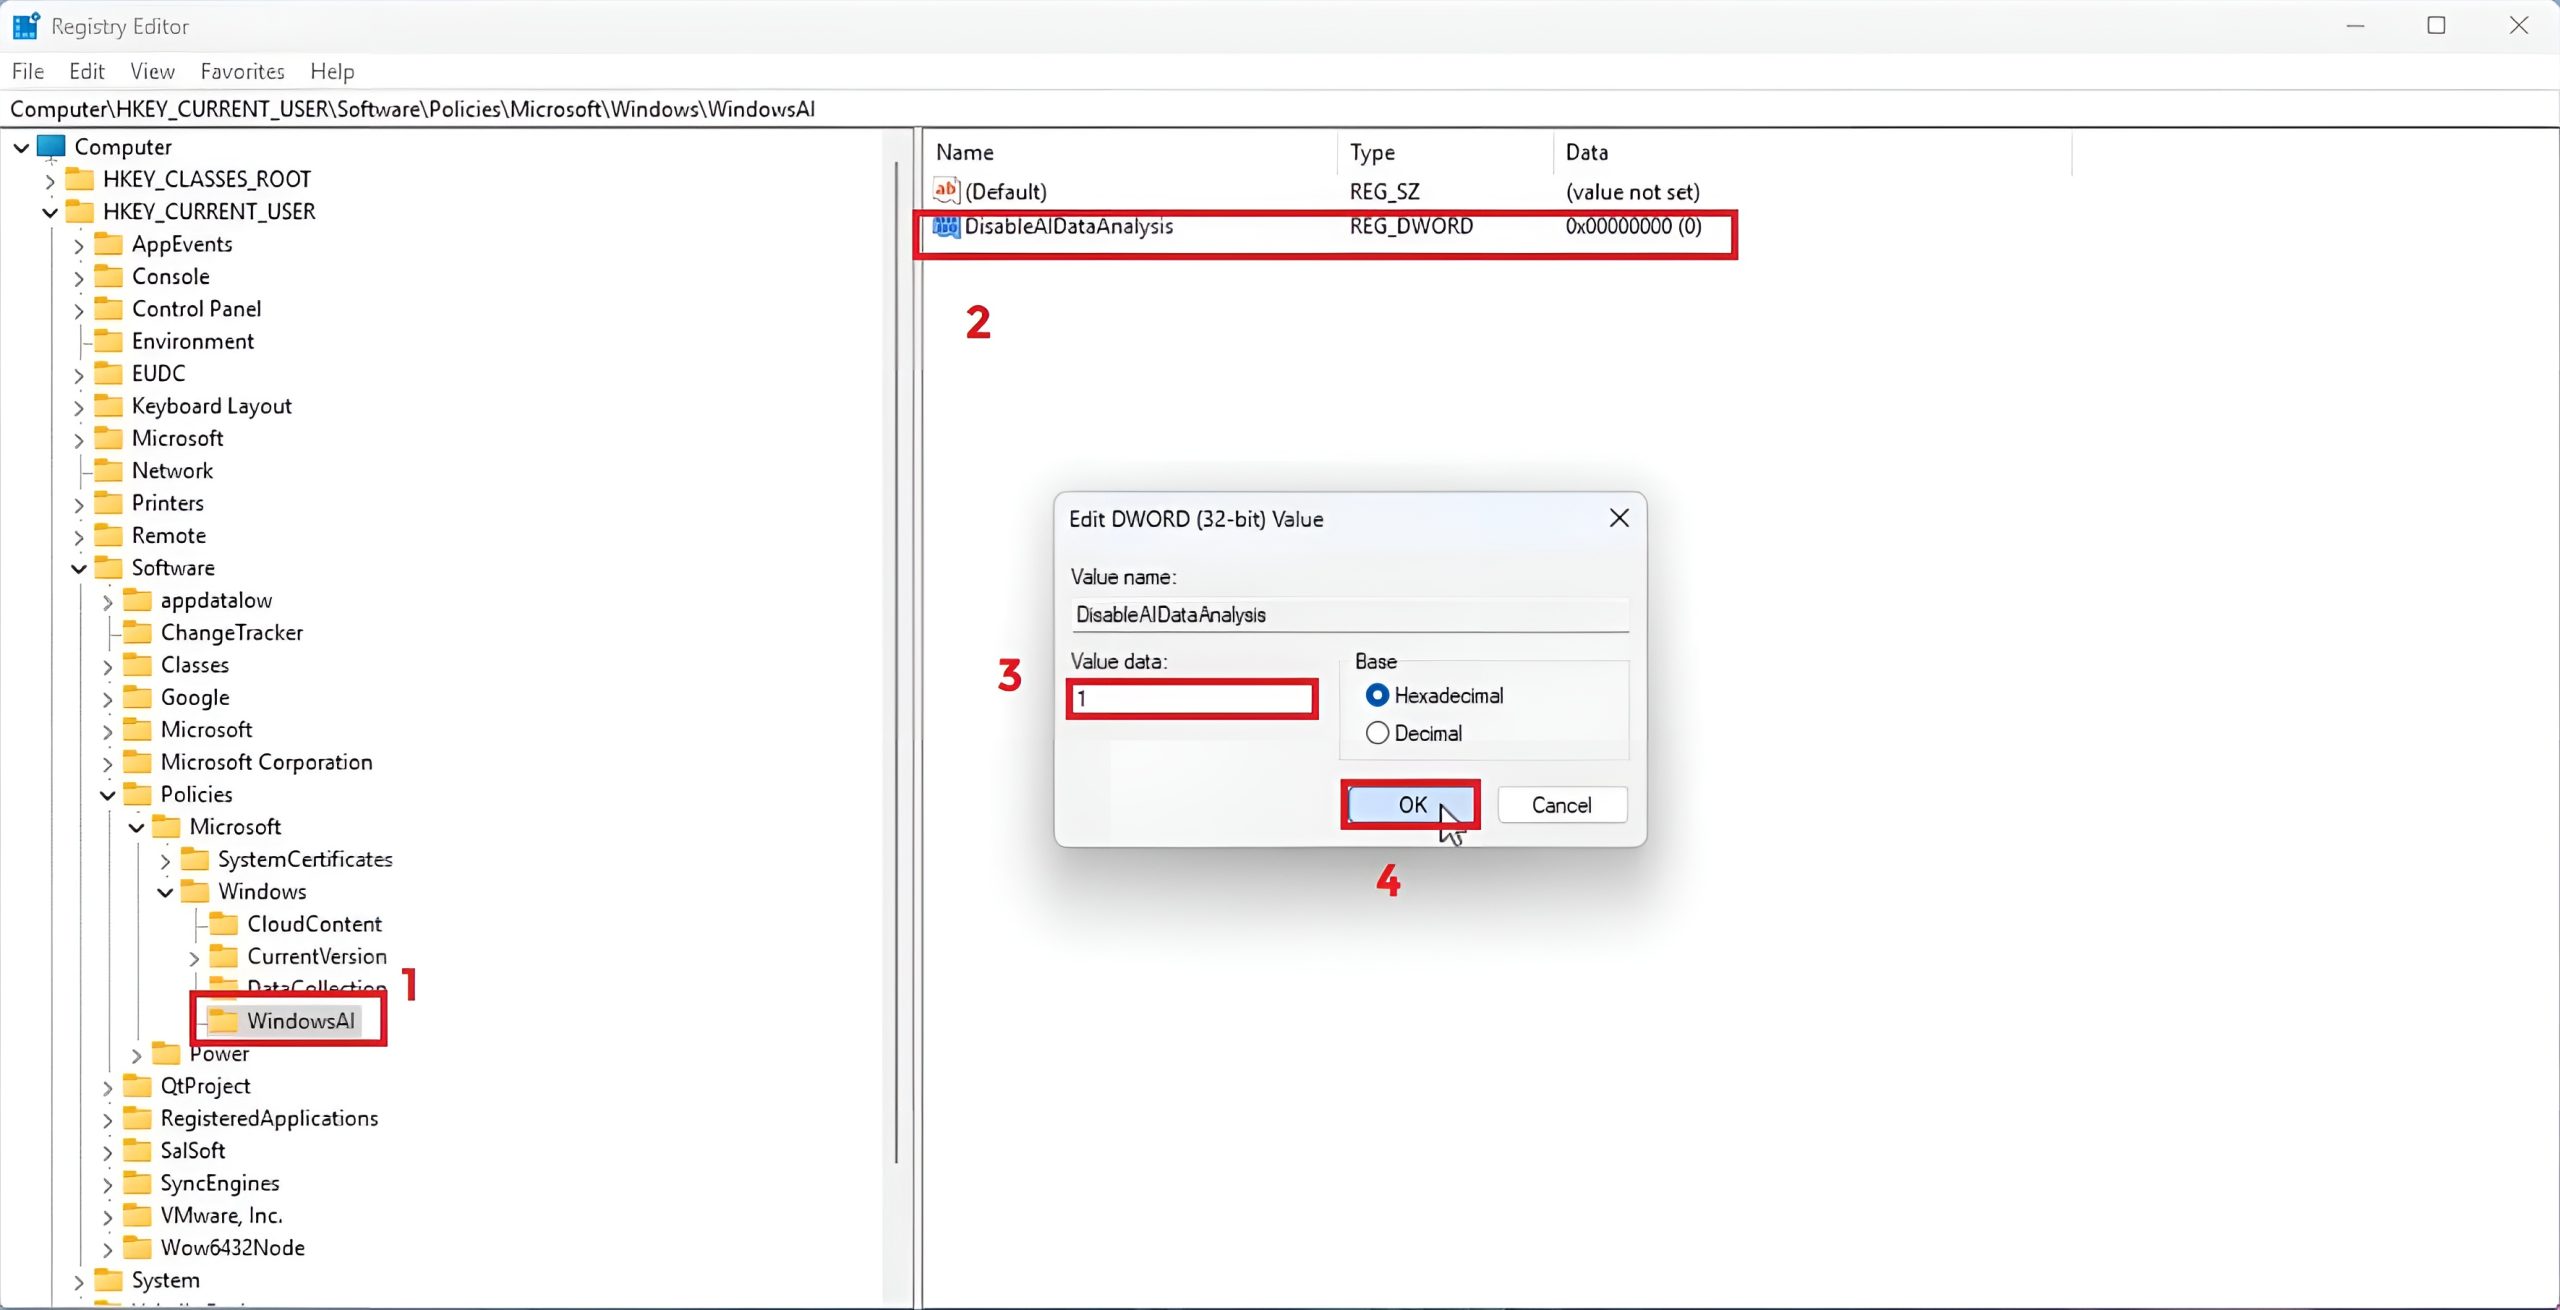
- Close Registry Editor and restart your PC.
Clean Up Stored Recall Snapshots (Optional but Recommended)
Even after disabling Recall, previously captured data may still be stored on your device. These steps will help you remove those snapshots, freeing up space and eliminating any sensitive information that was unintentionally saved.
- Open the Start menu.
- Search for “Settings” and launch it.
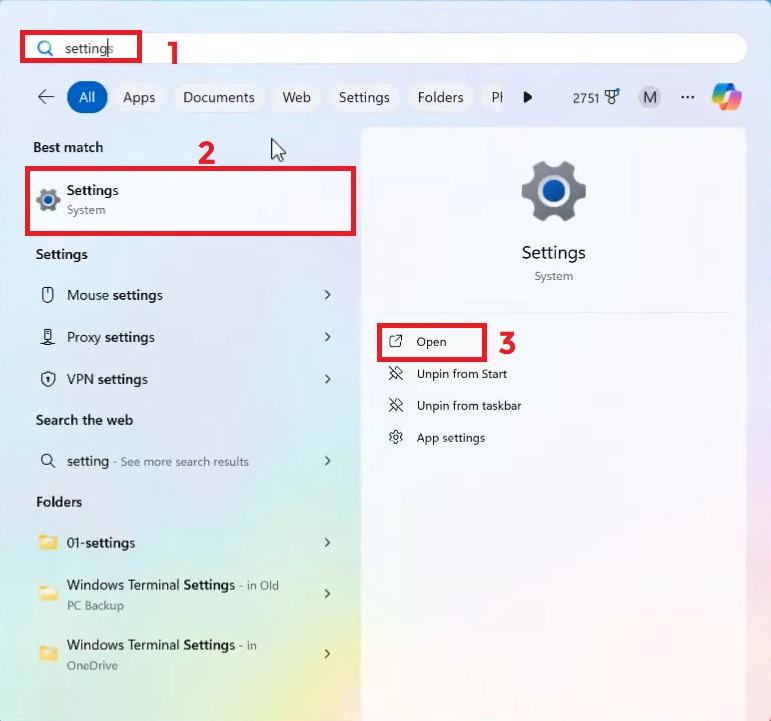
- Go to the “Privacy & Security” section and click “Recall snapshots.”
- Under “Delete snapshots”, click “Delete all.”
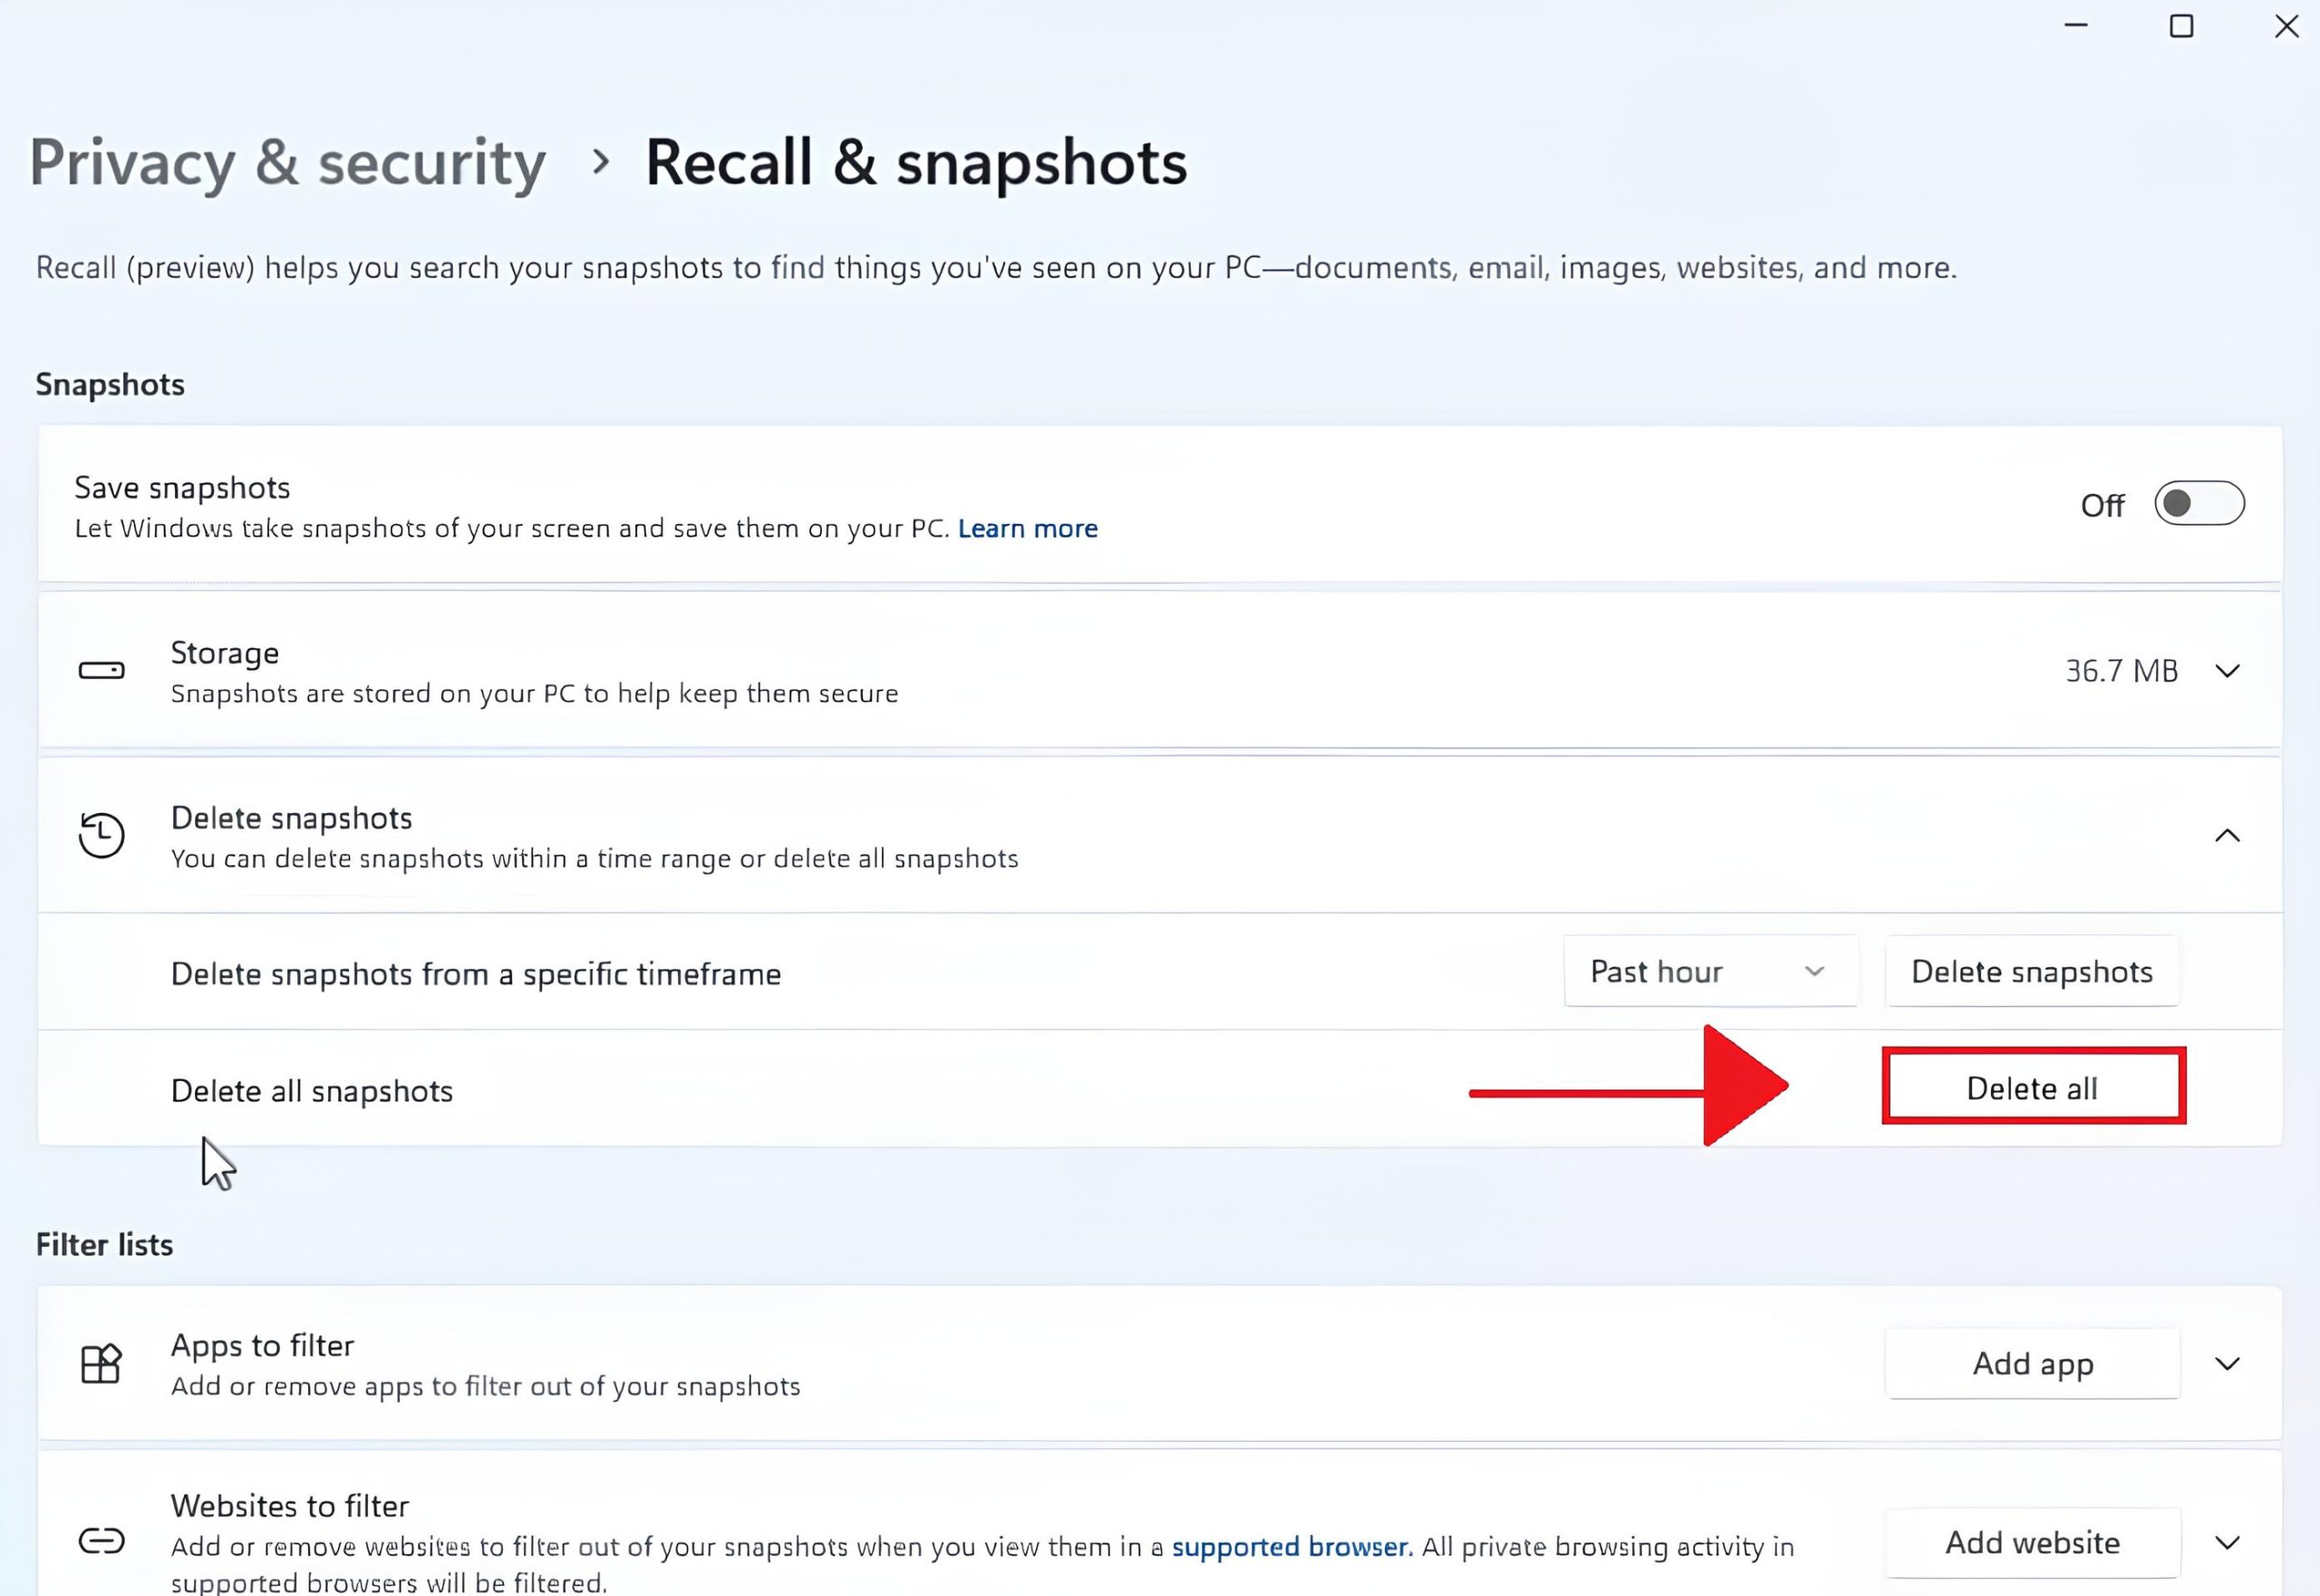
- This will permanently delete all existing snapshots.
5. Disable Copilot AI
Recall is only one part of Windows’ AI integration. Copilot AI runs in the background, providing system-wide suggestions and automations. If you’re aiming for a fully AI-free experience, disabling Copilot is also recommended.
To disable Copilot in Windows 11, follow our detailed step-by-step guide here: How to Turn Off Copilot in Windows
This guide walks you through multiple methods to remove Copilot completely from your Windows environment.