How to Remove Recycle Bin from Desktop in Windows 10/11
 Reviewed by Huzaifa Haroon
- Users might want to remove the Recycle Bin icon from their desktop for a cleaner look, especially with increasing reliance on cloud services and streaming.
- Various methods across Windows 10, 11, 8, and 7, include settings adjustments, Group Policy Editor, or Registry edits to remove or restore the Recycle Bin.
- Changes to the Recycle Bin's visibility are easily reversible, allowing users to bring back the icon if needed for file management or aesthetic reasons.
If you use Windows, you’re probably used to seeing the Recycle Bin on your desktop. It’s where your deleted files go before they’re permanently removed. You can also use it to bring back files you didn’t mean to delete. That’s why Microsoft put a shortcut to it right on your desktop.
But sometimes, you might not want the Recycle Bin icon taking up space there. Don’t worry, you can hide it. The way to do this depends on your version of Windows, as the process has changed over time.
In this guide, we’ll explain why you might want to remove the Recycle Bin from your desktop and show you how to do it in Windows 10, 11, 8, and 7. We’ll also cover bringing the Recycle Bin icon back if you change your mind later.
Why Get Rid of the Recycle Bin?
You might not always need the Recycle Bin, especially if you don’t keep many files on your computer.
- Cloud document services: Websites like Google Docs and Microsoft 365 save your work online for you.
- Streaming instead of storing: Nowadays, people usually stream music and films instead of saving them on their computers.
- Online photo backup: Services like Google Photos and iCloud automatically save your photos in the cloud.
- Cloud-based trash systems: When you use cloud storage, they often have their ways of retrieving deleted files.
Remove the Recycle Bin from the Desktop in Windows 10 or 11
If you’re using Windows 10 or 11 and want to remove the Recycle Bin icon from your desktop, it’s quite straightforward. All these steps are almost similar on both Windows versions, with a slight interface change. Here’s how you can do it:
Method 1: Remove Recycle Bin from Settings in Windows 10 or 11
- Open the Start menu, click “Settings, ” or press the Windows + I keys together. In the Settings menu, choose “Personalization.”
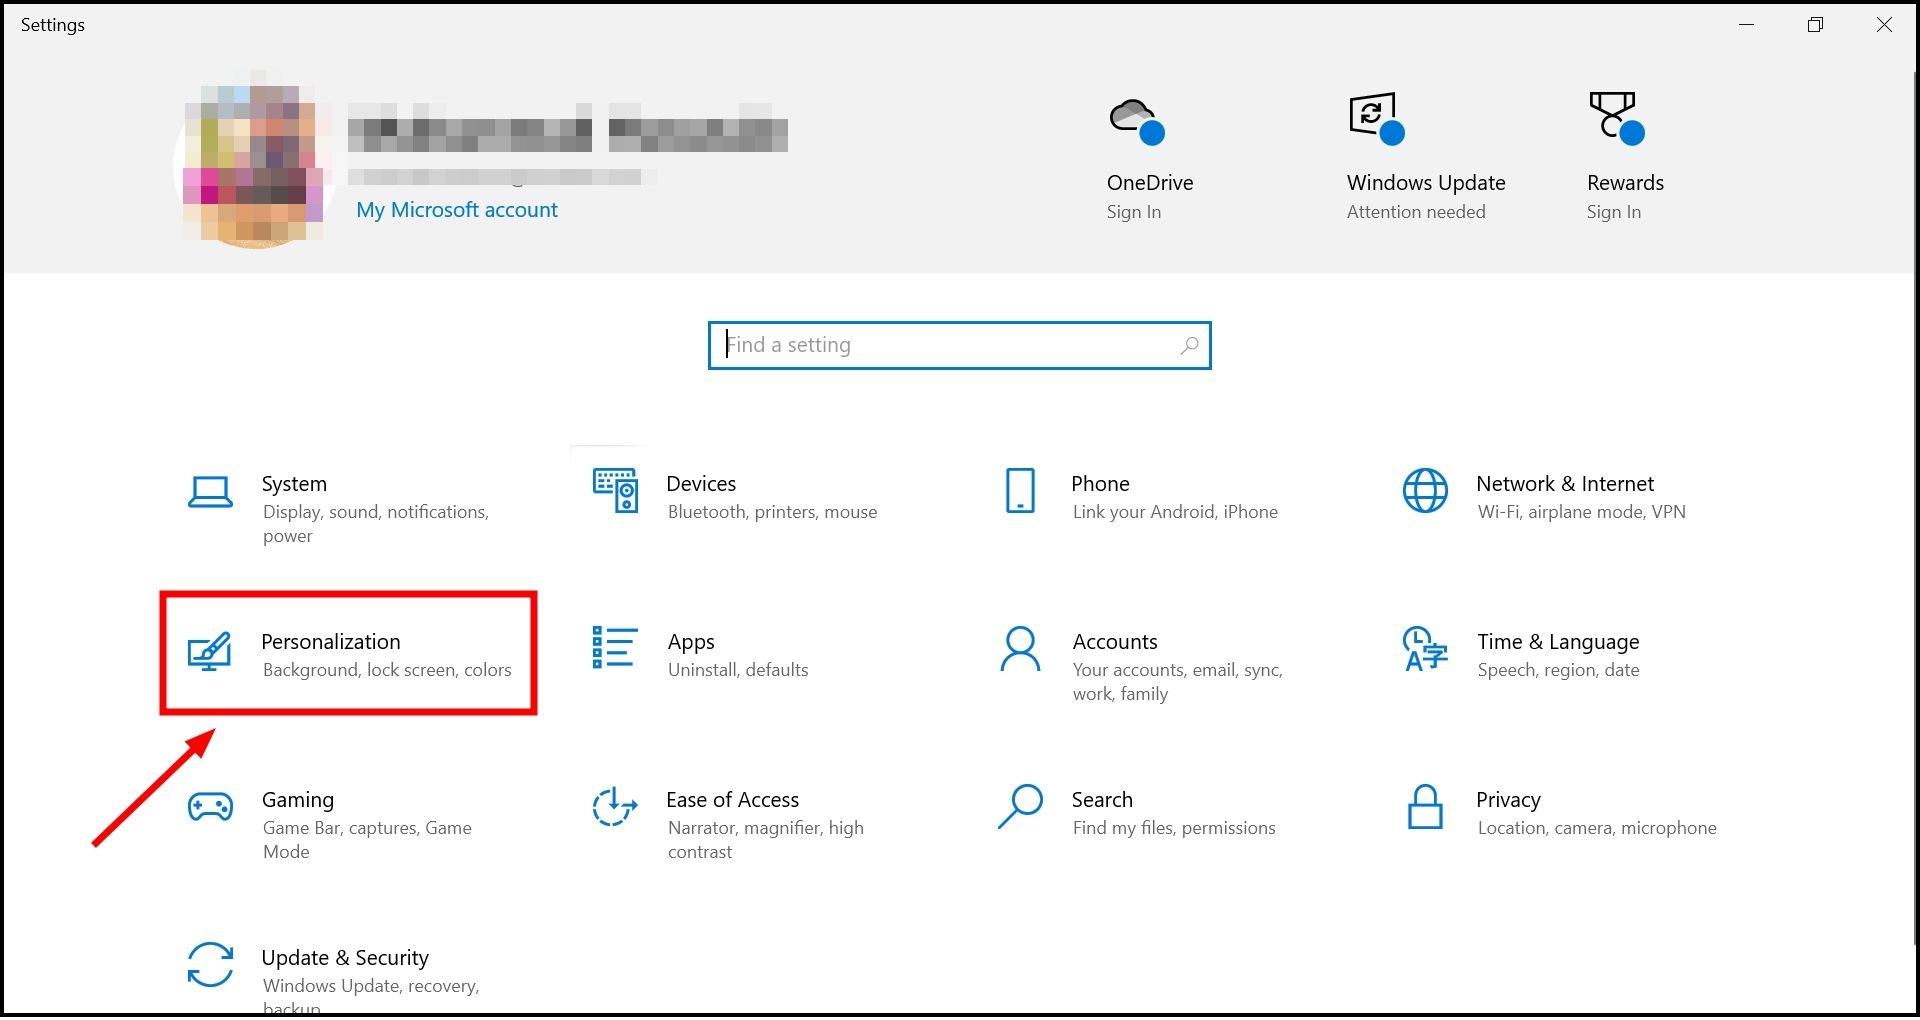
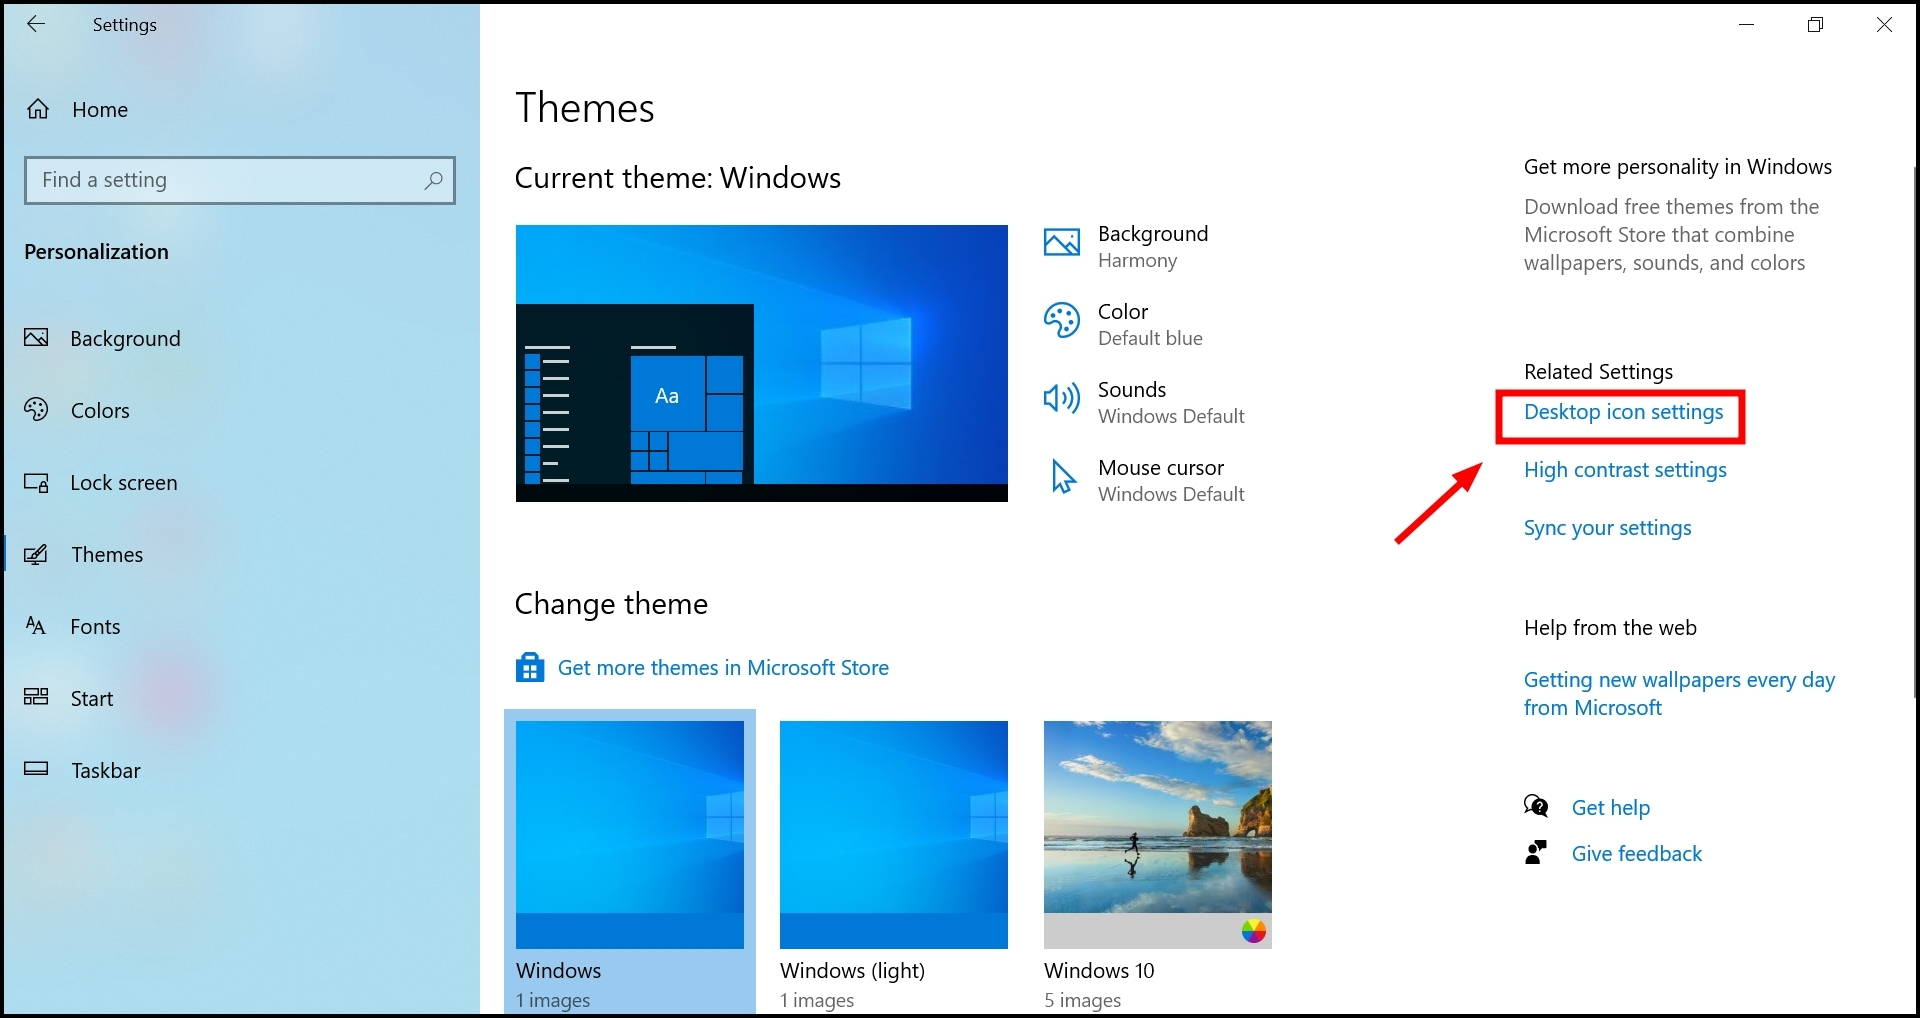
Choose Personalization - Then, go to the “Themes” section.
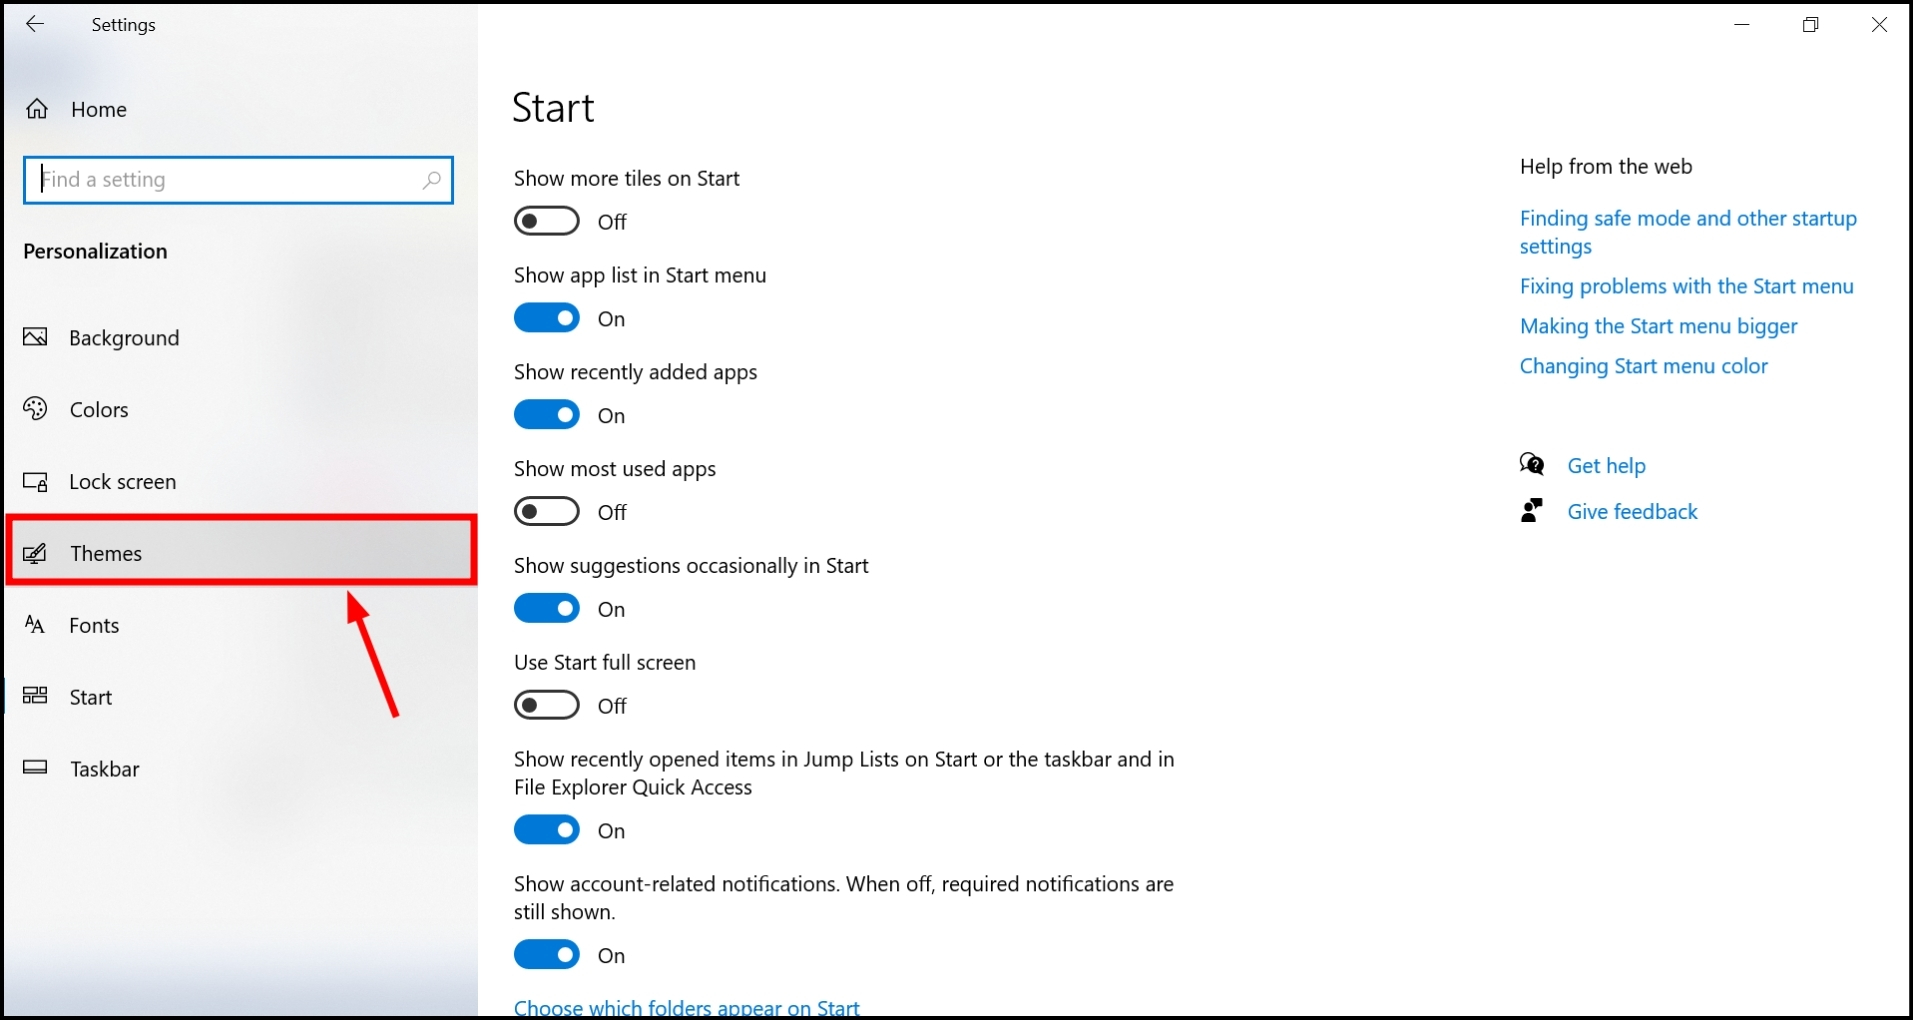
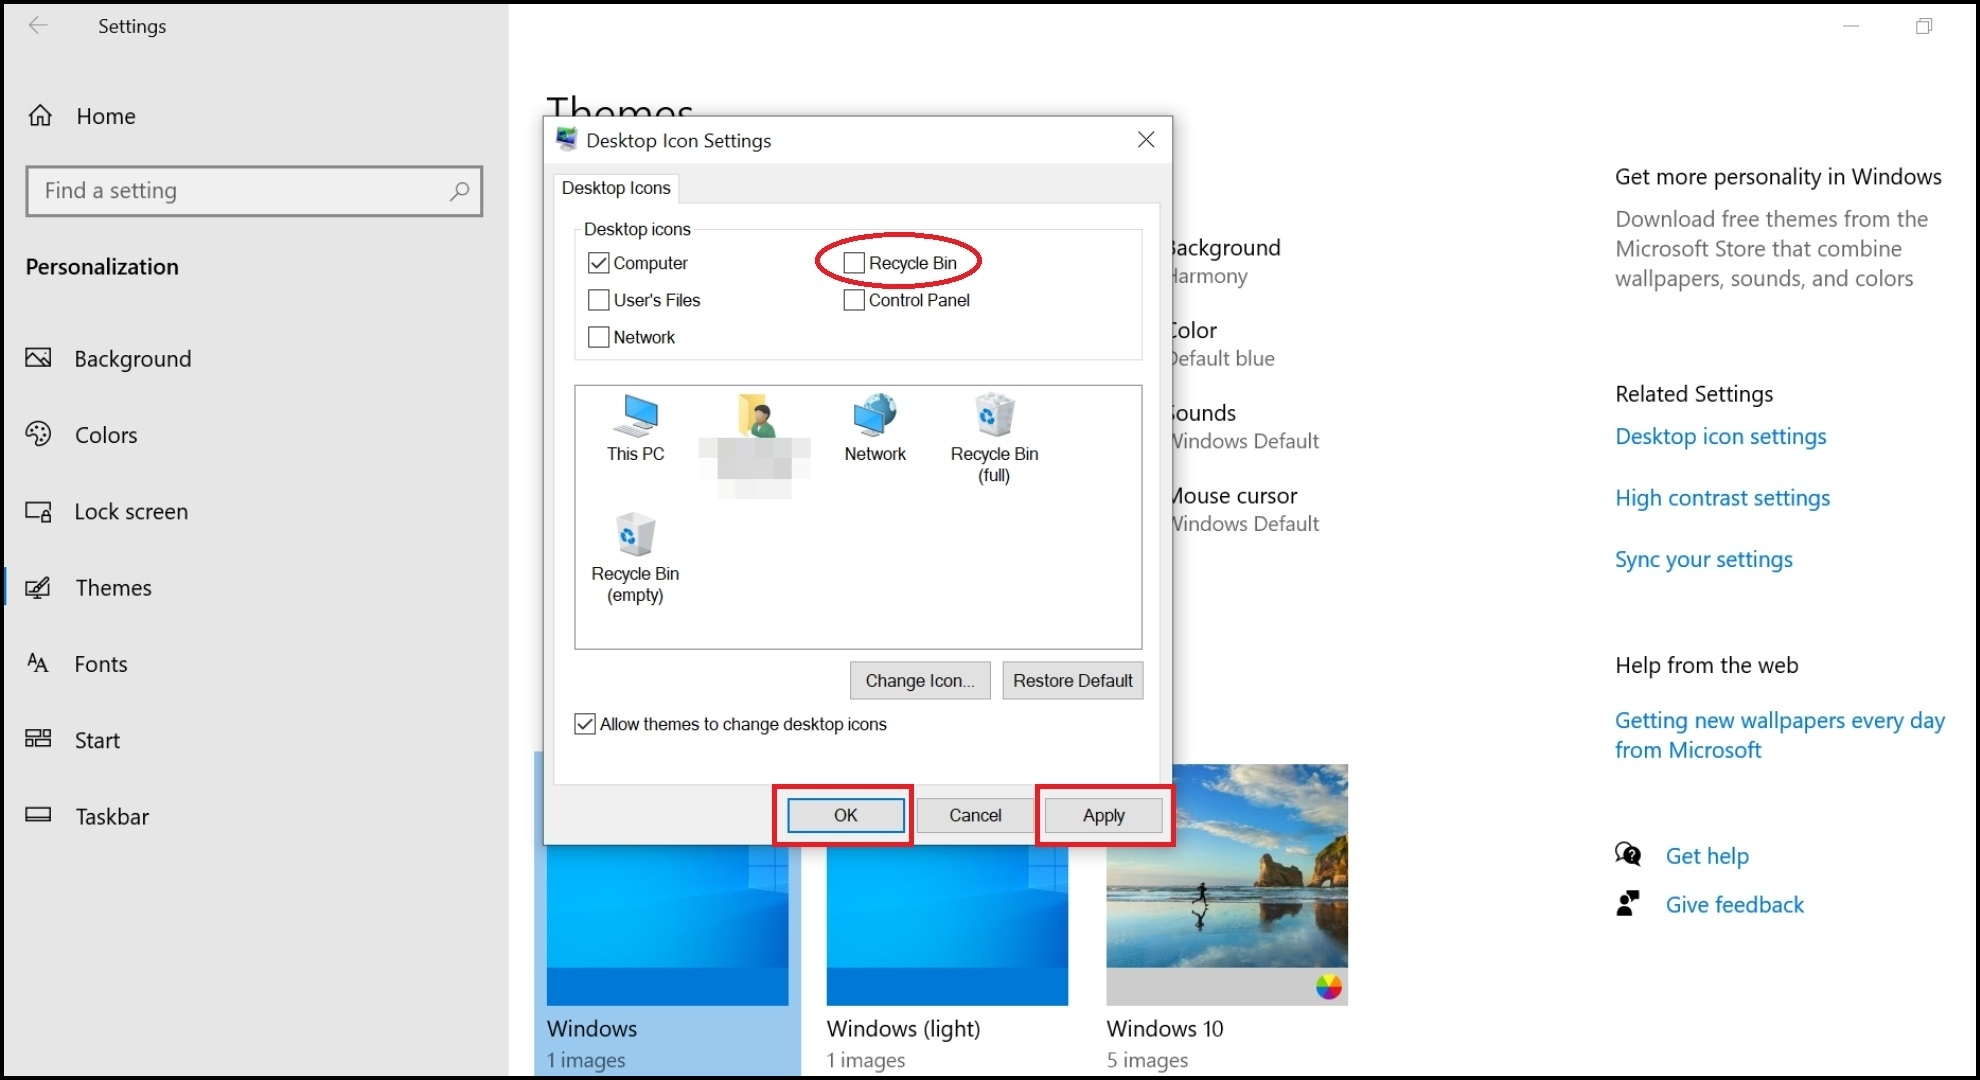
Go to the Themes - Here, look for and click on “Desktop icon settings.”
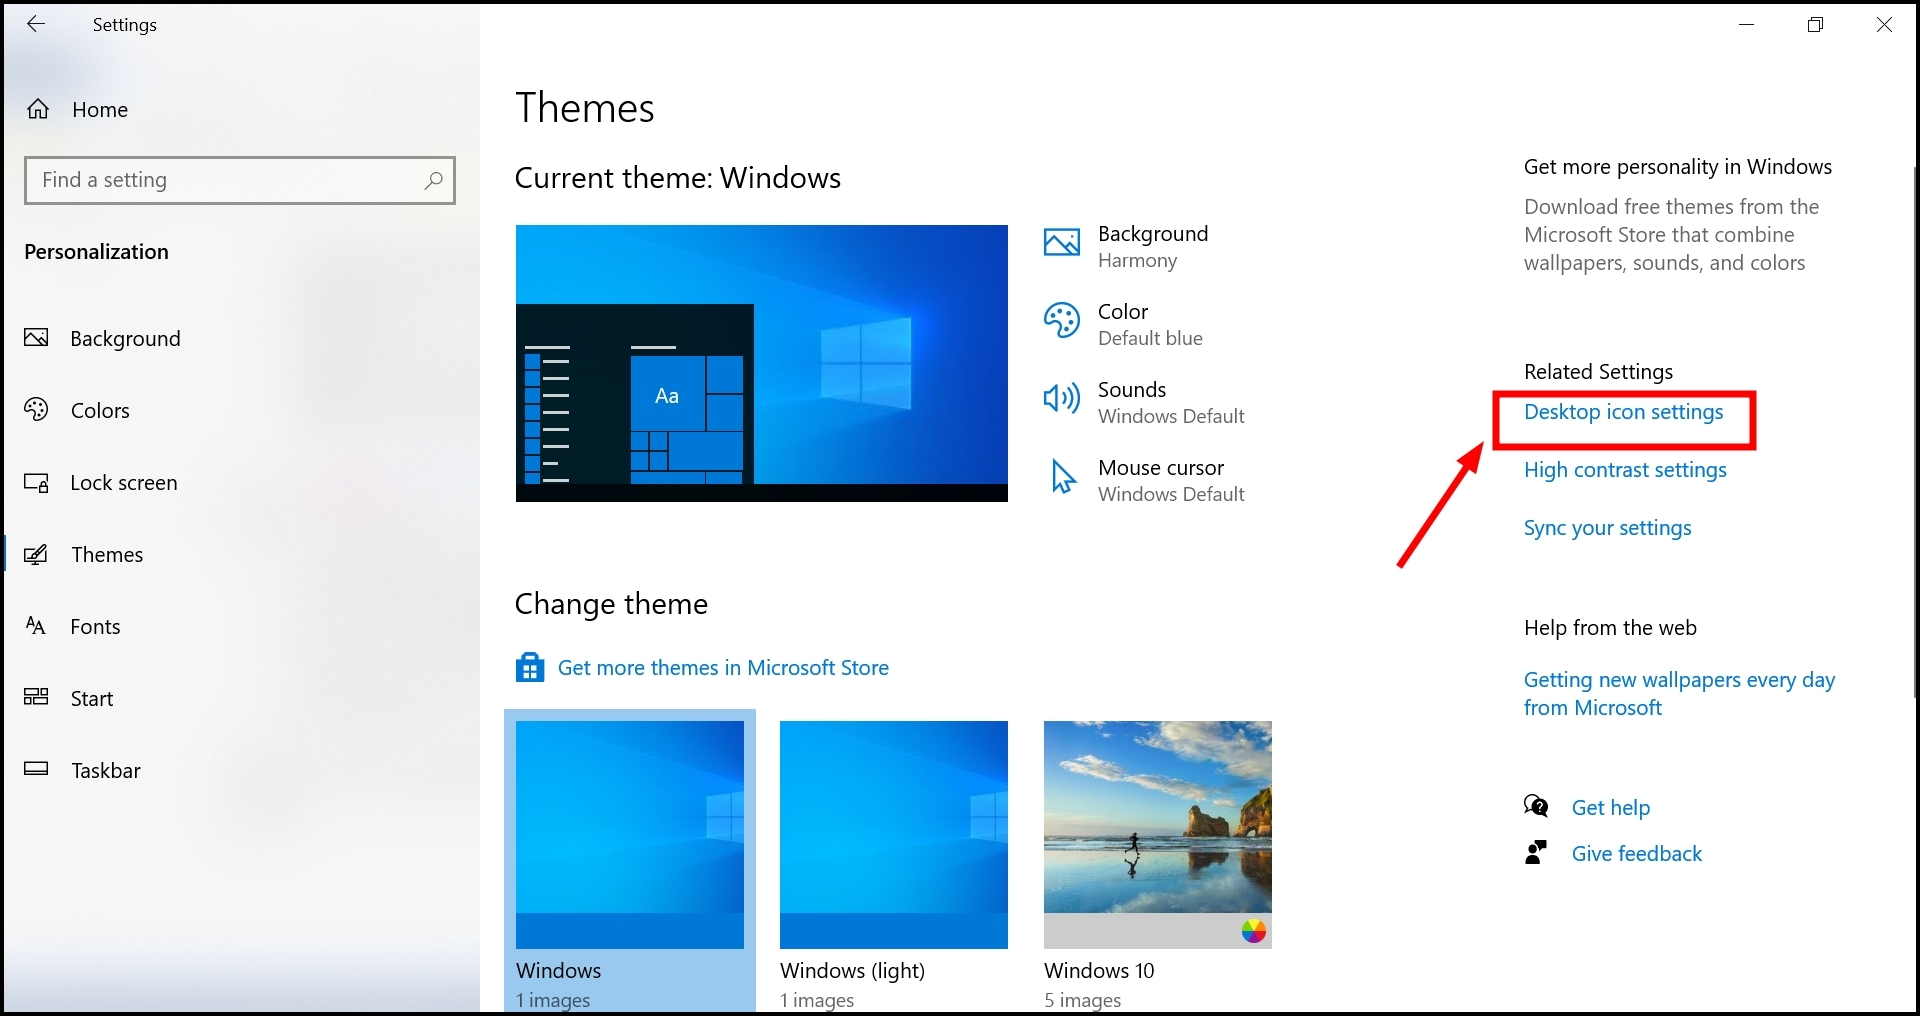
Click on Desktop icon settings - You’ll see a list of icons. Find the Recycle Bin and uncheck the box next to it.
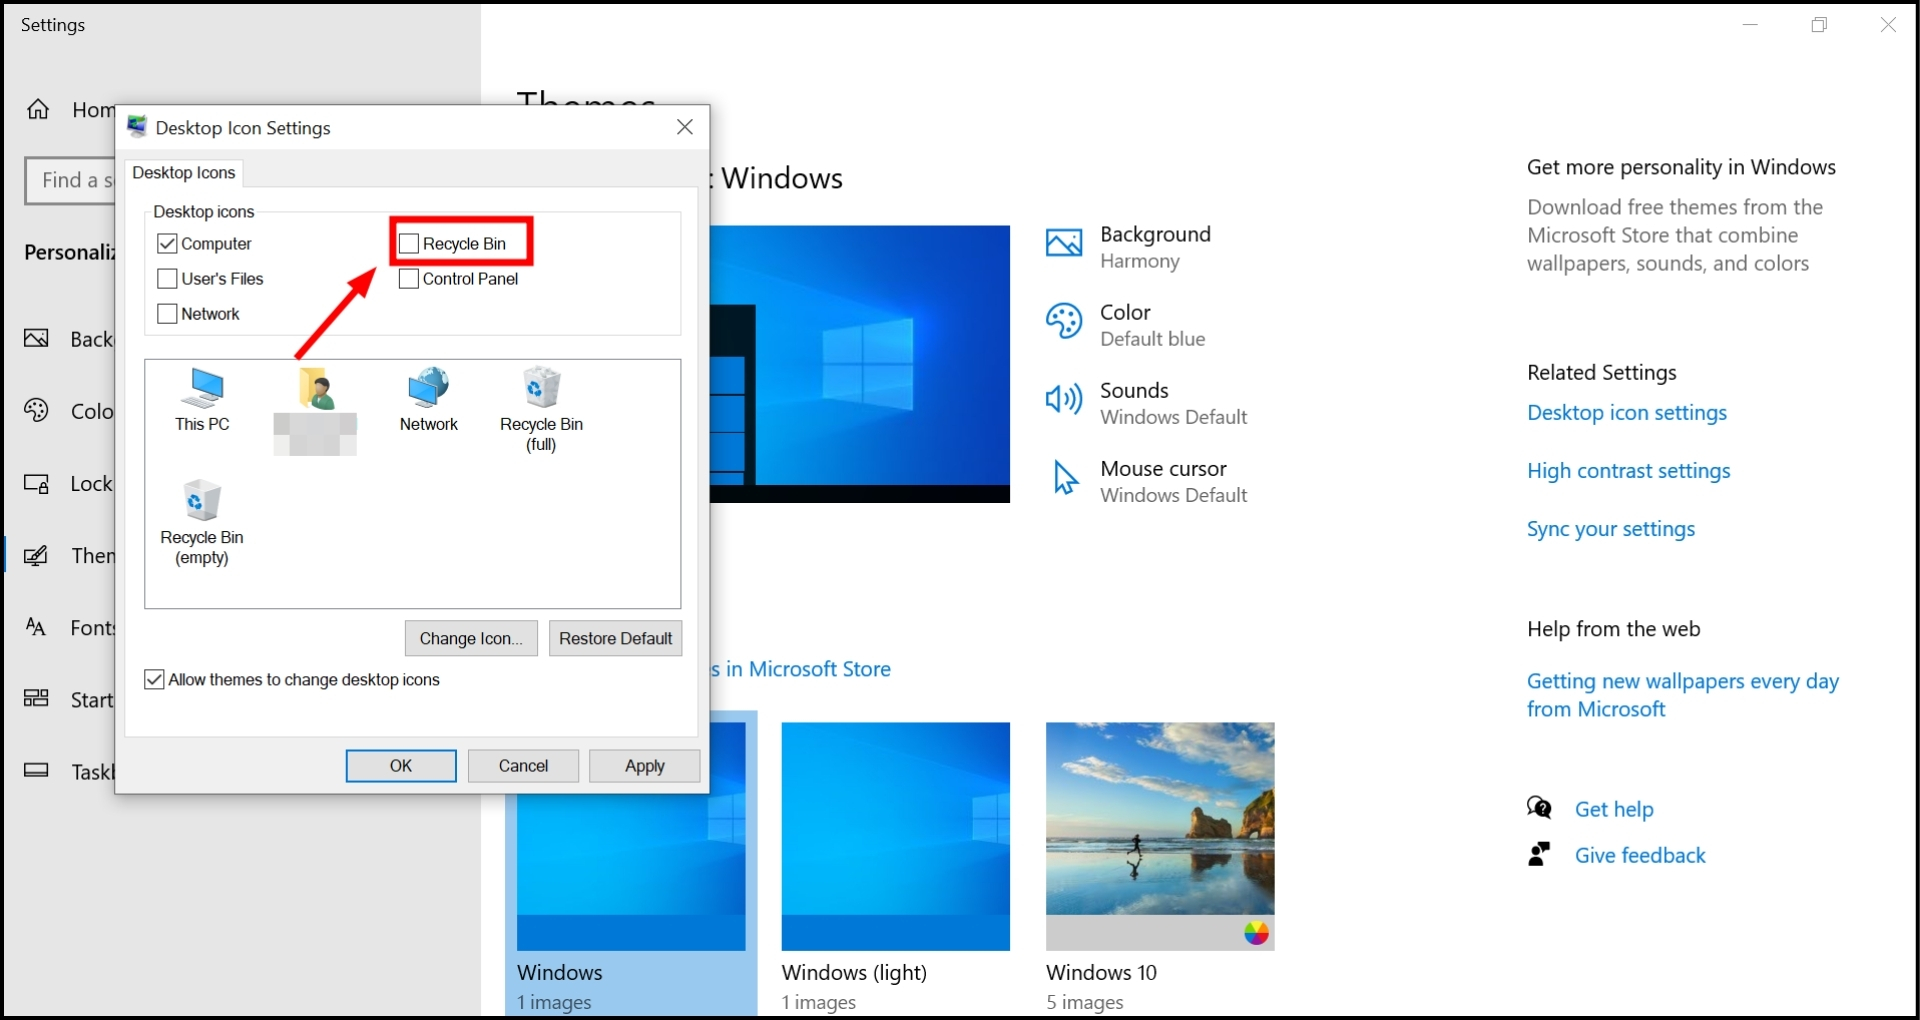
Find the Recycle Bin and uncheck the box - Click “Apply” to confirm your changes, and the Recycle Bin will disappear from your desktop.
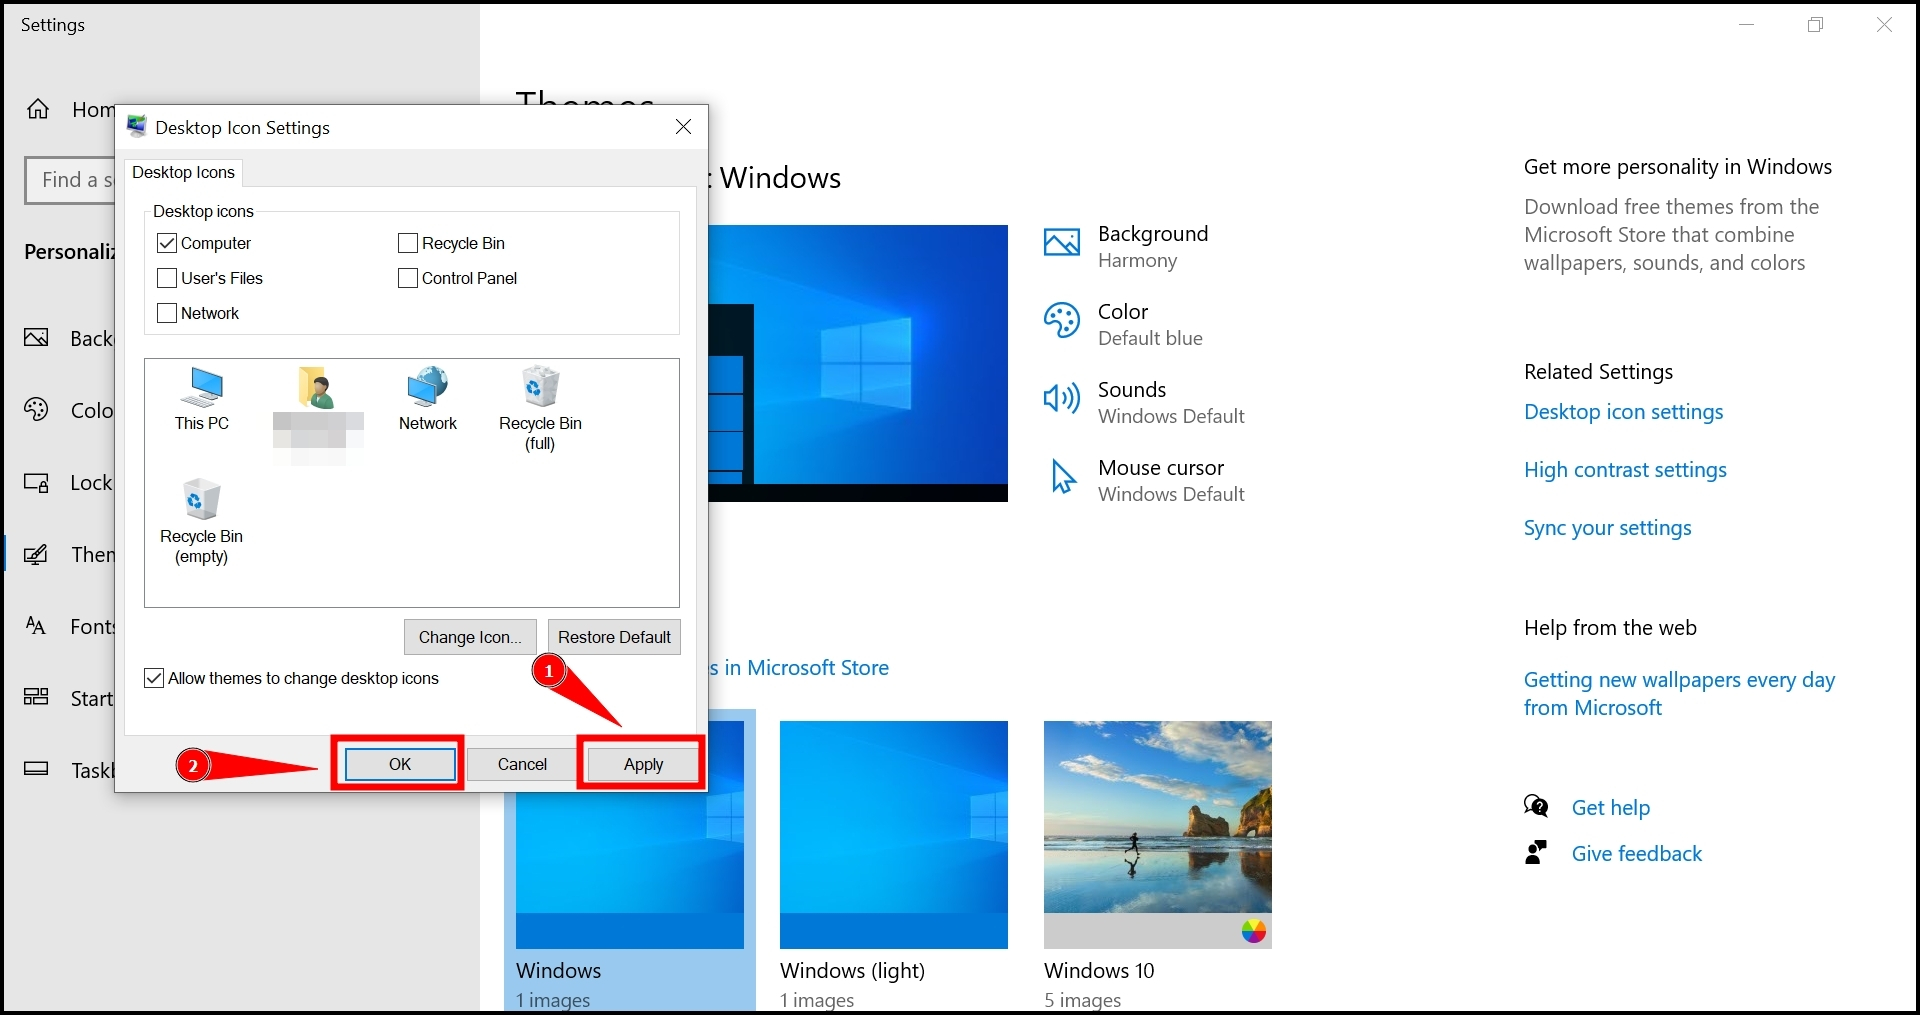
Click Apply
Remember, you can’t completely remove the Recycle Bin from Windows 10 or 11. It’s an essential part of Windows, used for deleting and recovering files easily. This method just hides the icon from your desktop.
Method 2: Remove Recycle Bin using Local Group Policy Editor in Windows 10 or 11
- Press the Windows key and R simultaneously, type in “gpedit.msc”, and hit Enter. This opens the Local Group Policy Editor.
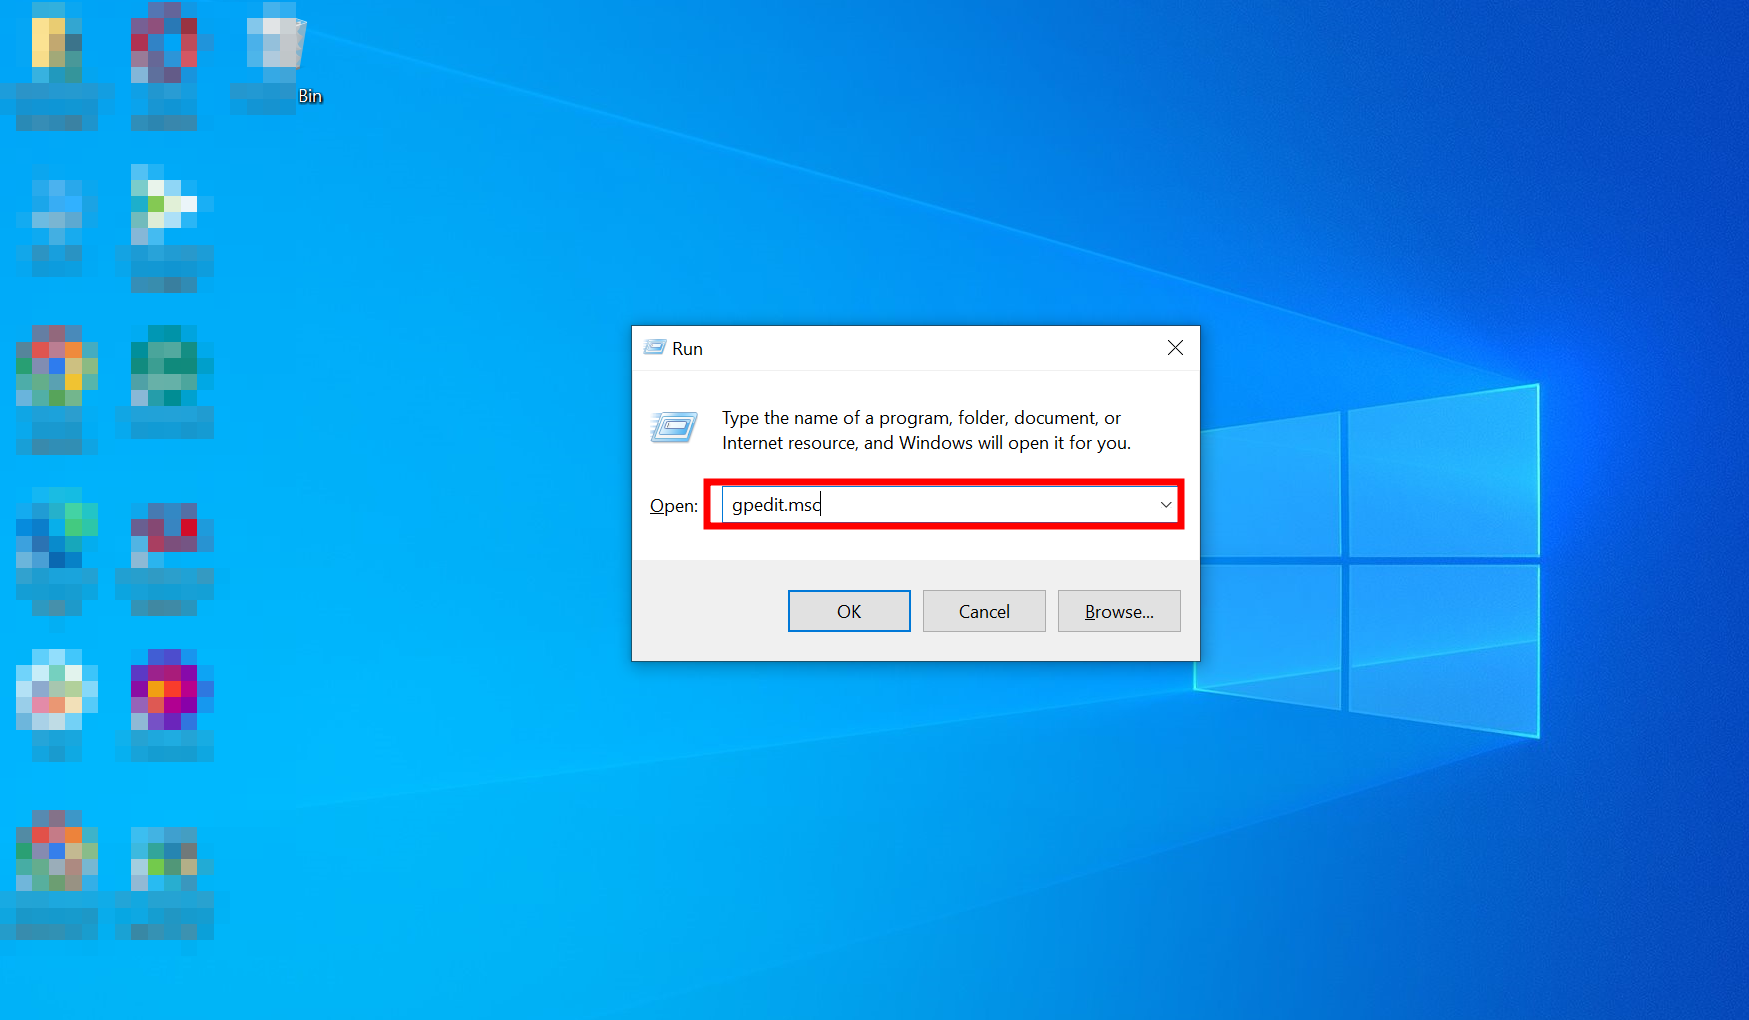
Press Win+R - Navigate to User Configuration, then Administrative Templates, and finally Desktop.
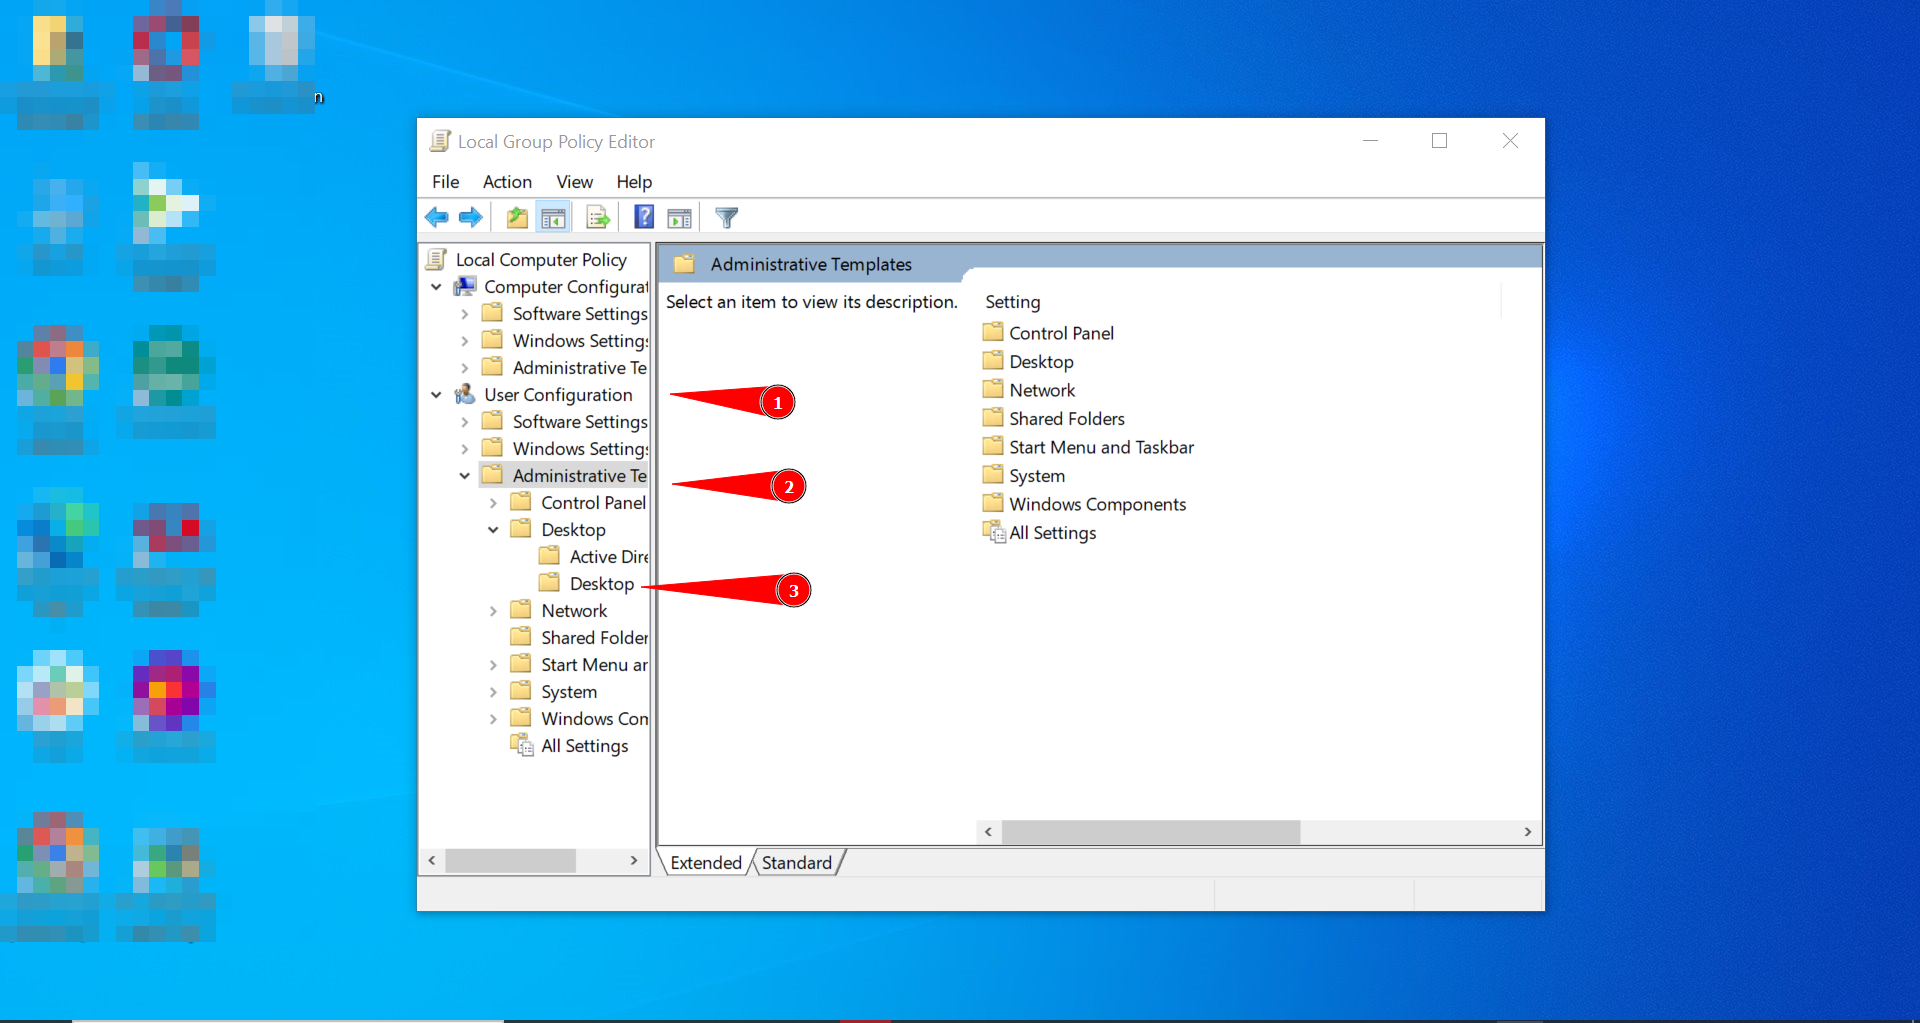
Go to Desktop section from User Configuration - Look for a setting that says “Remove Recycle Bin icon from desktop” or something similar.

Look for Remove Recycle Bin icon from desktop - To activate this setting, double-click on it, change it to “Enabled,” and then click “OK.”
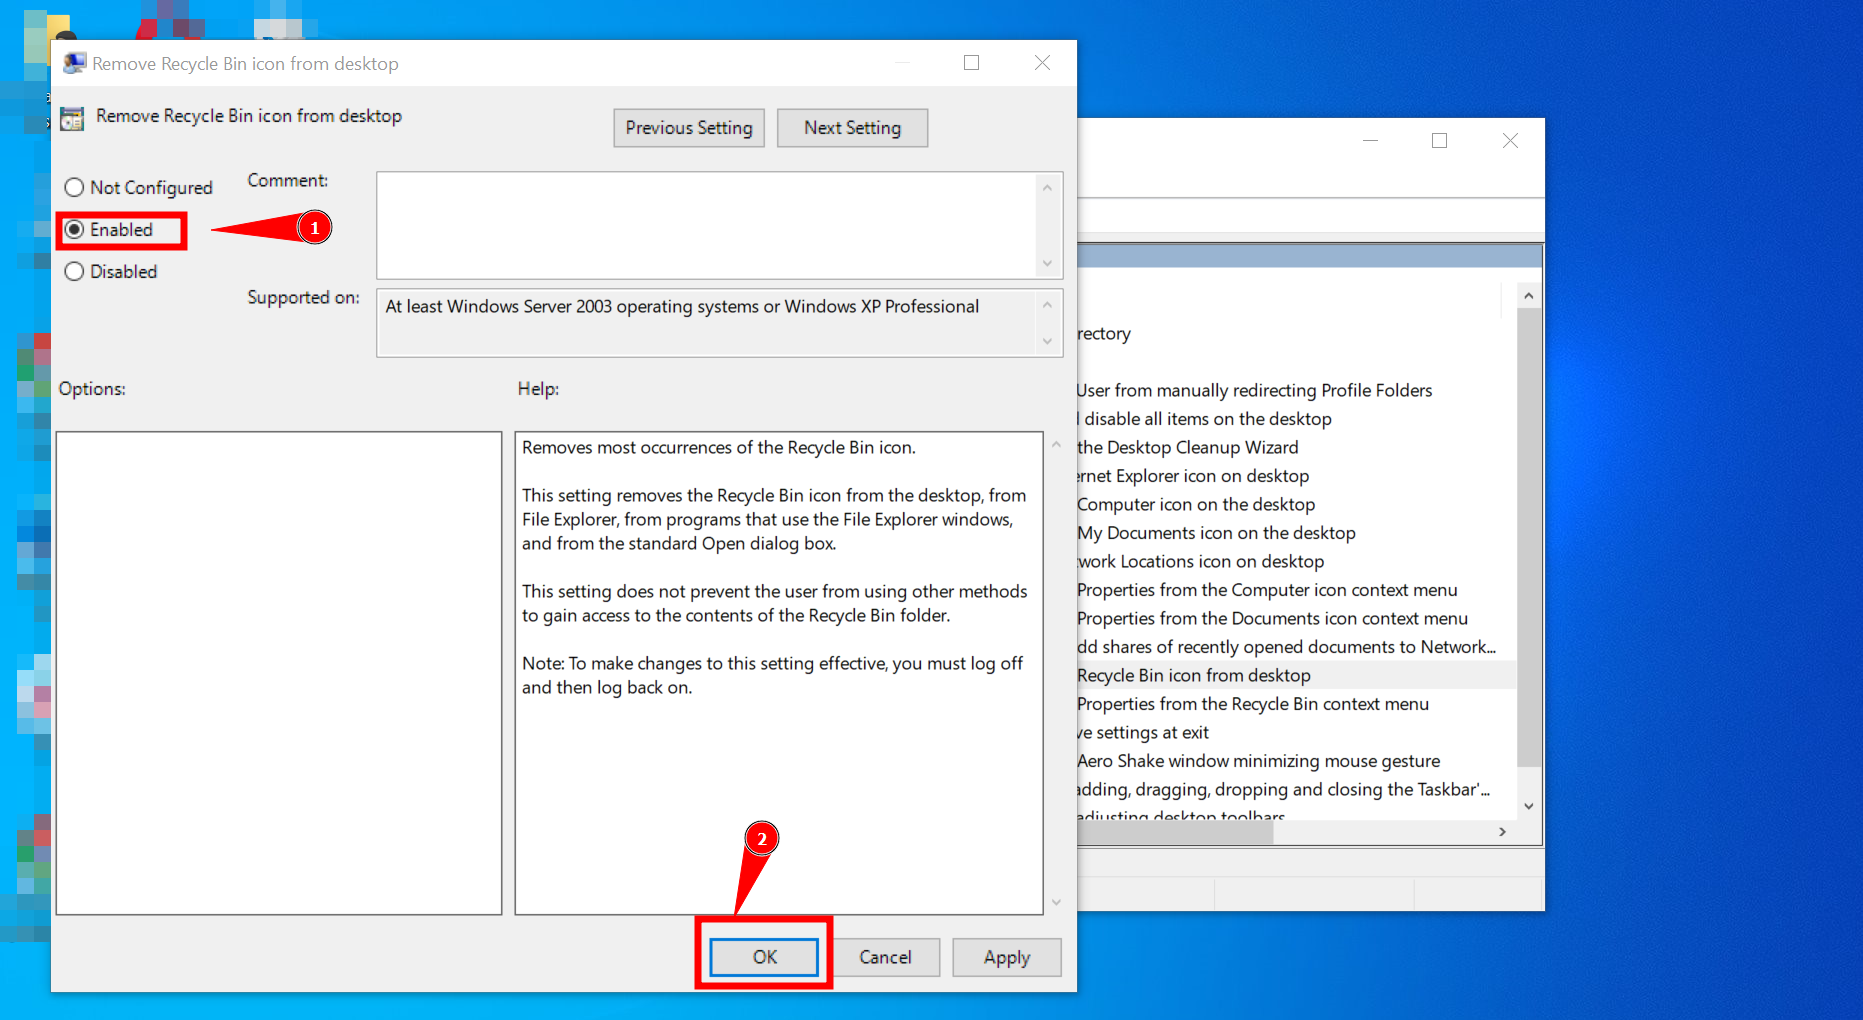
Enable the Setting
You might need to restart your computer or log out and log back in to see the changes. Remember that this method works on all versions of Windows, including Windows 7, 8, and 8.1.
Method 3. Remove Recycle Bin with Registry in Windows 10
Another way to hide the Recycle Bin icon from your Windows 10 and 11 desktop is by using the Registry Editor. Before you start, it’s a good option to back up your Windows registry to avoid any problems with your computer.
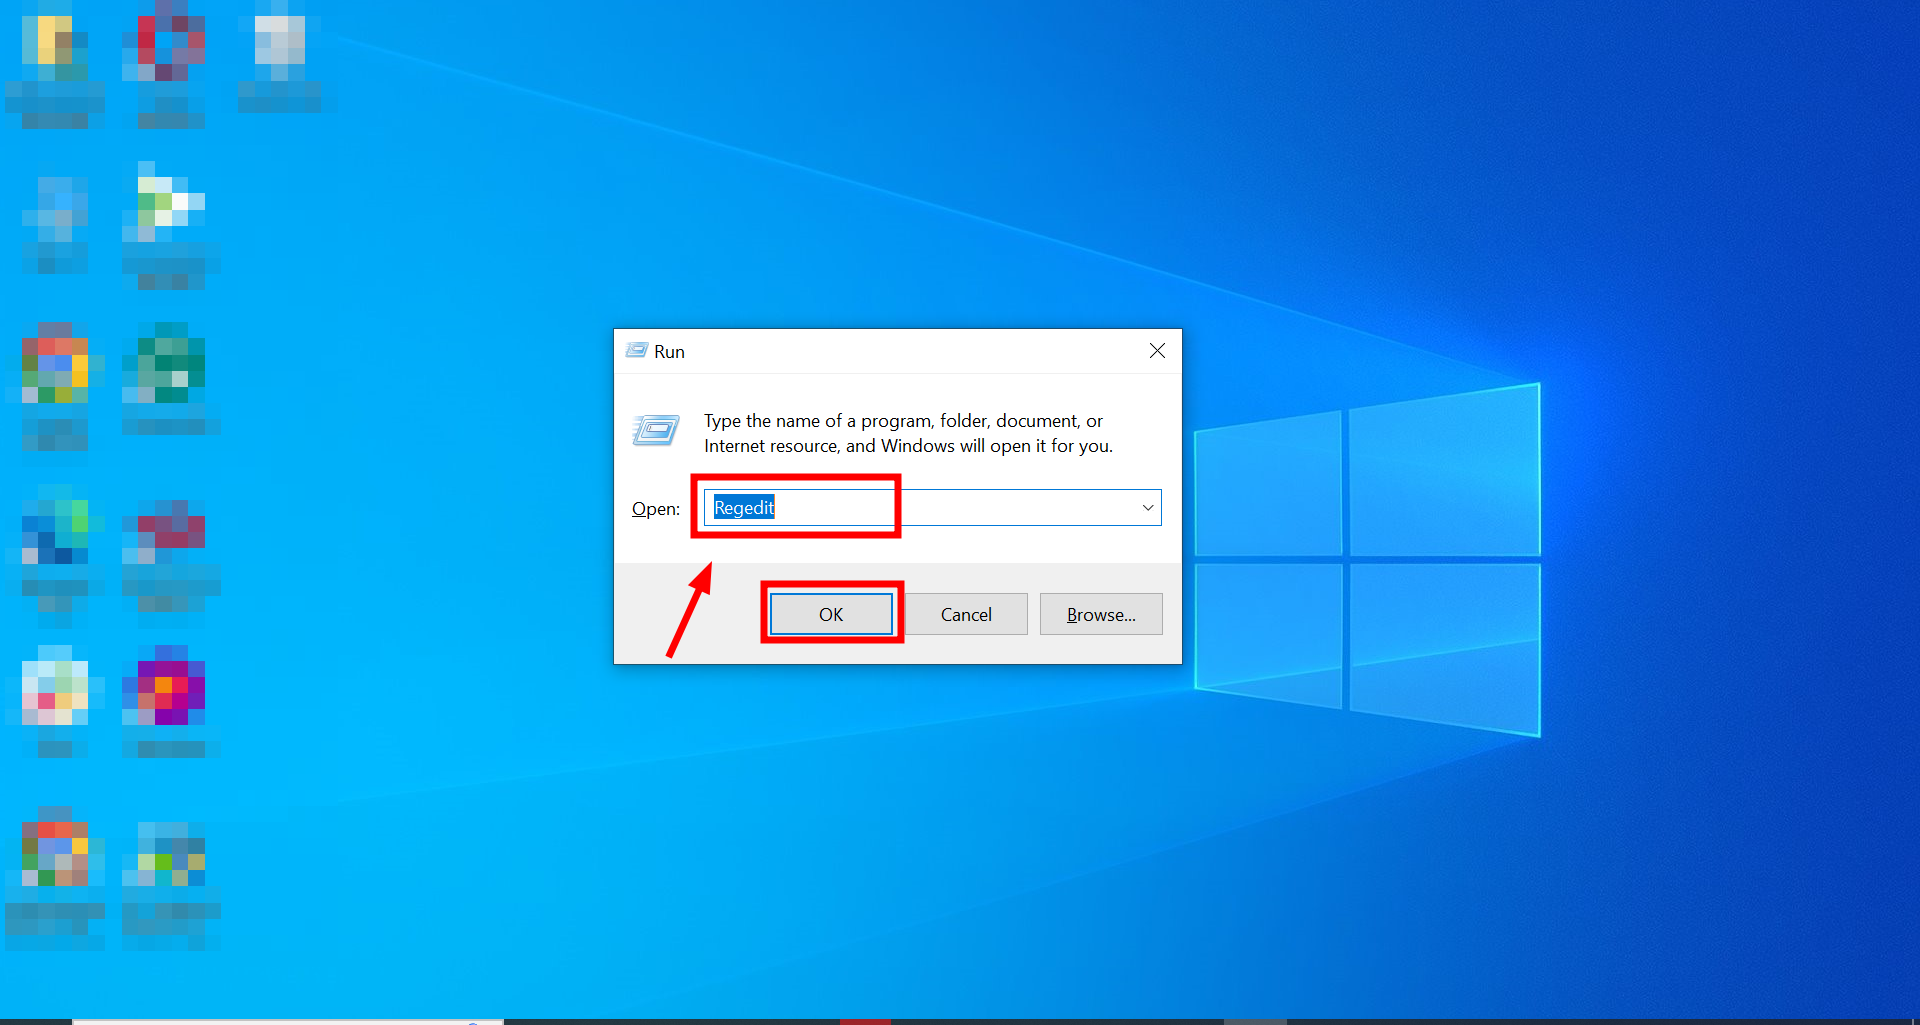
- Press the Windows key and R together to open the Run Type “Regedit” in the box and click “OK” to open the Registry Editor.
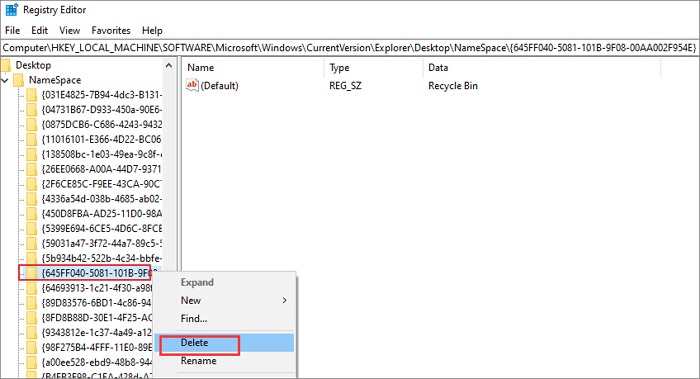
HKEY_LOCAL_MACHINE\SOFTWARE\Microsoft\Windows\CurrentVersion\Explorer\Desktop\NameSpace.
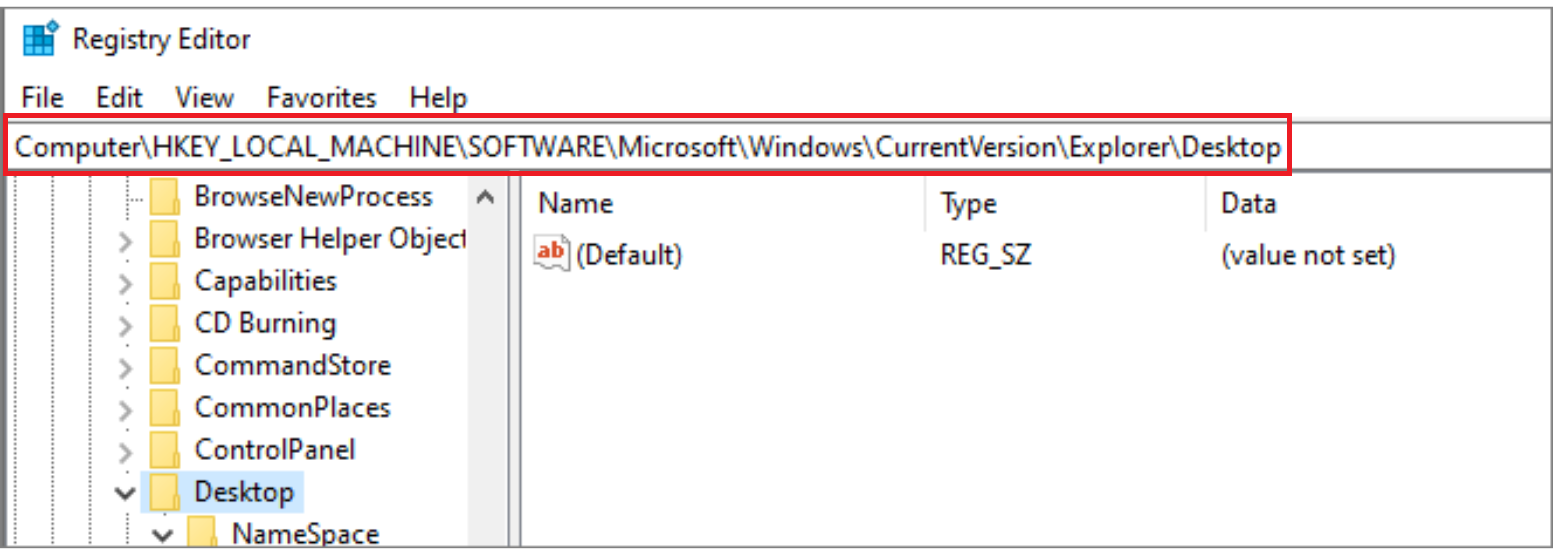
- Look for the registry key named “645FF040-5081-101B-9F08-00AA002F954E” and delete it.
After you’re done, close the Registry Editor and restart your computer. The Recycle Bin icon should no longer be on your desktop when it turns back on.
Remove Recycle Bin from the Desktop in Windows 7 and 8
Removing the Recycle Bin icon from your Windows 7 and 8 desktop is a simple way to make your desktop look neater and more organized. You’ll need to follow similar steps on both Windows 7 and 8. Here’s how to do it:
- If you’re using Windows 7 or 8, you are probably already on the desktop. In Windows 8.1, click on the “Desktop” tile from the main menu or press “Windows + D” to go straight to the desktop. Once there, right-click anywhere and choose “Personalize” to open the Personalization control panel.
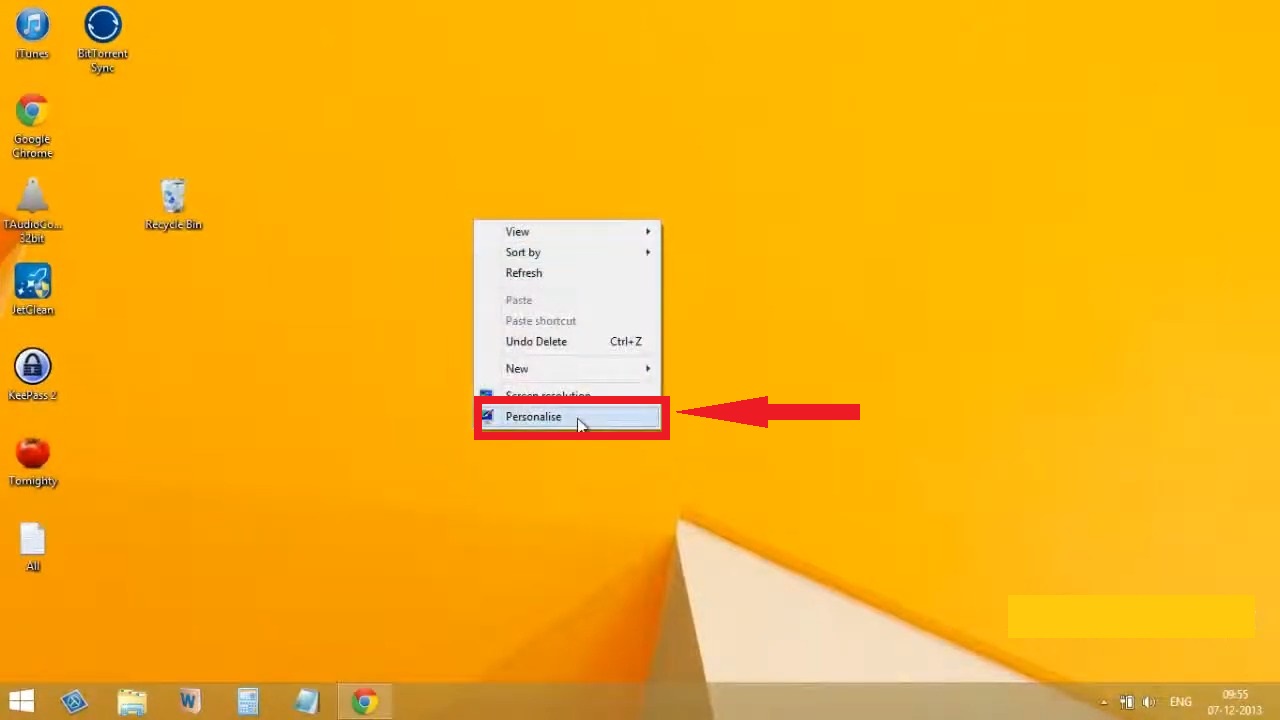
Right click anywhere and choose Personalize - On the left of the Personalization window, click “Change desktop icons.”
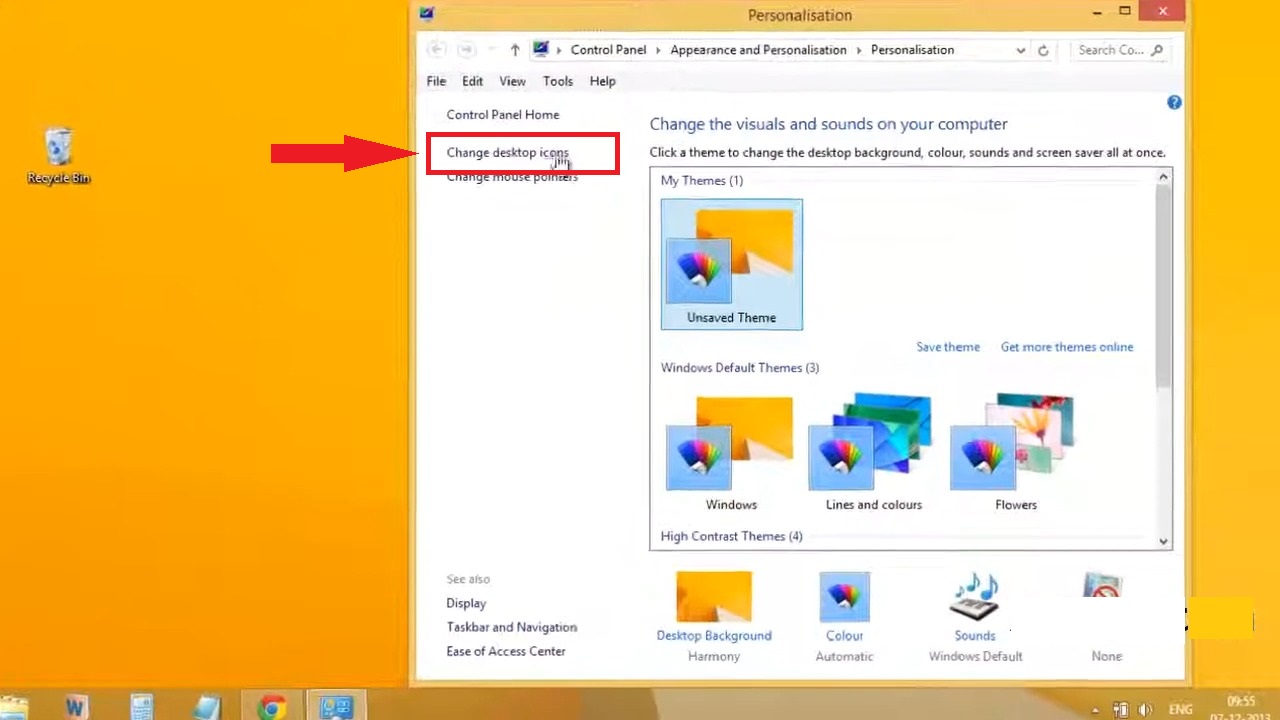
Click on Change desktop icons - Look for the “Recycle Bin” option in the Desktop Icon Settings window and uncheck its box.
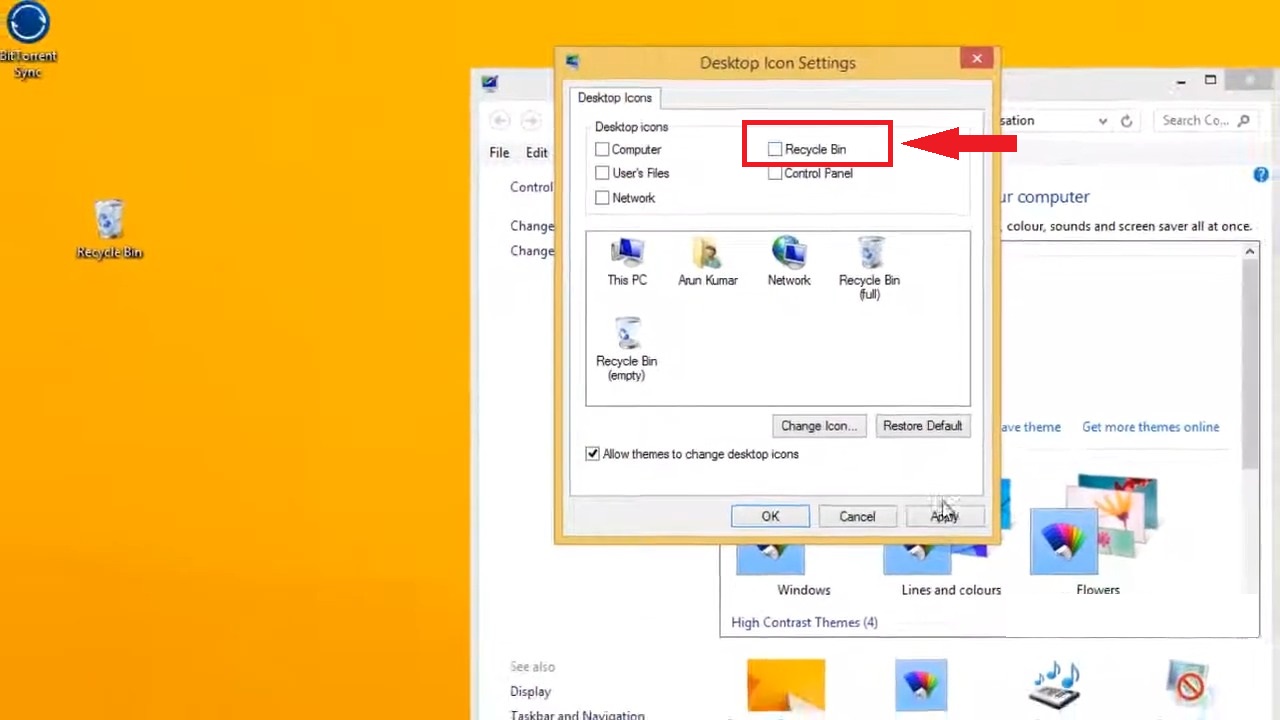
Uncheck Recycle Bin Box - After that, click “Apply” and then “OK.” This will remove the Recycle Bin icon from your desktop.
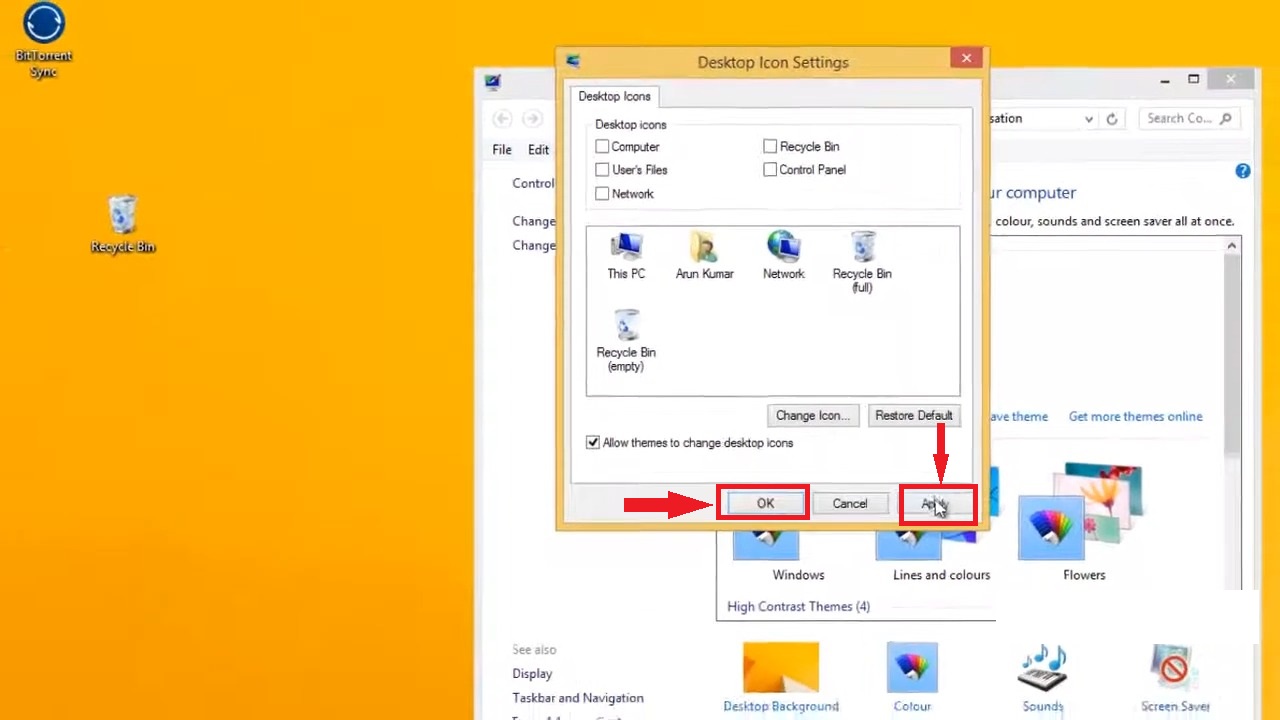
Click Apply and then OK
Restoring the Recycle Bin Icon on your Desktop
Restoring the Recycle Bin icon on your desktop in Windows is an easy process, and it follows the same steps as when you removed it on every Windows version:
- Right-click on your desktop and select “Personalize” to open the Personalization settings. In the Personalization window, click on “Desktop icons settings.”
Click on desktop icon Settings - You must check the box next to “Recycle Bin” in the Desktop icon settings.
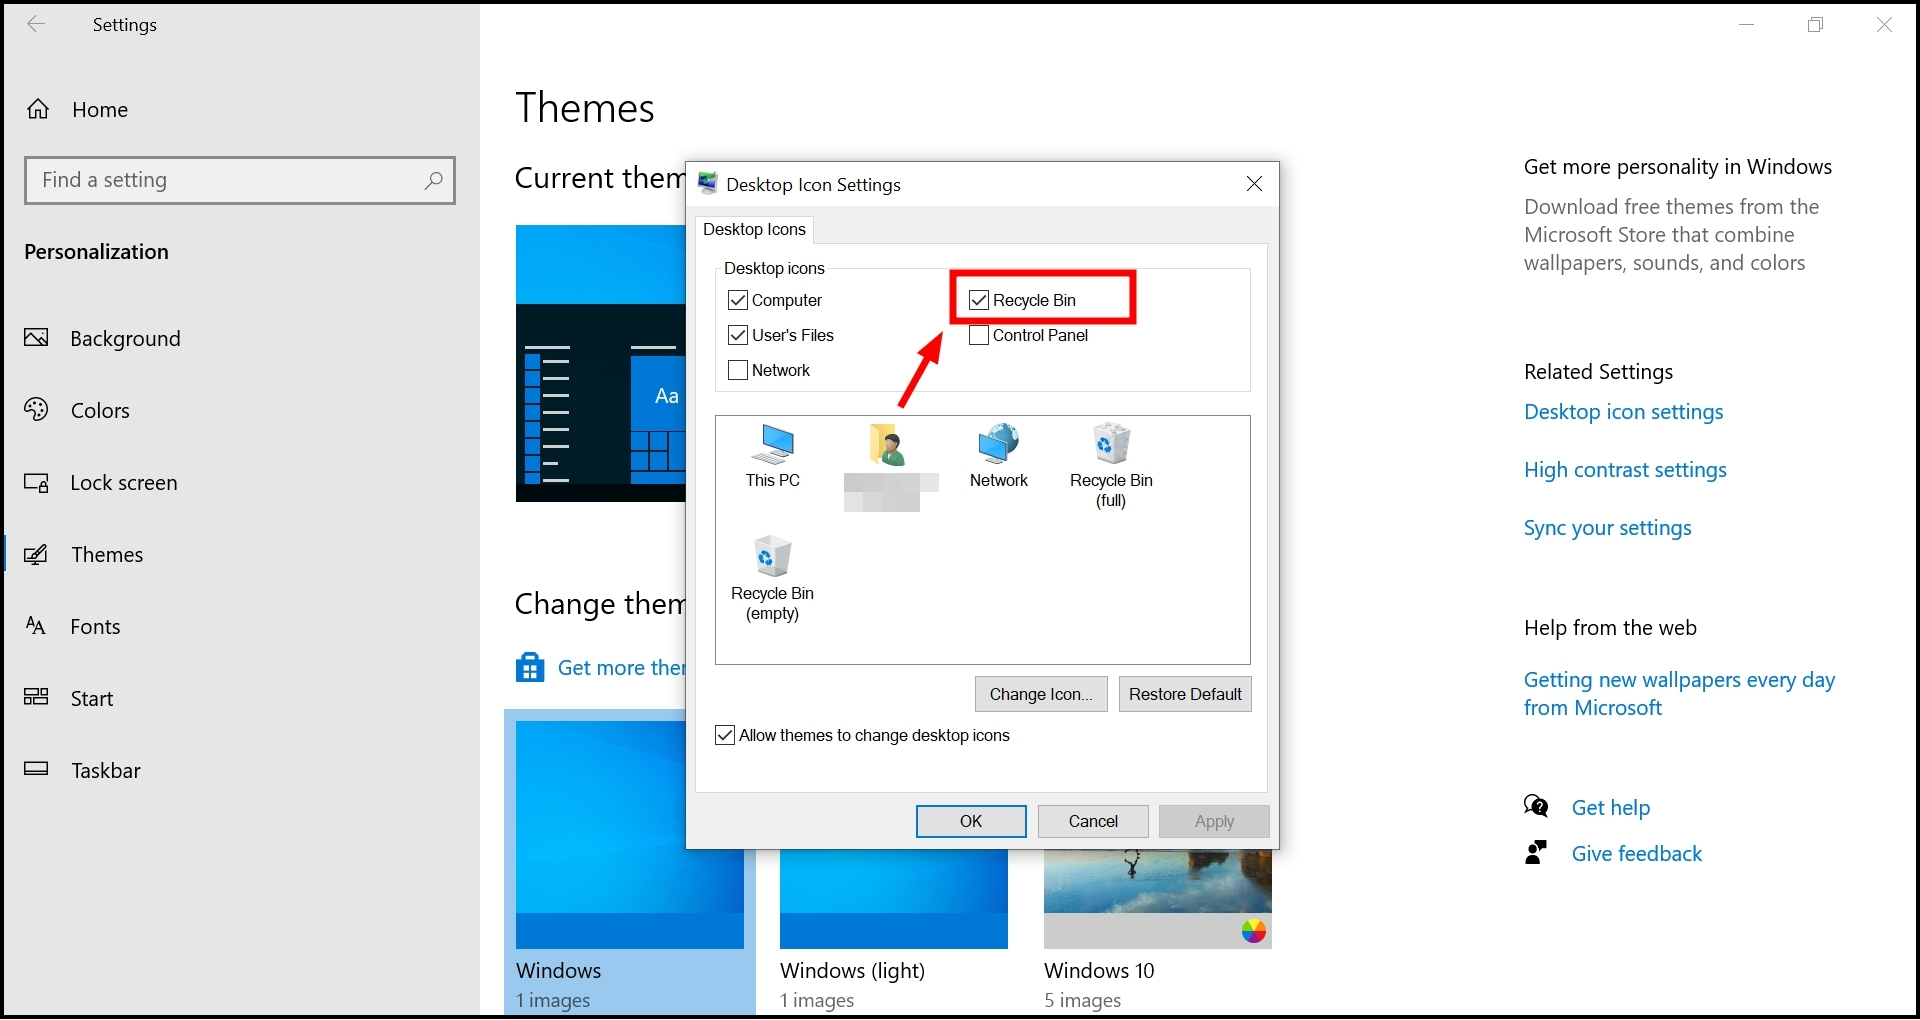
Check the box next to Recycle Bin - Then, click “Apply” and “OK.”
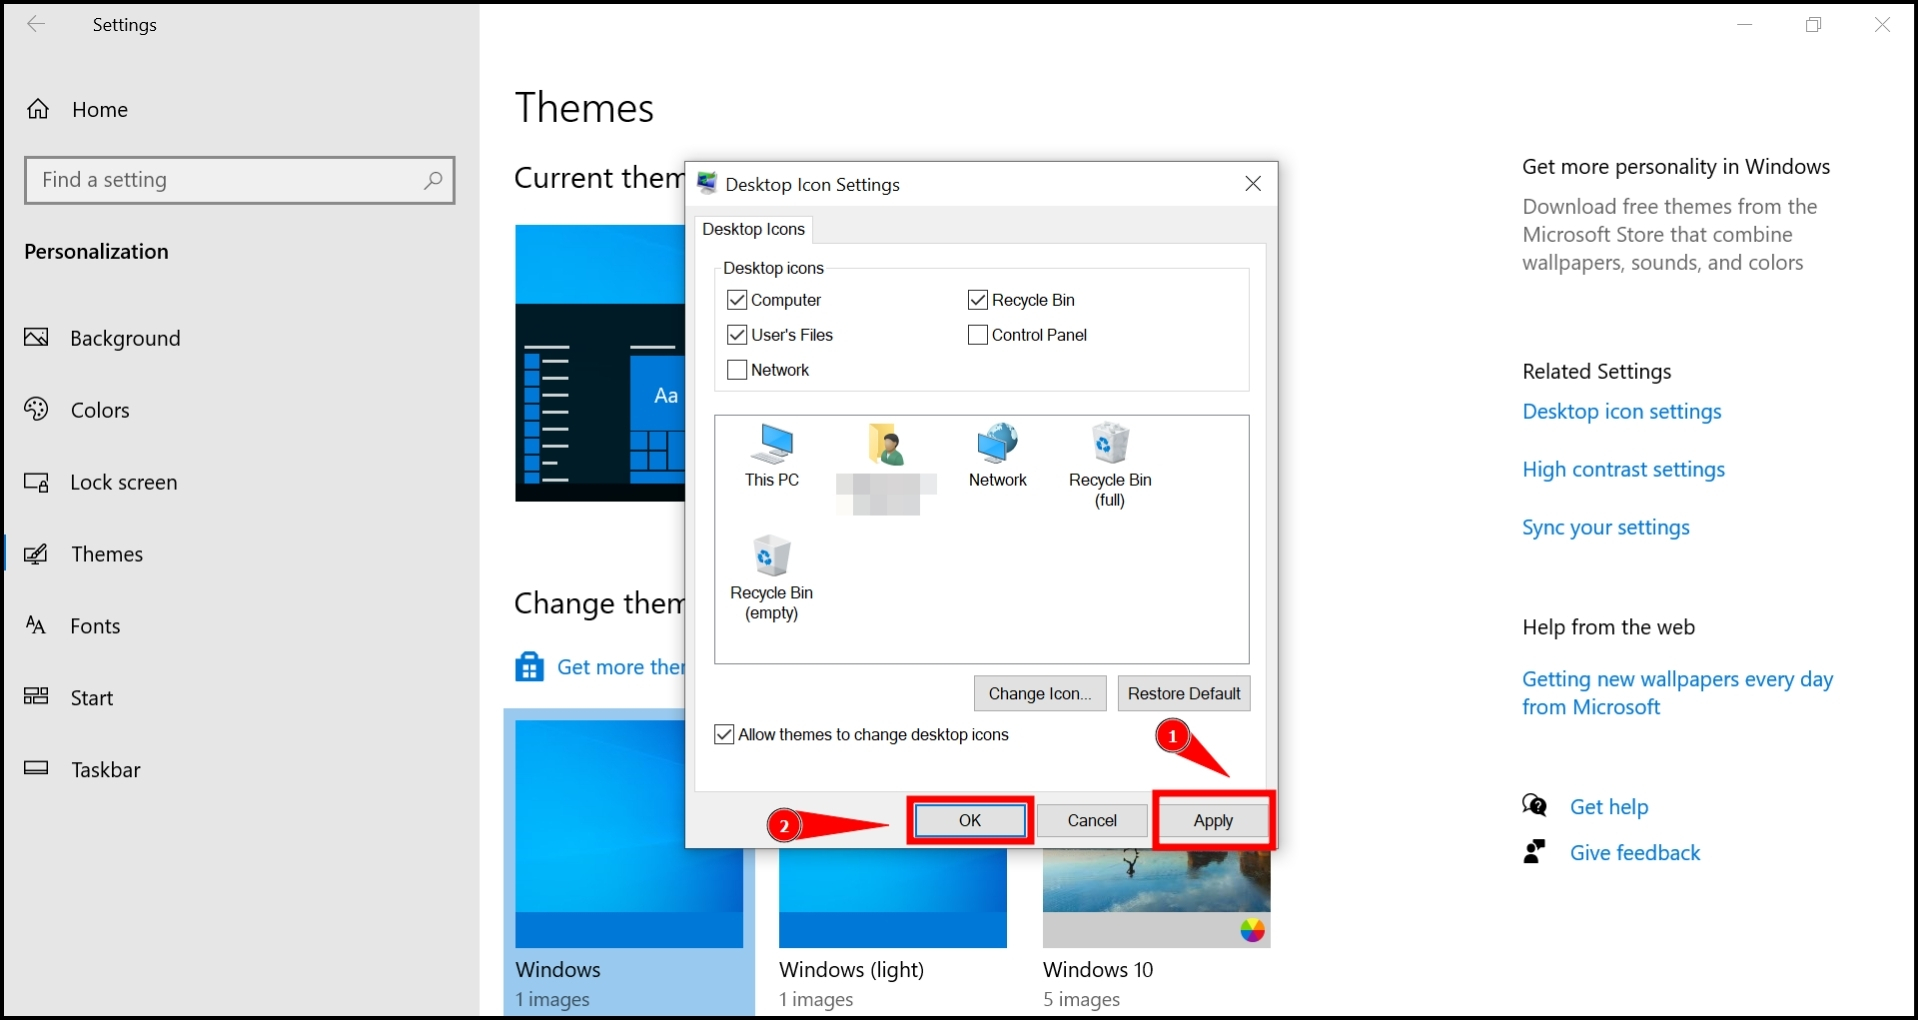
Click Apply and OK
After these steps, the Recycle Bin icon will be back on your desktop like before.
Reviewed by Huzaifa Haroon


