How to Manage and Delete Autofill Entries in Google Chrome?
Google Chrome features an auto-fill capability that automatically populates forms with saved information, such as URLs, usernames, addresses, passwords, and payment details. When users input new information on forms, Chrome may request permission to save this data. Nonetheless, in situations where multiple individuals share a browser, some may prefer to remove certain auto-fill entries. This article will guide you through the process of deleting auto-fill information from Google Chrome.
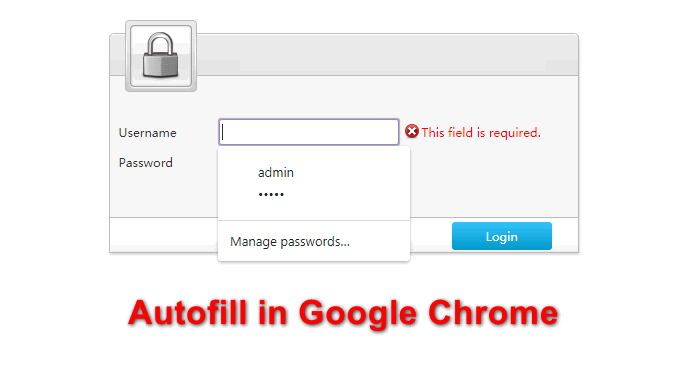
Situation 1. Removing URL Autofill Entries
Google often retains search terms and URLs, allowing users to quickly revisit them. Many websites also retain usernames and passwords, suggesting them upon subsequent logins. To delete particular auto-fill entries related to a specific search engine or website, follow these steps.
- Launch Google Chrome and click on the Search bar. Start typing to view the auto-fill suggestions that appear below.

Searching the keyword in Google Search - Navigate to the desired auto-fill entry using the arrow keys. Press Shift + Del simultaneously to delete it. If your keyboard lacks a Delete key, use Shift + Backspace instead.
Note: On a laptop keyboard, the combination may be Shift + Fn + Del or Shift + Fn + Backspace.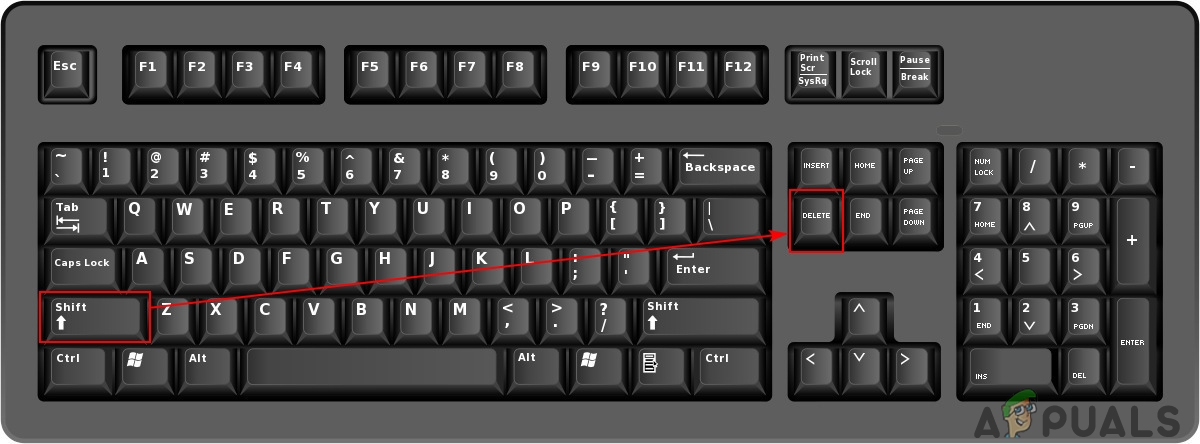
Removing an Autofill entry - Repeat this process for each auto-fill entry you wish to remove.
Chrome provides an option to clear all browser cache data, including history and most saved information. To delete auto-fill data alongside cache data, perform the following steps:
- Open Google Chrome and access the menu by clicking the three dots in the top right corner. Select More Tools followed by the Clear browsing data option.
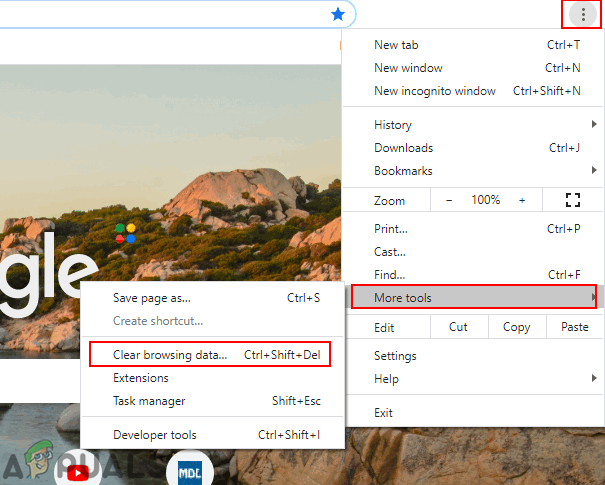
Opening the clear browsing data option - Switch to the Advanced tab. Choose a Time range and tick the Autofill form data checkbox.
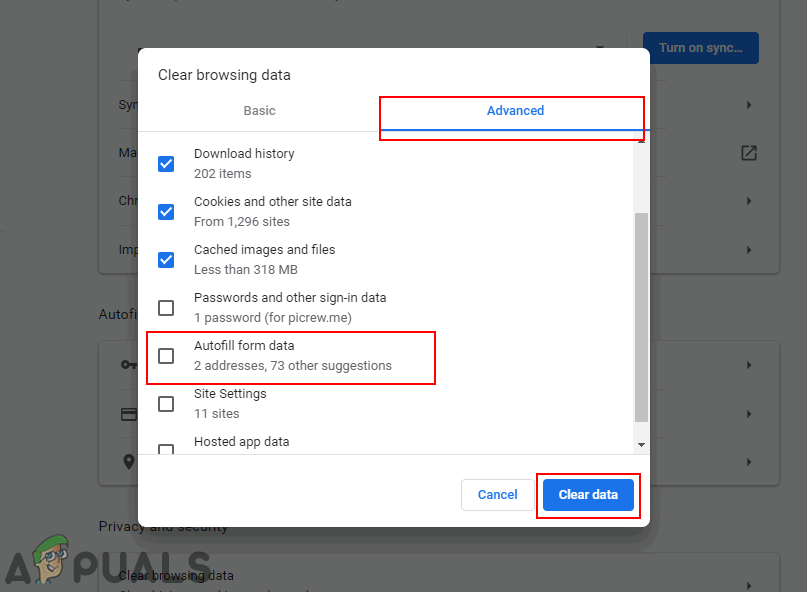
Selecting the Autofill option and removing data from Google Chrome - Click Clear Data to eliminate all the auto-fill entries from Chrome.
Situation 2. Removing Autofill Passwords from Google Chrome
Websites often save passwords, enabling hassle-free logins. Chrome usually asks whether to save passwords. You can view and delete these saved passwords by following these steps:
- In your Chrome browser, click the menu icon at the top right and select Settings.
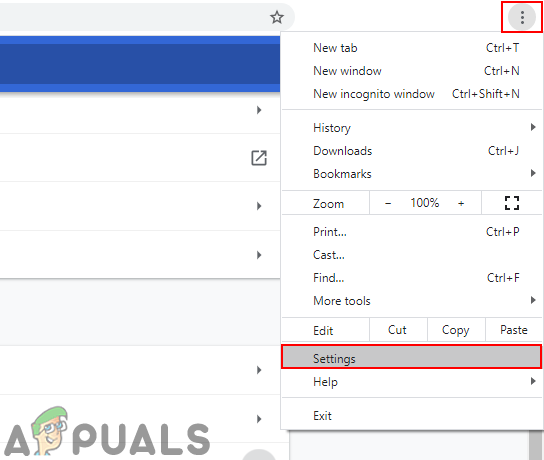
Opening the Google Chrome settings - Scroll to the Autofill section and click on Passwords.
Note: This area also allows you to remove saved payment and address information.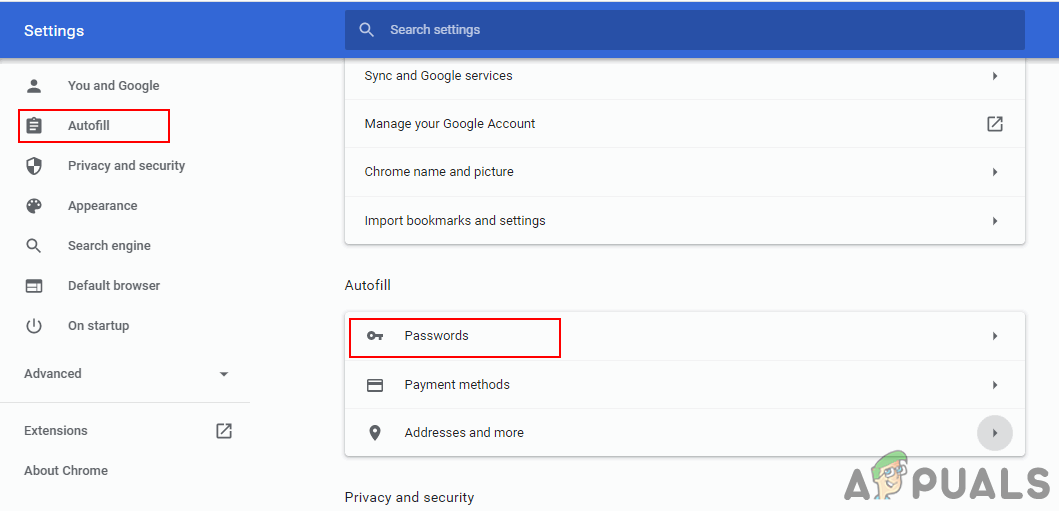
Accessing the Autofill Passwords option - Next to the password you wish to remove, click the three dots menu and choose Remove.
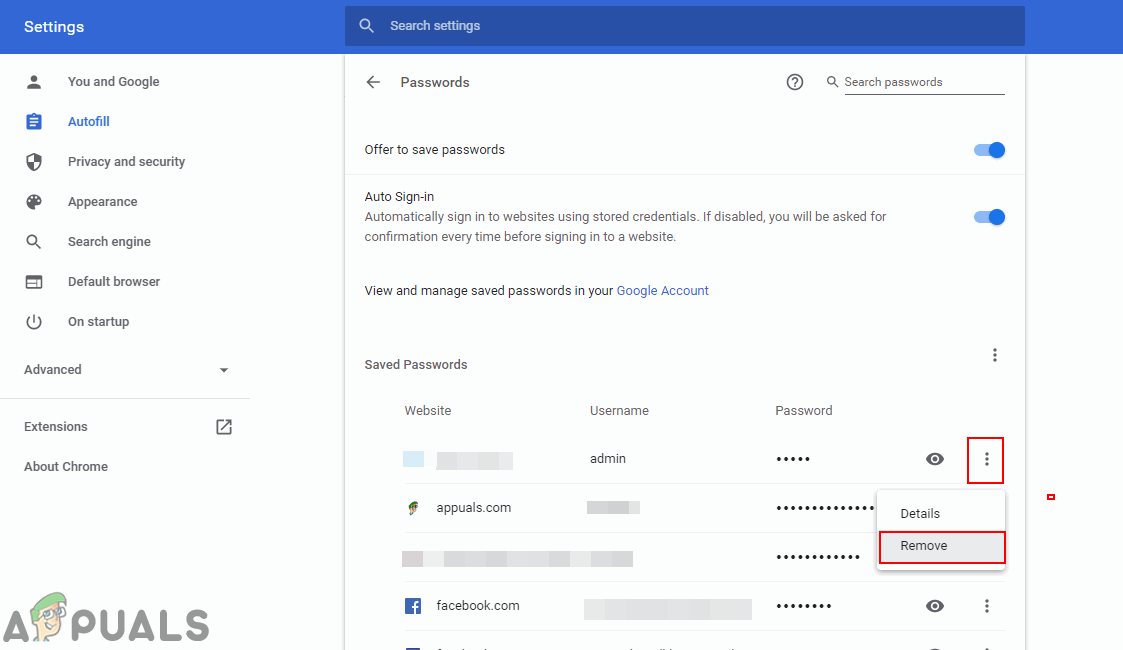
Deleting saved passwords from Google Chrome - The saved password will be removed, and it will no longer auto-fill during future login attempts.


