How to Remove Addresses from the Auto-Complete List Windows Mail App?
The auto-complete list in the Windows 10 Mail app (like any other application) is quite helpful for users to avoid the typing of the full address or typos. But the issue arises, when the user has already made a typo (which shows in the autocomplete list) or wants to remove an entry from the auto-complete list.
In the Mail app, things are not as simple as selecting and deleting the contact (like many other applications) as the Mail app generates the list from the received/sent email messages or the People app.
You can try the undermentioned solutions to delete AutoComplete in Windows 10 Mail app but before that, it will be a good idea to create a system restore point and backup the Contacts of the Microsoft People app.
Solution 1: Update the Windows, Mail App, and People App of Your System
The auto-complete list issue may arise if the Windows, Mail app, and People app of your system are outdated as it can create incompatibility between the OS modules. In this case, updating the Windows, Mail app and People app may solve the problem.
- Manually check for Windows updates of your system (including the Optional updates) and check if the issue is resolved.
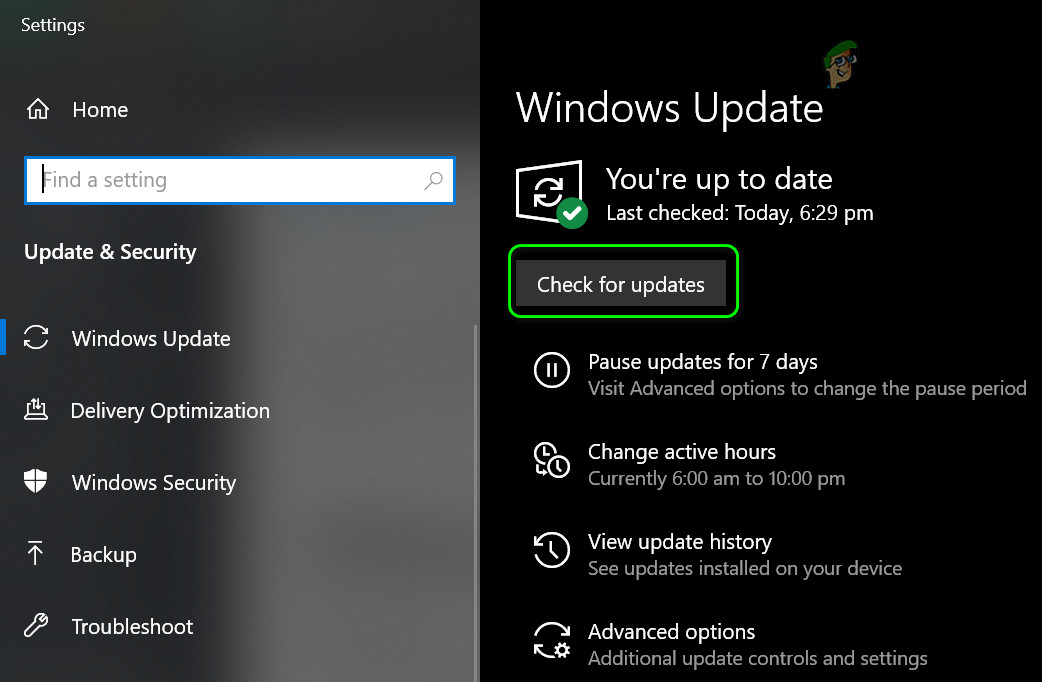
Check for the Windows Updates - If not, press the Windows key and in the search box, type: Mail. Then, right-click on the result of the Mail app and choose Share.
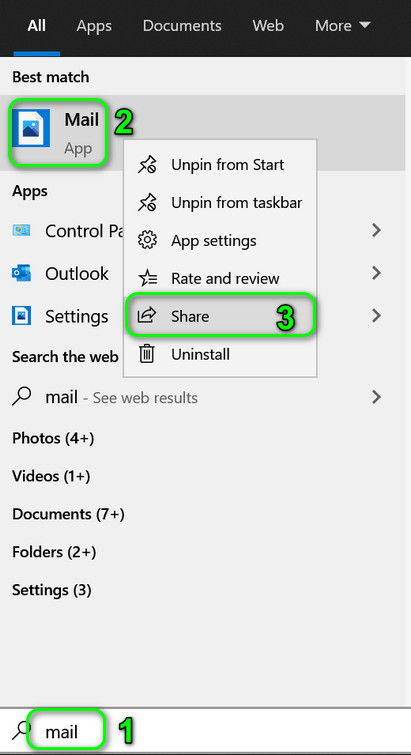
Right-click on Mail and select Share - Now, the Microsoft Store’s page of the Mail and Calendar app will be opened. If sharing screen is shown, skip it and then check if an update of the Mail app is available. If so, then update the Mail app.

Update the Windows 10 Mail App - Then, check if the auto-complete issue is resolved.
- If not, launch a web browser and navigate to the page of the People app in the Microsoft Store.
- Now click on the Get button and then in the dialogue box, choose Open Microsoft Store.
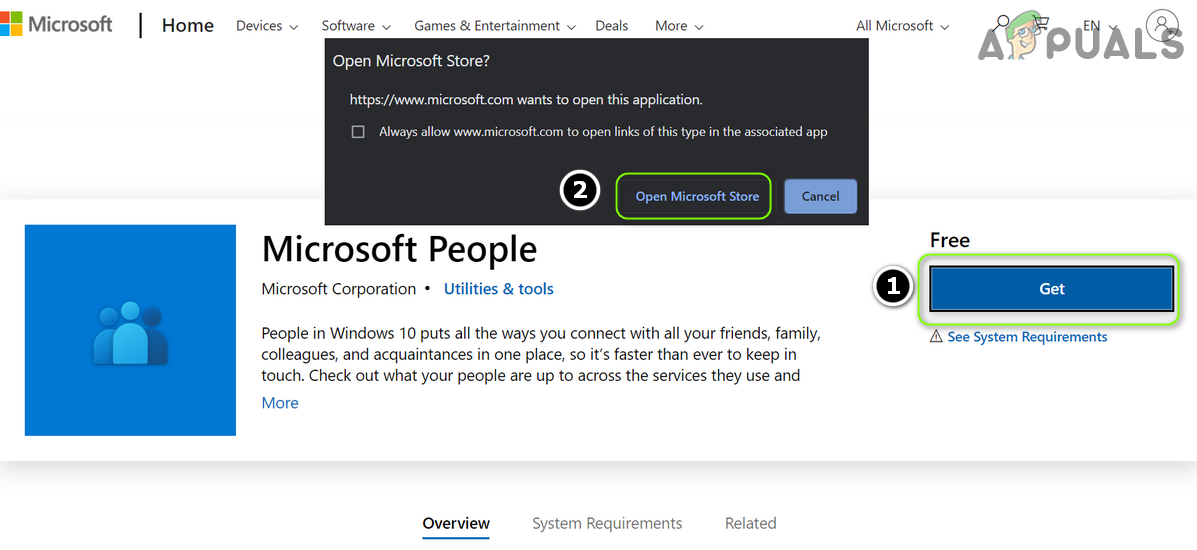
Open the Microsoft Store Page of the Microsoft People App - Then, in the Microsoft Store, check if the People app has an update available. If so, then update the People app and check if the Mail app is clear of the auto-complete issue.
Solution 2: Remove and Read the Problematic Account to the Mail App
The issue could be a result of a communication glitch between the email account server and your PC. In this case, removing the problematic email account and then adding it back to the Mail app may solve the problem. But before removing the account, make sure you have the credentials available.
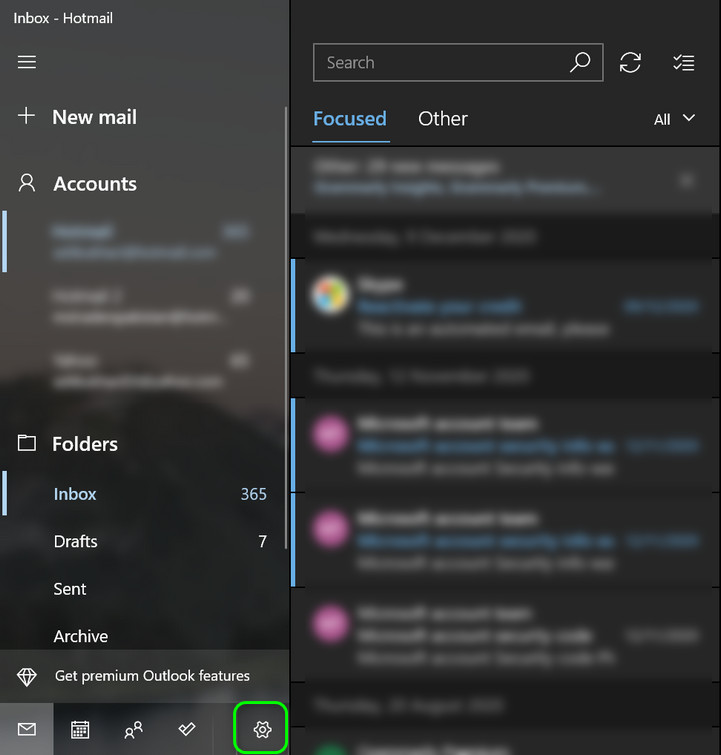
- Launch the Mail app and in the left pane (near the bottom of the pane), click on Settings.
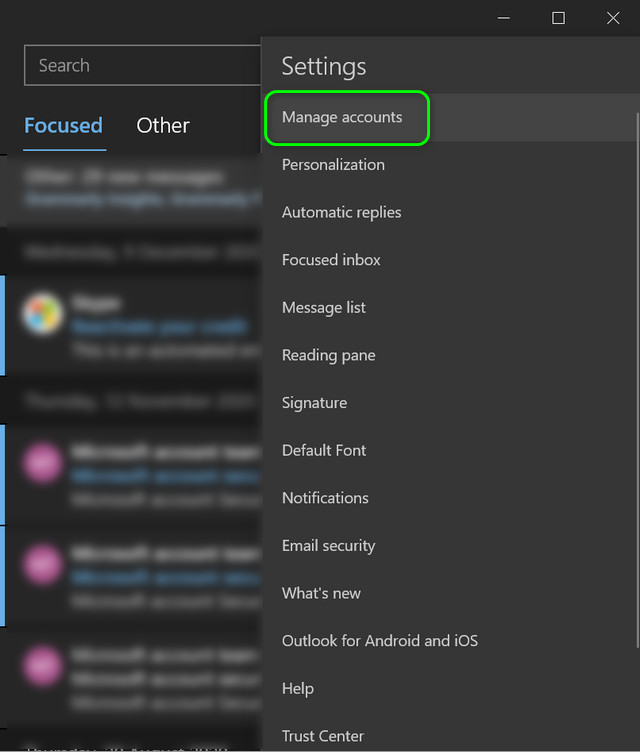
Open Settings of Windows 10 Mail App - Then, in the right pane, open Manage Accounts and select the problematic account.
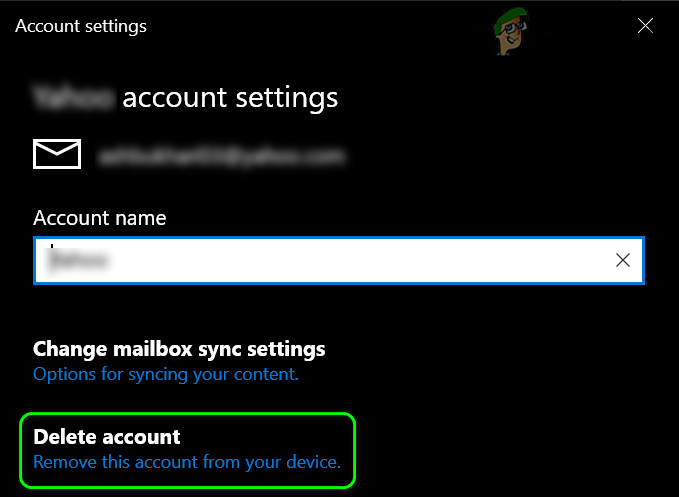
Open Manage Accounts in the Settings of the Mail App - Now click on the option of Delete Account from This Device and then click on the Delete button to confirm the delete action.
Delete Account in the Windows 10 Mail App - Then reboot your PC and upon reboot, add the account back to check if the autocomplete issue is resolved.
Solution 3: Reset or Reinstall the Mail App
The addresses in the auto-complete list may keep popping up if the installation of the Mail app is corrupt. In this context, resetting or reinstalling the Mail app may solve the problem. But before proceeding, make sure that you have the credentials of the accounts (added to the Mail app) are available.
Reset the Mail and Microsoft People Apps
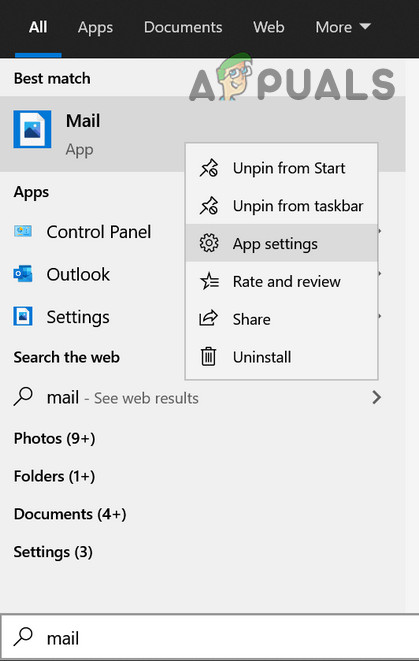
- Press the Windows key and in the search, type: Mail. Now, in the right pane of the window, select App Settings.
Open App Settings of the Mail App - Now click on the Terminate button (you may scroll a bit) and then click on the Reset button.
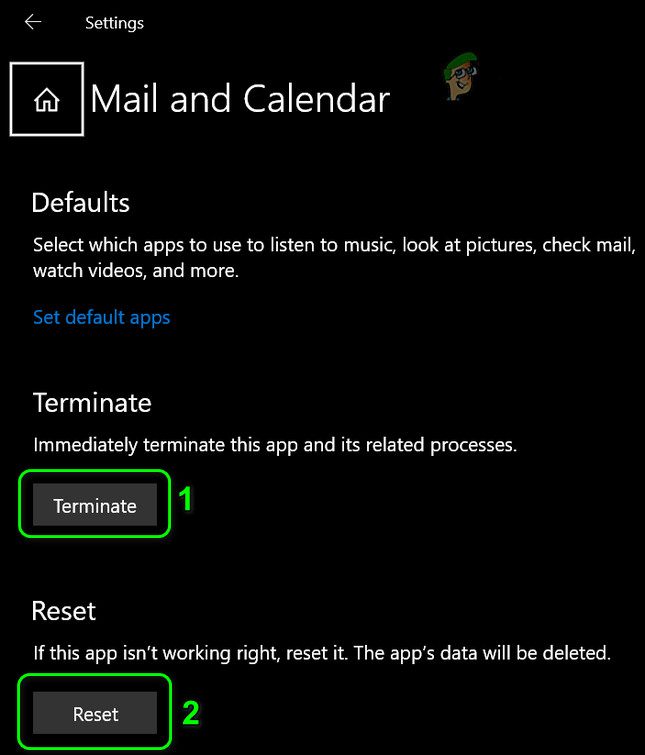
Terminate and Reset the Mail App - Then confirm to reset the Mail app and reboot your PC.
- Upon reboot, check if the auto-complete issue is resolved.
- If the issue persists, then check if resetting the Microsoft People and Mail apps (in the Apps & Features) resolves the issue.
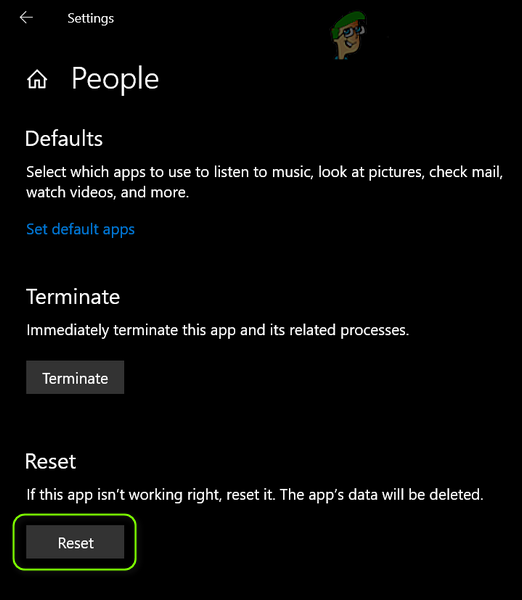
Reset the Microsoft People App
Reinstall the Mail App
- If the issue persists, launch the Quick Access menu (by right-clicking the Start menu button) and choose Windows PowerShell (Admin).
- Then, execute the following:
get-appxpackage *microsoft.windowscommunicationsapps* | remove-appxpackage

Uninstall the Mail App Through the PowerShell - Now reboot your PC and reinstall the Mail app (you may have to reinstall the Peoples app as well) through the Microsoft Store to check if the auto-complete is working fine.
Solution 4: Use the Web Portal of the Email Provider
The auto-complete entry shown by the Mail app may have been collected from the email provider’s server and is not available locally. In this scenario, deleting the auto-complete entry from the web portal of the email provider may solve the problem. For illustration, we will discuss the process for Outlook.com. Make sure Windows mail is closed, then proceed.
- Firstly, Reset the Mail app to the defaults (as discussed in solution 3).
- Then, launch a web browser and navigate to the Outlook website.
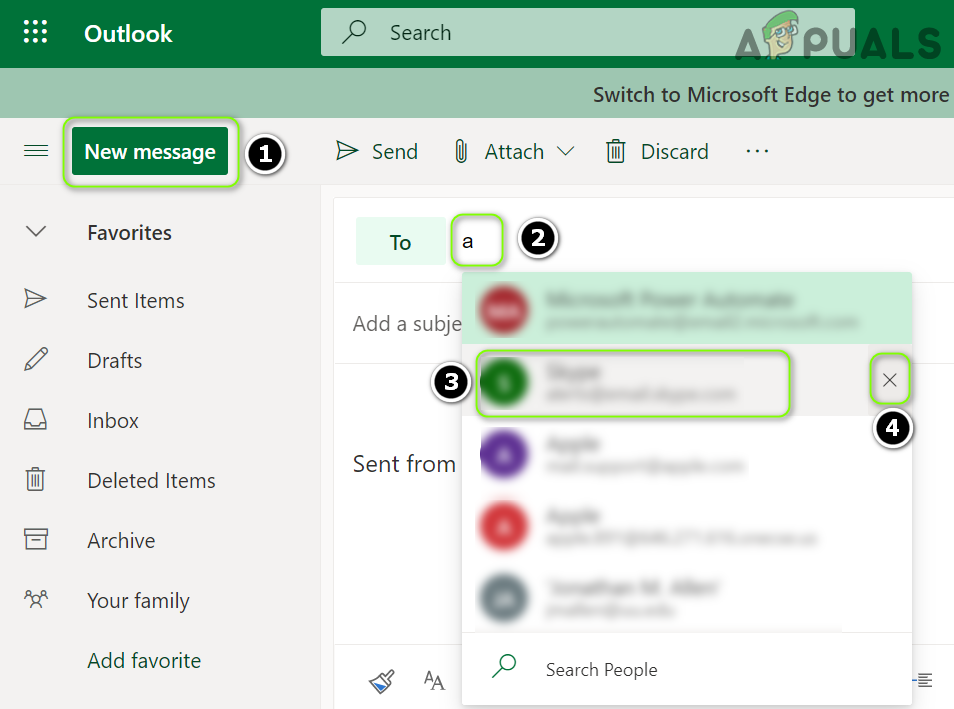
- Now, log in using your credentials and click on the New Message button.
- Then, in the To field, type the problematic email address and then hover your mouse over the address in the auto-complete list.
- Now click on the cross icon (near the right of the address) and close the browser.
Delete the Problematic Contact in the AutoComplete of the Web Portal - Then reboot your PC and upon reboot, add the account back to the Mail app to check if the annoying entry is removed from the auto-complete list.
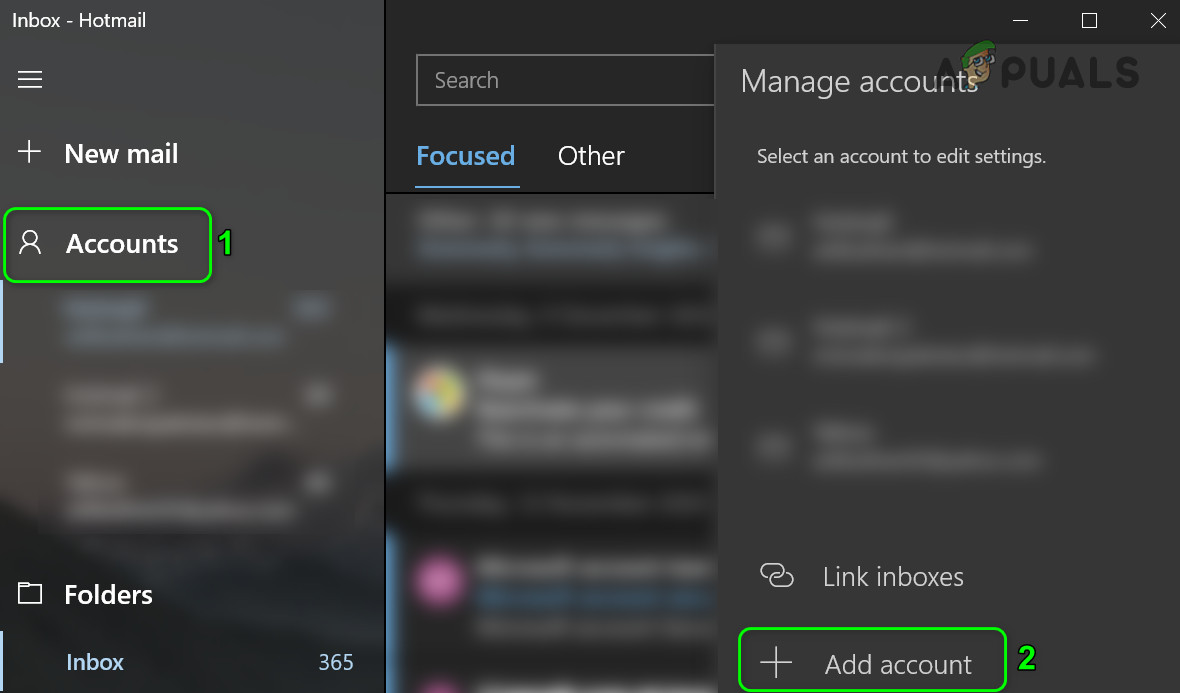
Add the Account to the Mail App
Solution 5: Find and Delete the Problematic Email in Your System’s Files
The cached database that is generating the auto-complete is buried down the OS modules and is not accessible (at least easily) to the end-user. In this case, deleting the entries relating to the problematic email address may solve the problem. But before proceeding, it is strongly recommended that you create a restore point of your system as the outcome of the suggested action may cause different issues for different users.
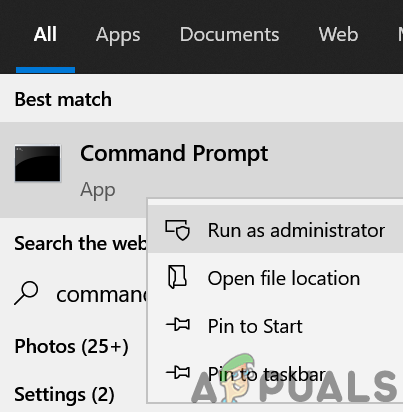
- Press the Windows key and in the search, type: Command Prompt. Then, hover your mouse over Command Prompt, and in the right pane of the menu, choose Run as Administrator.
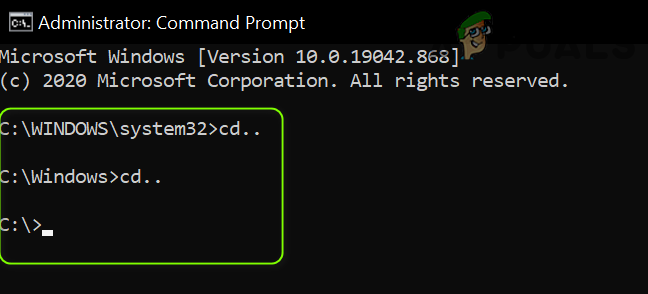
Open Command Prompt as Administrator - Now, something like the below will be shown in the Command Prompt window (where C is your system drive):
C:\Windows\system
- Then type “cd..” and press the enter key. Once again, repeat the same so that the Command Prompt shows something like below:
C:\
Change the Directory to the System Drive in the Command Prompt - Now execute the following (make sure to replace the abc@xyz.com with the problematic email):
findstr /s /i "abc@xyz.com" *.*>>"C:\theoutput.txt”
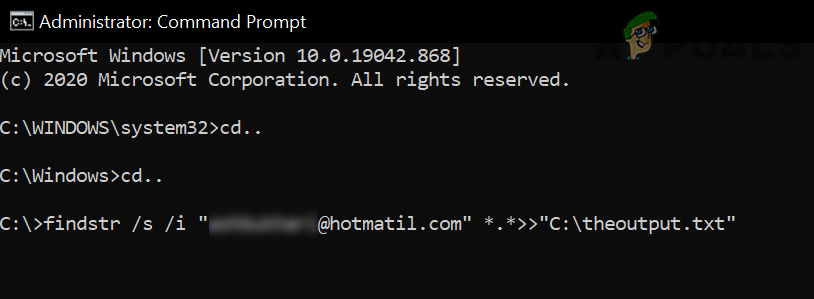
Find the Problematic AutoComplete Entry in the System Drive - Then wait till the Command Prompt shows C:\ and then open the system drive. If the out-of-memory error is shown, then repeat the above-mentioned command on the sub-directories of the C drive.
- Now double-click on theoutput.txt and check the location of the problematic email (use the Find in the Edit menu).
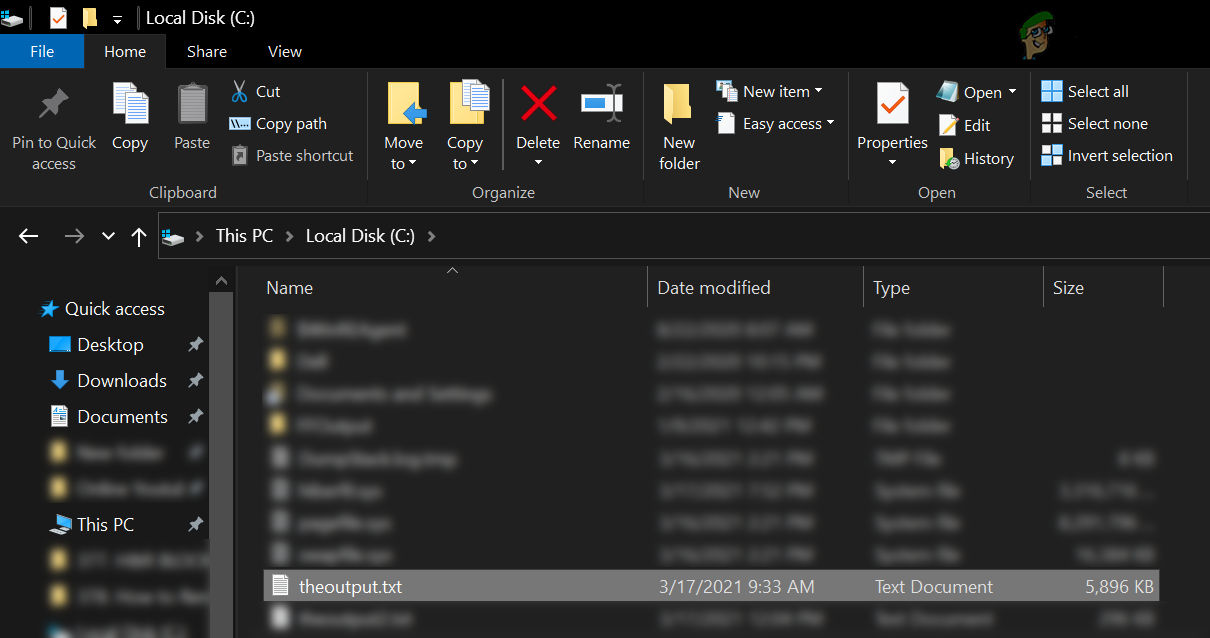
Open the Output File of the FindStr Command - Once the location of the problematic entry is found, navigate to it and then delete the entry (you may use the Notepad to open the file containing the entry).
- Then reboot your PC and check if the entry is removed from the auto-complete list.
Some users have reported that the problematic entry was located in the LocalProvider_None_default.txt and deleting it from the mentioned file solved their problem.
- Right-click on the Start menu button (to launch the Quick Access menu) and choose the ‘File Explorer’.
- Now, navigate to the following (copy-paste the address):
%localappdata%\Packages\Microsoft.People_8wekyb3d8bbwe\TempState\

Open the relevantContactsCache Folder - Then open the relevantContactsCache folder (if not present, move to step 7) and double-click on the LocalProvider_None_default.txt file.
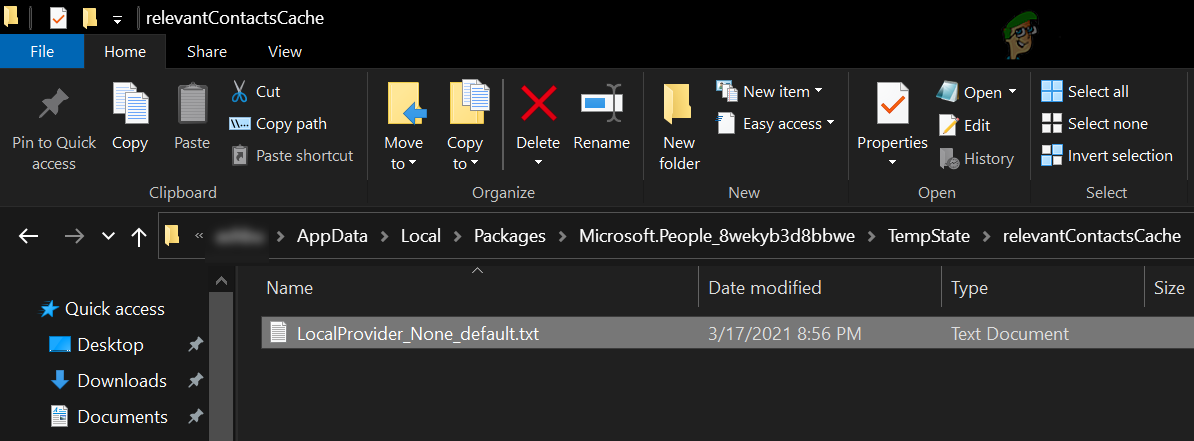
Open the LocalProvider_None_default.txt File - Now find and delete the problematic email address from the file and close the file after saving the changes.
- Then reboot your PC and check if the Mail app is operating fine.
- If not, then delete the LocalProvider_None_default.txt file (step 3) and reboot your PC to check if the autocomplete issue is resolved.
- If that did not do the trick, steer to the following path in the File Explorer:
%localappdata%\Packages\Microsoft.People_8wekyb3d8bbwe\
- Now right-click on the TempState folder and select Delete.
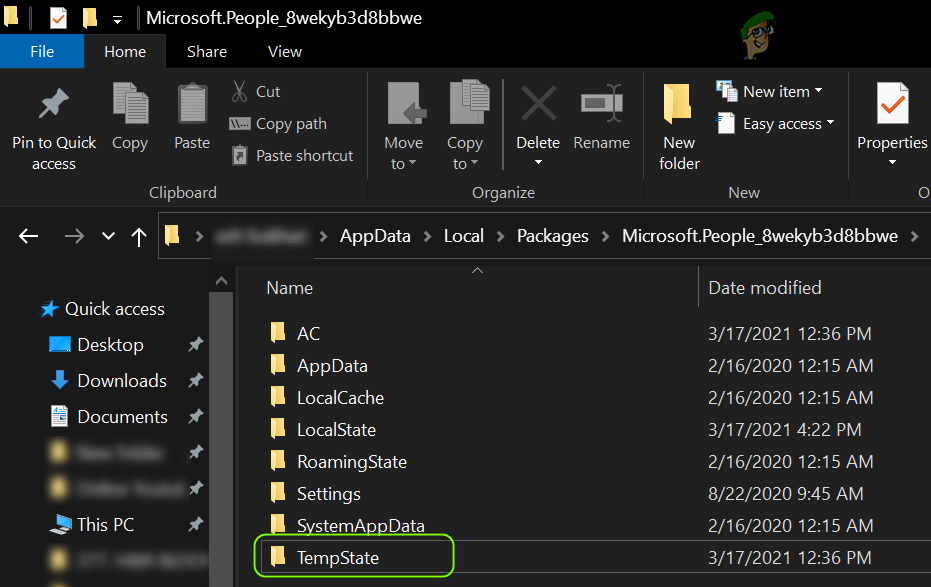
Delete the TempState Folder - Then confirm to delete the TempState folder and reboot your PC.
- Upon reboot, check if the auto-complete issue is resolved.
Solution 6: Delete the Problematic Email Messages
Microsoft, in an attempt to help its users, added the auto-complete feature to the Mail app, which drives the list values from the email addresses mentioned in the To, From, CC, BCC, etc., fields of all the email messages in all the folder. If the issue is persistent even after trying the above-mentioned solutions, then the tedious task of deleting all the email messages which contain the problematic or bad address may do the trick for you.
- Launch the Mail app and in the search box, type the problematic address.
- Now make sure Results are shown for All Folders and then check the first email message in the results.

Search and Delete the Problematic Email - If the message is essential, copy-paste it to someplace safe. You can also copy-paste the contents to a new email message and send it to yourself (but do not forward), but make sure the problematic email ID is not shown in the message (i.e., To, From, CC, BCC, or message body) and then delete the message.
- Repeat the same to delete all the messages that are shown as the result of the search.
- Then check (with the full concentration) the folders one by one (even the non-delivered, bounced back messages) for any remnants of the problematic email address, and if found, delete them as well.
- Now, navigate to the web portal of the email provider and delete any reference (either in Contacts or in messages) to the problematic email address.
- Once the messages or references to the problematic email address are deleted, reset the Mail and People app (as discussed in solution 3) and reboot your PC.
- Upon reboot, add the email accounts to the Mail app and check if the auto-complete issue is resolved.
- If the issue resurfaces, then repeat the process till all the email messages pointing to the problematic address are removed and check if the Mail issue is resolved.
To stop the bogus/spam email addresses in the Mail auto-complete list, make the habit of deleting all the bogus/spam emails.
Solution 7: Create a New Windows User Account
The auto-complete issue may arise if the Windows user profile of your system is corrupt. In this case, creating a new Windows user account may solve the problem.
- Create a new Windows user account (preferably a local administrator) and log out of the current user account.
- Then log-in using the newly created account and check if the Mail app issue is resolved.
- If so, then you may transfer all the user data of the problematic account to the new account.
If the issue persists, then you may try another email client till the issue is resolved.


I have tried what you have suggested, re removal of email addresses autosuggested, I have [a] removed emails that are associated with the address, and I have [b] tried deleting the address when it comes up, but it doesn’t go away.