How to Reduce the Hardware Reserved RAM in Windows?
Hardware Reserved refers to a portion of your RAM reserved by the hardware components and BIOS/UEFI firmware to work properly. Hardware reserved memory is not available to the operating system, which could reduce the system’s performance if too much of it is reserved.
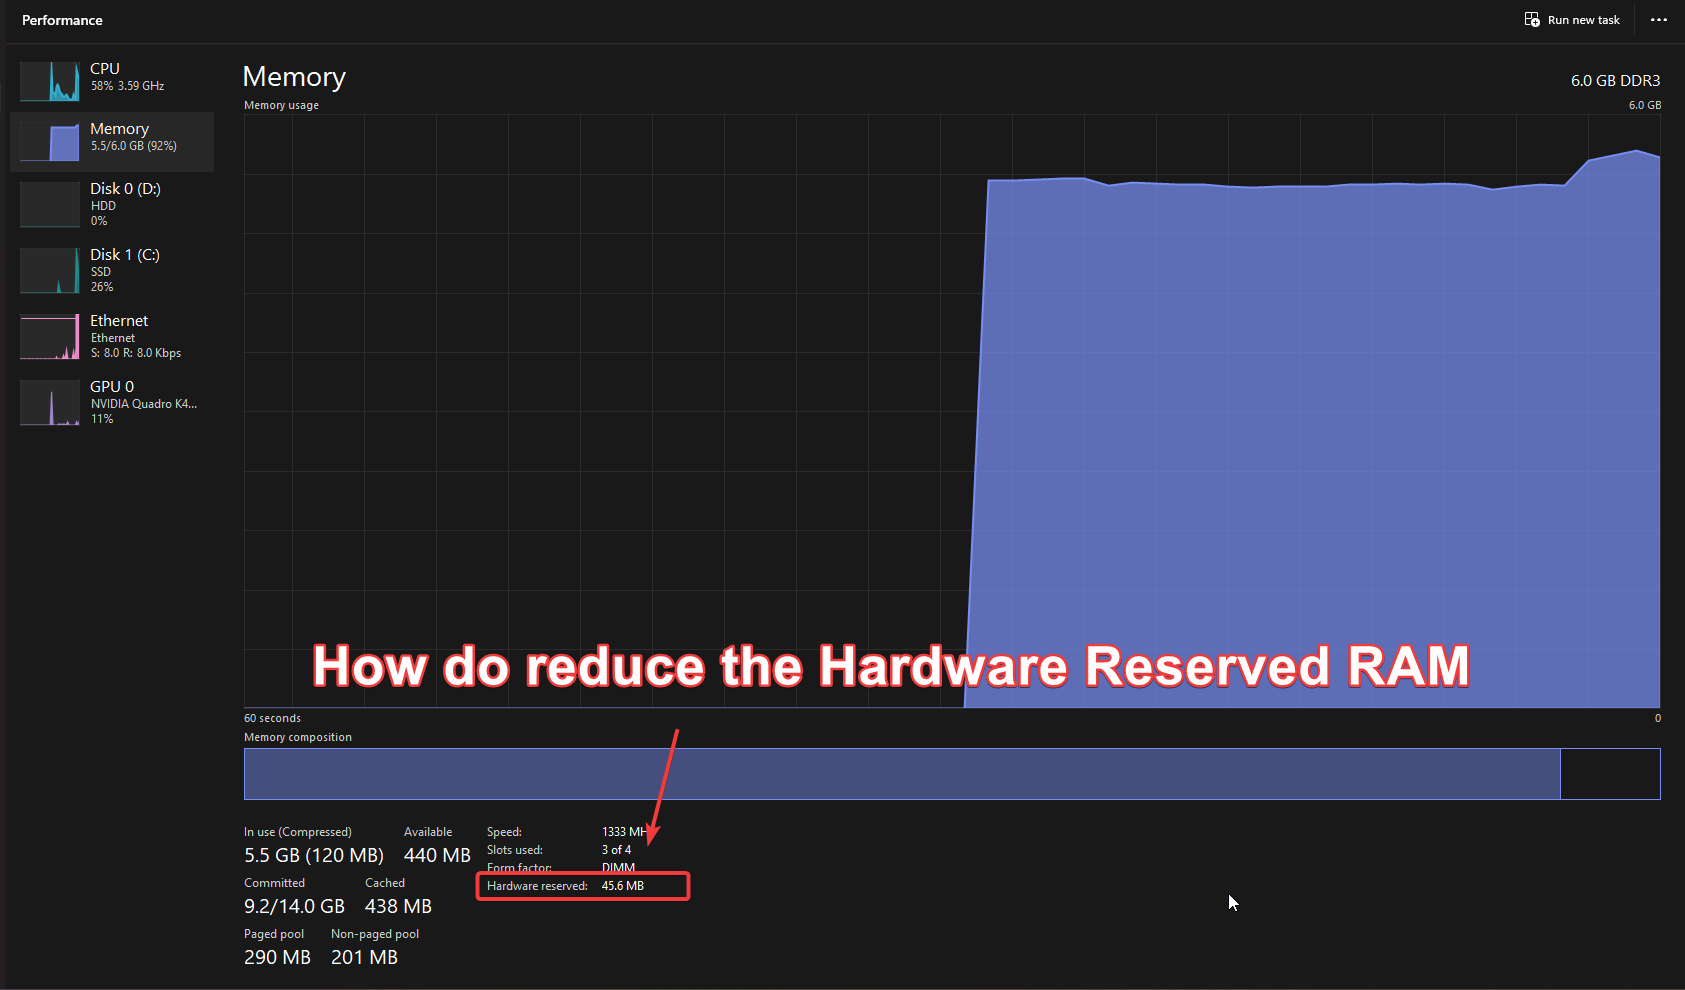
If you notice a significant portion of your RAM is unusable, leading to slow performance, it might be due to a high hardware reserved RAM. You should consider reducing the hardware reserved memory to increase and maintain the system performance by following the methods listed in this guide.
This issue often occurs when BIOS allocates more memory than necessary for hardware components such as integrated GPU, network adapter, and other peripherals.
While this is one of the primary causes, it may not be the only one, as other factors, such as incorrect system configurations and outdated drivers, can also lead to this issue.
1. Change Maximum Memory in Boot Options
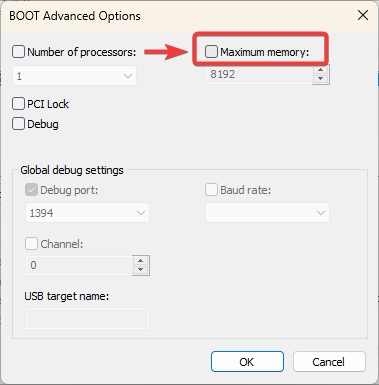
You can resolve high hardware reserved memory by making the correct changes in the boot options. There is an option called Maximum Memory in the boot options that restricts the system to use only the specified memory. By unchecking this option, you will ensure that the system utilizes all the physical memory and does not reserve any unnecessary memory for the hardware, which could lead to decreased performance.
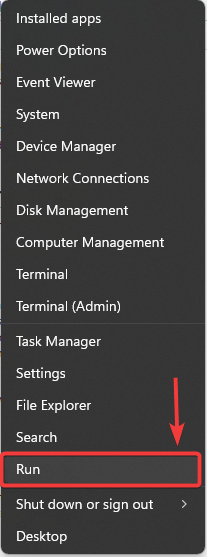
- Right-click the Start Menu and select Run from the listed options.
- Type msconfig in the input box and click OK to open the system configuration Window.

- Select Boot from the top and click Advanced Options.
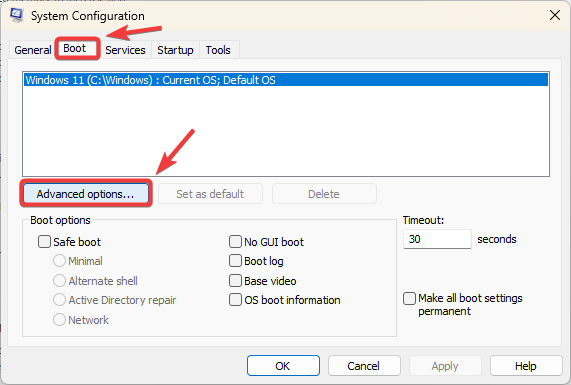
- Make sure the Maximum Memory option is unchecked.
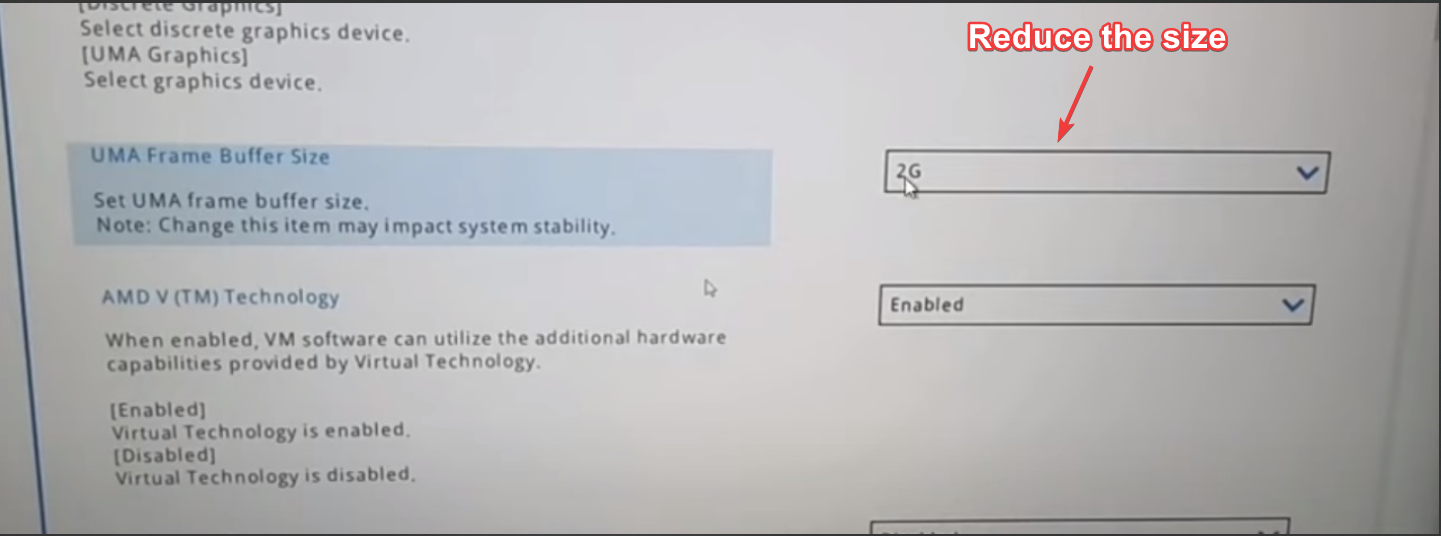
2. Adjust UMA (Unified Memory Architecture) Frame Buffer Size
UMA (Unified Memory Architecture) determines how much RAM the system allocates to the integrated graphics card for processing purposes. If you reduce the UMA, more RAM will be available to use for the operating system and applications installed on your PC.
Some motherboards don’t call this option UMA. Instead, they referred to this option as memory allocation. So, if you are unable to find UMA in the motherboard bios settings, look for the Memory Allocation option.
- Restart your computer and press the key that commonly navigates you to the bios settings during startup. Usually, the F2, Del, or Esc triggers the motherboard bios settings.
- Once you are in the motherboard bios settings, go to Advanced settings and look for the UMA Frame Buffer Size or Memory Allocation.
- If you can find it, simply reduce its size (If it is 512MB, reduce it to 256MB)
- Once done, save and edit the bio settings. This should fix the high-reserved RAM issue.
3. Check your system type
If you are using a 32-bit operating system, you need to upgrade it to 64-bit because a 32-bit operating system can only address up to 4GB of RAM, meaning above this limit won’t be available to the operating system.
A 64-bit operating system assigns less RAM to the hardware reserved than a 32-bit operating system. Therefore, you should consider upgrading if you have a 32-bit operating system.
- Press the Win key and type About.
- Hit Enter to navigate the settings. Here, you can see the system type under the Device Specifications.

4. Configure Virtual Memory
Virtual memory can be allocated from the storage devices such as hard drives. It is a memory management technique that allows users to extend the RAM available to operating systems by allocating from the hard drives. By configuring the virtual memory, you can run larger applications simultaneously. Plus, it can also reduce the hardware-reserved RAM by optimizing memory allocation.
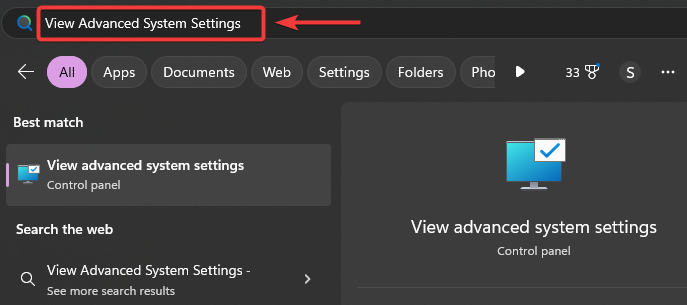
- Press the Win key and type View Advanced System Settings.
- Hit Enter to navigate the settings.
- Under the Performance, click Settings,
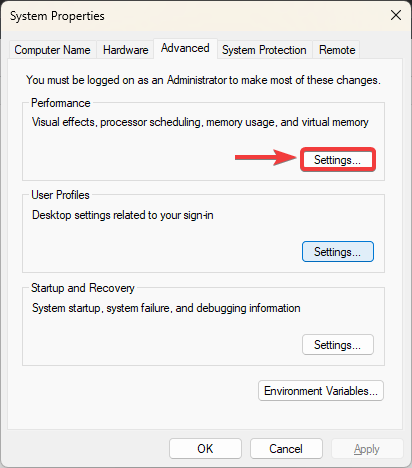
- Go to Advanced, click Change under Virtual Memory.

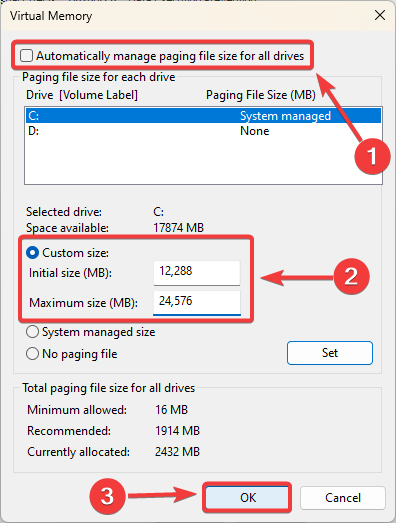
- Untick Automatically manages paging file size for all drives and select Custom size.
- Your initial size should be 1.5 times the physical RAM, and your maximum size should be three times the physical RAM installed on your PC. For instance, if you have 8 GB RAM, your initial size would be 1024 x 8 x 1.5 = 12,288 MB, and your maximum size would be 1024 x 8 x 3 = 24,576 MB.
- Once done, click OK and restart your PC for the changes to take effect.
If none of the solutions help reduce the hardware-reserved memory, try resetting the motherboard BIOS settings to default, as misconfigured BIOS settings might be causing the issue. If this also fails, consider upgrading your RAM for a permanent solution.