How to Fix Recording Stopped Error in the Snipping Tool?
When users attempt to use the Snipping Tool’s recording feature on Windows, they often face the “Recording stopped” error, which interrupts the process immediately after it begins. A message pops up, indicating a stoppage due to an unexpected issue. This error commonly occurs when the recording countdown starts, causing the tool to freeze and display the error message.
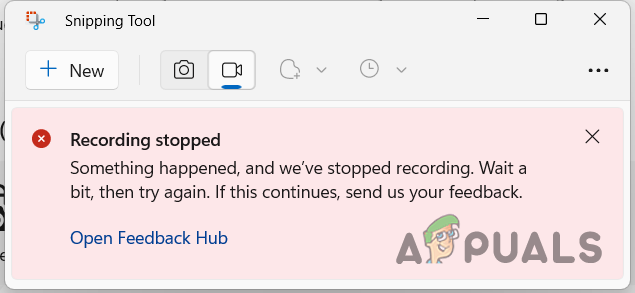
The majority of cases suggest that a bug within the application itself is the most common root cause of this problem, as a significant number of users have reported experiencing this issue, pointing to a widespread software fault.
Other contributing factors include conflicts with the graphics adapter or incorrect projection mode settings, which complicate the troubleshooting steps.
Further investigation suggests that device-specific issues, particularly with graphics settings, can also trigger this error. Some users have successfully bypassed the error by switching their graphics to high-performance mode, or by disabling certain graphics adapters, like the Intel UHD, from the device manager.
However, these workarounds may result in new challenges, such as the loss of functionality for projecting to multiple monitors. Users must therefore strike a balance between practicality and solution effectiveness.
1. Change Display Projection Settings
If you are encountering this problem when using the Snipping Tool, especially with multiple monitors extending the Windows projection, altering your display projection settings may help.
This can lead to inconsistencies during recording with the Snipping Tool, resulting in the aforementioned error message.
- Press the Win key + P on your keyboard to open the projection menu in Windows.
- Choose the PC Screen Only option at the top to disable the display on your secondary monitor.
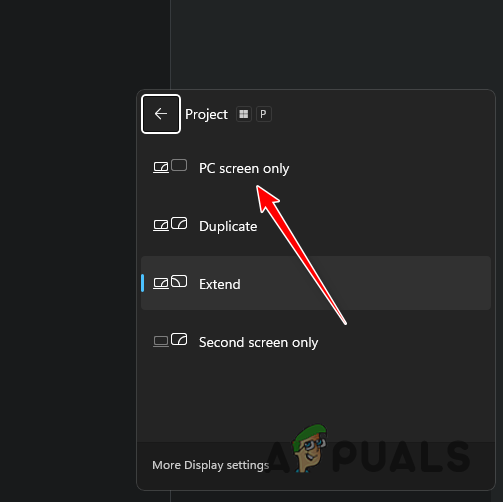
Changing Projection Settings to PC Screen Only - Then, start recording with the Snipping Tool again to check if the error persists.
2. Change Snipping Tool Graphics Preference
The graphics preference setting for the Snipping Tool can cause recording disruptions when set to power saving.
To resolve this, switch the graphics preference to high performance. This will ensure the Snipping Tool uses your machine’s primary graphics card, particularly if there is an integrated GPU on the motherboard.
- Open the Settings app by pressing the Win key + I.
- Navigate to System > Display > Graphics.
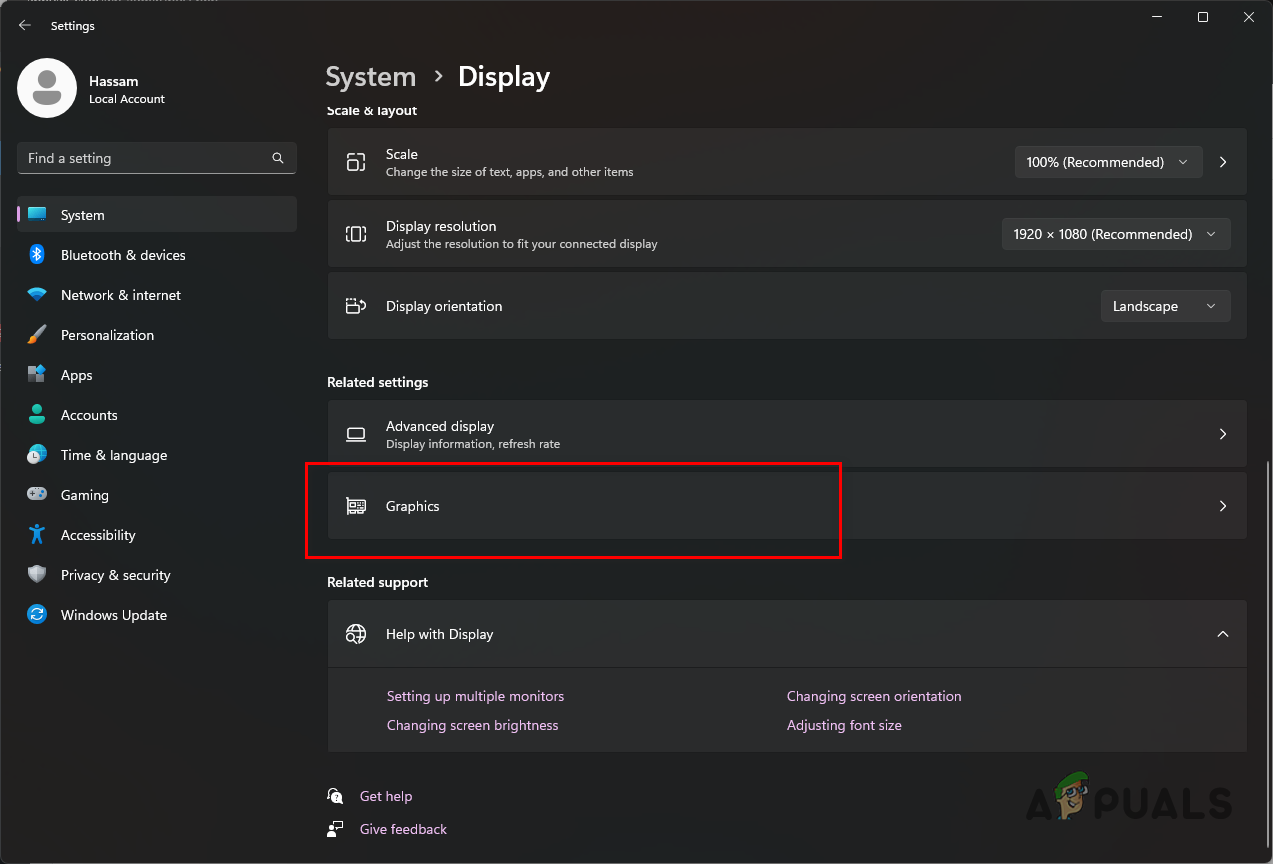
Navigating to Graphics Settings - Locate the Snipping Tool in the list of applications. If it’s not shown, click the top menu option called Add an app, and then select Microsoft Store app.
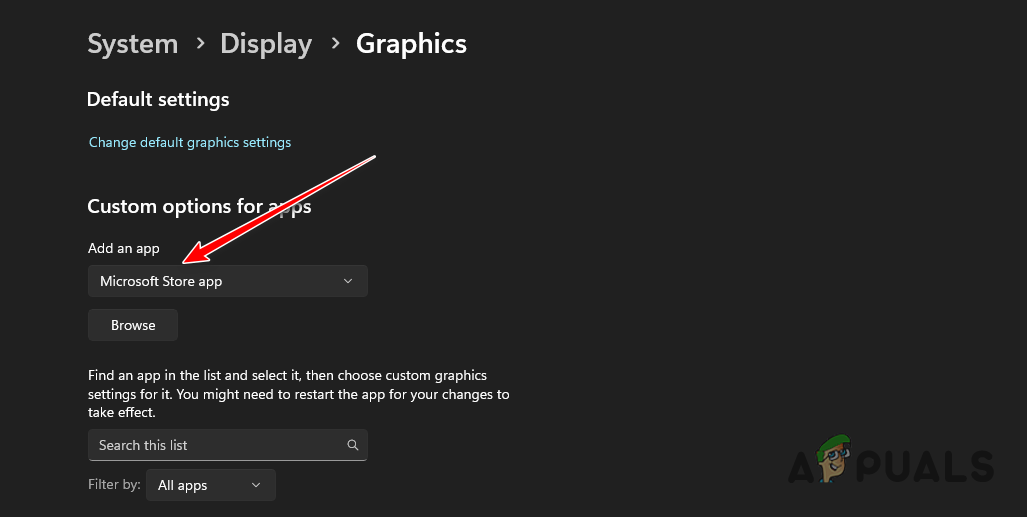
Adding a Microsoft Store App - Click Browse and select Snipping Tool.
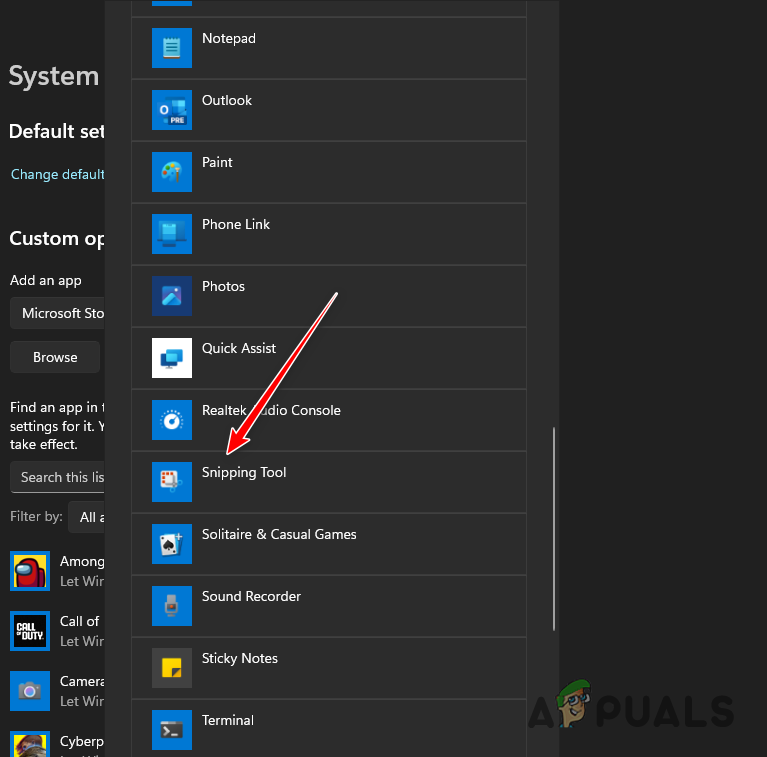
Adding Snipping Tool to Graphics Apps List - Choose Snipping Tool from the list and click on Options.
- Select the High performance option and click Save.
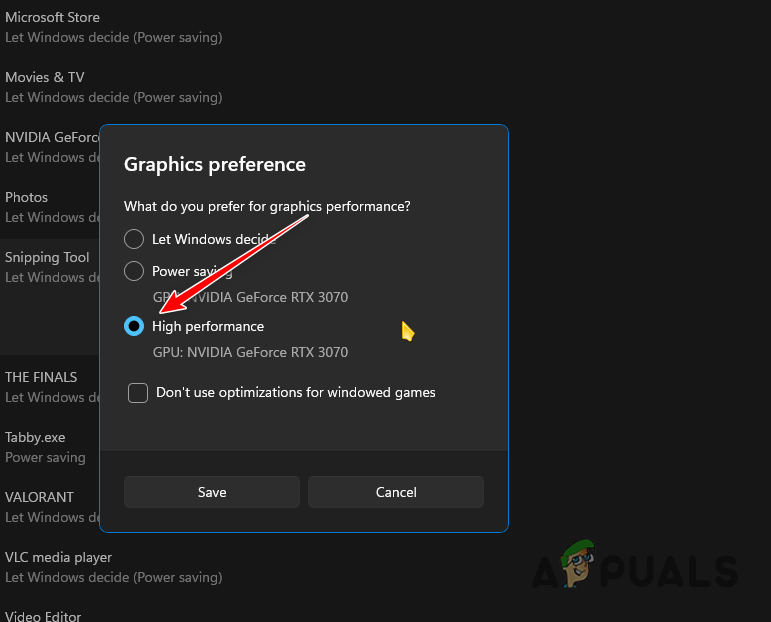
Changing Snipping Tool Graphics Preference - Restart the Snipping Tool and check if the issue has been resolved.
3. Repair and Reset Snipping Tool
Damaged local app data could be causing the Snipping Tool to malfunction. To fix this, you may need to repair and reset the application.
- Open the Settings app with the Win key + I shortcut.
- Go to Apps > Installed Apps.
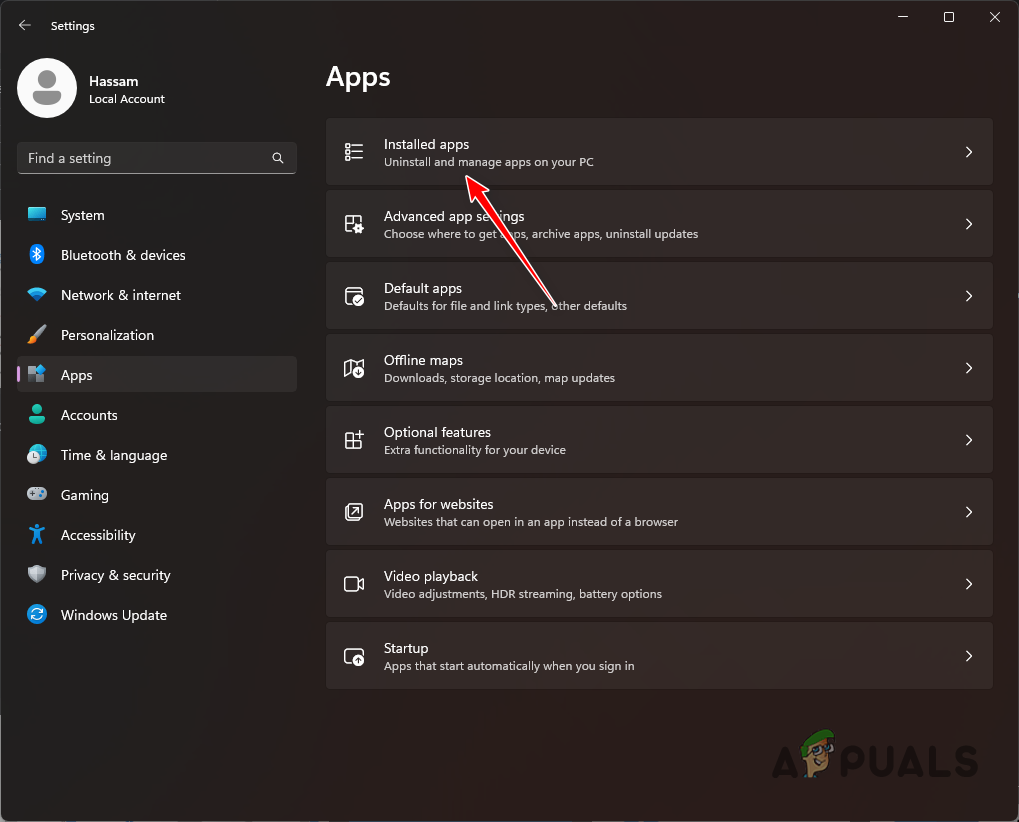
Navigating to the Installed Apps List - Find the Snipping Tool and click the three dots.
- Select Advanced options.
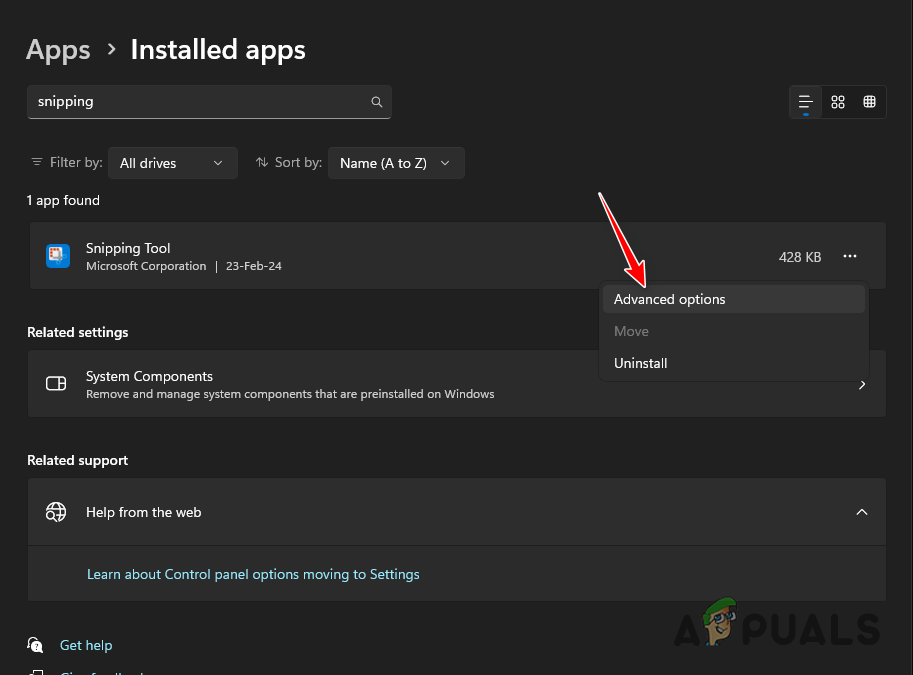
Navigating to Snipping Tool Advanced Options - Click Reset to clear the app data.
- Then, select Repair to fix any issues.
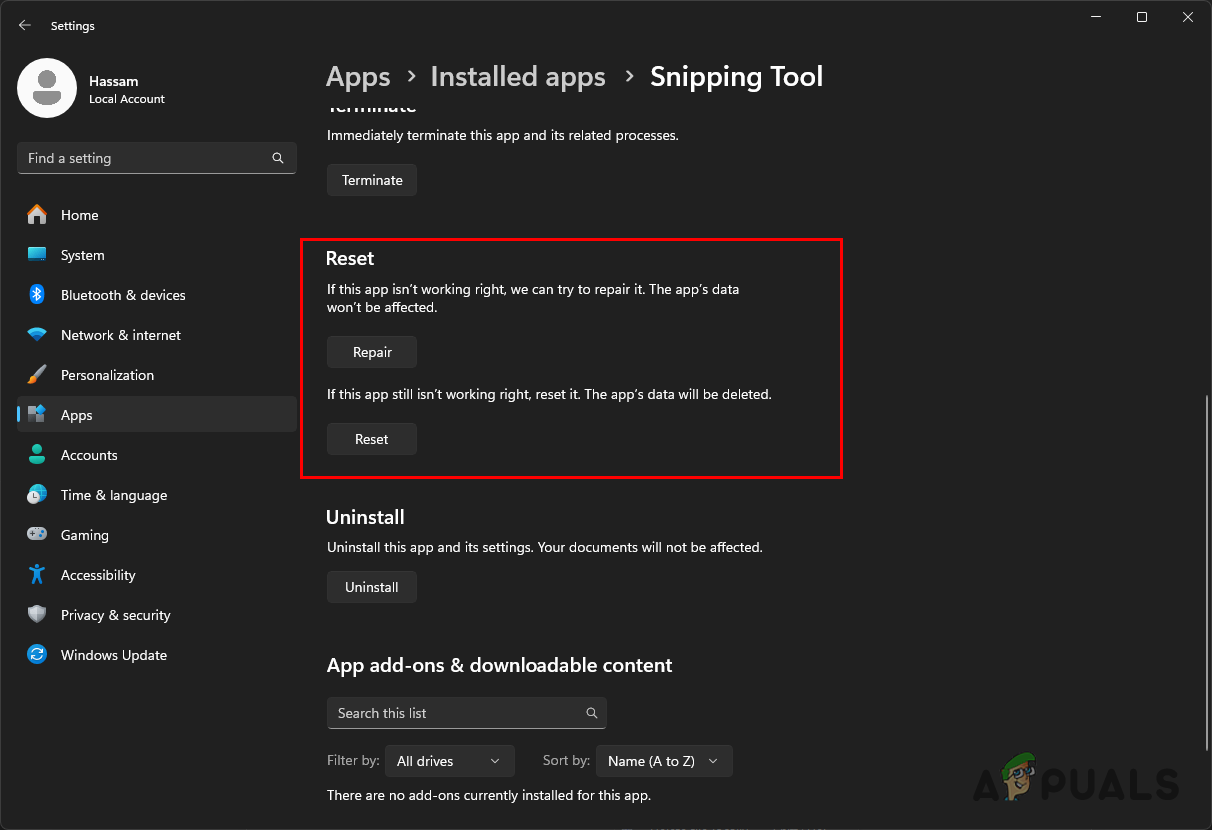
Resetting and Repairing the Snipping Tool - Check if the error is resolved after these steps.
4. Reinstall Snipping Tool
Corrupted installation files may also cause the “Recording stopped” error. Reinstalling the application can remove any corrupted files.
- Access the Settings app through the Win key + I shortcut.
- Navigate to Apps > Installed Apps.

Navigating to the Installed Apps List - Find the Snipping Tool and click the three dots.
- Choose the Uninstall option.
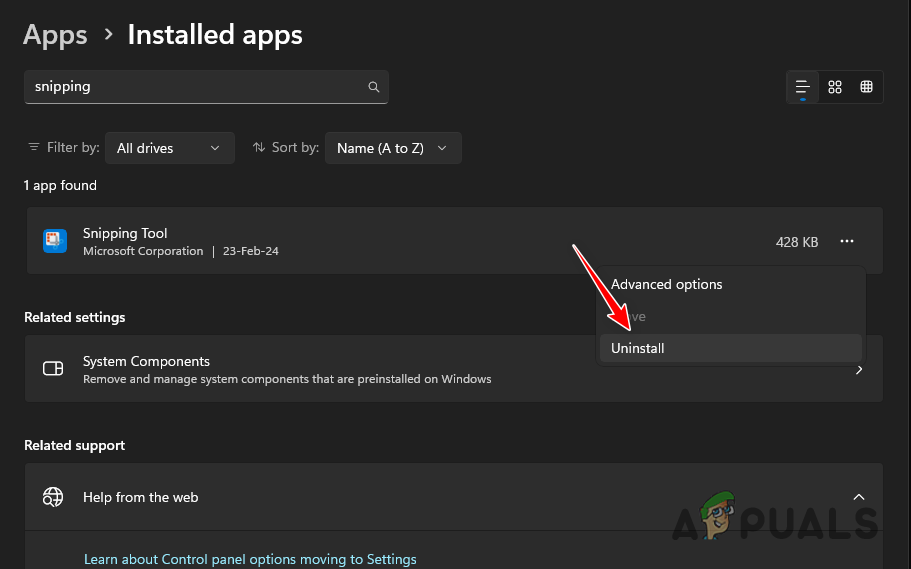
Uninstalling the Snipping Tool - Once uninstalled, open the Start Menu and search for the Microsoft Store. Open it.
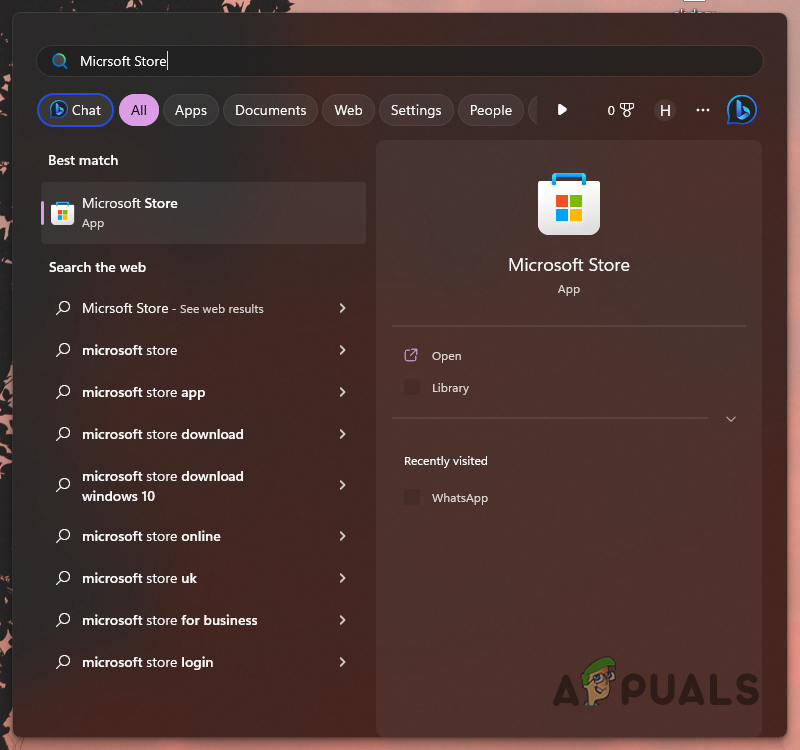
Opening the Microsoft Store - Search for and reinstall the Snipping Tool from the Microsoft Store.
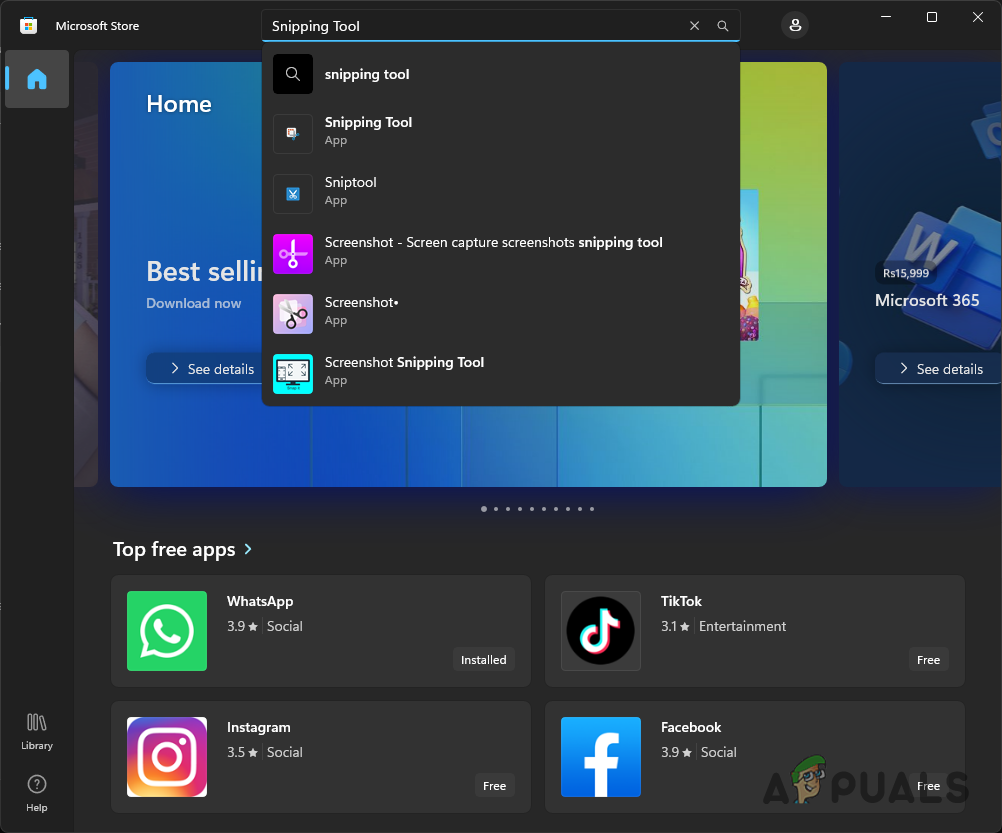
Searching for the Snipping Tool - Run the app to verify the problem is fixed.
5. Use Third-Party Alternative
If none of the previous methods resolve the “Recording stopped” error in the Snipping Tool, consider using a third-party alternative.
Such an option can be especially useful when the error stems from a software bug awaiting a fix from the developer team. In the meantime, a popular third-party alternative such as ShareX can be used for screen captures on your computer.
Download ShareX from the official website here. Once installed, open ShareX and select the Capture option to begin screen recording.


