Fix: Printer Error 0x803C010B
Printers are the souls of offices, large enterprises, and even homes nowadays. Whenever issues arise with printers, the whole workflow of organizations gets disturbed. Therefore, it is important to keep them in operation all the time.
Some people reported an error related to their printers, which was quite unexpected. According to them, the printers eventually stopped working, and when they tried to initialize the in-built troubleshooter, they encountered an annoying hex-coded error message stating 0x803C010B. This error message prevents the printer from performing its operations. Therefore, this error requires some fixes to return the printer to its working state.
This issue mainly occurs with network printers that are connected to the network. These computers can be connected through wired or wireless connectivity.
Reasons behind this error:
As I mentioned, this error occurs on network printers. Therefore, this issue can be caused by a protocol called Simple Network Management Protocol (SNMP). This protocol manages devices on the network and provides simple status information for printers. However, some printers do not support this protocol. As a result, it creates a problem by not allowing the printer to function properly.
Solutions to Fix this Issue:
There are a number of fixes for this issue, but I will discuss only those which have been proven to be the most effective. Just follow these methods accordingly.
Method #1: Disabling the Protocol.
As I discuss the reasons behind this error message, the following method becomes predictable because it involves disabling the SNMP protocol to fix it. Please follow these steps sequentially:
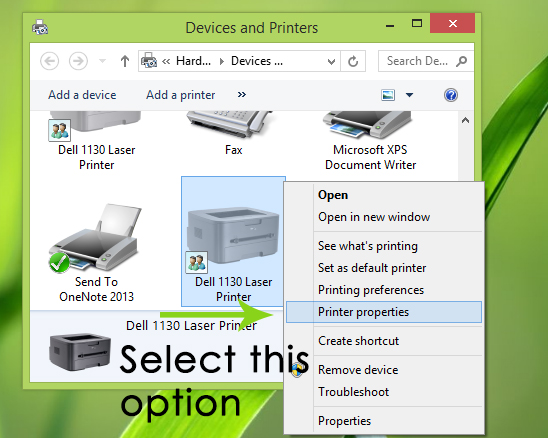
Go to the Control Panel by using the shortcut key Win + X, or you can right-click on the Start menu icon in order to access the Control Panel. Select ‘Devices and Printers‘ from the list and right-click on the printer experiencing this problem. Select ‘Printer Properties,’ and it will lead you to a new window.

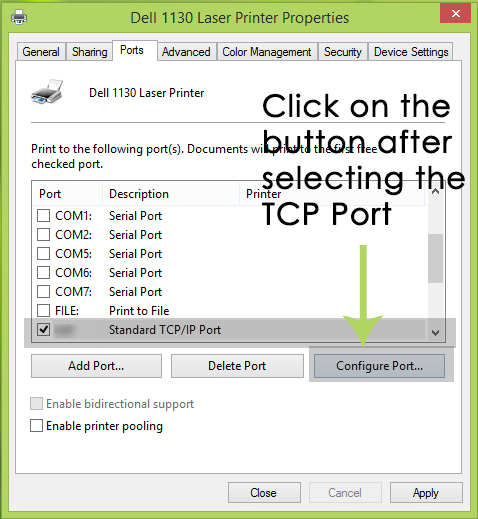
In the Printer Properties window, switch to the Ports tab and navigate through the list of ports to select the Standard TCP/IP Port. Check the box and click on the Configure Port button located just below the ports section.

In the next window, navigate to “SNMP Status Enabled” and uncheck the box, as shown in the picture below.

Click on the ‘OK‘ button and apply the settings afterward. Reboot your PC and check if it worked.
Method #2: Reinstalling the Printer Device
The above-mentioned method will work in a majority of cases. If it doesn’t work, then this fix will prove to be a healing balm for your printer. In order to reinstall the device, follow the steps below.
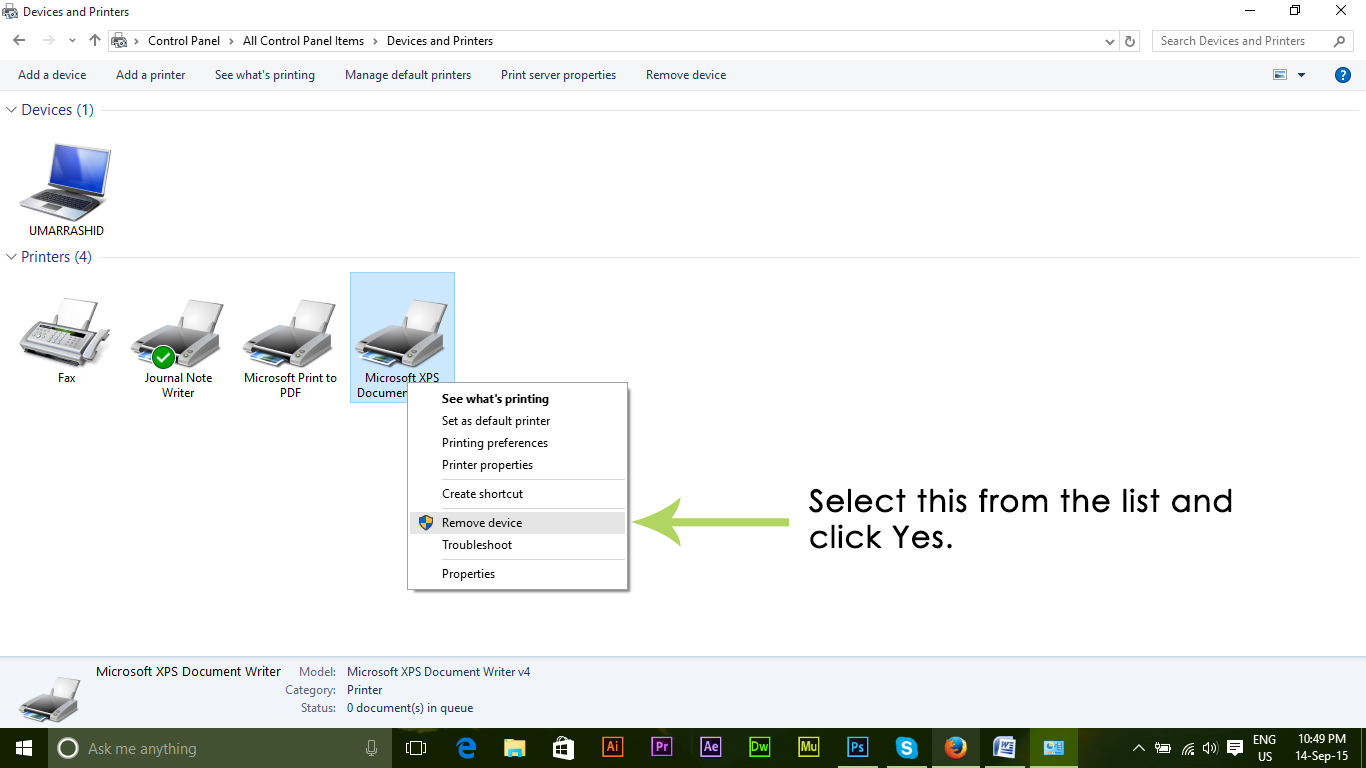
Go to the Control Panel and select Devices and Printers. Right-click on the printer causing the error. Select ‘Remove device‘ and click on ‘Yes‘ at the prompt window.

The selected device will be removed from the PC. Now, unplug the printer and restart your PC. After the PC has restarted, plug in the printer again to reinstall it along with its drivers.