How to Print Black and White on Mac
If you are a new Mac user and need to print a color page in black and white, or in grayscale, you do not need any special software to do it. However, Black & White printing available on your Mac is directly dependent on the printer you use.
Note: Some printers do not support printing in black and white. If this is the case, you cannot force the printer (which doesn’t support B&W printing) to have an ability that its hardware does not support.
If your printer supports B&W printing, here is how can you do it on a Mac.
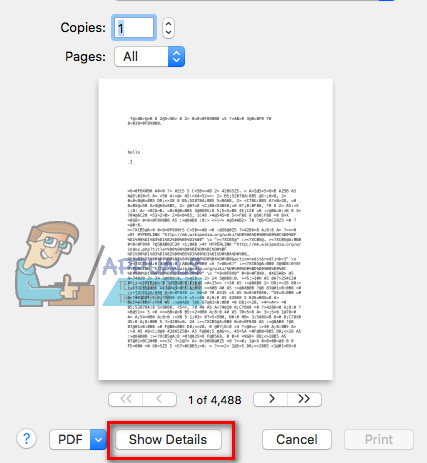
- While your document or image is opened (in the appropriate app – TextEdit, Microsoft Word, Pages, Preview, etc.) click on the file menu and choose Print.
- In the Print Options window, click on Show Details (if available), to reveal more information about the printing procedure. If you see Hide Details instead of Show Details, you can just continue to the next step.
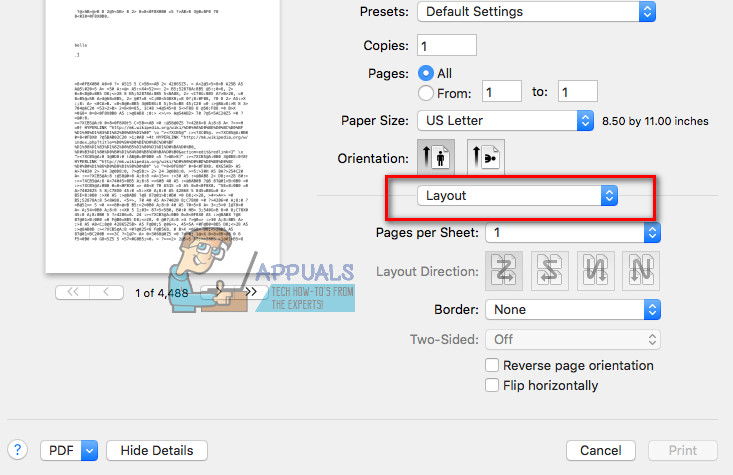
- Now depending on your printer you may or may not see a Black & White toggle on the Print Options window.
- If available, just check that toggle and you can print your document or image.
- If not available, click on the non-labeled Application Drop-down menu (check the image below).
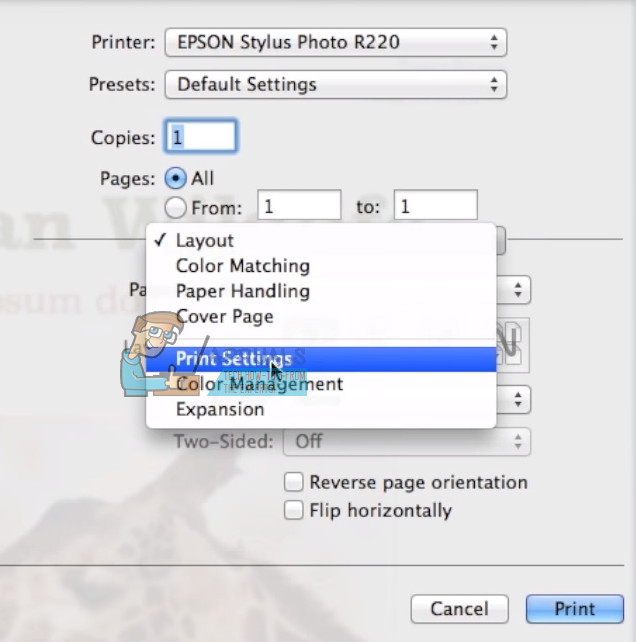
- Now, choose the Printer Settings option (or Paper Type/Quality). Depending on your printer this option may be named differently in your particular case. Usually, it is located in the bottom options.
- Once you choose the right option in the Application Drop-down menu, a Color (or color options) field will show up. Click on the Color drop-down and choose Black (or Grayscale, or any other option that stands for Black and White printing).
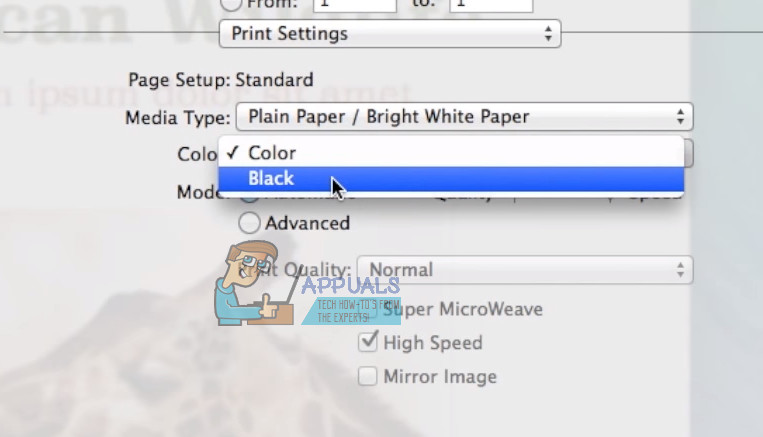
Note: Keep in mind that the fields’ names may vary depending on the printer model. Sometimes the grayscale option may be named Mono, or Black Cartridge Only, or something similar. Also, the positioning of these fields may be different.
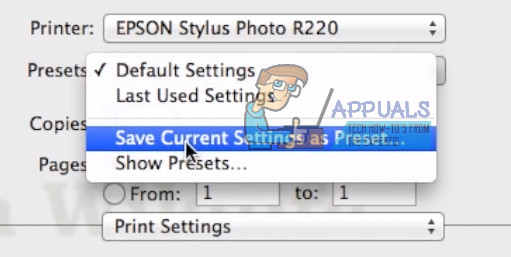
Create Black and White Preset
If you print black and white documents often, you can create a preset with these settings and use it instead repeating this procedure whenever you need to print in black and white.
- Click on the Preset drop–down, at the top of the Pring Option window.
- Choose Save Current Settings as Preset…
- Type a name for your preset (B&W for example).
- Choose if you want to save it for the current printer or all printers.
- Click save.
Hello, I have a new HP Envy 6055. I printed a color page, and then some word documents in b/w. Now I want to print a jpg or pdf but I cannot re-set to print in color. The “default settings” do not give me color. Please help!