How to Fix Powerpoint Couldn’t Write to Microsoft Word
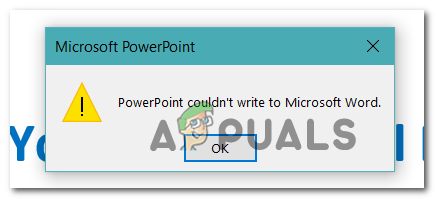
Some Office users are reporting that every time they try to create a Handout in Powerpoint (by going to Publish > Create Handouts in Microsoft Office Word), they end up seeing the ‘Powerpoint Couldn’t Write to Microsoft Word’ error. The problem is common with Office 2013 and older.
In most cases, expect this issue to occur due to the fact that there are no direct communications between Word and Powerpoint – most likely due to the fact that the two programs come from different Office installations. In this case, you can fix the issue by opening Word manually before initiating the handout. Additionally, you can ensure that both temp folders are cleared by running a series of commands in an elevated CMD prompt.
However, if the issue is caused by a series of temporary files, try opening PowerPoint in Safe Mode and see if the error repeats. If that doesn’t work, modify the default PowerPoint Option in order to force the program to save the presentations locally.
Some affected users have been using a couple of workarounds to resolve the issue temporarily. The first one implies creating a proxy folder that will be used whenever you need to create a handout for Word. But in case the error occurs because your PowerPoint presentation is too large, breaking it up in smaller presentations and re-combining them into a large word file should fix the issue.
In rare circumstances, the handout feature will be entirely broken due to a corrupted Office installation. In this case, you should be able to fix the issue by doing an Online Repair.
Method 1: Opening Word before exporting
Some affected users have confirmed that they were able to complete the exporting procedure successfully once they realized that Powerpoint needs Word to be opened in order to create the handouts. Keep in mind that this is not a requirement – in most cases, Powershell will be able to call upon Word whenever it needs to work with it.
However, if Powershell and Word come from different Office installations, they might not be able to communicate properly with each other. If this scenario is applicable, you should be able to fix the issue by opening Word manually.
Here’s a quick step by step guide on ensuring that the Word application is open and ready to accept handouts before initiating the procedure via Photoshop:
- Open Word and wait until the program is opened, then put it in the background – it’s not necessary to open up a document (it’s important that the main process of Word is running).
- After you’ve ensure that Word is opened, go to Photoshop and open the file that you’re encountering the ‘Powerpoint Couldn’t Write to Microsoft Word’ error.
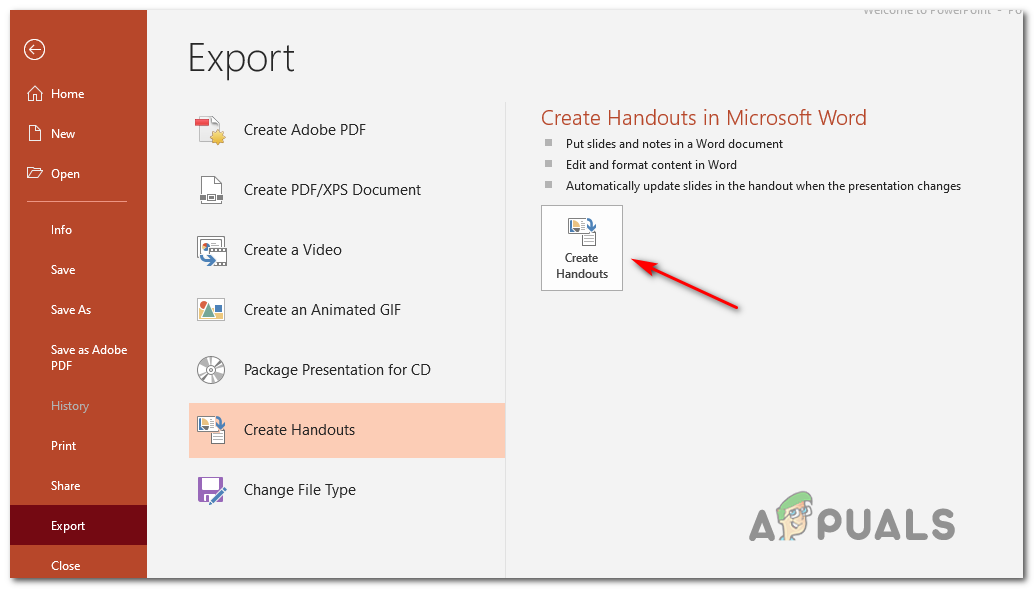
- Once you are ready to create the handout, click on the Export tab > Create Handouts > Create Handouts.
Creating Handouts in Powerpoint - Since you previously ensured that Word is running in the background, you should no longer encounter the ‘Powerpoint Couldn’t Write to Microsoft Word’ error.
Method 2: Opening Powerpoint in Safe Mode
As it turns out, this problem can also occur due to a series of temporary files that end up interfering with the communications between Powerpoint and other Office products like Word and Excel. If you’re looking for a quick fix that will allow Powerpoint to start fresh and create handouts successfully, try starting the program in Safe Mode.
This is not guaranteed to work, but a lot of affected users have confirmed that this operation was the only thing that allowed them to complete the creation of a handout without encountering the ‘Powerpoint Couldn’t Write to Microsoft Word’ error.
Here’s a quick step by step guide on opening Powerpoint in Safe Mode:
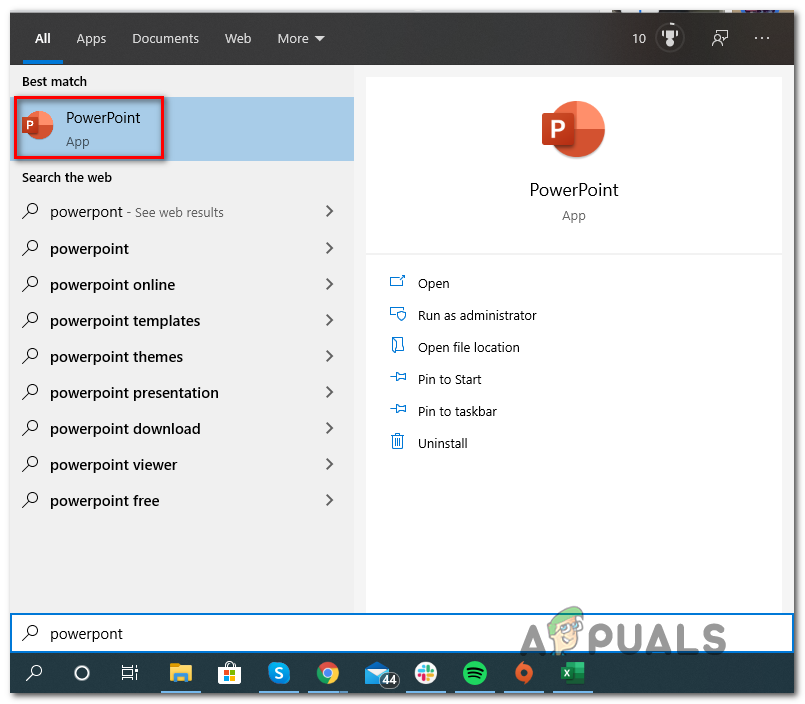
- Press the Windows key to open up the Start menu and start searching for ‘Powerpoint’ using the search function.
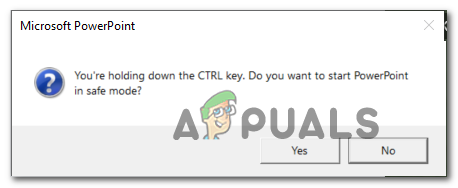
Finding PowerPoint via Start menu - Next, press and hold the Ctrl key while double-clicking on Powerpoint.
- At the confirmation prompt, click Yes to confirm the opening of Powerpoint in Safe Mode.
Opening PowerPoint in SafeMode - Once Photoshop is finally opened in Safe Mode, open the same file that was previously showing the ‘Powerpoint Couldn’t Write to Microsoft Word’ error.
- With the file opened, go to File > Export > Create Handouts > Create Handouts and see if the issue is still occurring.
Creating Handouts in Powerpoint - If the issue was previously caused by a temporary file, this operation should finally allow you to complete the exporting procedure.
In case you’re still encountering the ‘Powerpoint Couldn’t Write to Microsoft Word’ error, move down to the next potential fix below.
Method 3: Forcing Powerpoint to Save Presentations Locally
As it turns out, you might be able to fix this particular issue easily by modifying the default preferences set for Saving chores. Some users that we’re encountering the ‘Powerpoint Couldn’t Write to Microsoft Word’ error have confirmed that the issue was resolved entirely after they’ve accessed the PowerPoint Options and enabled the checkbox associated with Save to Computer by default.
After doing this and restarting the application, most have reported that the handout was completed successfully. Here’s what you need to do in order to force Powerpoint to save presentations locally:
- Open Powerpoint (no need to open the file that’s triggering the error).
- Use the ribbon bar at the top to click on Files, then click on Options from the vertical menu on the left-hand section of the screen.
- Once you’re inside the PowerPoint Options menu, select the Save tab from the menu on the left, then move to the right section and check the box associated with Save to Computer by default (under Save Presentations).
- Click Ok to save the modifications, then restart Powerpoint and load up the document that was previously triggering the ‘Powerpoint Couldn’t Write to Microsoft Word’ error.
- Try doing the export again and see if the issue is now resolved.

Method 4: Clearing the temporary folders of Powerpoint
Under certain circumstances, his handout export error happens due to the fact that a series of temporary file folders belonging to Powerpoint or Word (or both) ar full. If you’re encountering the ‘Powerpoint Couldn’t Write to Microsoft Word’ error due to this problem, clearing the contents of this temporary folders should allow you to fix the issue swiftly.
Here’s a quick step by step guide that will allow you to clear those temp folders in that are most likely responsible for the error:
- Close any instance of Word or Photoshop (including any background services that might be running passively).
- Press Windows key + R to open up a Run dialog box. Next, type ‘cmd’ and press Ctrl + Shift + Enter to open up an elevated Command Prompt window.

Running the Command Prompt Note: When prompted by the UAC (User Account Control), click Yes to grant administrative privileges.
- Once you’re inside the elevated CMD prompt, type the following command and press Enter to navigate to the location of the first temp folder:
CD %USERPROFILE%\AppData\Local\Microsoft\Windows\Temporary Internet Files\Content.MSO
- Next, type ‘ERASE *.*’ and press Enter, then press Y and hit Enter again to confirm and clear the contents of the Content.MSO folder.
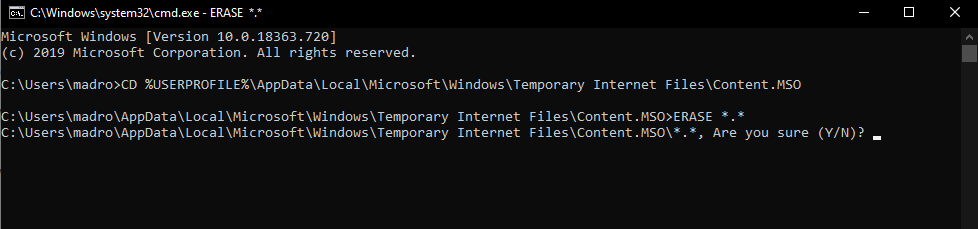
Clearing the contents of the first folder - Next, type the following command and press Enter in order to complete the deletion process:
FOR /f %s in ('dir /b/a') do rd /s/q %s - Once the first directory has been resolved, type or paste the following command and press Enter to land into the next folder that needs to be resolved:
CD %USERPROFILE%\AppData\Local\Microsoft\Windows\Temporary Internet Files\Content.Word
- After you land in the correct directory, type ERASE *.* press Enter, then type Y and press Enter to complete the operation.
- Finally, type the command below and hit Enter in order to clear the contents of the Content.Word folder:
FOR /f %s in ('dir /b/a') do rd /s/q %s - Restart your computer and see if the issue is resolved at the next computer startup.
In case the same ‘Powerpoint Couldn’t Write to Microsoft Word’ error is still appearing, move down to the next potential fix below.
Method 5: Using a proxy folder
If you’re only encountering the error with a singular file while the creation of handouts works just fine from other .pptx files, it’s very likely that you’re dealing with a fairly common Powerpoint bug that is occurring with Office 365.
Some affected users that were struggling with the same issue have confirmed that they were able to fix the problem by creating a proxy folder and moving the affected .ppt / .pptx file there whenever you need to create a handout for Word.
This might seem like a silly fix, but it has consistently worked for a lot of users that were struggling to fix this issue.
Here’s a short guide on how to do this:
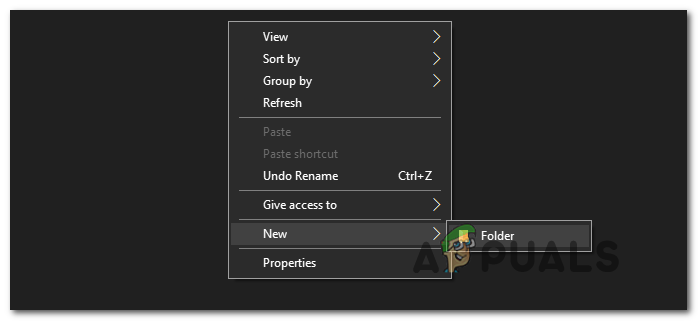
- Open My Computer / This PC and create a new folder on the root location of your operating system drive (C:) by right-clicking on an empty space and choosing New > Folder from the newly appeared context menu.
Creating a New folder on the OS drive - Next, close any associated Powerpoint instance and move the .ppt / .pptx file that is causing the ‘Powerpoint Couldn’t Write to Microsoft Word’ error to the newly created folder.
- Open it conventionally and go to File > Export > Create Handouts > Create Handouts and see if the issue is now resolved.
Creating Handouts in Powerpoint In case this fix workaround was not applicable to your current situation, move down to the next one below.
Method 6: Breaking the presentation into smaller pieces
Another potential workaround if none of the fixes above have worked for you is to break your presentation into smaller pieces before trying to create handouts for word. This operation will be efficient in situations where the ‘Powerpoint Couldn’t Write to Microsoft Word’ error appears due to the fact that the handout is a large resource-intensive file.
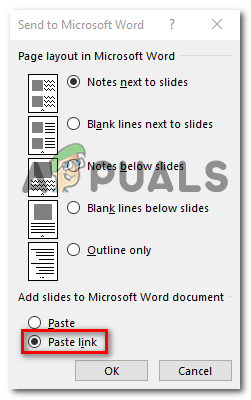
After you manage to break up the presentation into smaller pieces, begin creating individual handouts to word, then recombine the Word file into a big file. This should allow you to circumvent the error message entirely.
By the way, when you reach the Send to Word dialog box, ensure that you choose Paste Link before clicking Ok.
In case the same error is still appearing, move down to the final fix below.
Method 7: Repairing Office Installation
If none of the methods above have allowed you to fix the issue, it’s very likely that the ‘Powerpoint Couldn’t Write to Microsoft Word’ error is occurring due to a partially corrupted Office installation or after an A/V scan ended up quarantining some files belonging to Microsoft Office.
If this scenario is applicable, you should be able to fix the issue by repairing the Office installation in order to restore any corrupted or quarantined files that might be responsible for the issue.
Here’s a quick guide on repairing the Office installation in order to resolve the ‘Powerpoint Couldn’t Write to Microsoft Word’ error:
- Open up a Run dialog box by pressing Windows key + R. Next, type ‘appwiz.cpl’ and press Enter to open up the Programs and Features window.

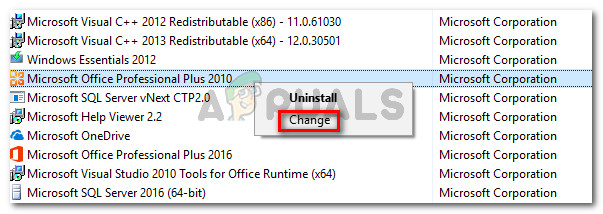
Typing in “appwiz.cpl” in the Run prompt - Once you’re inside the Programs and Features menu, scroll down through the list of installed applications and locate your Office installation.
- Right-click on the listing associated with Office and click on Change from the context menu.
Accessing the repair menu of the Microsoft Office installation - Wait until the initial scan is complete, choose Online Repair (if available) and wait until the operation is complete.
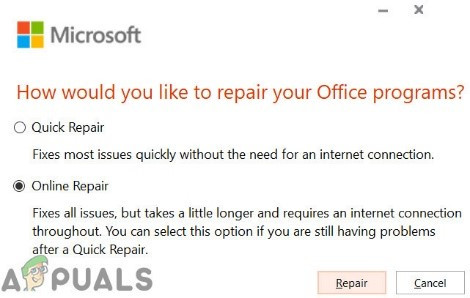
Online Repair Office Note: Ensure that you’re connected to a reliable network before initiating this procedure.
- Once the repair procedure is complete, restart your computer and see if the ‘Powerpoint Couldn’t Write to Microsoft Word’ error is fixed at the next computer startup.


none of these options work. Thsi is a bug in powerpoint and word that needs to be fixed