Fix: ‘This file cannot be previewed’ PDF Preview Handler
When you see the “This file cannot be previewed” error for PDF files, the preview pane in Windows Explorer or Outlook stays blank for PDFs, even though other file previews work. This error, related to the PDF Preview Handler, often shows up after upgrading Outlook, especially when Adobe Acrobat Reader is the default PDF reader.
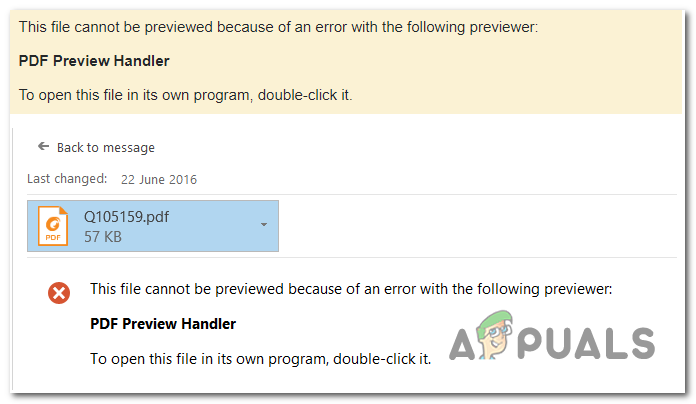
The main cause is usually a conflict between the 32-bit and 64-bit versions of Adobe Acrobat, the PDF Preview Handler, and Outlook or Windows Explorer, causing compatibility issues. Other factors can include outdated Adobe software, registry errors, or incorrect PDF handler settings, which can affect the preview function.
In this article, we will discuss different ways to solve this error.
1. Disable Internet Auto-Detect
By turning off “Internet Auto-Detect” in Internet Options, you let Windows handle local file previews without going through the network settings. This change reduces unnecessary network checks, allowing the preview handler to access file data more efficiently.
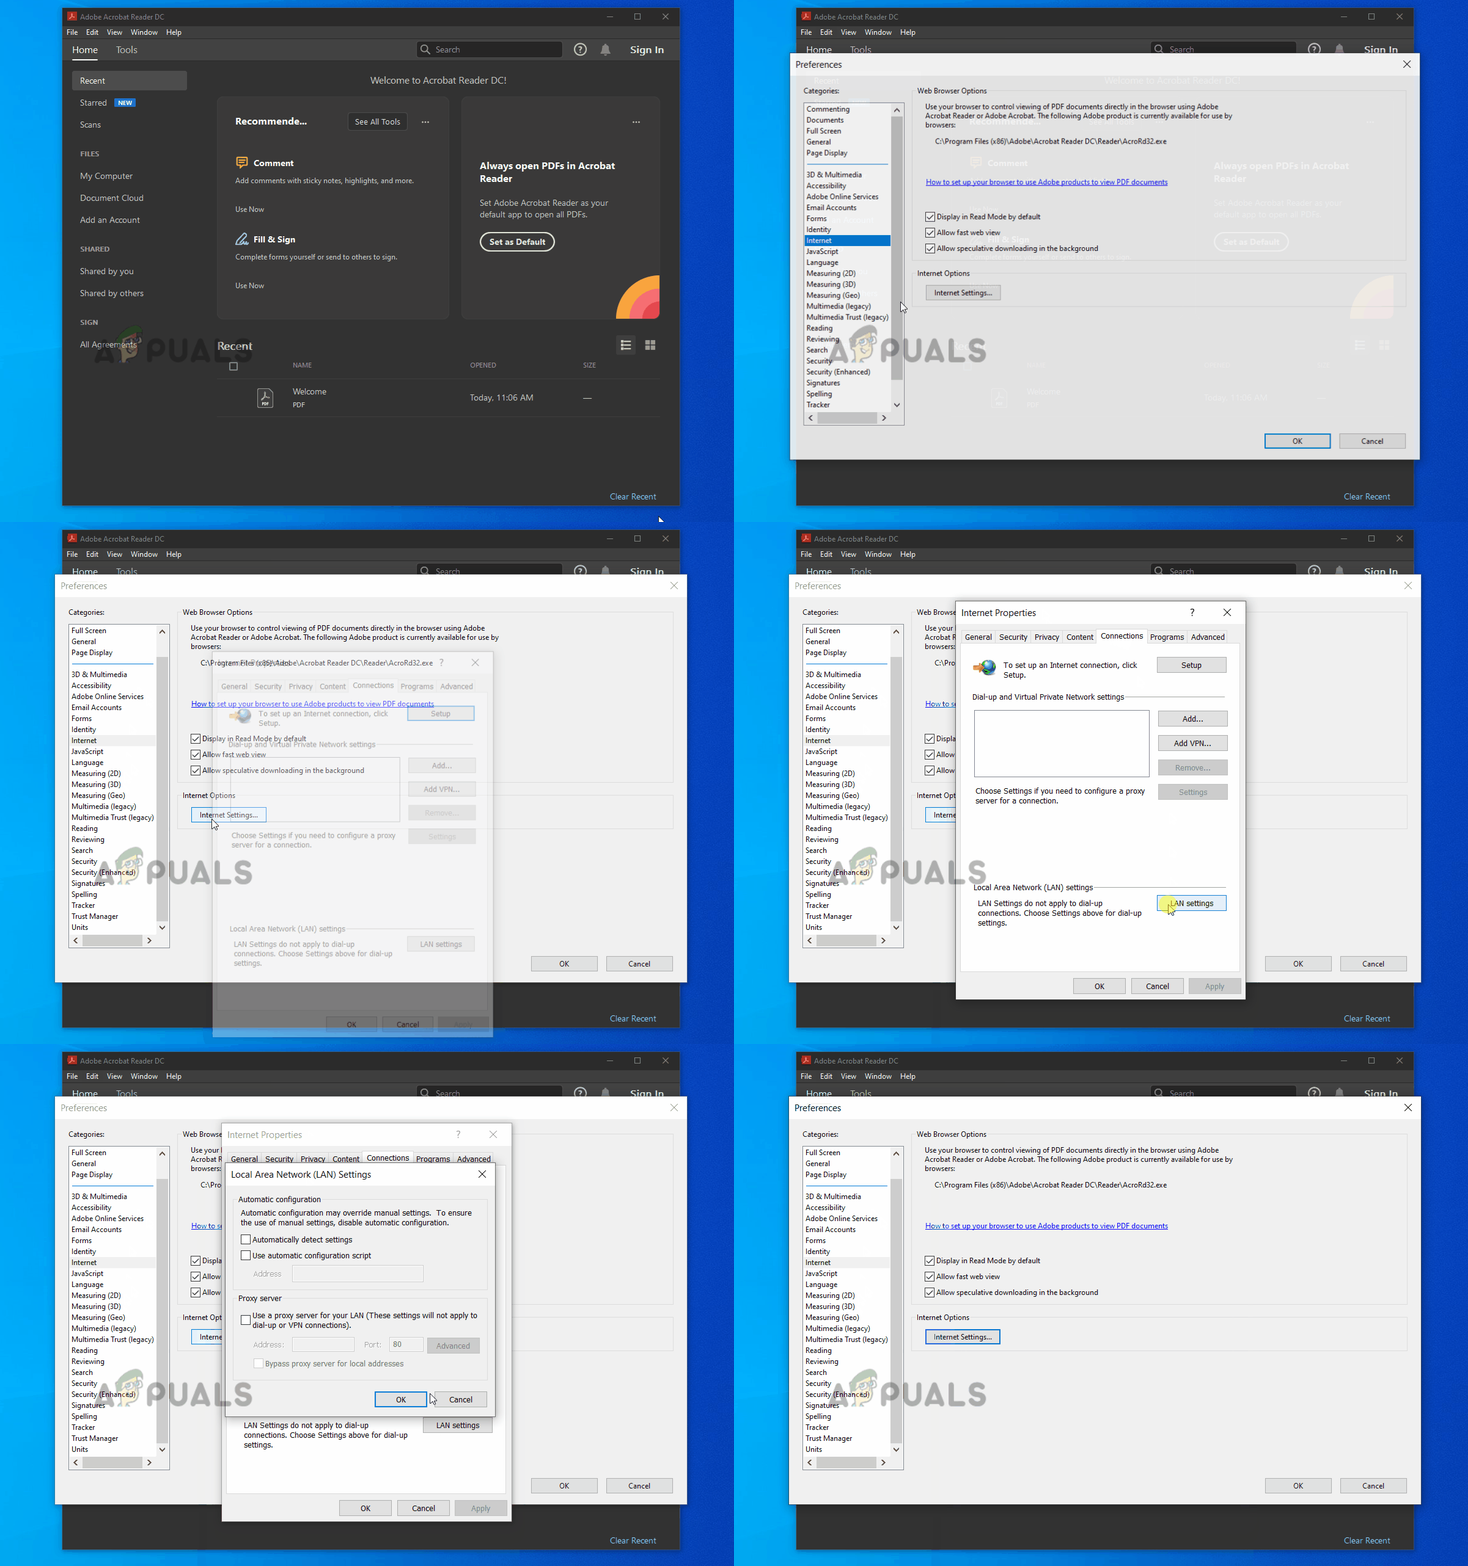
- Open Adobe Acrobat Reader, go to Edit, and select Preferences.
- From the Categories menu, choose Internet.
- Click Internet Settings on the right.
- In Internet Properties, go to the Connections tab and click LAN settings.
- In LAN settings, uncheck Automatically detect settings and click OK.
- Back in Internet Properties, click Apply to save changes.
- Close Adobe Reader, restart your computer, and check if the issue persists.
2. Accept Adobe Reader’s EULA
If you get the PDF Preview Handler error, accepting Adobe Reader’s End User License Agreement (EULA) might help. Accepting the EULA is necessary for Adobe Reader to work properly with programs like Outlook or Windows Explorer. Without it, Adobe’s functions are limited, which can prevent previews. This step can improve the connection, making PDF previews work better.
If this scenario is applicable, you can resolve the issue easily by opening Adobe Reader for the first time and accepting the Adobe Software License Agreement by clicking the Accept button.
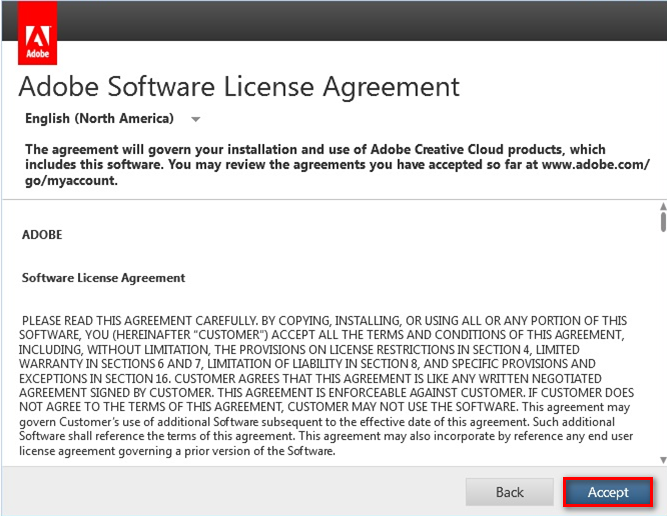
After you do this, you can safely close the application and restart your computer.
3. Run Adobe Reader in Compatibility Mode
Switching Adobe Reader to Compatibility Mode can help with preview problems by making it run like it’s on an older version of Windows. This can reduce conflicts with newer Windows or Outlook versions and prevent errors that disrupt the preview function.
- Open File Explorer and go to the Adobe Reader installation folder. By default, it is located at:
C:\Program Files (x86)\Adobe\Acrobat Reader DC
- Double-click on the Reader folder.
- Find AcroRd32.exe, right-click it, and select Properties.
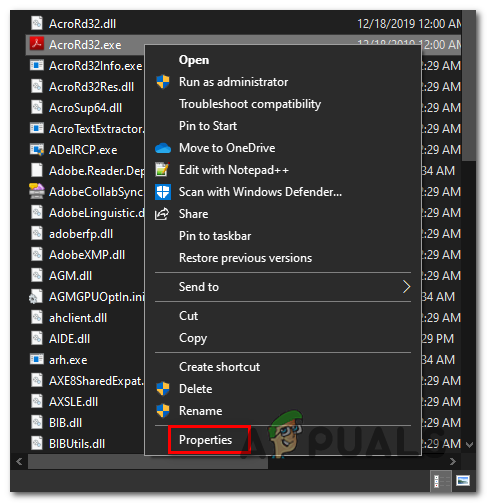
Accessing the Properties menu - Go to the Compatibility tab in Properties.
- Under Compatibility mode, check Run this program in compatibility mode for and choose Windows 8 from the drop-down.
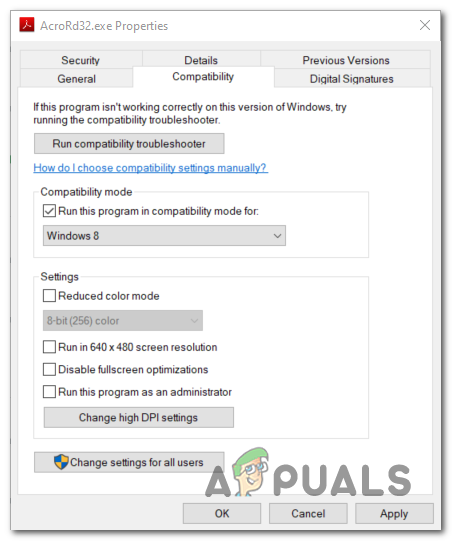
Forcing Adobe Reader to run in compatibility mode - Click Apply, restart your computer, and test if the PDF Preview Handler error persists.
4. Make Adobe Reader the Default PDF Handler
Setting Adobe Reader as the default PDF handler makes sure Windows uses Adobe’s tools to show PDFs, reducing conflicts and improving preview stability.
- Open Acrobat Reader and navigate to Edit > Preferences.
- In Preferences, select General and enable Enable PDF thumbnail previews in Windows Explorer.
- Scroll to Application Startup and click Select As Default PDF Handler.
- Follow prompts to set Adobe Reader as the default PDF handler.
- Restart your computer to apply changes.
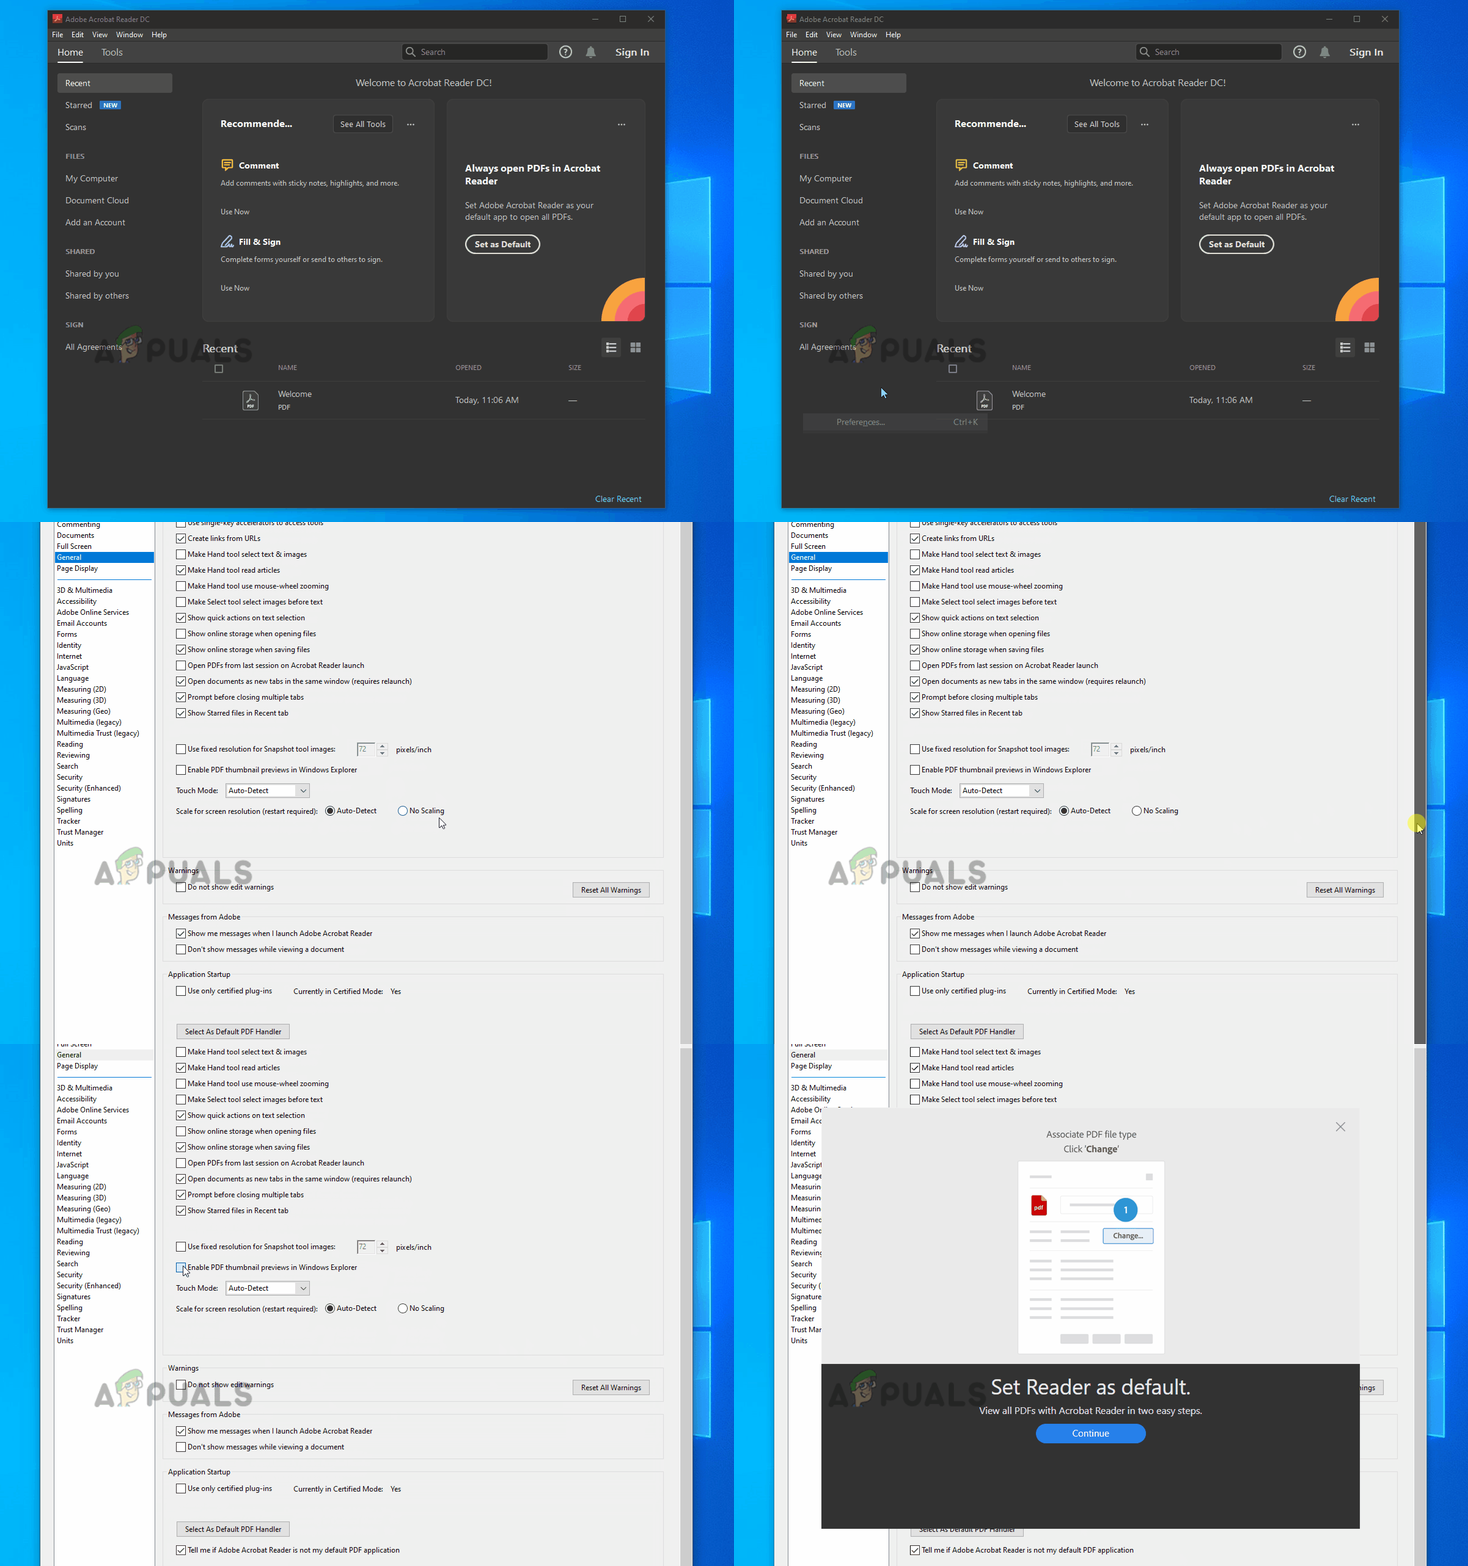
If the PDF Preview Handler error persists, proceed to the final potential fix below.
5. Edit Registry
To address the PDF preview issue, adjust the registry settings. Change certain registry keys to help Outlook or Explorer connect properly with Adobe’s PDF Preview Tool. This aligns file paths and permissions, improving compatibility between Acrobat Reader and Windows.
- Press Windows key + R, type ‘regedit’, and press Enter to open the Registry Editor. Approve UAC prompt by clicking Yes.

Opening the Registry Editor If there’s an error, see how to fix regedit.exe.
- In Registry Editor, navigate to:
HKEY_LOCAL_MACHINE\SOFTWARE\Wow6432Node\Classes\CLSID\{DC6EFB56-9CFA-464D-8880-44885D7DC193}Tip: Paste the location in the navigation bar and press Enter.
- Double-click AppID, change Value data to {534A1E02-D58F-44f0-B58B-36CBED287C7C}.
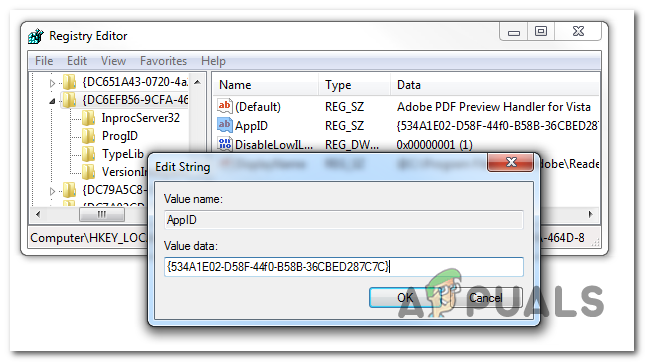
Adjusting AppId value - Click OK to save changes. Restart your computer to apply them.


