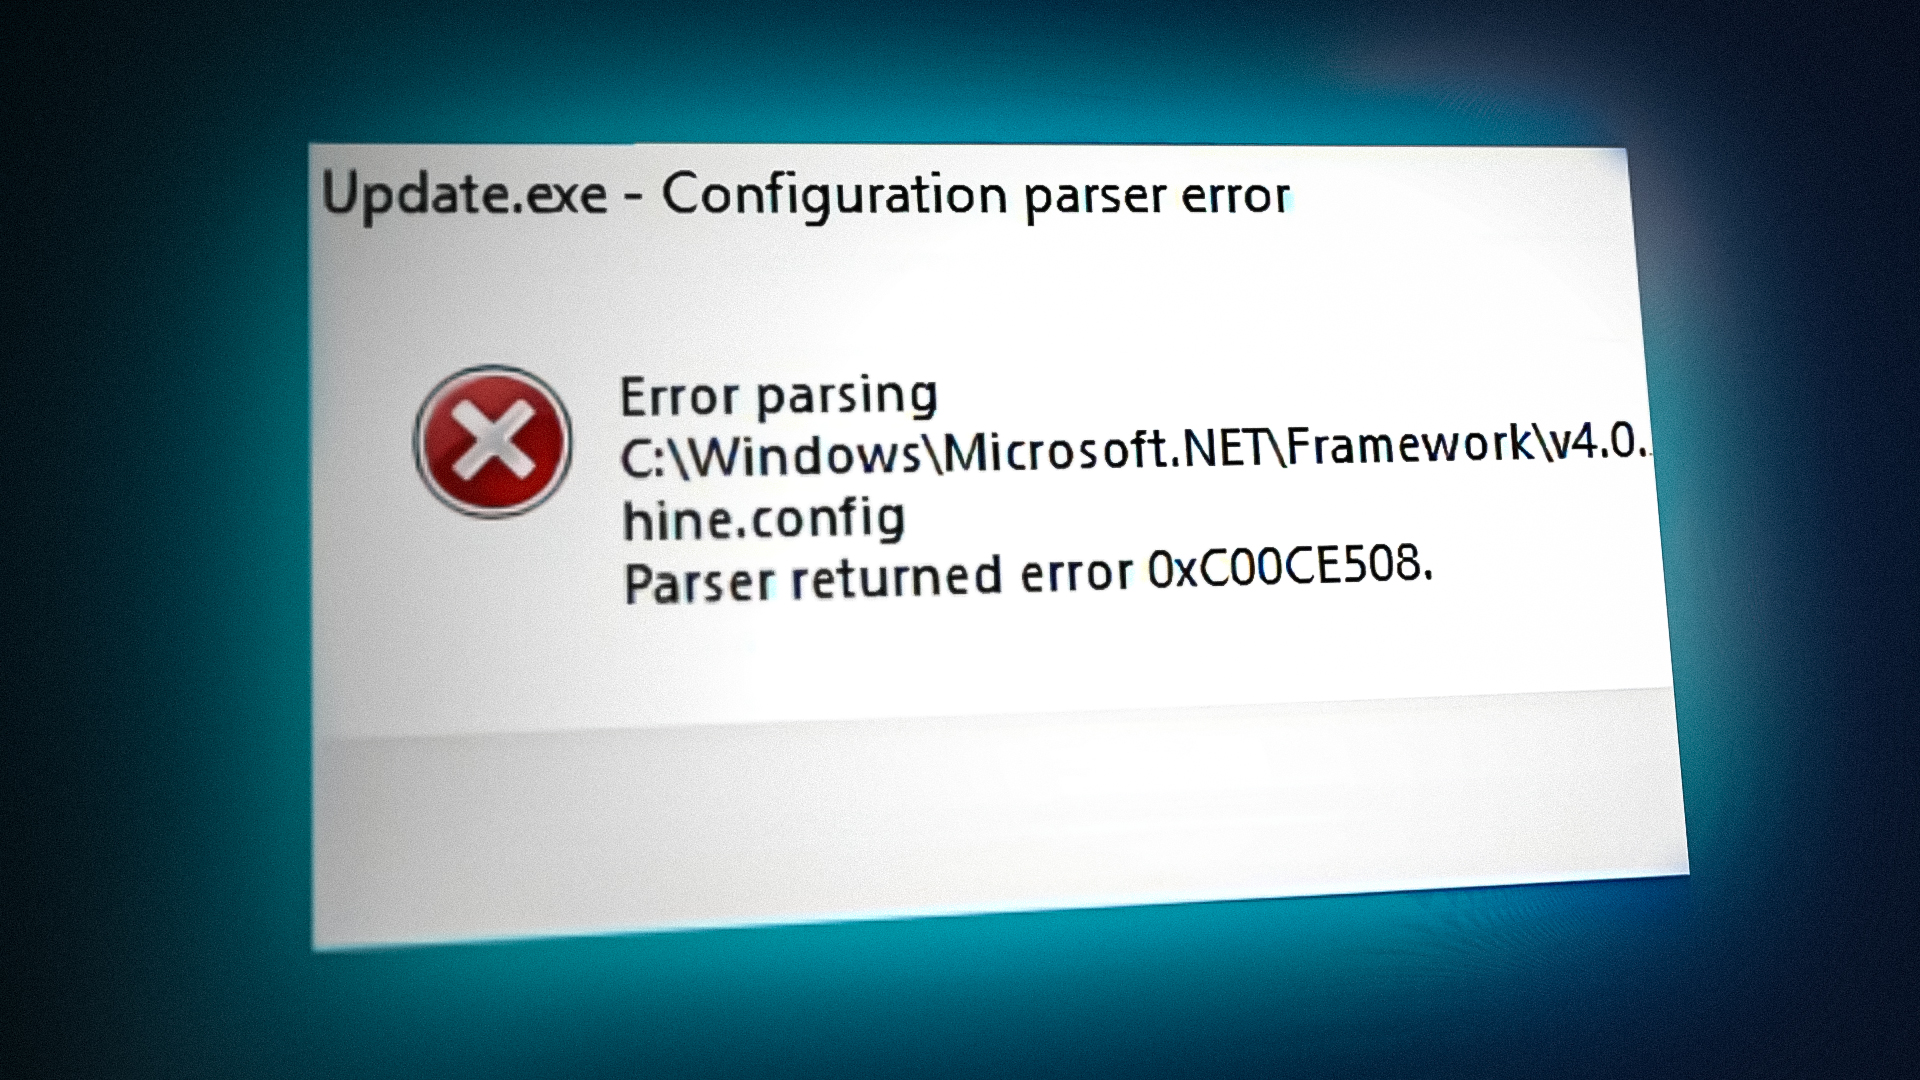
How to Fix Configuration Parser Returned Error 0xC00CE508
The error ‘Parser Returned Error 0xc00ce508‘ typically occurs when users attempt to open, install or update a desktop program on their Windows computer. However, this error is also confirmed to appear for some at every startup as a startup process doesn’t load properly.
If you’re starting to troubleshoot this issue, the first thing you should investigate is a corrupted machine.config file. This master configuration file is responsible for holding a lot of local system files that might ultimately be responsible for this issue.
However, the most frequent cause of why you’ll see this error occurring is a missing or corrupted .NET framework dependency. In some cases, the .NET framework triggering the error might actually be installed locally but disabled at a system level.
In case you only started to see this error after a major system change, using the System Restore utility or deploying a startup repair should help you fix the issue.
But keep in mind that system file corruption or a problem with your OS drive might also have something to do with this type of error.
Below you’ll find a series of confirmed fixes that other users have successfully used to get to the bottom of this issue.
Method 1: Replace the corrupted machine.config file
The ‘Parser Returned Error 0xc00ce508‘ error message is often a symptom of an underlying problem with the master configuration file (machine.config) belonging to the .NET framework installation that is currently in use.
If you’re just starting to troubleshoot this issue, the first thing you need to replace the current machine.config with machine.config.default.
Note: The machine.config file is the master configuration file that your active .NET dependency uses to store the vast majority of local settings that are used whenever your OS needs to leverage a .NET dependency.
The machine.config file comes bundled with the Windows installation on Windows 10 or Windows 11, but it might also be installed along with Visual Studio or when you installed an optional .NET dependency.
The default installation location is: C:\Windows\Microsoft.Net\Framework\Version\Config
If you’re dealing with this issue whenever you open a program built on the .NET framework, will allow you to ensure that the 0xc00ce508 error is not occurring due to a corrupted machine.config file.
Follow the instructions below to replace the supposedly corrupted machine.config file with a healthy equivalent:
- Press Windows key + R to open up a Run dialog box.
- Next, paste the following location inside the navigation box, then press Ctrl + Shift + Enter to open it up with administrative access:
C:\Windows\Microsoft.Net\Framework\v4.0.30319\Config\
Note: When you’re prompted by the User Account Control (UAC), click Yes to grant admin access.
- Once you arrive in the correct location, scroll down through the config files and locate the machine.config.default file.
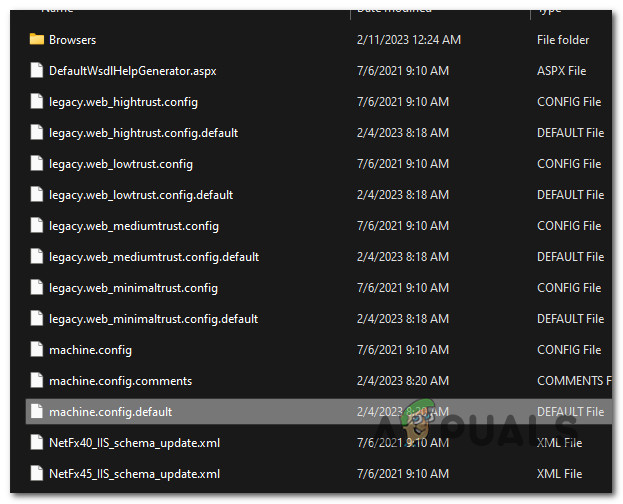
Locating the Machine Config file - Right-click on it and click on Copy from the context menu or simply select it and press Ctrl + C.
- Next, go to your desktop (or any other location) and paste the file you’ve just copied for safekeeping.
- Now that the file is moved away from the initial directly, let’s modify it. Right-click on it and choose Rename from the context menu.
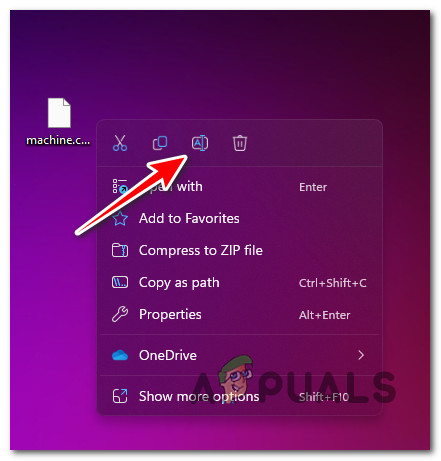
Renaming the machine.config.default file - Remove ‘.default’ from the end of the name file and press Enter to modify the naming convention. The final name should be machine.config.
- At the confirmation prompt, click Ok to confirm the name change.

Confirm the name change - Right-click on the modified file (machine.config) and click on Cut (or select it and press Ctrl +X).
- Press Windows key + R to open up a Run dialog box.
- Next, paste the following location inside the navigation box, then press Ctrl + Shift + Enter to open it up with administrative access:
C:\Windows\Microsoft.NET\Framework\v4.0.30319\CONFIG
- Once you arrive inside the correct location press Ctrl + V (or right-click on an empty space and click on Paste).
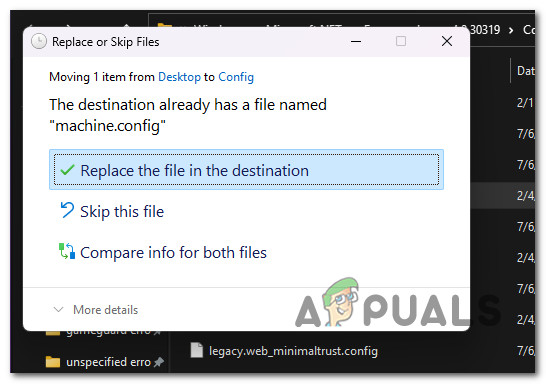
Replacing the machine.config file - Next, your OS will ask you if you want to override the existing file. Click Ok at the prompt.
- After the file has been successfully copied, reboot your system and see if the ‘Parser Returned Error 0xc00ce508’ error is fixed at the next system startup.
Method 2: Download & Enable Missing .NET frameworks
A missing.NET framework requirement is another possible cause of the “Parser Returned Error 0xc00ce508” while attempting to begin or update a desktop application.
If you’re using Windows 11 and you haven’t manually installed any .NET framework packages, you may be missing several .NET dependencies that are required by apps that were originally designed for Windows 7.
If this scenario is applicable, you should be able to fix the issue easily just by executing a DISM command from a Windows installation disk that is compatible with your operating system. This will guarantee that all legacy.NET dependencies, which are not installed by default, are added to your system.
The following is a brief explanation of the procedure:
- First, you need to mount the ISO file or insert the installation DVD/USB flash drive into your computer’s optical drive.
- Open the Run dialog box by pressing the Windows key + R.
- After that, type “cmd” into the box and hit Ctrl + Shift + Enter to open a superuser-level Command Prompt.
Open an elevated Command Prompt - Click Yes to continue granting administrator privileges when requested by the UAC (User Account Control).
- If you have installation media with a letter other than C, replace ‘XXX’ in the following command with the actual letter of the media you are using for the OS drive:
Dism /online /enable-feature /featurename:NetFX3 /All /Source:XXX:\sources\sxs /LimitAccess
- From the next screen, select all the missing.NET components, click Enter, and then wait for the installation to complete.
- Once everything is installed, restart the computer and try repeating the action that was previously causing the Parser Returned Error 0xc00ce508.
Method 3: Run the .NET Framework Repair Tool
In certain situations, the ‘Parser Returned Error 0xc00ce508’ problem might be caused by corruption in the.NET file library. One technique that will allow you to fix this problem quickly and efficiently is to use the .NET Repair tool and ensure that all dependencies are healthy.
Note: If you only notice this problem while installing an update or program that uses the .NET framework, your existing .NET framework installation is most likely damaged. If this is the case, you should be able to resolve the issue by updating your.NET Framework. This problem is very widespread when launching legacy apps that were released way before the official Windows 10 launch.
If this is the case, the issue will be fixed by replacing corrupted .NET instances with healthy copies. There are several ways to accomplish this, but the simplest is to use the .NET Framework Repair Tool.
The majority of people affected stated that the problem was quickly resolved once they used this confidential Microsoft procedure to repair the corrupted.NET dependencies.
Here’s how to use the.NET Framework Repair Tool on any contemporary version of Windows:
- Launch your browser and navigate to the official.NET framework download URL.
- After the website has completely loaded, click the Download button (under Microsoft .NET Framework Repair Tool).
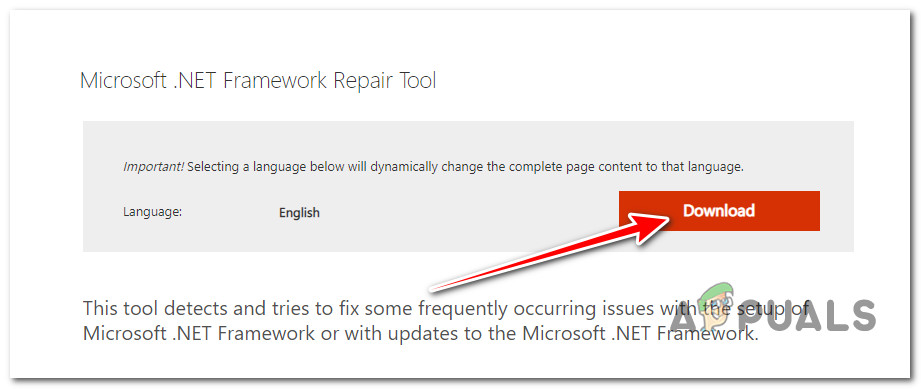
Downloading the .NET framework - On the following page, check the box next to NetFxRepairTool.exe to begin the operation.
- Then, click the Next button to go to the next selection screen and initiate the download.
- When the download is finished, double-click the installation application and grant administrative access by clicking Yes when requested by the User Account Control box.
- On the first window of the Microsoft.NET Framework Repair tool, check the box next to ‘I have read and accepted the licence conditions.’
- From, the bottom-left area, select Next to go to the next choice.
Running the net framework repair tool - At this time, the program has already begun searching for problems in the active .NET dependencies.
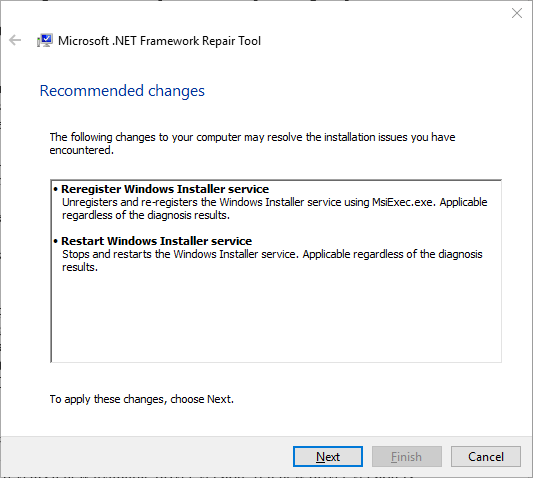
Note: Wait patiently for the operation to finish and do not interrupt it to avoid incurring more issues. Closing this window forcibly before the operation is finished might cause other logical issues that will be harder to remove. - When the process is finished, click Next to have the recommended repair solutions implemented automatically.
Note: If no issues are identified with your .NET dependencies, skip the next steps and move directly to the following methods below. - Whether or not you are prompted to restart your computer automatically, do it nonetheless and run the program (or initiate the update) once the next startup is complete to see if the issue is now addressed.
Method 4: Mount the latest System Restore snapshot
If you started to see the ‘Parser Returned Error 0xc00ce508’ error pop-up after a recent system change, this problem is likely caused by a registry change that is affecting the .NET dependencies.
Note: A recent system change might mean a new driver installation, an interrupted update, or an AV scan that resulted in quarantined system files.
If this is the case, you can address the issue by restoring your system to a prior state where the problem did not exist.
According to multiple users who have had this problem, you might anticipate dealing with it following a recent system change (like the installation of an infrastructure update, a driver update, or a cleanup procedure performed by an antivirus).
The majority of the damage (in this specific instance) can be circumvented by using System Restore to restore your system to a healthy state. However, this method is only applicable if you have a System Restore snapshot to select from.
Remember that using this procedure will wipe out all modifications made since the system restore point was established.
Everything will be gone, including any installed programs, system preferences, and other settings.
If you’ve decided to restore your system, follow these steps:
1. Open a Run dialog box and type ‘rstrui’ and press Enter to launch the System Restore wizard.
2. If the User Account Control invites you to provide administrative access, choose Yes.
3. To proceed, click Next on the first screen of the System Restore method.
4. Select a suitable restore point before clicking Next, then check the box next to Show more restore points.
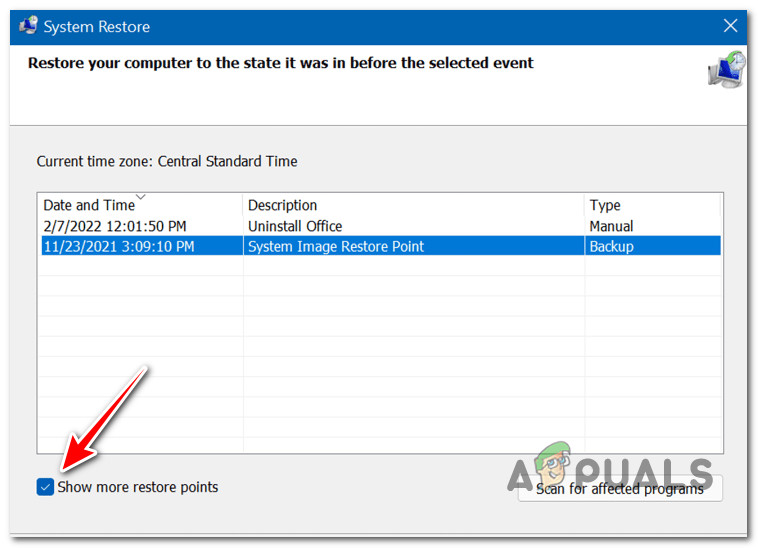
5. Next, choose a restore point that is older than the date you first started to see the Parser Returned Error 0xc00ce508 and click Finish to initiate the restore procedure.
IMPORTANT: Keep in mind that once you perform this action, every system change, program installation, file modification, and every other action will be reverted back to the state when the snapshot was originally created.
6. Once the procedure is completed, perform the same activity that caused the error to determine if the problem has been addressed.
Method 5: Perform a startup repair
It turns out that the ‘Parser Returned Error 0xc00ce508’ problem can also be caused by a mismatch in the boot-related data, causing your computer to trigger this error at every startup. One easy way to address this issue is to use the recovery menu in Windows 11 or Windows 10 to perform a startup repair.
Note: Startup Repair, a Windows automatic troubleshooter, is intended to resolve booting-related difficulties. This system recovery program scans your computer and repairs any problems it finds. But in this particular case, it’s also confirmed to ‘help’ .NET-dependent programs find the appropriate path of the dependencies they need in order to start when your system boots up.
If you want to go this route, you must first open Windows Advanced settings menu from the Recovery Menu and initiate the startup repair from the dedicated sub-option.
Here’s a quick step-by-step guide on
- Start by launching the Recovery Menu. To do this, hit the F11 key on your keyboard while your Windows 11 / Windows 10 installation is loading. When you see the screen lighting up, press the key multiple times to make sure you access the Setup screen.
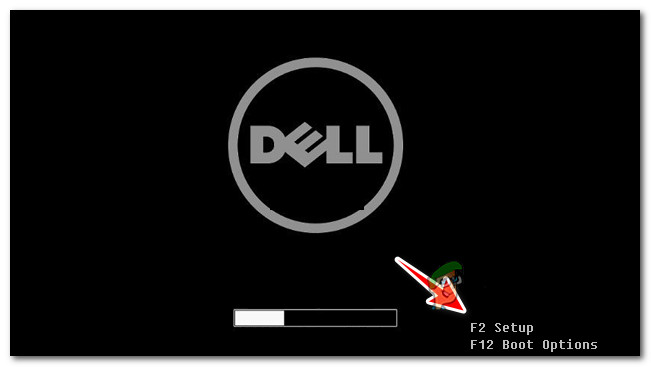
Accessing the Setup screen Note: The F11 is the most commonly used key for accessing the setup (Boot) menu with most PC builds, but this will be different from manufacturer to manufacturer. If the setup key is not visible in one of the bottom or top corners of the screen, consult the official documentation of your motherboard manufacturer or search online for the specific steps of accessing the Recovery menu.
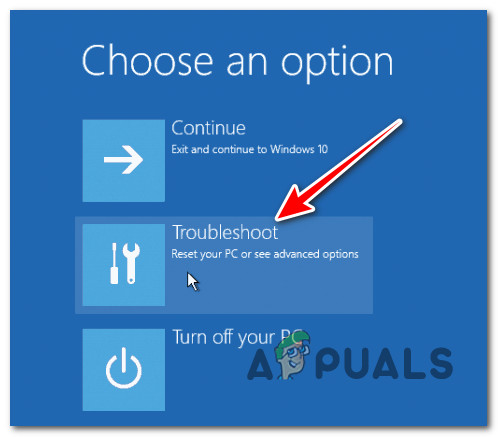
- Once you finally arrive in the Recovery menu, browse to the Troubleshoot section.
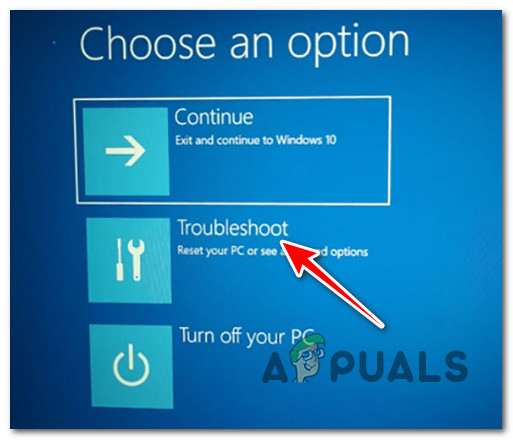
Accessing the Troubleshoot menu Note: If your mouse is not usable inside the Recovery menu, use the arrow keys to select the Troubleshoot menu, then press Enter to access it.
- Once in the Troubleshoot menu, locate and select Startup Repair from the list of available choices.
Accessing the Troubleshoot tab - When you arrive at the Startup Repair page, follow the on-screen directions to begin and complete a Startup Repair operation.
- At the confirmation prompt, click Yes to start the operation.
Note: Depending if you’re using a traditional HDD or a newer SSD, this operation can take up several hours. Remain patient and don’t interrupt the operation prematurely even if the utility looks stuck. - Once the procedure is finished, restart your computer to see if the problem has been repaired.
If this strategy does not resolve your problem, try the next one.
Method 6: Deploy CHKDSK Scans (if applicable)
Some Windows 10 and Windows 11 customers who utilize traditional HDDs report that this issue might be caused by damaged sectors on the HDD – this scenario will end up causing overall system instability.
It’s possible that you’re experiencing the 0xc00ce508 error because the data block where the .NET dependency is stored is actually failing due to a hardware cause.
If this scenario is applicable, you will eventually have to replace the failing drive. But until you do that, you might be able to prologue the life of your traditional storage device by replacing the failing sector with an unused equivalent.
To do this, you’ll need to run the CHKDSK (Check Disk) utility on the affected drive.
Follow these instructions to conduct a CHKDSK scan on your Windows PC:
Note: The instructions below are universal and will work on every Windows version.
- Press Windows key + R to open the Run dialog box.
- Type “cmd” in the box and press Ctrl + Shift + Enter to launch an elevated Command Prompt.
Opening up an elevated CMD window - When prompted by UAC, click Yes to grant someone administrative permissions (User Account Control).
- To begin an offline scan, execute the following command and press Enter at the elevated Command Prompt:
/f chkdsk
- Once the operation is complete, restart your computer and check to see if the problem has been resolved when the system boots up again.
Method 7: Deploy SFC & DISM scans
If you’ve come this far without a viable fix (and you followed every potential fix above), you should really start investigating a potential issue caused by some kind of system file corruption.
It’s not uncommon to see the ‘Parser Returned Error 0xc00ce508‘ due to a case where Windows services leveraging the installed .NET dependencies are actually corrupted and triggering the error.
If the damage is just superficial and does not compromise kernel files, built-in scans such as SFC (System File Checker) and DISM (Deployment Image Servicing Management) should help you replace every corrupted system file with a fresh counterpart that is not affected by corruption.
Note: Even if both utilities will ultimately accomplish the same thing, their M.O. is different, so we recommend running both utilities in quick succession from an elevated CMD prompt.
Here’s a quick guide on running SFC & DISM scans to address the 0xc00ce508 error:
- Open the Run dialog box by pressing the Windows key + R.
- To launch a Command Prompt with administrative privileges, type “cmd” into the Run box and press Ctrl + Shift + Enter.
Open a CMD menu with admin access - When the User Account Control prompts you to provide administrative access, select Yes.
- To begin an SFC scan, type the following command and press Enter:
sfc /scannow
Note: Keep in mind that System File Checker is a local application that does not require an active internet connection. It operates by sending out healthy copies of corrupted system files from a locally cached system file backup.
- When the SFC scan is finished (regardless of the outcome), run the following command from the same elevated CMD window to initiate a DISM scan:
DISM /Online /Image Cleanup /RestoreHealth
IMPORTANT: DISM is a newer repair utility that will need a persistent Internet connection. This is important information to remember because DISM will utilize a piece of WU to find sound substitutes for the damaged files that must be replaced.
- Once the DISM scan is complete, reboot your PC and see if the 0xc00ce508 error is still occurring.
Method 8: Perform a clean install/repair install
If none of the solutions listed above have helped you address the’0xc00ce508′ error when installing a program or when trying to update existing software, you can assume that the .NET dependency issue cannot be fixed conventionally.
The last resort and a method that will surely work is to simply refresh every Windows system file to ensure that no corrupted file is causing this behavior.
You can achieve this either by performing an in-place fix (repair install) or a clean install.
Note: A clean install is the simplest option, but it has the disadvantage of not allowing you to save your personal data (apps, games, personal media, and so on) unless you back them up first. If you choose a repair install, the operation takes a little longer, but the key advantage is that you get to preserve all of your personal data, including programs, games, personal media, and even specific user preferences.


