How to Overclock Raspberry Pi 4 Safely?
Raspberry Pi 4 has the Broadcom BCM2711 processor with four Cortex-A72 cores (same as the Raspberry Pi 400). Raspberry Pi 4 is factory clocked at 1.5GHz, whereas, the Pi 400 module is clocked at 1.8GHz, which is a clear indication that the Pi 4’s processor is capable of overclocking.
Then a question may come into a reader’s mind then why the Pi foundation has not done it by default? This is because the heat generated by an overclocked processor cannot be handled by the Pi’s motherboard (unless, some steps are taken to cool it down, which will increase the Pi’s cost). So, if you have or can arrange a heatsink or cooler, then you can easily overclock your Raspberry Pi 4 (safely to 2.147GHz or a maximum of reported 3Ghz but not useable) which will enhance the Pi’s performance significantly. Before diving into the overclock process of a Raspberry Pi 4, let’s cover some basics.
Meaning of Clock Speed in Computing
A Clock in computing is an electronic pulse that is used to sync all other components in a processor and a clock speed of 1.5 GHz simply means that the process is done 1.5 billion times in a second.

Overclocking Explained
Overclocking a processor (CPU or GPU) means setting the processor’s maximum clock speed to a higher level than the default or factory state e.g., the default clock speed of a Pi 4 is 1.5GHz, and the process to increase this clock speed to anything above 1.5GHz (like 2.3GHz) will be called overclocking (that is around 35 percent speed increase to the stock clock value). But to overclock any CPU or GPU (the Pi 4’s GPU can be safely overclocked from 500MHz to 750MHz), just not Pi-4, you may have to keep an eye on the temperature and involved voltages or currents.
Benefits of Overclocking a Raspberry Pi 4
The following are some of the advantages that you may get by overclocking a Raspberry Pi 4:
Retro gaming: If you are using your Pi 4 to play retro games, then Overclocking can significantly improve the retro gaming experience. This is specifically true if you are running Nintendo N64, Sony PlayStation 1, or Sega Dreamcast games on RecalBox, RetroPie, or some similar retro gaming solution.
Video Streaming: If you are using Raspberry Pi 4 for video streaming like Kodi, then you can get rid of the performance problems by running Kodi on your overclocked Pi. Also, an overclocked Pi will help you in using a VPN (a must for running Kodi).
Desktop: The additional performance of an overclocked Raspberry Pi can help a lot if the Pi is being used as a desktop computer.
ExaGear Emulator: If you are running Windows on your Raspberry Pi through the ExaGear emulator, then overclocking the Pi can enhance the Pi’s Windows performance.
Warnings Before Overclocking a Raspberry Pi 4
The overclocking of a Raspberry Pi 4 is generally a safe process but can be risky and overclocking it may void its warranty or even cause permanent hardware damage to it, so, you may try these steps at your own risk as we will not be responsible for any damages to Raspberry Pi 4 due to overclocking. Moreover, the SD card (make sure no essential data on the card, or you can back up the data by using an application like Win32 Disk Imager) or its slot can also be damaged. Last but not least, if everything works fine, overclocking a Pi 4 can certainly reduce its life.

Points to Consider Before Overclocking a Pi 4
There are reasons why a Pi 4 does not have higher clock speeds and you must consider these points before overclocking your Raspberry Pi 4.
- Make sure that a heat sink (for passive cooling) and a cooler (for active cooling) are installed on the board. Please do note that without this cooling technique, the overclocking will be counterproductive because the CPU will start throttling (to safeguard itself from burning) and may cause freezing (low performance as compared to the stock clock speed of 1.5GHz) as the Pi 4’s temperature rises.

Install a Heat Sink and Cooler on the Raspberry Pi 4 - There is always a chance (even with the above cooling technique) that the Pi 4 may overheat and get fried.
- You may void the warranty of the Pi 4 if over_voltage is greater than 6, force_turbo=1, and temp_limit greater than 85 or any settings above these values.
Requirements to Overclock a Pi 4
- Firstly, a Raspberry Pi 4 (single-board computer).
- SD card (32 GB or higher) with Raspberry Pi OS Installed.
- A cooling solution for Raspberry Pi 4 (a heatsink and cooler).
- A good power supply (it is recommended to use the official supply) so the Pi 4 does not starve of the power.
- USB Keyboard (optional).
- USB Mouse (optional).
- Monitor or display.
- Internet availability to the Raspberry Pi 4.
- A laptop or a desktop computer
Coming Out of the Crash of an Overclocked Raspberry Pi
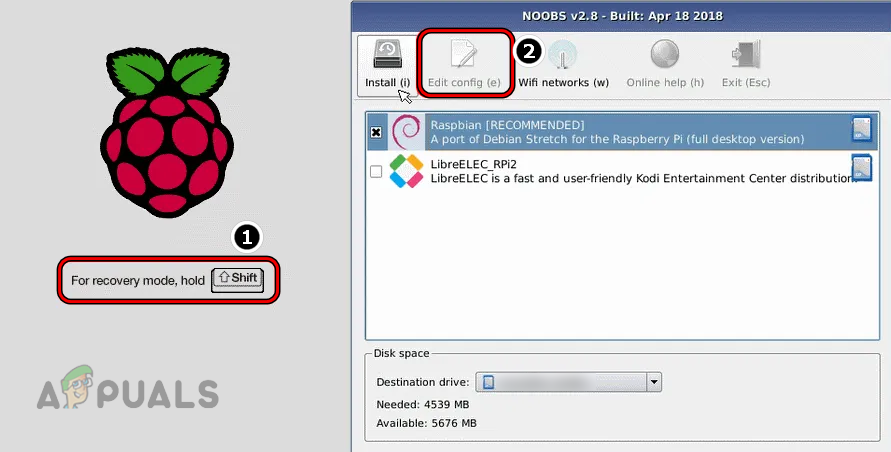
Before we start the process, the most important part is to come out of the crash or no boot scenario. If Raspbian is installed by New Out of Box Software (NOOBS) you have the option to press and hold the Shift key on the keyboard when booting the Pi 4, which will then lead to the original installation screen of the OS. Then you can modify config.txt, (the file we will modify to overclock the Pi 4 as discussed later).
In the case, you are using a PC or Pi OS to overclock the Pi 4, then you may edit its configuration file (discussed later) to revert the settings of the Pi 4 to the defaults.
Methods to Overclock Raspberry Pi 4
There are two methods to overclock a Pi 4, one through the Raspberry Pi OS and the other through a PC or phone (which can open the Pi 4’s SD card and edit its configuration file). Keep in mind that an older Raspberry Pi could be overclocked through its menu (along with the above two methods).
Overclock Raspberry Pi 4 Through the Raspberry Pi OS
If you have set up a Raspberry Pi OS on your Pi 4, then you can use it to overclock the Pi 4. The process can be divided into the following steps:
Update Packages and Dependencies of the Pi 4 to the Latest Build
- Launch the Terminal on the Pi 4 and execute the following:
sudo apt update && sudo apt upgrade -y
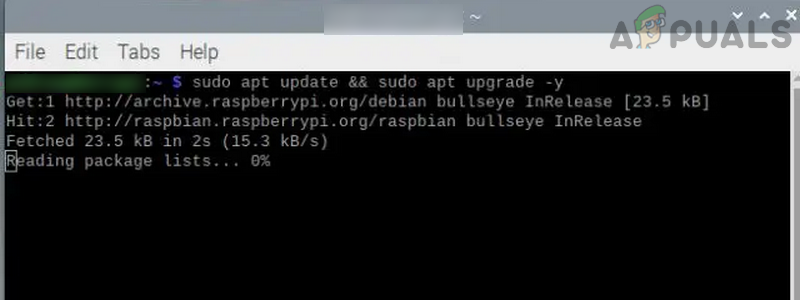
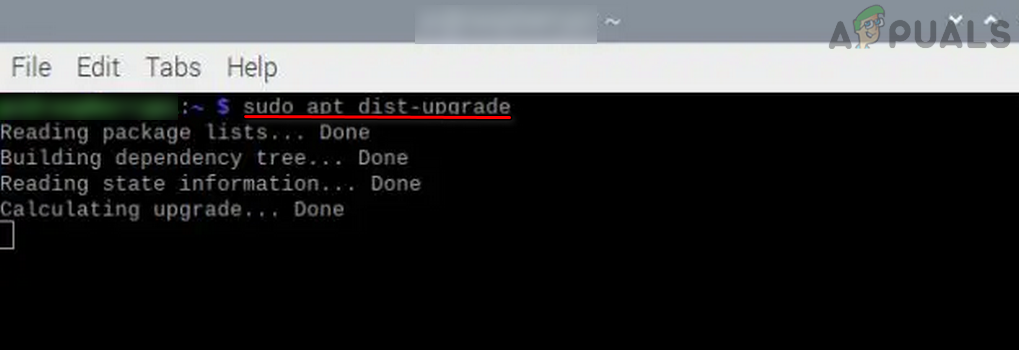
Update and Upgrade the Packages on the Raspberry Pi 4 - Now execute the following in the Terminal to upgrade the distro on the Pi 4:
sudo apt dist-upgrade
Upgrade the Distro of the Pi 4 to the Latest Build - Then execute the following to update the firmware of the Pi 4:
sudo apt install rpi-update
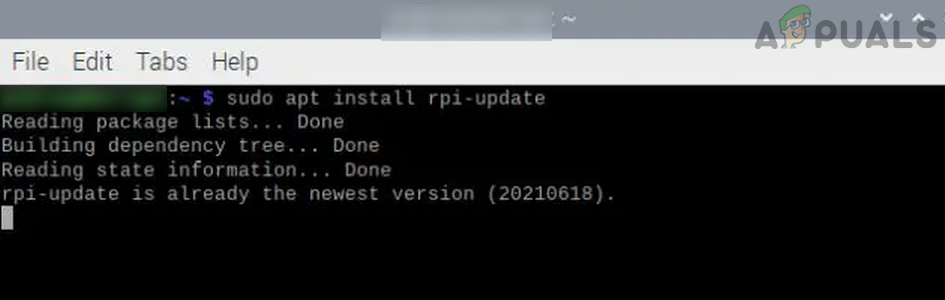
Update the Firmware of the Raspberry Pi 4 to the Latest Build - If the firmware is already updated, proceed further, otherwise, execute the following:
sudo reboot
Check Current Configurations of the Pi 4
Before overclocking the Pi 4, it is better to check the current configurations of the Pi 4. To do so, launch the Pi 4’s Terminal and execute any one of the following:
Lscpu
or
cat /sys/devices/system/cpu/cpu0/cpufreq/scaling_cur_freq

Start Overclocking the Pi 4
So, now the major part begins, overclocking your Raspberry Pi 4. To do so:
- Launch the Terminal and execute the following to open the Pi 4’s configuration file in the Geany editor:
sudo geany /boot/config.txt

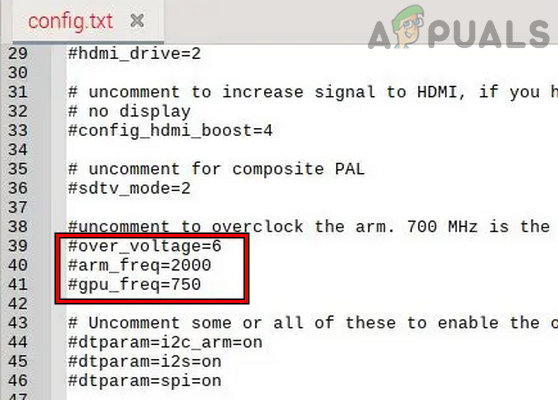
Open the Config File of the Pi 4 in the Geany Editor - Now, wait till the Geany editor window is launched with the opened configuration file and then find #arm_freq=800 (you may need to scroll a bit).
- Then delete the # from the beginning of the line to enable the command (as it will uncomment it) and change its value from 800 to 2000.
- Now look for over_voltage and set its value to 6.
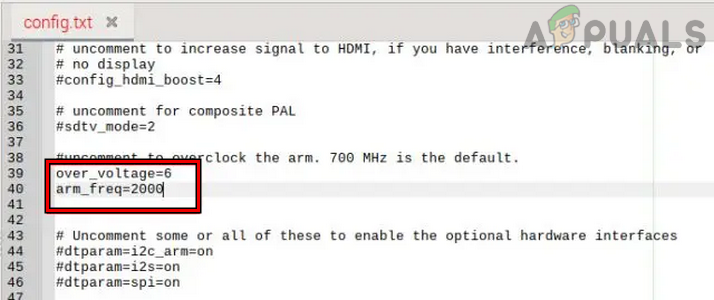
Set the Voltage to 6 and ARM Freq to 2000 in the Configuration File of the Pi 4 - Then, if you want to overclock the GPU of the Pi 4, look for gpu_freq and set its value to 750.
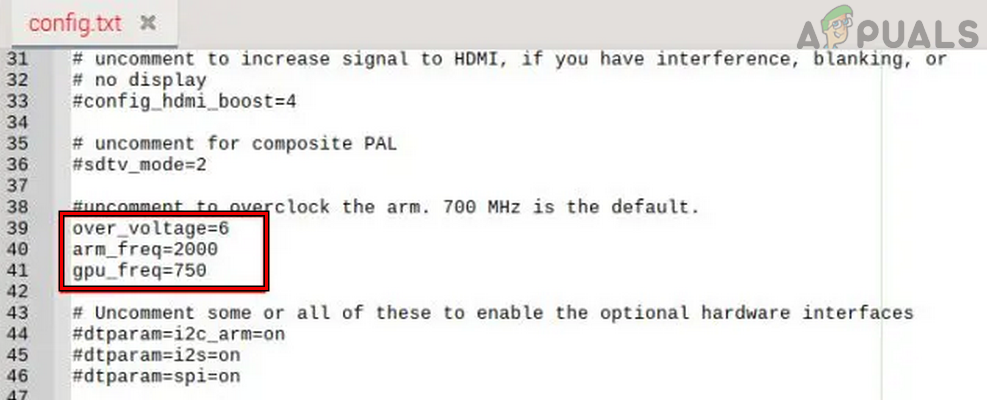
Set the GPU Freq of the Pi 4 to 750 - Now save the changes made to the configuration file and close the Geany editor.
- Then restart your Pi 4 and now the Pi 4 will boot with the overclocked values.
If it fails to boot, then press the Shift key on the keyboard and reboot the Pi 4 with the stock values. If that fails, then you may edit the Pi 4’s configuration file on a PC to revert its value to the defaults (discussed later).
Set Up Monitoring of Temperature and Clock Speed of the Pi 4
- Once the Pi 4 is booted with the overclocked values, open two instances of Terminal on your Pi 4 and execute the following in one of the Terminal windows to monitor the clock speed of the CPU:
watch -n1 vcgencmd measure_clock arm
- Now, in the other Terminal window, execute the following to measure the Temperature of the Pi 4:
watch -n1 vcgencmd measure_temp
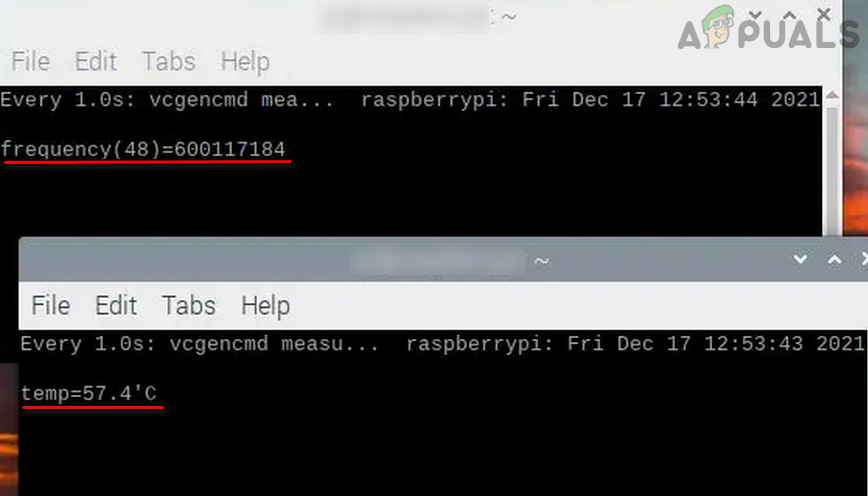
Check Freq and Temp of the Pi 4 Through the Terminal
Run SysBench to Test the Overclocking of the Pi 4
- Once the clock speed and temperature monitoring are in place in the Terminal, execute the following in the Terminal to install SysBench:
sudo apt install sysbench

Install SysBench on the Pi 4 - Once installed, execute the following in the Terminal window and keep on checking the temperature as well as clock speed windows in the Terminal to note down the parameters:
sysbench --num-threads=8 --test=cpu --cpu-max-prime=20000 run
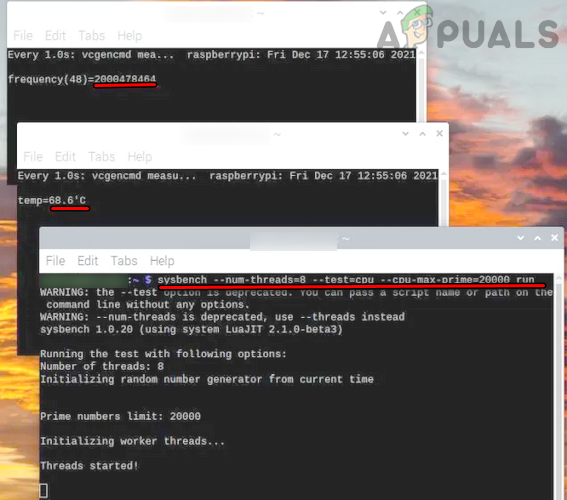
Run SysBench Test on the Pi 4 and Check Temperature Along with Frequency - Once the test completes, you can check the numbers. As your mileage may vary, depending on many factors, we can give you some numbers to compare with. The overclocked 2Ghz Raspberry took 10 seconds to complete the sysbench test, whereas, the stock or base clock (1.5GHz) Raspberry Pi 4 took around 15 seconds to complete the same test. This is some serious performance boost to the Pi 4 which you can notice in your real use.
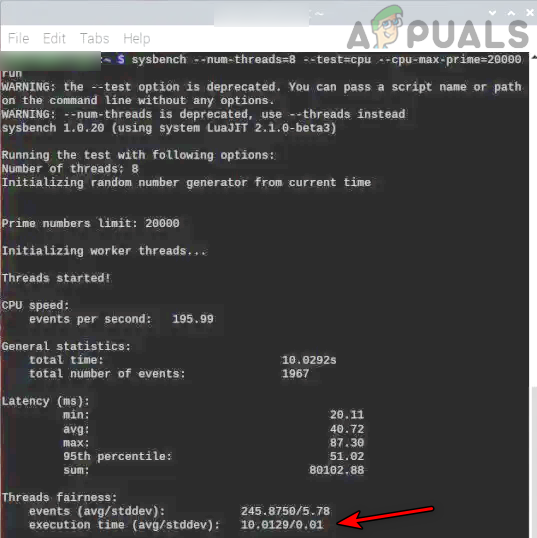
Check Execution Time of the SysBench Test on the Raspberry Pi 4
Try Higher or Lower Clock Speeds on the Pi 4
Not every silicon chip is made equal and not every Pi 4 will be feasible with the above values. In such a case, you may try higher or lower clock speeds on the Pi 4.
- To lower the clock values, add the following to the configuration file of the Pi 4 (as discussed above) and restart the Pi 4:
over_voltage=2

arm_freq=1750
- To increase the clock values of the Pi 4, add the following to the Pi 4’s configuration file and restart the Pi 4:
over_voltage=6

arm_freq=2147

gpu_freq=750
Disable Overclocking of the Pi 4
There may come a time when you may want to run your Pi 4 with the stock clock speed. To do so:
- Launch the Terminal of the Pi 4 and execute the following to open the configuration file in the Geany editor:
sudo geany /boot/config.txt

Open the Config File of the Pi 4 in the Geany Editor - Now head to the section where the values were added/edited earlier and simply add a # sign (which will disable the execution of these commands by marking them as comments) before each entry i.e., add # before over_voltage, arm_freq, and gpu_freq.
Disable Overclock of the Pi 4 by Adding # Sign into the Beginning of Lines - Then save the changes made to the configuration file and close the Geany editor.
- Now restart your Pi 4 and it will boot with the default clock speeds.
In the case, you want to enable overclock, repeat the above steps and simply remove the # sign from over_voltage, arm_freq, and gpu_freq in the Pi 4’s configuration file to uncomment these values and restart the Pi 4.
Overclock Raspberry Pi 4 Through a PC
If you have installed Windows on Raspberry Pi 4 or have another PC, you can then overclock the Raspberry Pi 4 through Windows on Pi or another PC. In the case of a Pi 4’s Windows, you may use the Boot Partition Mount Utility. For another PC, the process is the same for Windows, Mac, and Linux (even for an Android phone and iPhone that can open an SD card and edit the Pi 4’s configuration file) but we will discuss the process for a Windows PC:
- Power off the Pi 4 and remove its SD card.
- Now insert the SD card into the Windows PC and open the SD card through the File Explorer.
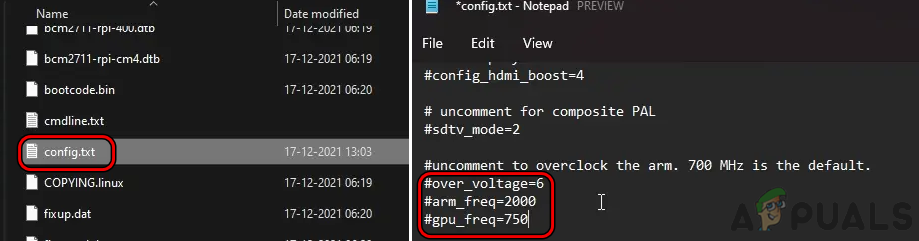
- Then, in the Boot partition of the SD card, find the config file and open it with the Notepad or Notepad++ (it is better to use Notepad++ as notepad can corrupt Linux distro files and the changed configurations may not be applied).
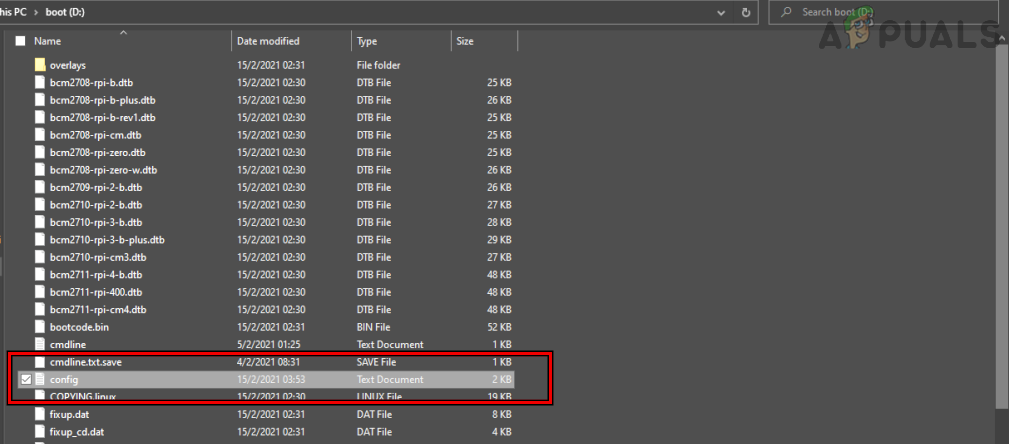
Open Config File Through the Notepad or Notepad++ - Now add the lines below if you want to use stable overclocking (for a Pi 4 with a decent cooling system):
over_voltage=6

arm_freq=2147

gpu_freq=700
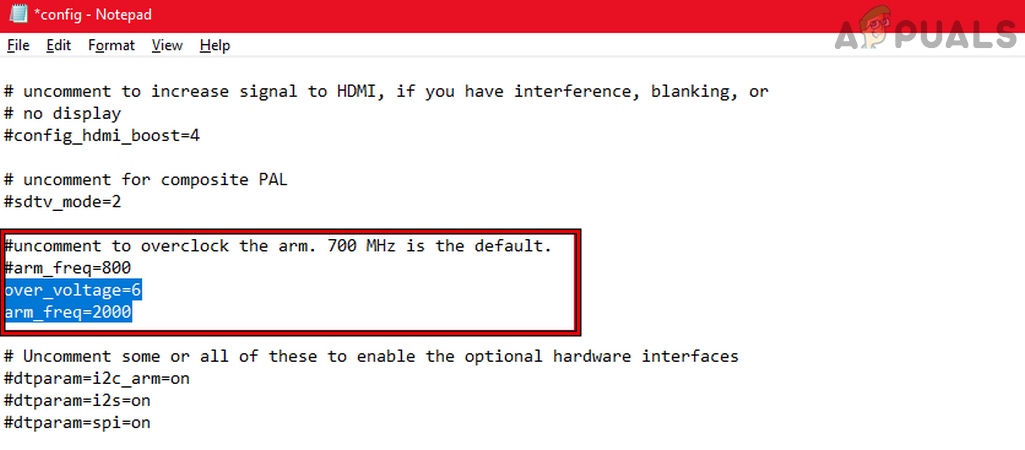
Set the Voltage to 6 and ARM Freq to 2000 in the Pi 4’s Configuration File on Windows - In the case, you want to use the Medium Overclocking (for a Pi 4 with a moderate cooling system), add the following lines to the configuration file:
arm_freq=2300

gpu_freq=750

gpu_mem=32

over_voltage=14

force_turbo=1
- In the case, you want to use the Extreme Overclocking (for a Pi 4 with a highly efficient cooling system) on the Pi 4, add the following lines to the configuration file but be careful, it can cause freezing and could be dangerous:
initial_turbo=60

over_voltage=15

arm_freq_min=100

arm_freq=2350

gpu_freq=800

gpu_mem=512

Use Liquid Nitrogen to Cool the Pi 4 to -196 °C - Once the required lines are added (stable, medium, or extreme overclocking), save the changes made and close the text editor. It will be better to start from stable and then move to the extreme after testing the working condition of the Pi 4.
- Now remove the SD card from the Windows PC and insert it into the Pi 4.
- Afterward, boot the Pi 4 with the overclocked settings.
- Then launch the Task Manager and head to its Performance tab (if the Pi 4 is using Windows).
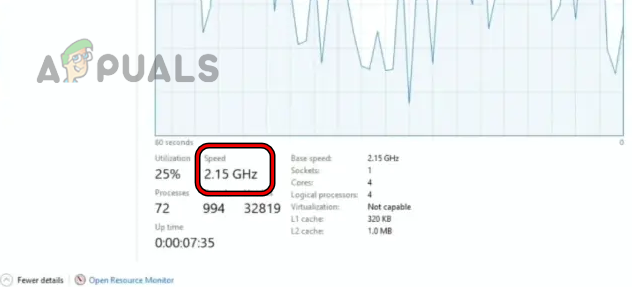
Check Speed of the Pi 4 in the Performance Tab of the Pi 4’s Windows - Now you can notice the Pi 4’s CPU clock speed to be at 2.1GHz (if stable overclocking was used).
Keep in mind if the Pi 4 fails to boot, you may use the above steps to revert the clock speed to the defaults.
Understanding Different Warning Signs
During the overclocking, you may notice the following warning icons and then adjust the problematic feature to resolve the issue.
Undervoltage Warning
If you are seeing an Undervoltage warning, adjust the voltages of the Pi 4 (you may need another stable power supply).

High-Temperature Warning (80-85 °C)
If you are seeing a high-temperature warning, either increase the cooling of the Pi 4 or power it off and decrease its overclocking speeds after letting it cool down.
Over-High Temperature Warning (Above 85 °C)
If you are seeing this icon, power off the Pi 4 immediately and let it cool down. Now decrease its overclocking speeds and try the overclocking again.
Conclusion
We are hopeful that everything would have gone well for you and that you have successfully overclocked your Raspberry Pi 4. If you have any queries or suggestions, do not hesitate to ask in the comments section.