How to Fix Oculus Software Not Installing on Windows?
The installation failure of the Oculus software in Windows usually points to interruptions during the setup process, which prevent the installer from properly configuring one or more essential components. One of the most common causes is firewall or security software blocking the installer’s connection to Oculus servers, stopping it from downloading necessary files.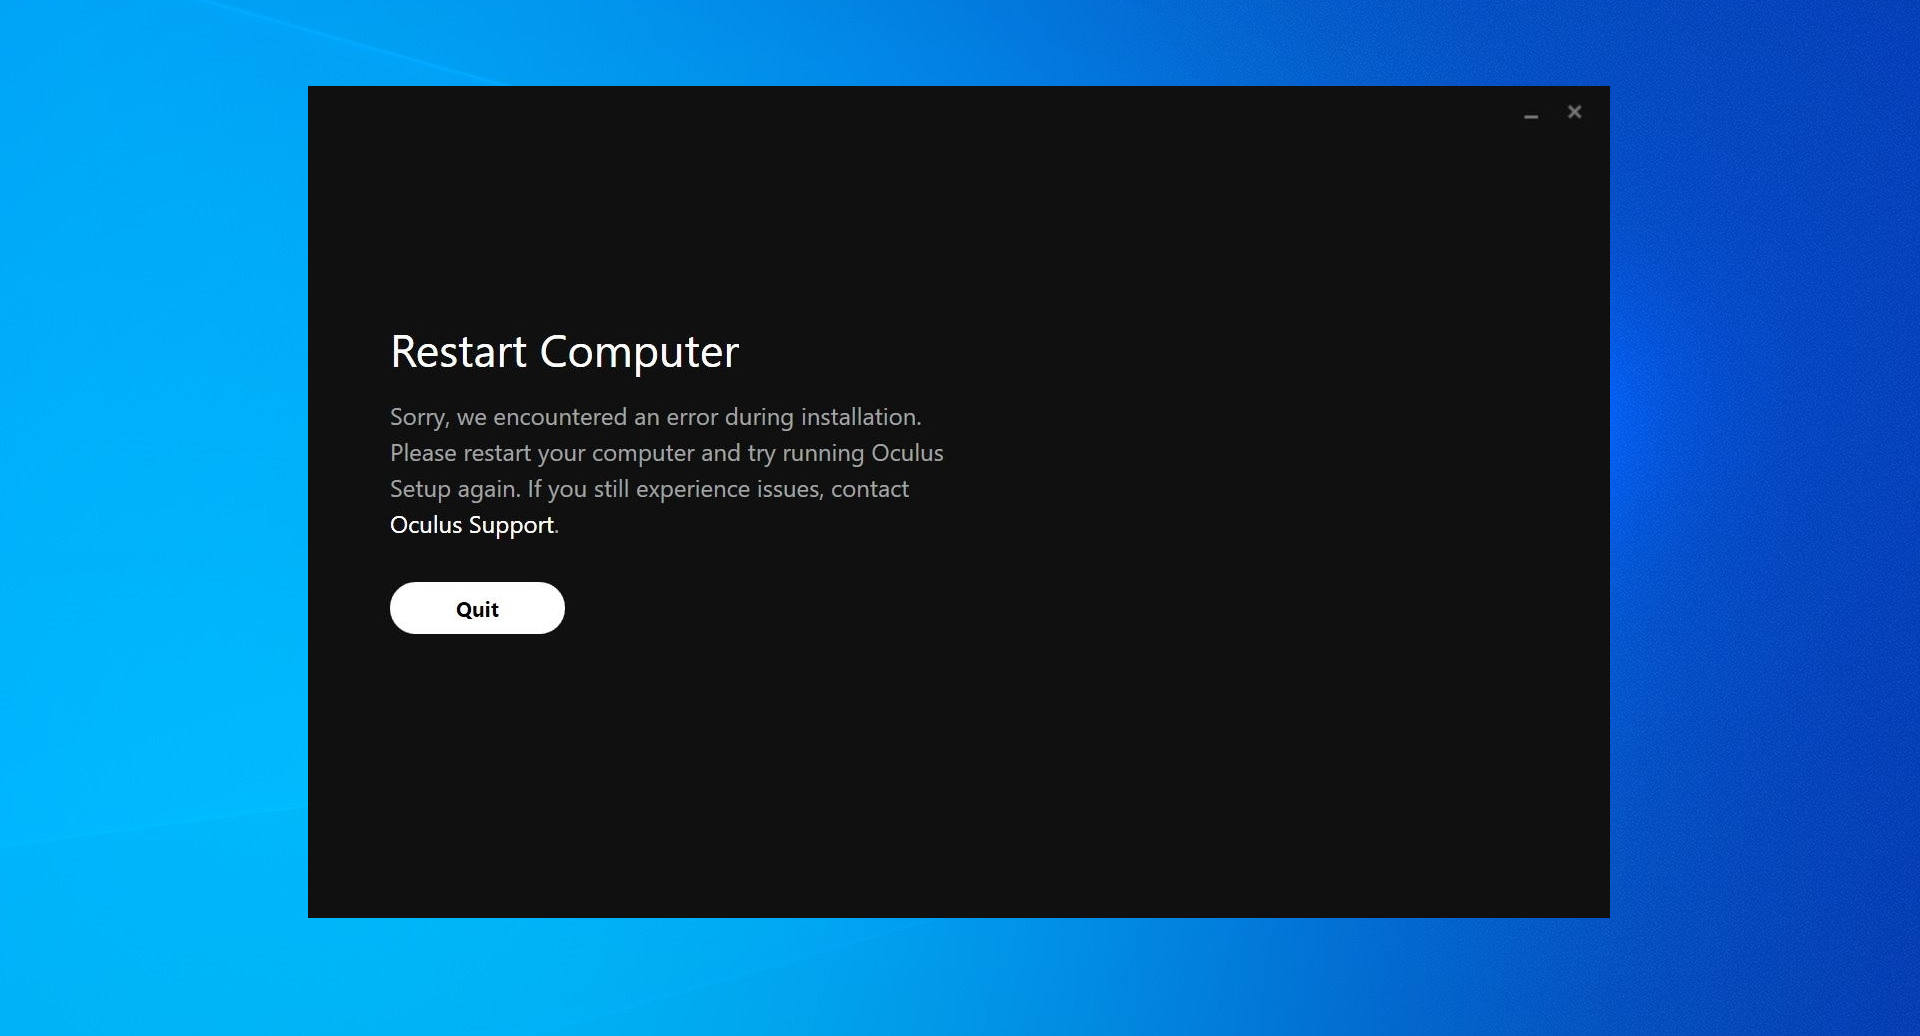
Other contributing factors include network restrictions, such as proxy settings or DNS issues, and Oculus drivers failing to install automatically during setup.
To avoid permission-related problems, make sure to run the Oculus installer as an administrator. Additionally, try unplugging your Oculus headset and other VR peripherals before starting the installation, as this has helped some users complete the process without errors.
1. Allow Oculus Installer in Firewall and Windows Defender
The Windows Firewall may block the Oculus installer, preventing it from accessing the internet and downloading essential files. Adding the installer to the firewall’s exception list can help restore proper network access and avoid connection-related errors.
Additionally, Windows Defender might falsely detect some Oculus installation components as threats, especially during driver installation. Temporarily allowing or whitelisting the installer can prevent these interruptions and ensure a smooth setup.
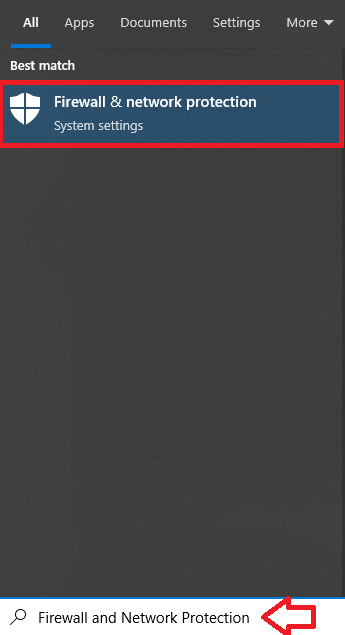
- Click the Start button, search for ‘Firewall and Network Protection’, and open it.
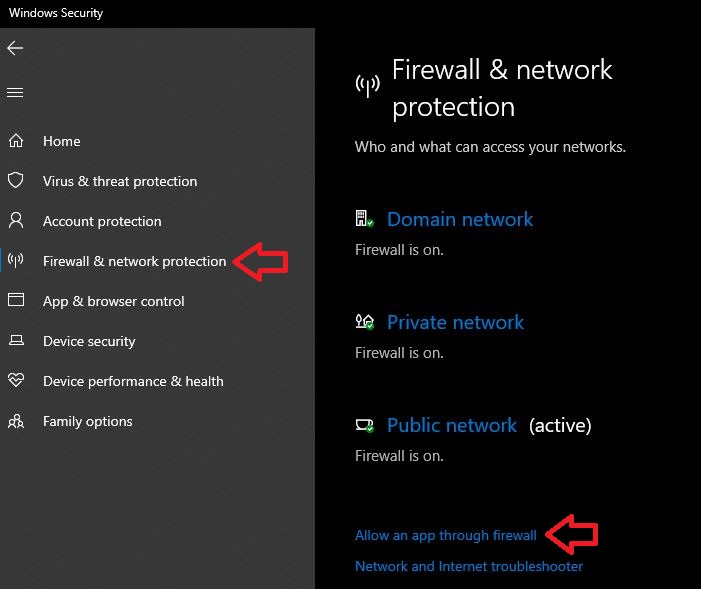
- Click ‘Allow an app through firewall’ in the left sidebar.
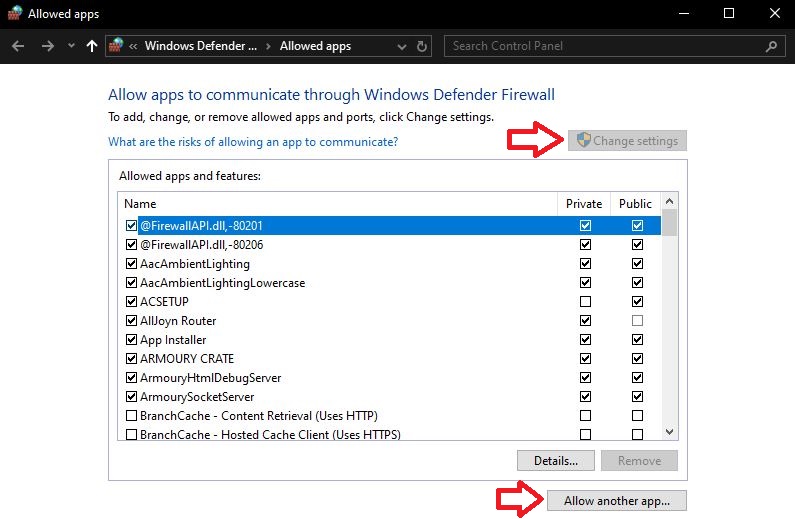
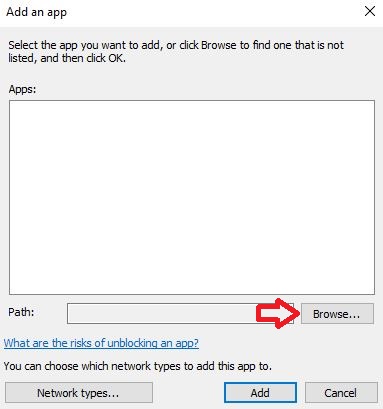
- Click ‘Change settings’ (admin rights required), then click ‘Allow another app…’.
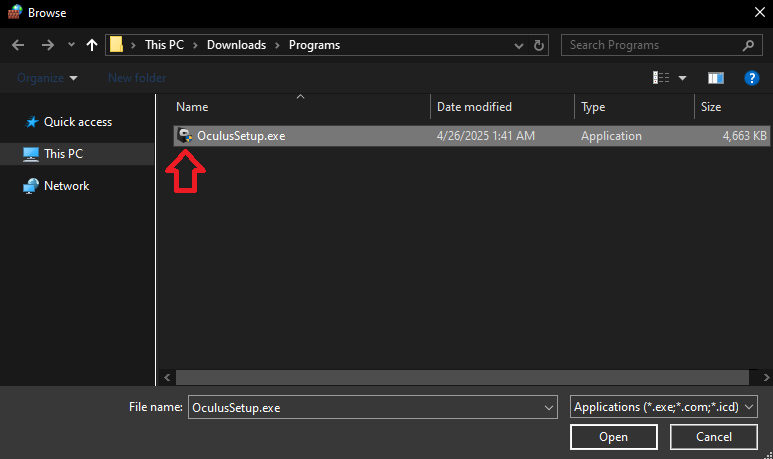
- Click Browse and navigate to where you saved ‘OculusSetup.exe’.
- Select ‘OculusSetup.exe’ and click Open.
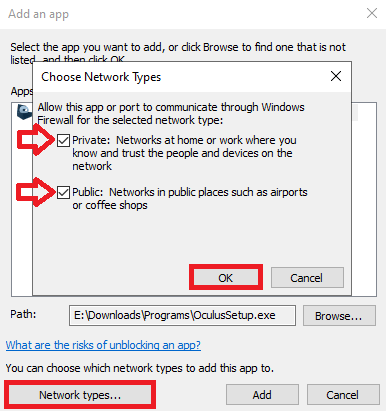
- Check both Private and Public network boxes, then click OK.
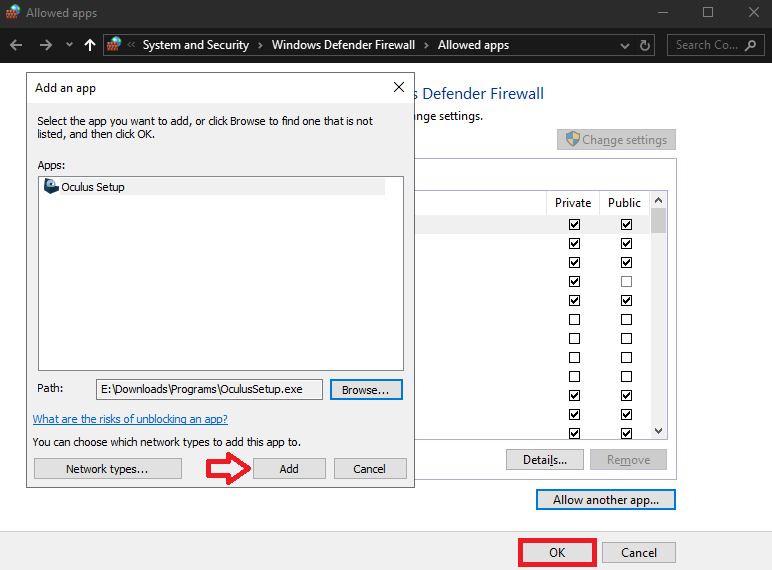
- Click Add, then OK to confirm.
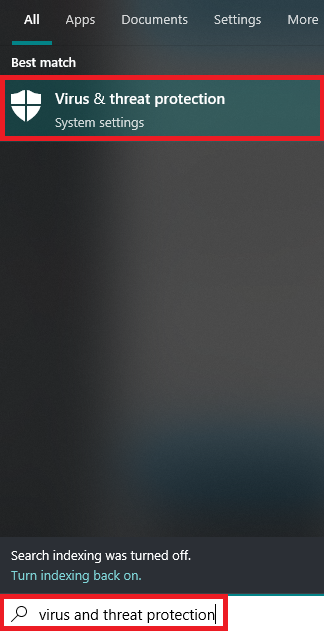
- Search for and open Virus & Threat Protection from Start.
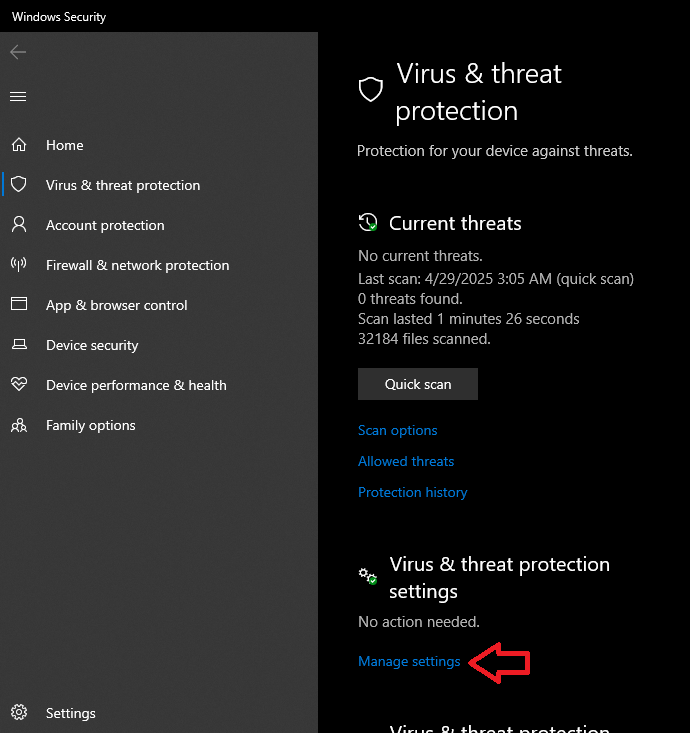
- Click Manage settings under Virus & Threat Protection settings.
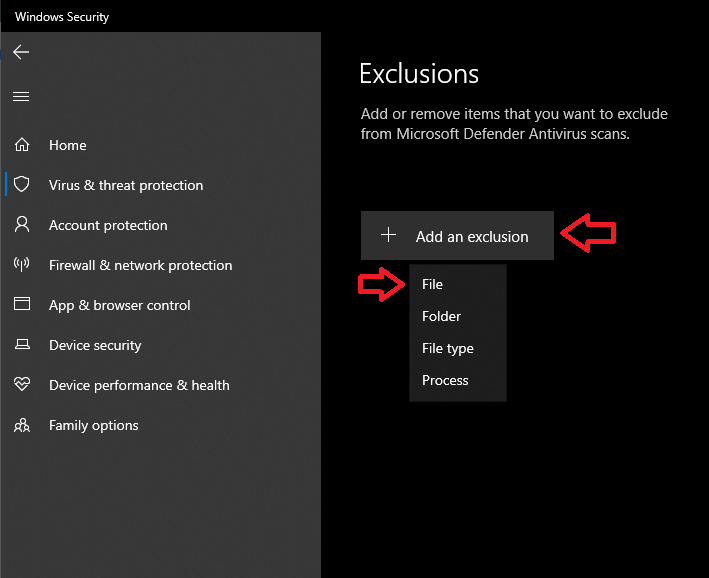
- Scroll down to Exclusions and click ‘Add or remove exclusions’.

- Click Add an exclusion and select File from the dropdown.
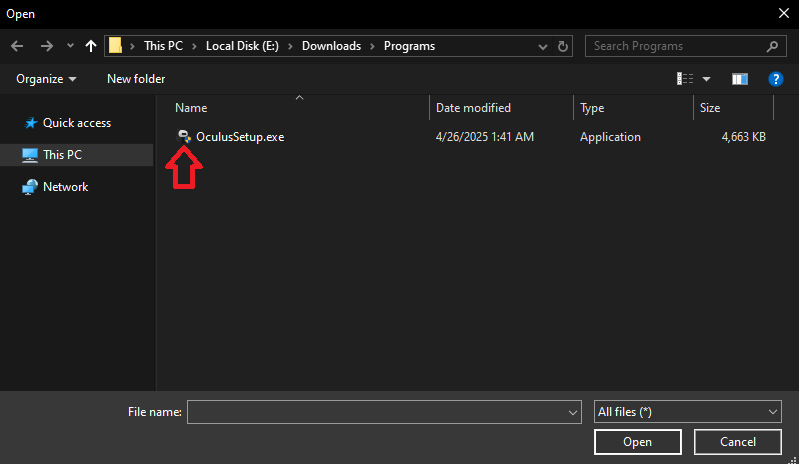
- Select OculusSetup.exe to add it to exclusions.
- After Oculus installs, repeat the process but select Folder to exclude the entire Oculus application folder.

2. Install Oculus Driver Manually
The Oculus driver may fail to install during the automatic setup due to a glitch or corrupted installer files. This can prevent the installation process from continuing. Manually installing the Oculus driver ensures that the required components are properly configured, allowing the software to function as intended.
- Run the Oculus installer and wait for the initial setup to begin.
- While the installer runs, open File Explorer and go to:
C:\Program Files\Oculus\Support\oculus-drivers
(Note: This path may vary if you installed Oculus in a different location)
- Create a new folder on your desktop, then copy these files from the Oculus drivers folder:
- Oculus-driver.exe
- Daybreak.dll
- Newtonsoft.json.dll
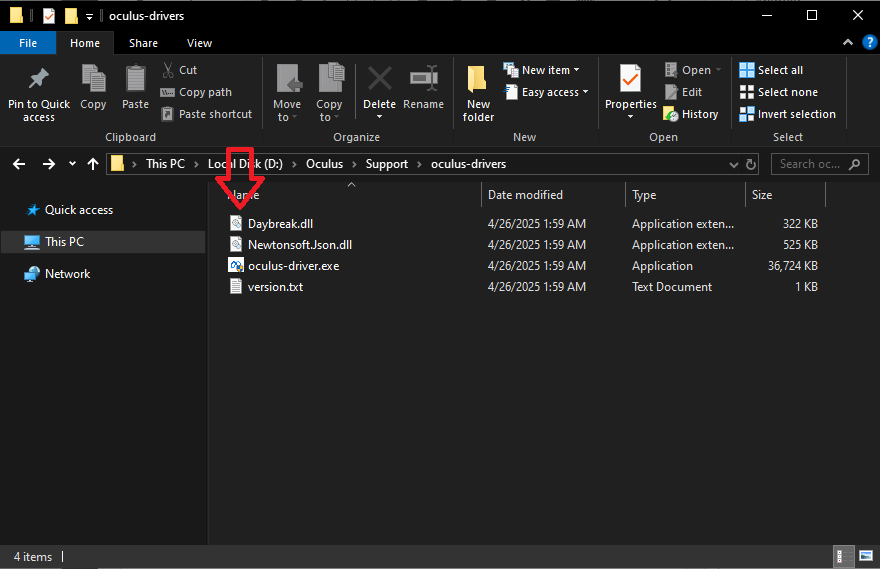
- If you can’t access individual files, copy the entire oculus-drivers folder to your new location.
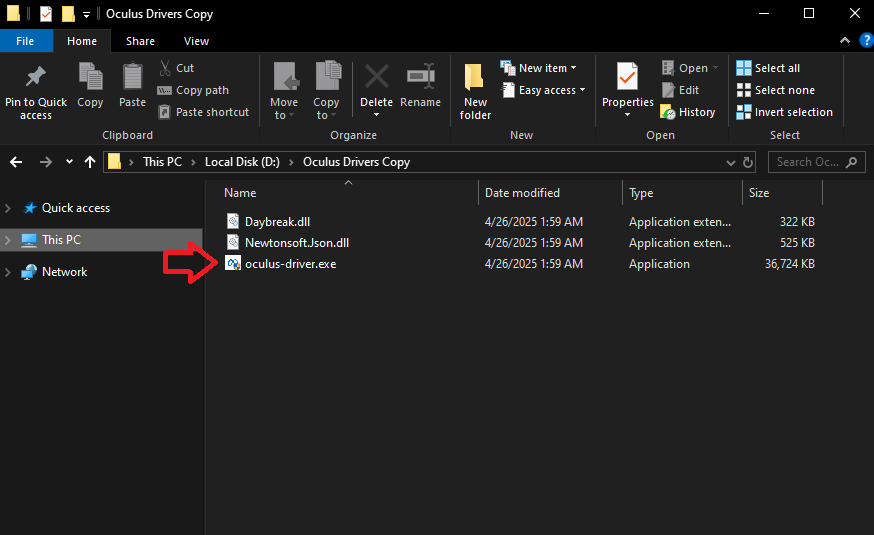
- When the Oculus installer fails, close it completely and open your backup folder.
- Double-click oculus-driver.exe to manually install the drivers.
- Restart your computer, then run the Oculus installer again to complete the setup.
3. Use VPN
Sometimes, your ISP may block Oculus-related domains or impose regional restrictions, which can prevent the installer from communicating with Meta’s servers. This can interrupt the download of essential files and drivers, ultimately causing the installation to fail. Using a VPN can reroute your network traffic through different servers, helping you bypass any such blocks or restrictions.
Note: For best results, we recommend using a premium VPN, as they offer multiple server options, better stability, and no speed limitations.


