How to Fix “GPU Not Supported” Error in OBS Studio
This error typically appears when OBS Studio cannot recognize your GPU or properly access its resources. In most cases, it’s caused by either unsupported hardware or a canvas size that exceeds your GPU’s rendering capacity. This prevents OBS from initializing video output and may cause crashes on startup.
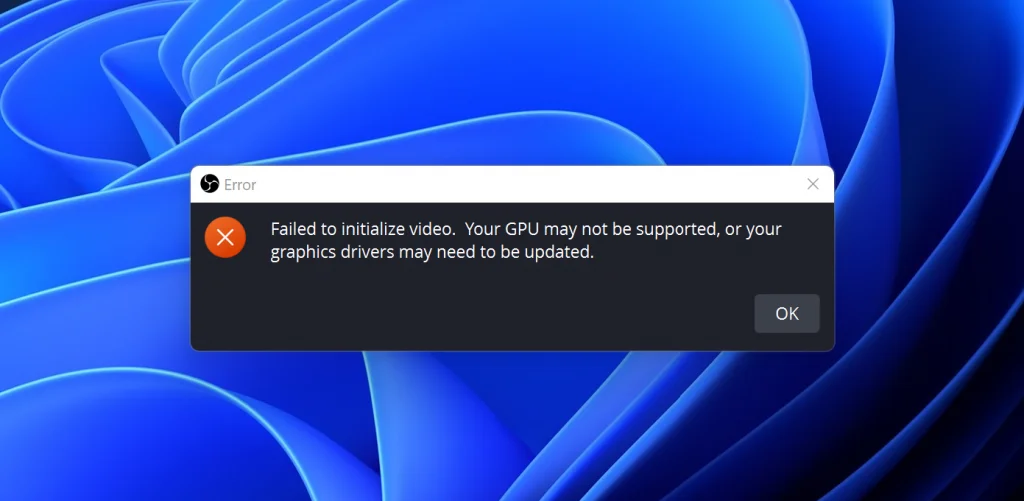
Another possible cause is installing the wrong OBS version—for example, downloading a 64-bit build on a system that only supports 32-bit applications, or using a hardware-accelerated version that your GPU does not support.
Now that you understand the possible causes behind this error, let’s move on to the solutions. Below, we’ve listed a series of proven methods that can help resolve the “GPU Not Supported” issue in OBS Studio. Make sure to follow each step carefully to identify which fix works best for your system configuration.
1. Set OBS to High Performance
This error can occur if Windows is not allowing OBS Studio to fully utilize your dedicated GPU. To ensure that OBS has unrestricted access to GPU resources, you need to manually assign it to run in High Performance mode through Windows graphics settings. This tells the system to prioritize your dedicated GPU (NVIDIA or AMD) when launching OBS, instead of defaulting to the integrated graphics.
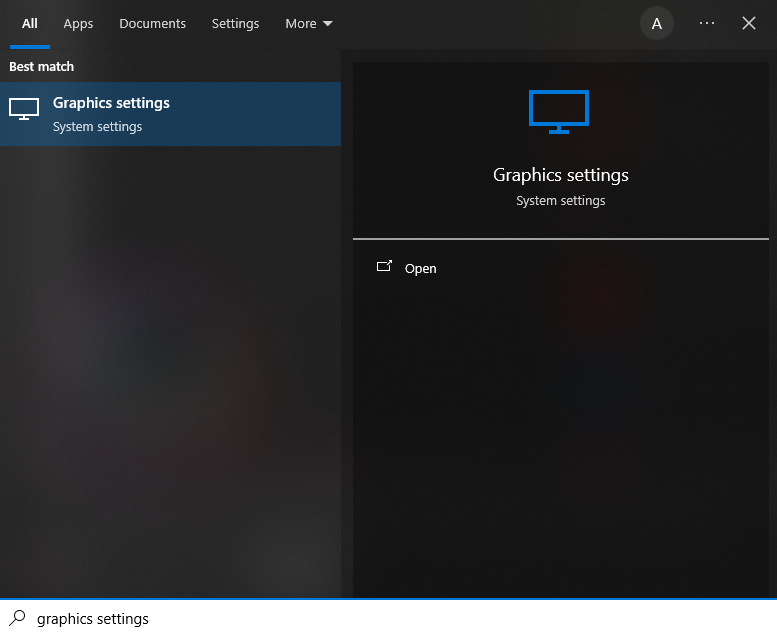
- Open the Windows search bar (Windows key + S), type “Graphics Settings”, and select the matching system setting.
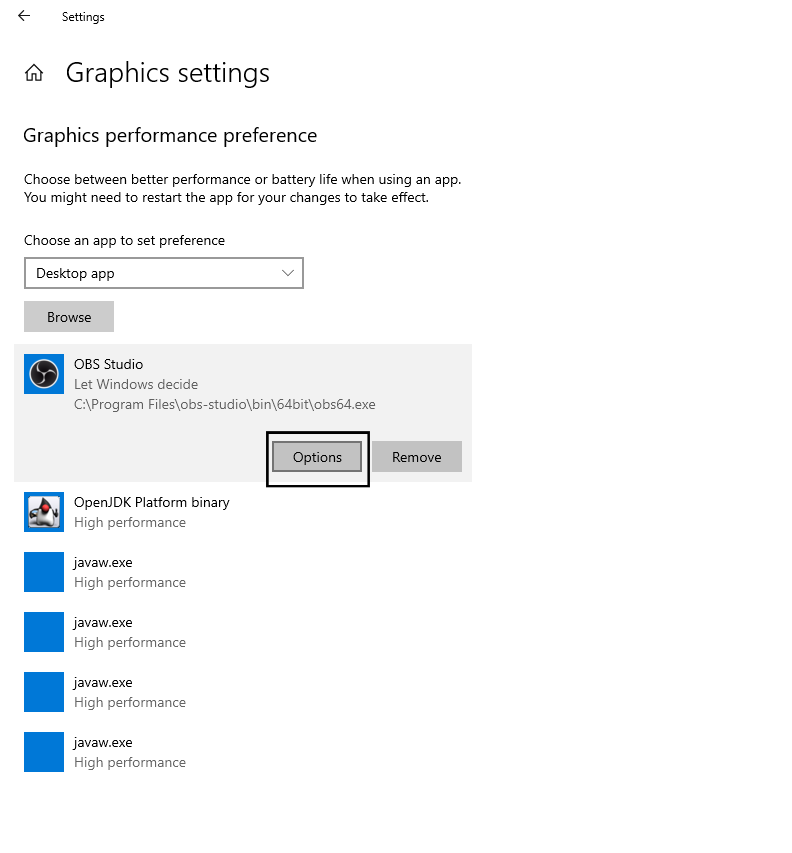
- In the Graphics Settings window, click the Options button (typically located under the app selection).
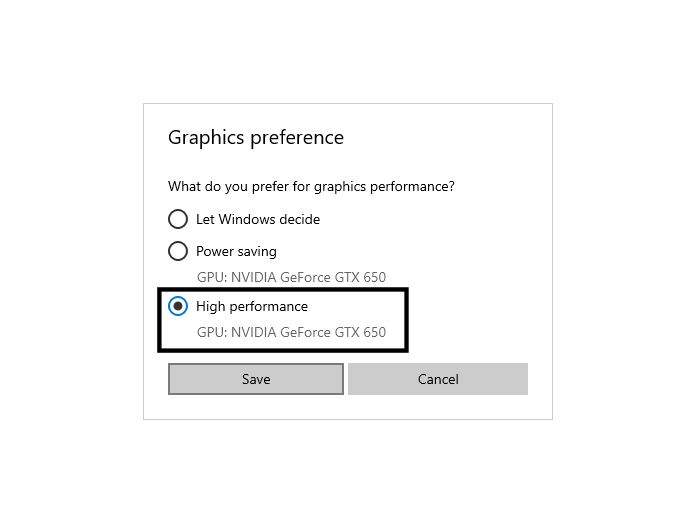
- From the graphics preference drop-down, select High Performance, then click Save to apply the changes.
2. Change Resolution from the Initialization File in OBS
OBS uses your system’s base resolution as a reference for streaming, recording, and capturing. If this resolution is set too high—such as 2560 x 1440 or higher—your GPU might fail to support it, resulting in the “GPU Not Supported” error during OBS launch.
If OBS doesn’t open due to this issue, you won’t be able to lower the resolution through the interface. Instead, you can manually change it by editing the initialization (INI) configuration file located in the OBS Studio folder. This allows you to set a more GPU-friendly resolution and restore functionality.
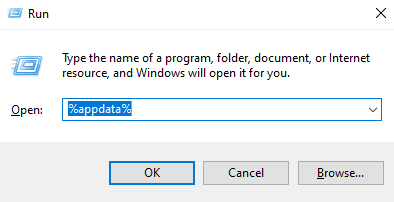
- On your desktop, press Windows key + R to open the Run dialog.

- Paste this exact path into the Run dialog and press Enter:
%appdata%\obs-studio\basic\profiles\Untitled
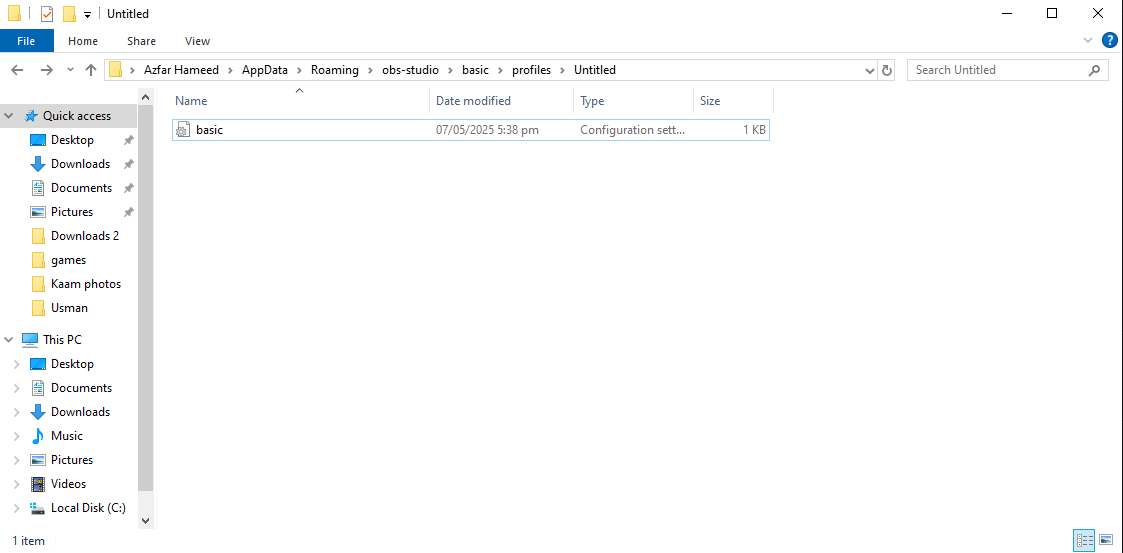
- Right-click the basic file and select Open with Notepad.
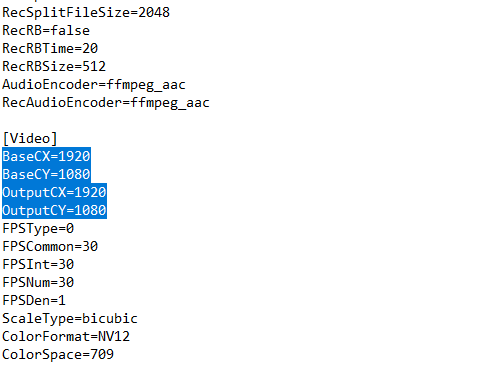
- Find the [Video] section and modify these values:
BaseCX=1920
BaseCY=1080
OutputCX=1920
OutputCY=1080
3. Delete the OBS Settings Folder
Corrupted or misconfigured OBS settings—such as an oversized canvas resolution or incompatible capture settings—can prevent the application from launching properly. If OBS isn’t using its default configuration, it may trigger the GPU error or crash on startup.
To resolve this, you can delete the OBS settings folder from your system. Doing so will reset OBS to its default configuration, allowing it to launch cleanly without applying problematic custom settings.
Note: This will reset all your OBS settings and profiles. If you want to preserve your current setup, consider backing up the folder before deleting it.
- On your desktop, press Windows Key + R to open the Run dialog box.
- Type or paste the following path and press Enter:
%appdata%\obs-studio
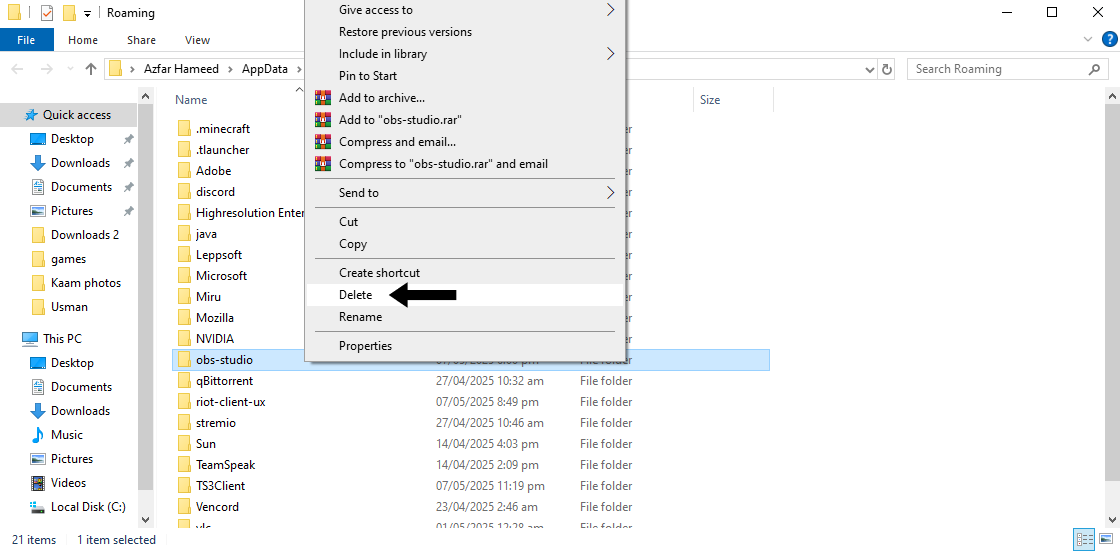
- Right-click the obs-studio folder and select Delete to remove it completely.
- Restart OBS Studio – this will generate fresh configuration files and should resolve your issue.
If none of these methods work, consider reinstalling OBS Studio with the latest stable version from the official OBS website.


