Monitor Says “No Signal”? Try These 8 Easy Fixes!
Imagine turning on your computer only to find your monitor displaying nothing—a black screen staring back at you. While this situation can be alarming, the “no display” or “no signal” issue is a common problem that often leaves users feeling confused and anxious.

The good news is that in most cases, you can resolve this issue by following a few essential troubleshooting steps. Read on to discover how to fix the “Monitor says no signal” issue with clarity and confidence.
If your monitor displays a pop-up message like “No Signal,” this usually indicates a problem with the connection between your computer’s graphics output and the monitor’s input. This communication problem can be caused by several factors, including loose cables, outdated drivers, incorrect input settings, and other issues. Let’s examine these possible causes and learn the steps you can take to fix them.
1. Check Cable Connections
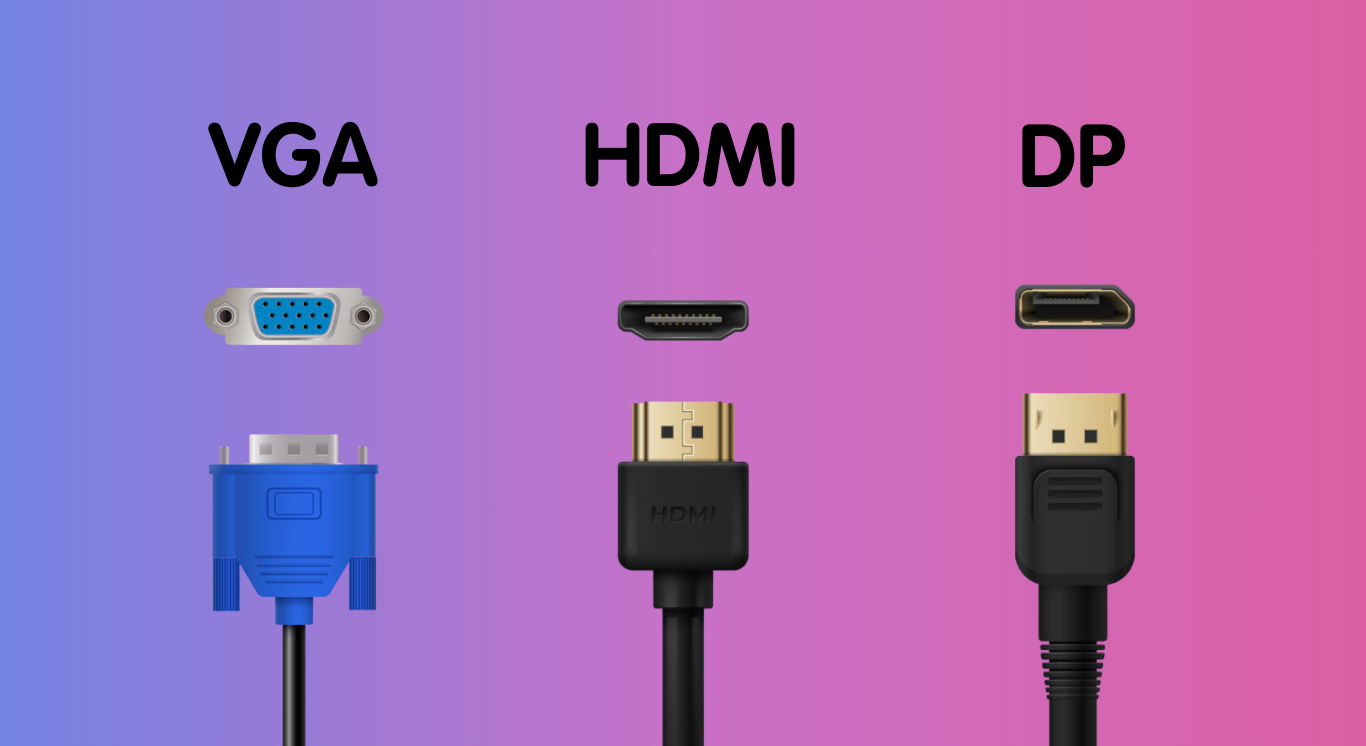
Begin by inspecting your video cables to ensure they are securely and properly connected. Verify that your VGA, HDMI, or DisplayPort cables are firmly attached to both your computer and the monitor. Additionally, check for any damaged or bent pins, as these can easily disrupt the signal. If you discover damage or wear, replacing the cable should promptly restore your display.

2. Check Input Source
Next, make sure your monitor is set to the correct input source. For example, if you are using an HDMI cable, your monitor should be set to “HDMI” as the input. It’s easy to overlook this setting, but an incorrect input source will prevent the monitor from displaying anything.
Here’s a step-by-step guide to choosing the right input source on your monitor:
- Ensure both your PC and monitor are powered on.
- Press the menu button on your monitor. The button’s location may vary—look for it along the edge or underneath the monitor.

Press the menu button - Navigate to the “Input Source” tab using the monitor’s buttons.

Head to Input Source - Select the correct input source that matches your cable connection.

Choose your specific input source
3. Switch To a Different Connection
If you still experience a “no signal” issue, try using a different type of video connection. For example, if you are currently using a VGA port, switch to HDMI or DisplayPort instead. HDMI offers much better video quality than VGA, and DisplayPort can provide even greater performance in some cases.
If changing the connection resolves the issue, this indicates that the original port on either the monitor or the computer may be faulty. In this case, the damaged port may need repair for long-term reliability.
4. Inspect Your Graphics Card
This step requires opening your computer case and checking your graphics card to ensure it is firmly and correctly seated in its slot. While re-seating a graphics card is not overly complex, always handle components gently and do not force the card into the slot. Proper installation allows for reliable video output.
- Turn off your computer and disconnect all power and data cables.
- Open the computer case, and gently remove the graphics card by unscrewing and carefully lifting it out, if necessary.

- Gently re-insert the graphics card into the PCIe slot, making sure it is fully and properly connected.

PCIe slot should look like this
While performing this task, examine the graphics card for any physical damage such as burnt areas, worn-out connectors, or visible signs of overheating. If your CPU has integrated graphics, you can also try connecting your monitor directly to your motherboard’s video output. If you see a display this way, your dedicated graphics card may be the cause of the original problem.
5. Update Your Graphics Card’s Drivers
If your CPU includes integrated graphics and your monitor works when connected directly to the motherboard, your dedicated graphics card drivers may be outdated or corrupted. To fix this, visit your graphics card manufacturer’s website and download the latest driver updates. After installation, restart your computer and check if your monitor is now displaying as expected.

6. Test the Monitor on Another System
If your monitor still shows no display after the above steps, test the monitor with another computer using the same video cable and input source. This process helps you pinpoint whether the cause is your computer or the monitor. If the monitor works with another device, there may be an underlying issue with your computer’s hardware or configuration.
7. Thoroughly Examine Your PC
Once you have determined that your problem originates from your computer, it is important to methodically examine each component to identify the root cause.
- Power Supply: The power supply provides essential power to your entire system. Ensure all cables are connected securely. In areas susceptible to power surges or outages, consider using a surge protector or UPS for added safety.
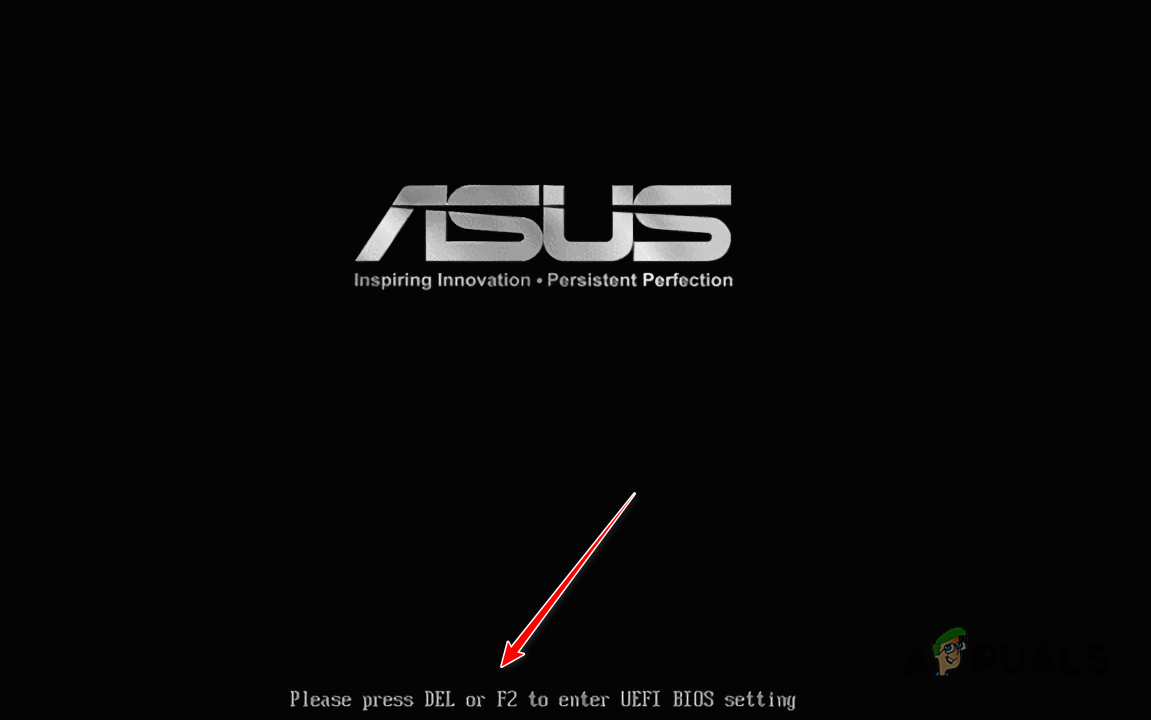
- BIOS Settings: The BIOS manages hardware configurations for your system. To check these settings, restart your computer and press the designated key (usually Delete, F12, or F10) during startup. Make sure the correct graphics output (dedicated GPU or integrated graphics) is selected.

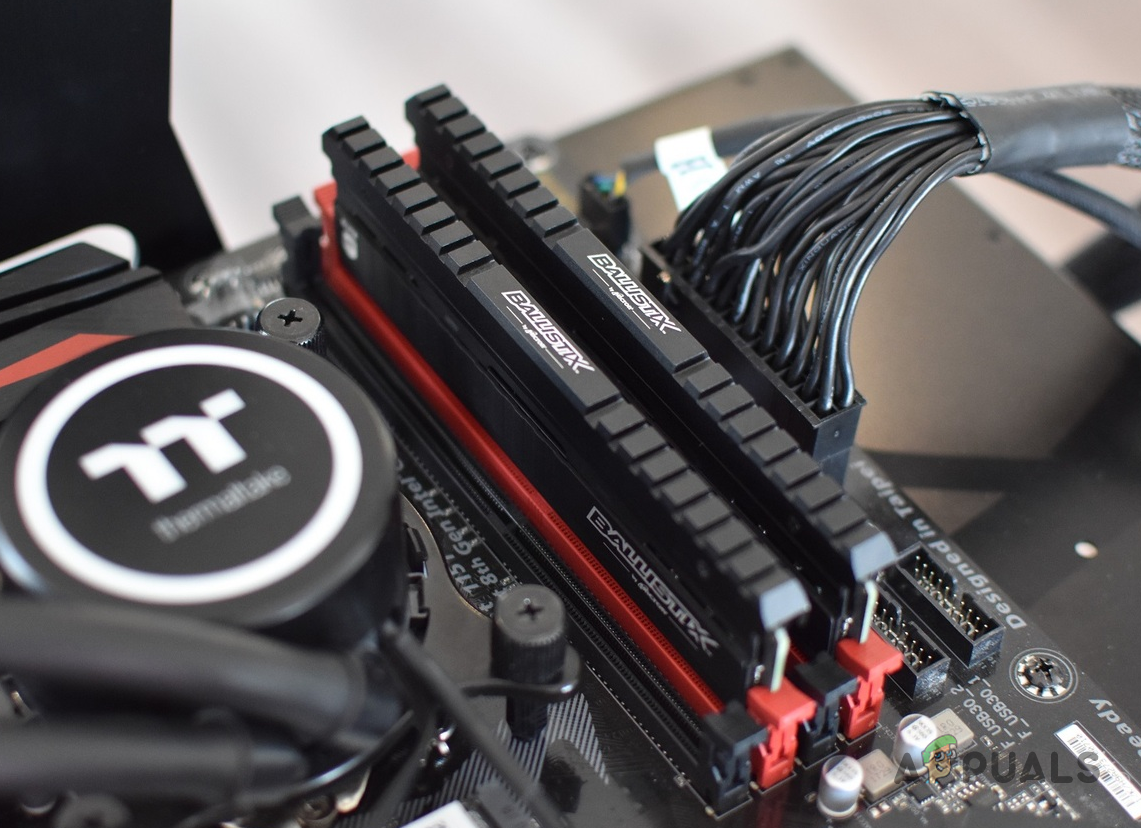
BIOS Shortcut Key for ASUS - RAM and Motherboard Connections: Confirm that your RAM sticks are firmly seated in their slots. Loose or improperly installed memory can cause display problems. Remove and reinsert the RAM if necessary, ensuring all other connections to the motherboard are also tight.

RAM Sticks on Motherboard
These are some of the fundamental troubleshooting steps to guide your examination. Additional options include resetting BIOS settings, testing individual hardware components, and monitoring for signs of overheating. However, working with computer hardware and advanced software settings requires appropriate knowledge and caution. If you are unsure, consider consulting a professional before proceeding further.
8. Talk To an Expert
If your PC continues to display the “no signal” issue, the best solution is to take your system to a qualified technician. An expert can thoroughly diagnose your hardware, test with alternative RAM, GPU, and motherboard components, and check your CPU for possible bent pins or hidden faults. Professional assistance ensures your system receives the necessary attention for a reliable fix.


