How to Fix an Empty DXCache Folder in Windows?
If you encounter an issue where the DXcache folder remains empty, it means your graphics driver fails to create shader cache files after you launch the game for the first time.
Various reasons can cause this issue, but mainly it happens due to problems with the graphics driver. Additionally, the recent change in the location of the DX cache folder might be the reason you cannot see any file or DX cache folder in the location where you used to see it.
1. Verify the Shader Cache Settings in the Nvidia Control Panel
If the shader cache option is not enabled, your GPU driver won’t create shader cache files even if you play the game for several hours; you will find the DX cache folder empty. Therefore, ensure that the shader cache option is turned on in the Nvidia Control Panel.
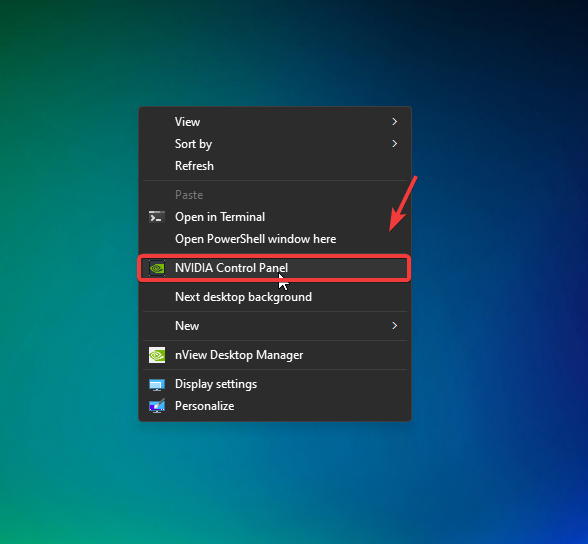
- Hold the Shift key, right-click the desktop, and select Nvidia Control Panel.
- Go to Manage 3D settings from the left.
- In the right pane, find the Shader Cache option listed under Settings and make sure it is turned on.
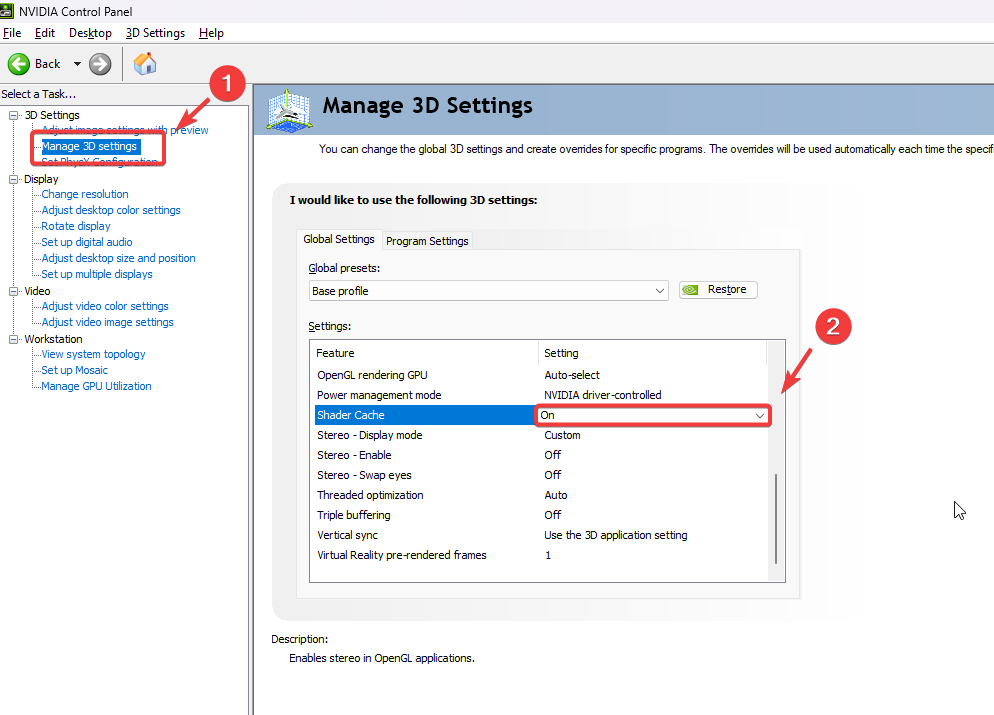
- Once done, click Apply and check if the files are being created under the cache folder.
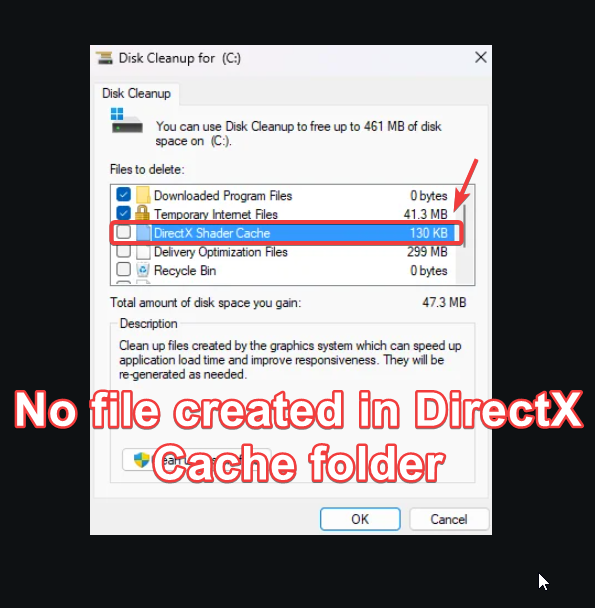
2. Verify the DX Cache Location
Recently, the location of the DirectX cache folder has been moved from the Local folder to LocalLow, which might be why you are unable to see it in the location where you used to.
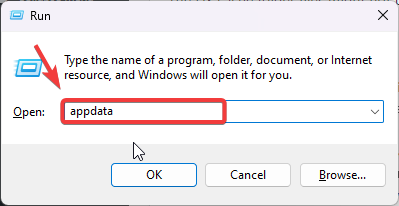
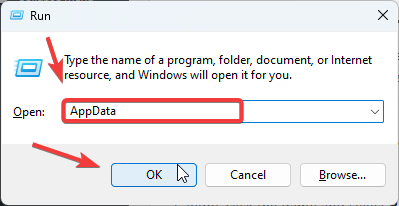
- Press the Win + R keys simultaneously and type Appdata in the input box.
- Click OK to navigate to the folder.
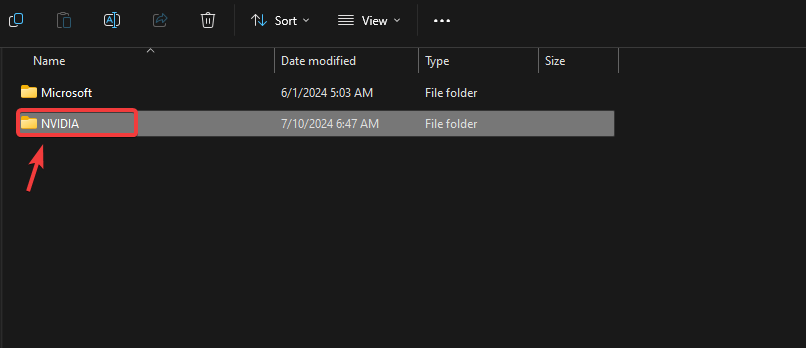
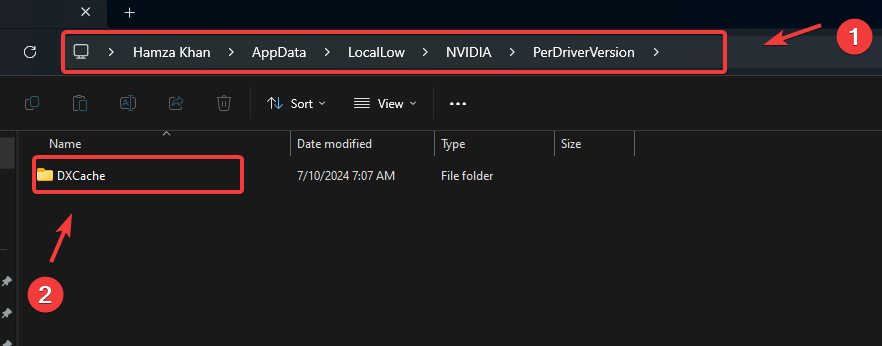
- Navigate to LocalLow\NVIDIA\; here, you should see the DX cache folder listed. If you cannot see it, you can also check the Local folder. If it still cannot be found, proceed to the following methods to fix the issue.
3. Use DDU to Reinstall the Driver
The DX cache folder files might not be created due to a problem with your GPU driver. Reinstalling the GPU driver using DDU (Display Driver Uninstaller) will remove all the traces of the previous driver, which might be corrupted, resulting in this issue.
- Download the Display Driver Uninstaller using the link.
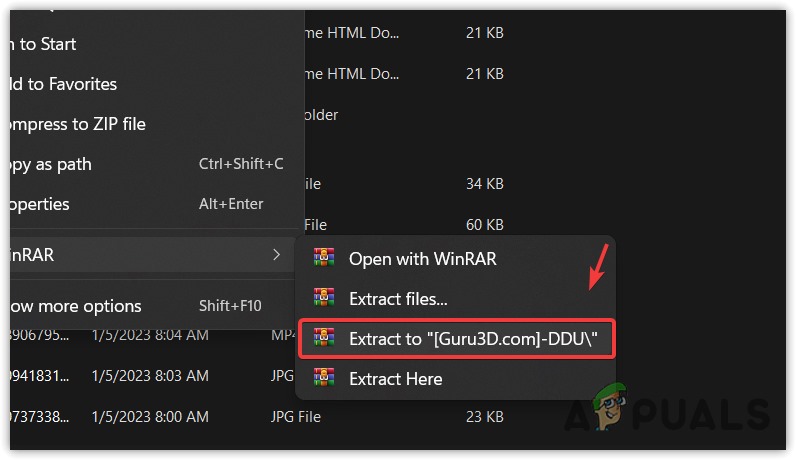
- Once downloaded, extract the folder using WinRar or 7zip.
- Now, navigate to the extracted folder and run the DDU 7zip file.
- Click on the Extract option and navigate to the extracted folder once done.
- Then, run the Display Driver Uninstaller application.
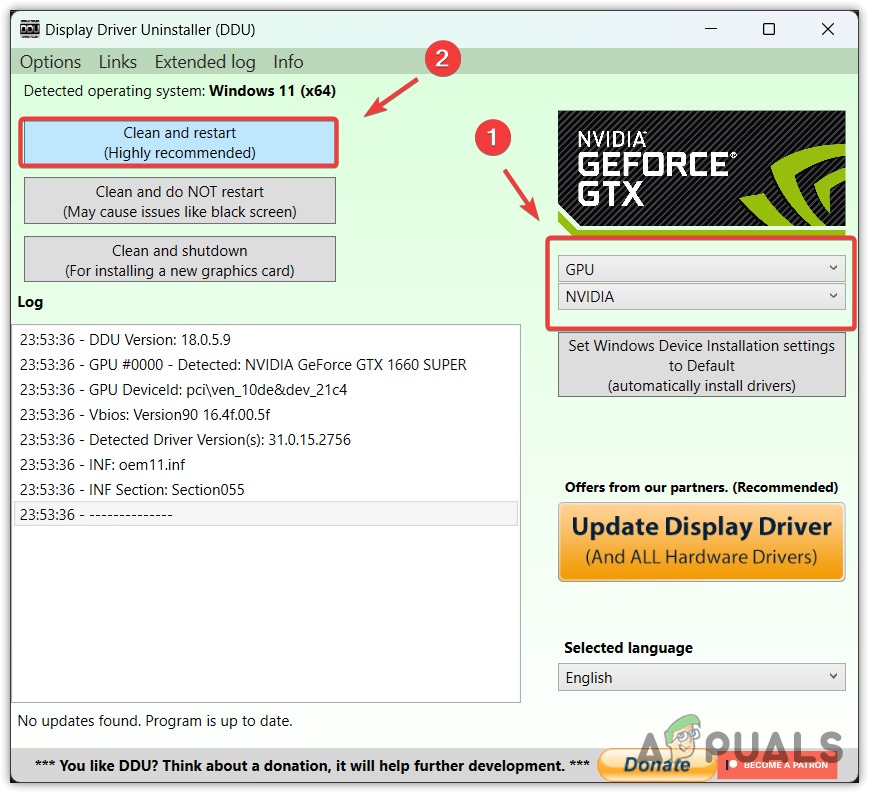
- Select the GPU from the device type and the GPU vendor.
- Then, click Clean and Restart.
- Once done, install the GPU Driver from the official manufacturer’s site.
- Once done, restart your computer.
- Then, launch the game and see if the problem is resolved.
4. Manually Create DXCache Folder
Manually creating the DXCache folder directory in the right location will help the games access and create the necessary cache files. Sometimes, issues with the profile usernames and incorrect driver installation prevent the applications from saving the cache files. Therefore, manually creating the folder might resolve the issue.
- Press the Win + R keys simultaneously to open the Run window.
- Type AppData in the input box and click OK.
- Now, navigate to the following directory and create a folder with the name DXCache.
AppData\LocalLow\NVIDIA\PerDriverVersion\
- Once done, see if the issue is resolved or not.
5. Verify the Game Permissions
Another reason could be a lack of permissions, which could prevent the game from storing the shader cache. To address this, try running the game as an administrator and verify that you have full control over the DXCache folder to create the necessary files.
Running the game as an administrator will ensure that the application has all the necessary permissions to perform the required actions.
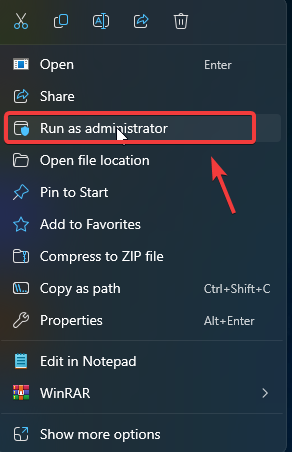
- Right-click the game and select Run as administrator.
- If you find the issue is fixed, then configure the game or application to always run with administrator privileges.
- Again, right-click the game, go to Properties from the top, then go to Compatibility and tick Run this program as an administrator.
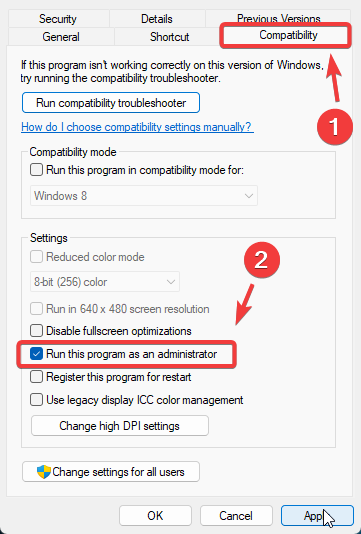
- Once done, click Apply and click OK.
- Then, check if the issue is fixed or not.
Lastly, if none of the solutions work, you can try using the system restore utility to revert Windows to a previous state. This requires having a restore point from before you encountered the issue. If you don’t have any restore points, resetting the PC without losing data might be the best solution.