Fix: CMD System Error 6118 occured
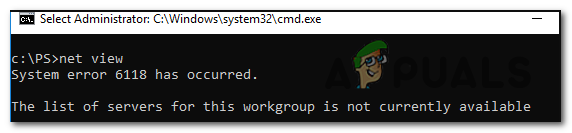
The ‘Net View Error 6118′ CMD error typically appears when the user tries to use the ‘net view /all‘ command to view the full list of network devices from via the terminal. In most cases, affected users report that no devices are showing up under Network in File Explorer, although they can ping them directly via CMD.
What’s causing the ‘Net View Error 6118’ and How to Fix it?
- 3rd party AV / Firewall interference – As it turns out, this particular issue can appear due to an overprotective security solution that is interfering between the Server Message Block and the other network devices. To fix the issue in this case, you will need to uninstall your current 3rd party firewall or at least disable the real-time protection.
- Function Discovery service is Disabled – If none of your network-connected devices show up inside the services screen, it’s probably because of the Function Discovery Provider Host service is disabled. To fix the issue in this case, all you need to do is open the Services screen and enable the service + the one associated with it (Function Discovery Resource Publication).
- Computer Browser service is Disabled – If no ‘net view’ commands are being processed by CMD, it’s probably because the Computer Browser service is disabled. This was part of the SMBv1 the was deprecated on the latest versions of Windows 10. To use it, you will need to enable SMBv1 via the Windows Features menu and then enabled the Computer Browser service via the Services menu.
1. Disable 3rd party Firewall / AV (if applicable)
As it turns out, one of the most common causes that might end up spawning the ‘Net View Error 6118’ error is overprotective firewall protection that blocks the SMB (Server Message Block) from communicating with other network devices.
Note: If you’re not using an external firewall/security suite that might cause this issue, move down directly to the next method below.
Quite a lot of affected users have reported that in their case, the issue ended up being caused by an overprotective security suite that ended up interrupting the connection between the SMB and other devices connected to the same network due to a false positive.
If this scenario is applicable, you should start your troubleshooting guide by investigating if the 3rd party virus protection tool that you’re using is not actually causing the ‘Net View Error 6118′ issue.
If you’re using a 3rd party AV, the ideal way to start is to disable the real-time protection, restart your computer and see if the issue goes away for good.
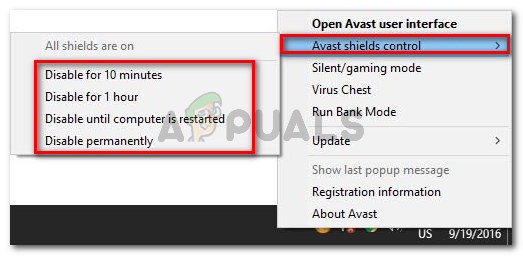
However, if you’re using an external firewall, disabling the Shields / Real-Time protection will not do you any good since the same security rules will remain firmly in place. If the latter scenario is applicable, the only way you will be able to confirm your suspicion is by temporarily uninstalling the 3rd party suite and seeing if the ‘Net View Error 6118′ error stops occurring.
Here’s a quick guide on uninstalling your 3rd party firewall in order to eliminate the potential interference:
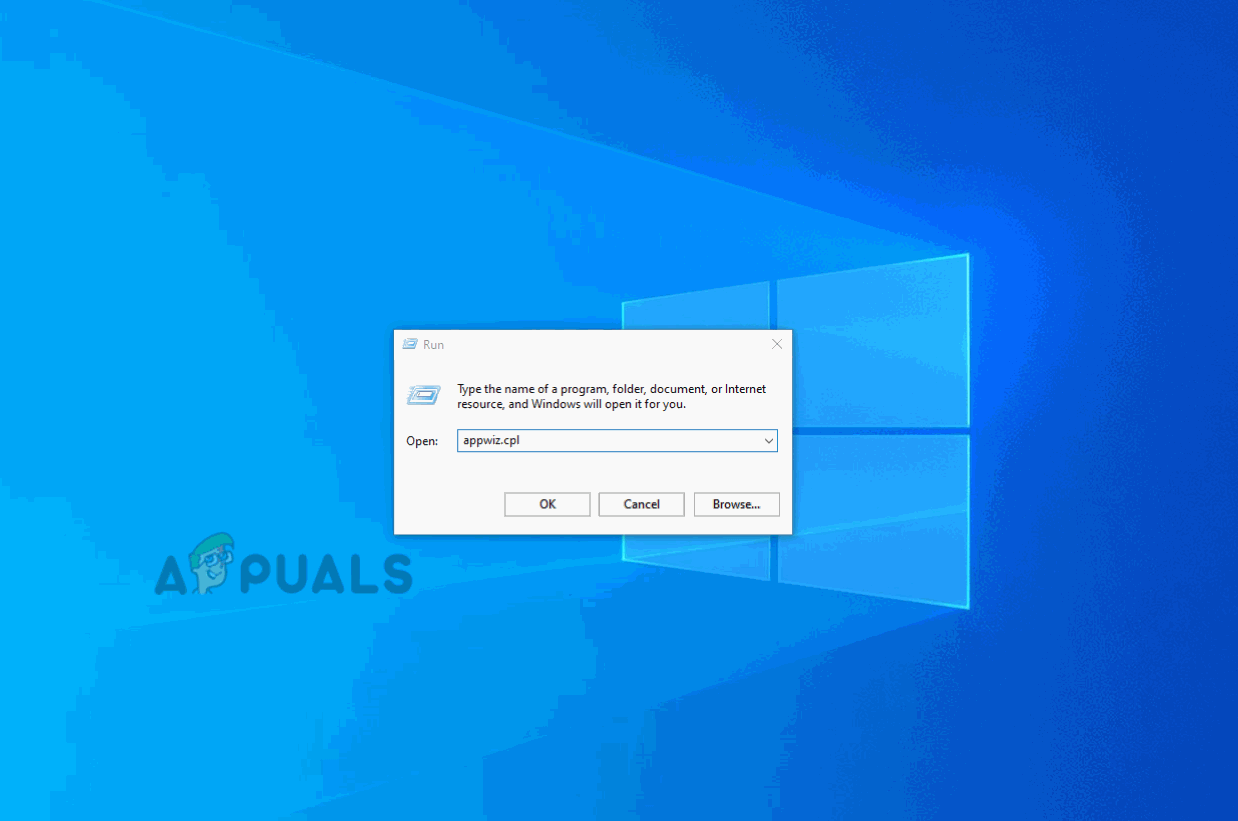
- Press Windows key + R to open up a Run dialog box. Next, type ‘appwiz.cpl’ and press Enter to open up the Programs and Features window.

Type appwiz.cpl and Press Enter to Open Installed Programs List - Once you’re inside the Programs and Features screen, scroll down through the list of installed applications and try to locate the 3rd party security suite/firewall that you’re using. When you see it, right-click on it and choose Uninstall from the next context menu.
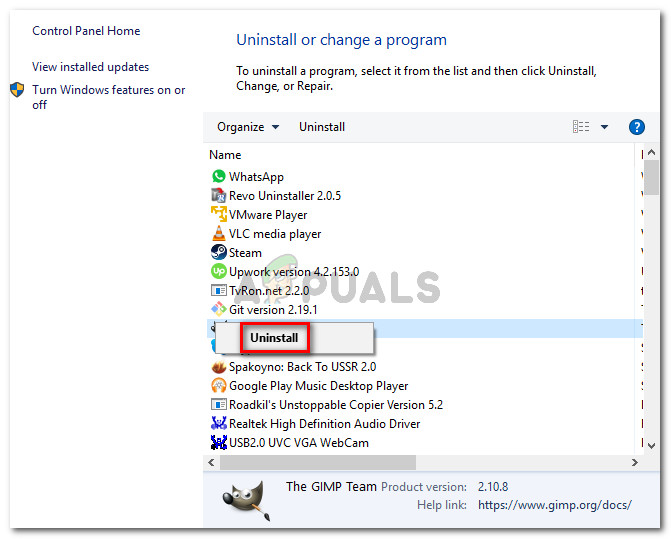
Uninstalling the security suite - Now that you’re inside the uninstallation prompt, follow the on-screen prompts to complete the removal of your 3rd party suite/firewall.
- Restart your computer and see if the issue went away now that you uninstalled your potential culprit.
In case the same issue is still occurring, reinstall the 3rd party you previously uninstalled and move down to the next potential fix below for a different repair strategy.
2. Enabling the Function Discovery Provider Host
Another potential cause that might make the other network-connected devices inaccessible is a disabled Function Discovery Provided Host service. Some users that we’re struggling to resolve the same issue have reported that they were finally able to fix the issue after they accessed the Services menu and enabled this service.
After doing this and opening File Explorer again, affected users were prompted to enable Network Discovery, which made the network-connected devices accessible again.
Note: While this method will not fix the ‘Net View Error 6118′ error, it will provide you with a safer protocol for accessing network-connected devices directly from File Explorer.
Here’s a quick guide on enabling the Function Discovery Provider Host in order to force the other connected network devices to appear inside File Explorer:
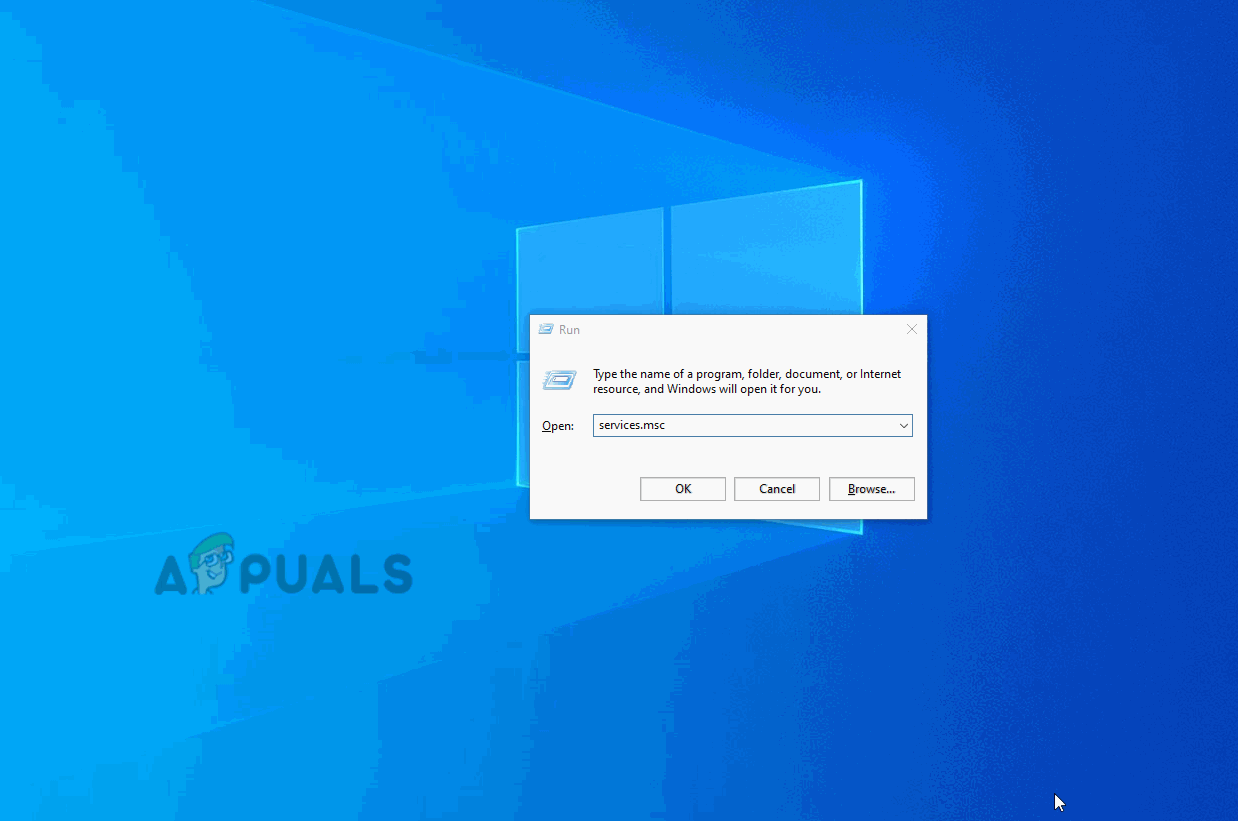
- Press Windows key + R to open up a Run dialog box. Next, type ‘services.msc’ inside the text box and press Enter to open up the Services screen. When you are prompted by the UAC (User Account Control) prompt, click Yes to grant administrative privileges.
- Once you’re inside the Services screen, scroll down through the list of Local services and locate the Function Discovery Provider Host service. When you see it, right-click on it and click on Properties from the context menu.
- Inside the Properties menu of Function Discovery Provider Host, select the General tab, then change the Startup type to Automatic (Delayed Restart) and click on Apply to save the changes.
- Next, find the Function Discovery Resource Publication and repeat the same changes you did at step 3 for the Function Discovery Provider Host service.
- After the modifications were operated, close the Services screen and open file Explorer and clicking on Network from the left-hand side menu.
- You will get an error message initially, so dismiss it by clicking on Ok.
- Next, click on the yellow bar that appears at the top of the window and then click on Turn on Network Discovery and File Sharing to make the other connected network devices visible.
In case you want to go for a different fix that will actually treat the symptoms of the ‘Net View Error 6118’ error and make the network devices visible inside the terminal, move down to the next method below.
3. Enabling the Computer Browser service
As it turns out, the number one reason that is known to cause the ‘Net View Error 6118′ error is a disabled service called Computer Browser. But the problem is, this service was deprecated in the latest versions of Windows 10 for security reasons.
However, if you do want to leverage this fix, you will need to start by enabling SMBv1 via Windows Feature – this technology was since deprecated. After you do this and restarting your computer, the Computer Browser service should become available inside the Services screen.
Here’s a quick guide on enabling SMBv1 via Windows Feature and then starting the Computer Browser service to fix the ‘Net View Error 6118′ error:
- Press Windows key + R to open up a Run dialog box. Next, type ‘appwiz.cpl’ inside the text box and press Enter to open up the Programs and Features menu.
- Once you’re inside the Programs and Features screen, use the vertical menu on the right-hand side to click on Turn Windows Features On or Off.
- When you’re inside the Windows Features screen, scroll down through the list of native Windows features and locate SMB 1.0/CIFS File Sharing Support. After you manage to locate it, simply check the box associated with it and hit Ok.
- Next, wait for the operation to complete and the changes to be applied. When prompted to restart, do so by clicking on Restart Now.
- After the next startup sequence is complete, press Windows key + R to open up another Run dialog box. Next, type ‘services.msc’ and press Enter to open up the Services screen. When prompted by the UAC (User Account Control), click Yes to grant administrative privileges.
- Once you manage to get inside the Services screen, scroll down through the list of local services and locate the Computer Browser service.
- When you see it, right-click on it and choose Properties from the newly appeared context menu.
- Inside the Properties screen of the Computer Browser service, select the General tab and then change the Startup type from Disabled to Automatic. Then, click on Start to start it right away and finish it up by clicking Apply to save the changes.
- Now that the Computer Browser service is enabled, open a terminal window and run the same command that was previously causing the ‘Net View Error 6118′ CMD error to see if the issue has been resolved.


last one worked