Fix: MSCONFIG Not Saving Changes on Windows 10
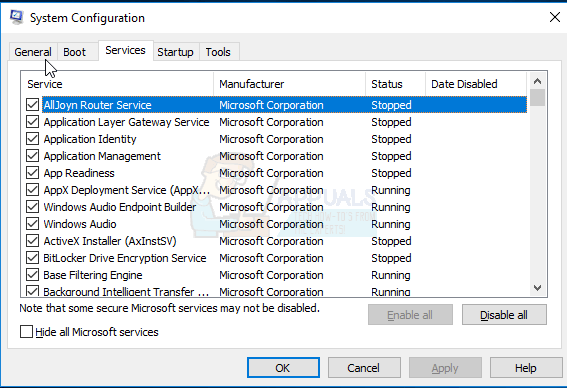
MSCONFIG is an extremely handy system utility that is included in all versions of the Windows Operating System and is designed to be used to alter and make changes to the Microsoft Windows startup process. If a Windows user wants to have Windows boot into Safe Mode or have Windows start up with one or more specific services or startup items disabled from within Windows, MSCONFIG is the way to go. MSCONFIG can be launched by simply pressing the Windows Logo key + R to open a Run dialog, typing msconfig into the Run dialog and pressing Enter.
Once a Windows user makes the desired changes to the Windows startup process in MSCONFIG, they can simply click on Apply and then on OK (after which they are prompted to restart the computer) to have the changes implemented the next time the computer boots up. However, unfortunately, quite a few Windows 10 users have reported an issue with MSCONFIG where any changes they make to the System Configuration aren’t saved. When users affected by this issue make changes to MSCONFIG and click on Apply and then on OK, they are not prompted to restart their computer – instead, the System Configuration window simply closes and when it is reopened or the computer is restarted, the changes the user made are all reverted.

This issue can prove to be pretty significant for affected users as not being able to make changes to System Configuration relinquishes, at least to some extent, the control that users are supposed to have over the Windows Operating System. The exact cause of this problem is unknown – while many believe that this can be caused by permission issues or a third-party antivirus program, others believe that this has to do with certain startup items and services being disabled. Thankfully, though, the following are some of the most effective solutions that you can use to try and get rid of this issue and get MSCONFIG to start saving the changes you make to it again:
Solution 1: Make the desired changes to MSCONFIG in Safe Mode
Many users affected by this issue have been able to make the same changes to MSCONFIG that would have been reverted back under normal circumstances while their computers were in Safe Mode. Trying to make the changes to MSCONFIG that you desire after booting your computer in Safe Mode is a pretty effective solution to this problem, and here’s how you can apply it:
- Open the Start Menu.
- Click on the Power
- Hold down the Shift key, and while doing so, click on Restart.
- When the computer boots up, you should see a Choose an option On this screen, click on Troubleshoot.
- Click on Advanced options on the next screen.
- Click on Startup settings out of all the options provided.
- Click on Restart.
- When your computer boots up, you should see a Startup Settings screen with a bunch of different startup options. On this screen, simply press the Function key that corresponds to the Enable Safe Mode In most cases, this is the F4 key.
- Once the computer has booted up and you have signed into it, press the Windows Logo key + R to open a Run dialog, type msconfig into the Run dialog and press Enter to launch System Configuration.
- Make all of your desired changes to MSCONFIG.
- Click on Apply.
- Click on OK.
- You should see a dialog box asking you if you want to restart the computer now or later. Click on Restart.

Once your computer boots up, check to see if the issue has been fixed and if the changes you made to MSCONFIG still remain.
Solution 2: Create a new Administrator account and use it to make changes
- Open the Start Menu.
- Click on Settings.
- Click on Accounts.
- Click on Family & other users in the left pane.
- Click on Add someone else to this PC in the right pane.
- Type in a Microsoft email address and click on Next if you want the new account to be a Microsoft account, or click on The person I want to add doesn’t have an email address, click on Add a user without a Microsoft account, type a name for the new account, set a password and password hint for the new account and click on Next if you want the new account to be a local account.
- Follow the rest of the onscreen instructions.
Once you’re done, you will have created a new user account on the computer. However, this user account will be a Standard account and won’t have administrative privileges. To give the new user account administrative privileges, you need to:
- Open the Start Menu.
- Click on Settings.
- Click on Accounts.
- Click on Family & other users in the left pane.
- Click on the newly created user account in the right pane to select it.
- Click on Change account type.
- Open the dropdown menu under Account type and click on Administrator.
- Click on OK.

When done, log in to the newly created user account with administrative privileges, launch MSCONFIG, make some changes to System Configuration, and check to see if any changes you make are successfully saved.
Solution 3: Uninstall any and all third-party security programs
If there is a third-party security program (such as an antivirus, firewall or anti-malware application) installed on the affected computer, it may be the cause of this issue. Since that is the case, you should uninstall any and all third-party security programs from the affected computer, restart it and check to see if doing so managed to get the job done.