How to Move Outlook ‘All Versions’ to a New Computer
Getting a new computer is always exciting. But soon after you get your hands on it you’ll be faced with the task of migrating various data files. While some data is easy to migrate, Outlook data is certainly not on that list. However, the steps are not that complicated, they merely require more effort than a normal file transfer. As always, we will provide you the best way to move important outlook data to a new computer.
The method below will require you to get quite technical in each step, but it will give you a higher degree of control over your Outlook data. Oh, and it’s completely free.
When you’re ready, follow the guide below to migrate your Outlook data to a new PC.
How to manually move Outlook data to a new PC
This steps below will cover all the necessary chores needed to efficiently move Outlook data to a new computer. This method will take some time, but it’s infinitely better than using Windows Easy Transfer (which will corrupt your Outlook profile).
Since the entire procedure is quite tedious, we have decided to split it into several steps. The guide below will work on Outlook, 2010, Outlook 2013 and Outlook 2016. It will work on computers running Windows 7, Windows 8 and Windows 10. While the steps are similar to older versions of Outlook, the exact paths that we’ll access will vary.
Keep in mind that accounts can’t be moved with this method since they are stored in the registry. You’ll need to recreate them on the new computer (we’ll show you how). With this in mind, here’s what you need to do:
Step 1: Show hidden files, folders and extensions
The first thing we need to do is fetch the files from the old computer. But things are a little more complicated than that since the necessary files are stored in a hidden folder in the Windows directory. Here’s a quick guide on how to show hidden files and enable extensions in Windows:
- Open a File Explorer window and select the View tab.
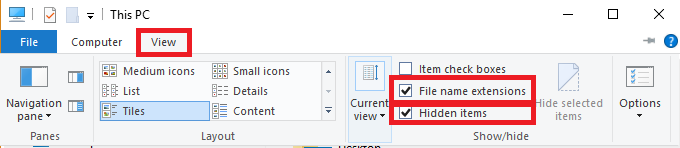
- From the newly appeared ribbon, check the box next to File name extensions.
- Check the box next to Hidden items.
Step 2: Fetching the necessary files from the old computer
Now that the extensions and hidden folders are visible, it’s time to start fetching the required Outlook files. The data we are going to extract will contain all your Outlook emails, calendar, and contacts.
If you’re using Outlook 2010, the data will be available in two distinct PST files. Outlook 2013 uses an OST file to store Calendar, Contacts, and tasks. Without further ado, here’s what you need to do:
- Make sure Outlook is fully closed. Otherwise, the required files won’t fully updated.
- Navigate to %YOURUSERNAME% \ Local Settings \ Application Data \ Microsoft \ Outlook.
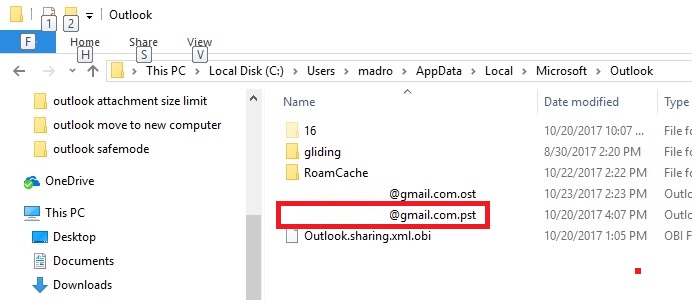
- Now copy only the file that has a .pst extension. If you have multiple PST files and you’re unsure which file is the one that holds your data, compare them and pick the one with a larger size.
- If you use macros often, you should also copy the VBA file, if you have one.
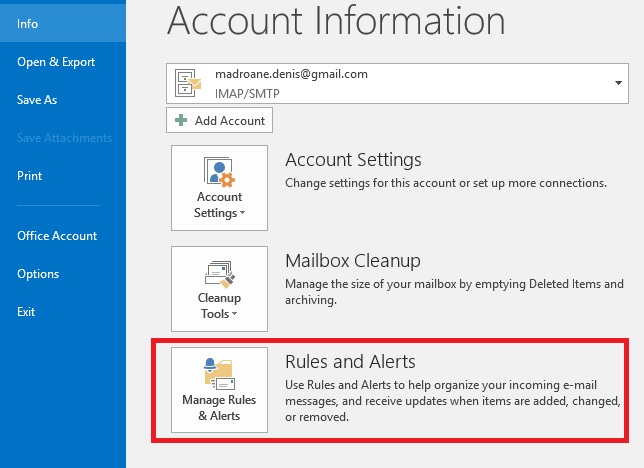
- Now open Outlook and navigate to File > Rules and Alerts.
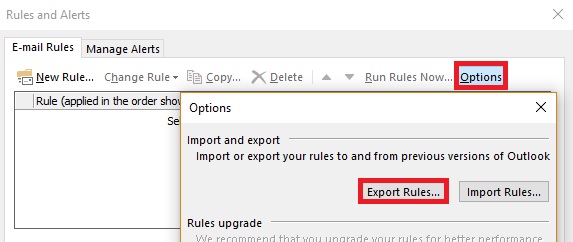
- From there, expand the Options tab and click on Export Rules.
- Insert an external storage device and paste the files previously fetched there. Alternatively, you can use a cloud service to move the files to the new computer.
Step 3: Migrating the files to the new computer
Now it’s time to move the files previously fetched to the new computer. Start by plugging the storage device in your new computer. Alternatively, use a cloud service to cross them over to the new machine.
If you haven’t installed Outlook on the new machine, now is the time to do it. Once you got that going, follow the steps below:
- If you fetched the VBA file used for macros, navigate to %YOURUSERNAME% \ Local Settings \ Application Data \ Microsoft \ Outlook on the new machine and paste it there. If you didn’t copy the VBA file, skip this first step.
- Now paste the PST file in My Documents / Outlook Files. You can also paste them into a custom location, but make sure you remember the exact path.

- Finally, paste the rules file into %YOURUSERNAME% \ Local Settings \ Application Data \ Microsoft \ Outlook.
Step 4: Creating a new profile on the new computer
Once the PST file is placed on your new machine, it’s time to create a new profile that will be used to restore your old Outlook data. Here’s what you need to do:
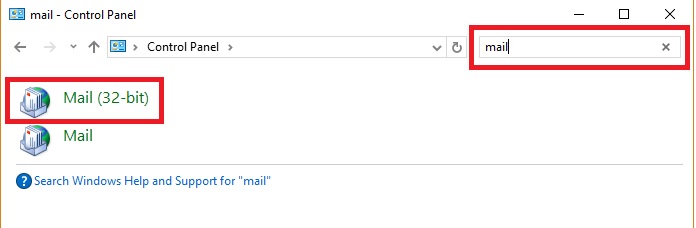
- Access the Control Panel use the search bar (top-right corner) to find the Mail settings. Double click on the 32-bit version.
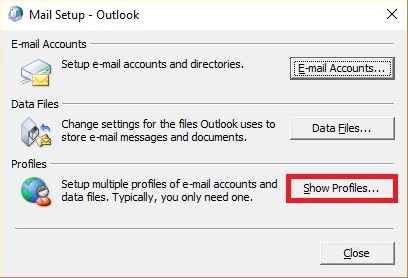
- Under Profiles, tap on Show Profiles.
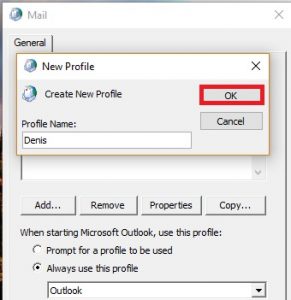
- Click on Add to create a new profile. Then, enter the name of your new profile and hit OK to confirm.
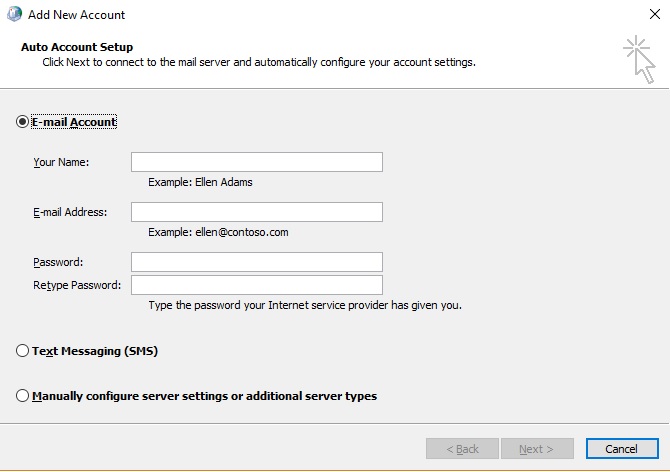
- Now enter your real name followed by your email address and password. Since most ISPs currently support auto account setup, I’m going to assume yours does too. Hit Next and wait for the auto setup is complete.
Step 5: Linking the PST file to the new profile
Once the new profile is created, we need to make the necessary arrangements so that the PST file we previously fetched gets recognized. Here’s how:
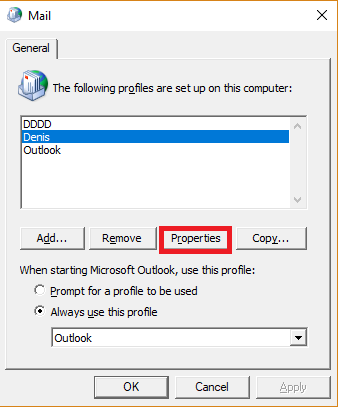
- Return to the initial Mail window and click once on the profile you’ve just created. With the profile selected, click on Properties.
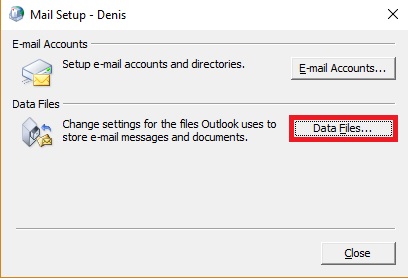
- Click on Data files to open the Account Settings dialog.
- Expand the Data files tab and click on Add.
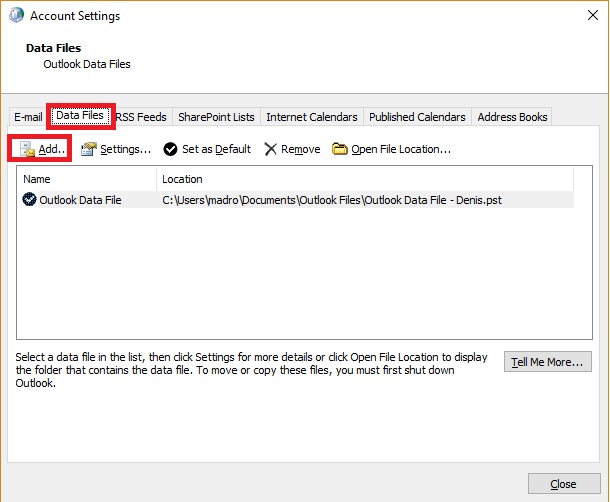
- Then, browse to where you previously pasted the PST file and select it.
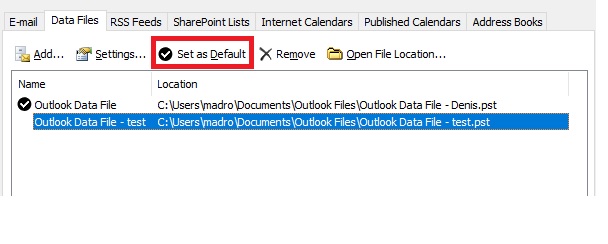
- Now click on the imported PST file to select it and hit the Set as Default button.
- Close the dialog and Open Outlook. Your email, contacts, calendar, and macros(if you imported the required file) should be available on the new PC.
THanks Kevin. Do you have something similar for moving outlook from one mac to another?