How to Fix Missing Proofing Tools on Microsoft Word?
The missing proofing tools error appears in Microsoft Word while editing any document. The users see the error message on the screen: Missing proofing tools. This document contains text in Russian, which isn’t being proofed. You may be able to get proofing tools for this language.
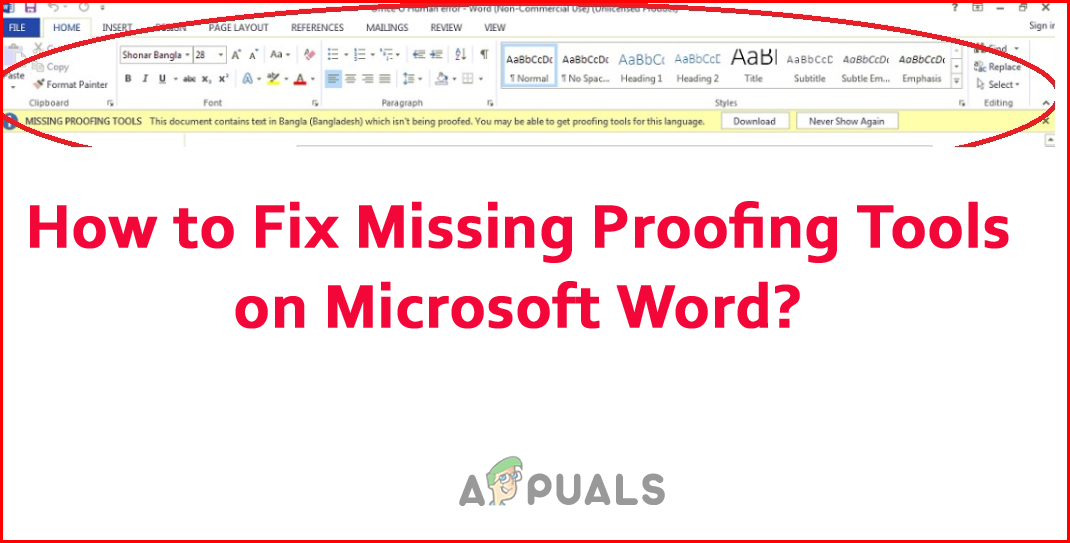
The error appears when the proofing tools feature stops working on MS Word for various reasons. So here in this article, we have shortlisted the common reasons that trigger the error. After that, follow the fixes to resolve the error and start using the Microsoft Word file.
- Corrupted data: The main reason the proofing tools stopped working is the file data corruption, which caused the Microsoft word features to start malfunctioning. In this case, repairing the word document with the inbuilt tool is recommended.
- Third-party add-ins: The 3rd party add-ins in the word document sometimes also cause conflict and stop certain features from running. In this case, disabling the add-ons may work for you.
- Unavailable Proofing Tools in the MS Word version: Some of the Microsoft Word versions do not have the proofing tool feature as standard. So, if the version you are using is not having the tool, you are more likely to encounter the error. Updating the software to the latest version may work for you.
- Incorrect Configuration: The improper language configuration cause the software various issues, and it starts struggling to recognize the language you are using. In this choice, the language manually works for you to solve the error.
- Faulty Installation: The previous installation of the MS Word application can be faulty, or some of the files might be corrupted, malfunctioning and stopping the Proofing tool from functioning properly. Reinstalling the MS word software may work for you.
So, these are some of the common culprits triggering the error, now follow the potential solutions to solve the missing proofing tools error.
1. Change Proofing Language Manually
Microsoft Word can detect your language in the document and implement essential recommendations for improving the quality. But there are cases when the software fails to recognize the language used in the document.
In this case, many users reported that manually changing the proofing language helped them solve the issue. So, it is worth trying and checking if this works for you to fix the error. To change the proofing language manually, follow the instructions given:
- Open the document in Microsoft Word you are facing the error with.
- Now select the whole document by pressing Ctrl + A on the keyboard.
- Then click on the Review tab available on the top and then click on the Language option.
- Now in the Language window, click on the Set Proofing Language option.
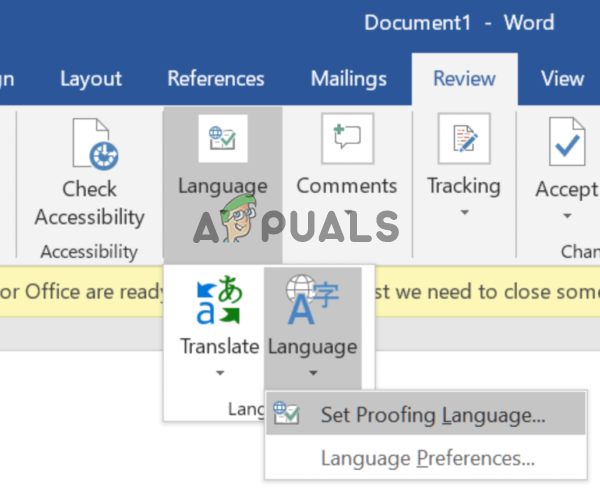
Click on the Set Proofing Language option - Then select the language you prefer, click on the Set as the Default option, and save the changes.
- Now check if the issue is resolved or not.
2. Run Online Repair Tool
The Word document might have some sort of underlying corruption or bugs which result in causing the proofing tools not to work correctly. In this situation, you take the help of the inbuilt Microsoft Online Repair Tool to solve these sorts of issues. This tool will scan your document and diagnose and fix Microsoft Word stopped working problem.
To use the tool, follow the steps given:
- Press the Windows button on the keyboard and search for Control Panel in the search bar.
- Launch Control Panel from the list of results.
- Now click on the Programs and then click on the Programs and Features option in the next window.
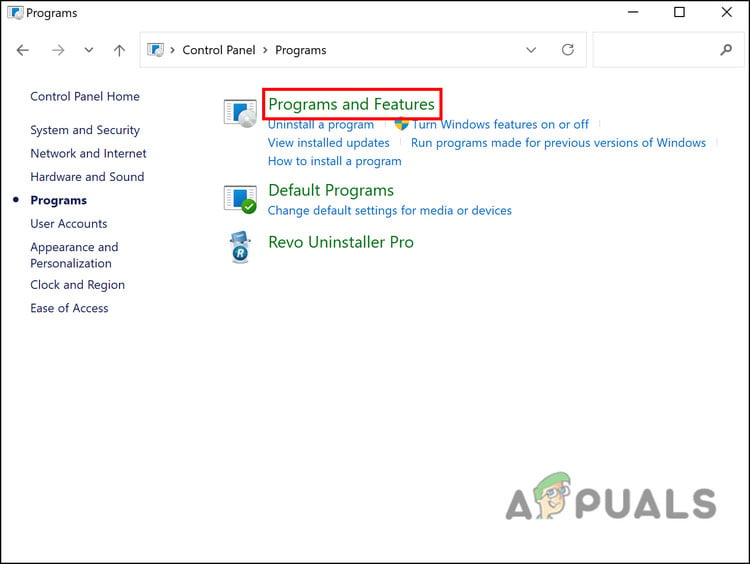
Click on Programs and Features - And select Microsoft Office in the list of applications.
- Then right-click on Microsoft Office and click on the Change option.
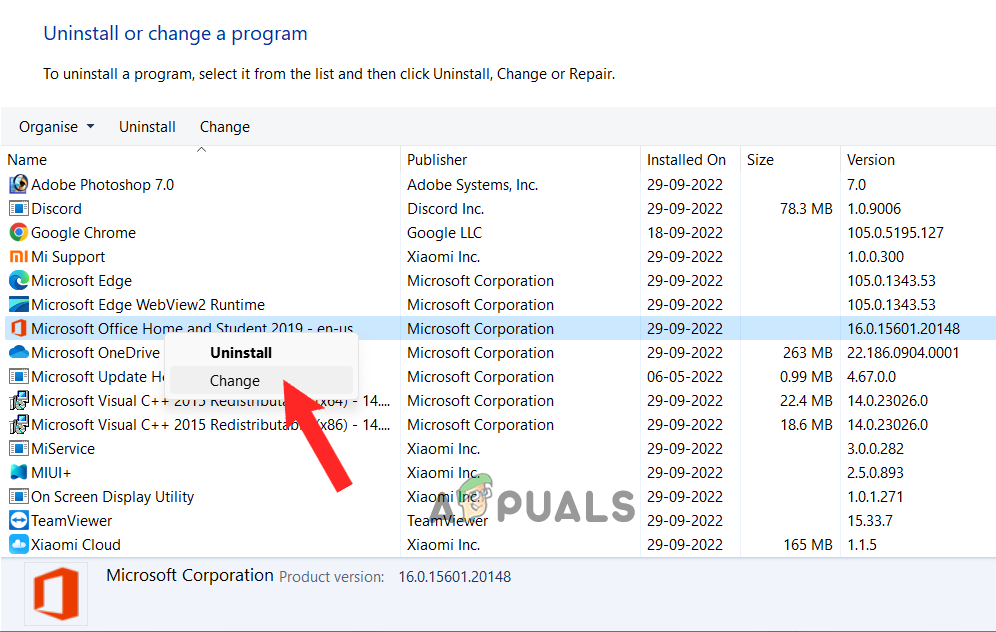
Click on the Change option - A UAC popup appears on the screen, and click on Yes
- Now tick the box next to Quick Repair and click on the Repair option below.
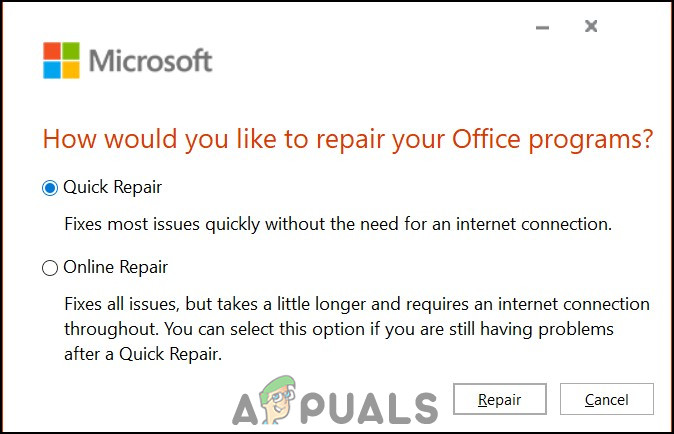
Choose Quick Repair - Wait for the repairing process to complete and restart MS Office.
- Check if the error is fixed or not. If the error still persists, then perform Online Repair.
- Make sure you are connected to a stable internet connection and tick mark the Online Repair below the Quick Repair option.
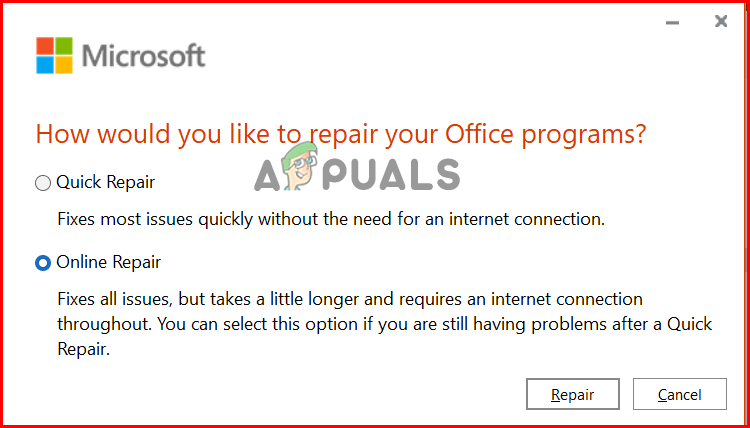
Click on Online Repair - This will complete the scan for the corruptions and fix entire issues with the office, and it may take longer to complete the scanning process.
- Once the process is done, restart your computer and check if the issue is resolved or not.
3. Install the Proofing Tools 2016
The Proofing tool only works on the Microsoft office 2016 version and includes a complete set of the proofing tools available for the office. You can install the proofing tools individually and restart the MS office to let the changes take effect and allow Proofing to work on Office.
Please Note: Make sure to check the program version and install the 32-bit proofing tool for 32-bit and 64-bit for the 64-bit Windows version, or else it won’t work correctly.
To do so, follow the instructions mentioned given:
- Open any browser on your Windows computer and paste the link
- And on the Microsoft Office Proofing Tools 2016 download page, select your preferred language and hit the Download button to download the proofing.
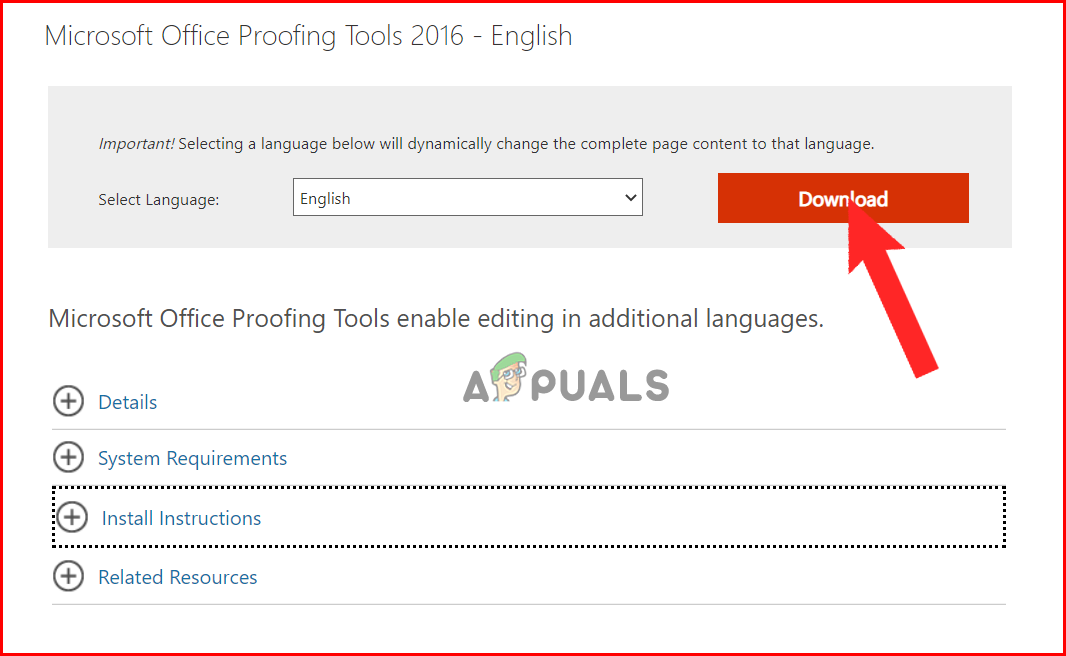
Click on the Download button to download the proofing tools - Select the proofing tools version 32bit or 64-bit, as per your Windows OS version.
- Click on the Next
- Then open the downloaded file and start the installation process. Follow the instructions mentioned to complete the installation.
- Once the installation process is done, restart your computer and check if the issue is resolved or not.
4. Disable Add-Ins in Microsoft Word
Many users utilize the add-ins in Microsoft Word to provide additional functions to the system. But in many cases, it starts causing issues with the Word document and conflicts with specific features. So, if you are using add-ins and none of the above-listed solutions works for you to solve, then disabling the add-ins is recommended.
Follow the steps given to do so:
- Launch Microsoft Word and click on the File tab.
- Then click on Options; after that, click on the Add-ins tab
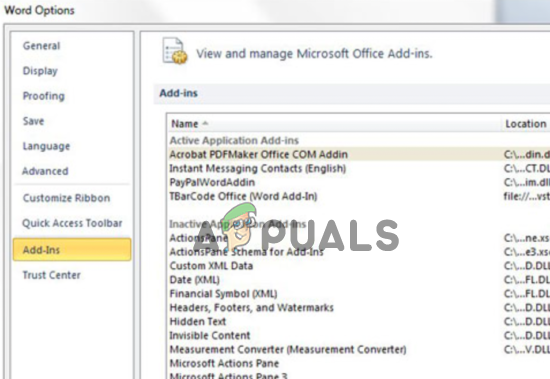
Click on the Add-ins tab - Now start disabling the add-ins one by one.
- Next, reboot your system to let the changes take effect
Check if the proofing tools missing on the Microsoft Word error are fixed or not.
5. Reinstall Microsoft Office 2016
At last, you can try reinstalling the Microsoft Office suite as there can be some errors in the previous installation process which is causing issue with the office programs. So, it is recommended to reinstall the application and check if the issue is resolved or not.
To reinstall Microsoft Office, follow the instructions shown:
- Press the Windows button on the keyboard and search for Control Panel in the search bar.
- Launch Control Panel from the results list, and click on Uninstall a program under Programs.
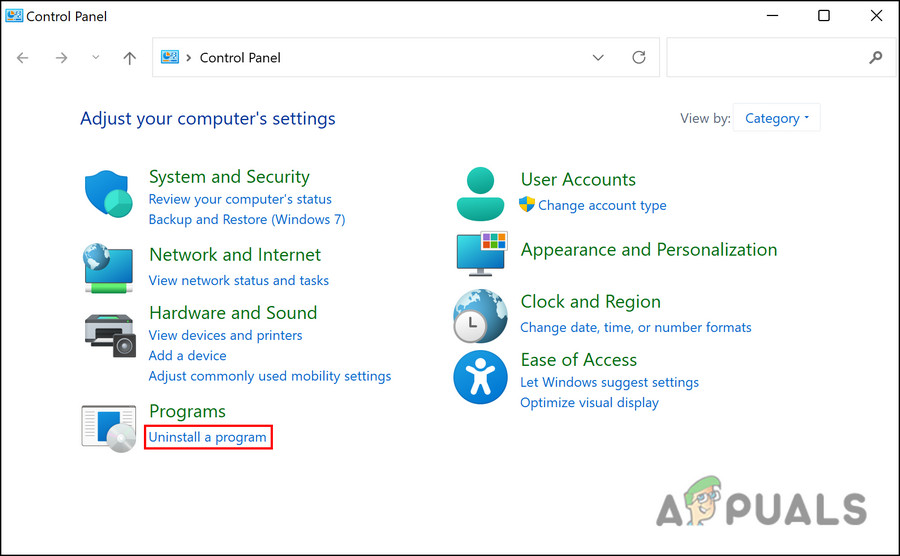
Uninstall a Program - Select Microsoft Office in the list of applications.
- Then right-click on Microsoft Office and click on the Uninstall option.
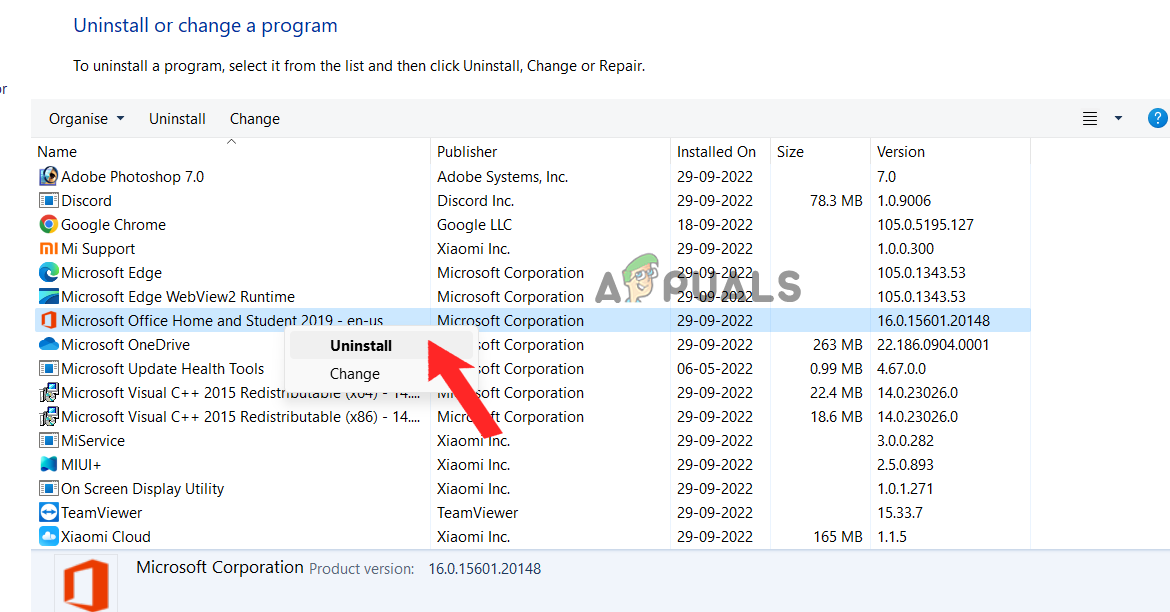
Uninstall Microsoft Office - Now follow the instructions and complete the uninstallation process.
- Once the process is done, restart your computer and reinstall Microsoft Office.
- Complete the installation process and launch the Microsoft Word application and check if the error is resolved or not.
It is estimated now the Proofing Tools missing error on Microsoft Word is fixed. Make sure to follow the instructions given carefully and fix the error easily.


