How to Fix Missing “Enroll Now” Option in Windows 10 (ESU)
When certain prerequisites are not met, the “Enroll Now” option may not appear in Settings → Windows Update on Windows 10. This button is required to join the Extended Security Updates (ESU) program, which allows eligible systems to continue receiving critical security patches even after official support ends.
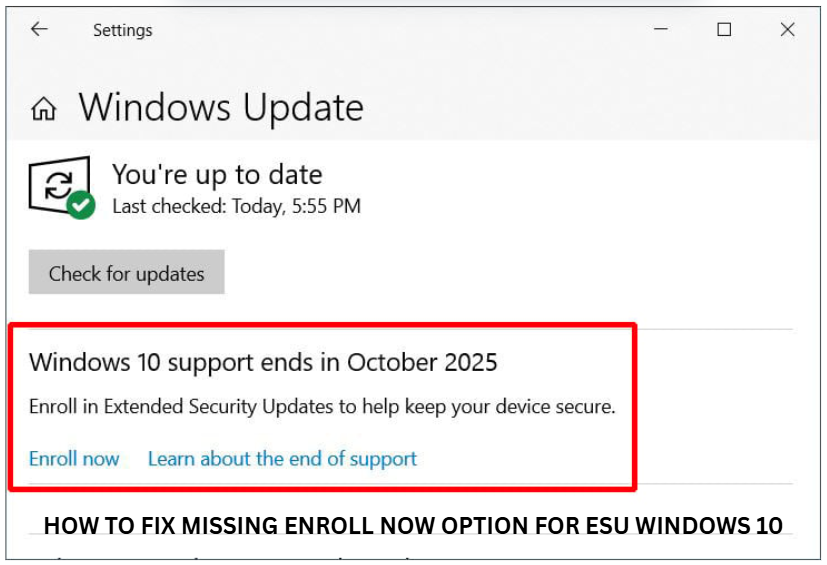
In most situations, this option is missing because the device is either not updated to version 22H2, hasn’t installed the latest optional or preview updates, or is part of a non-eligible configuration (such as a domain-joined or managed environment). Additionally, Microsoft is rolling out this feature in stages, so even qualified devices may not see the button right away.
Enrollment is limited to specific editions and configurations. If a system is running an older build, is tied to a local-only account, or has unsupported device settings, the Enroll now button will not appear even if the hardware meets the minimum requirements.
This guide explains why the “Enroll Now” option may be missing and provides practical methods to make it appear when your device qualifies, or confirm that it doesn’t.
1. Manually Force the Enrollment Prompt
Manually forcing the prompt helps because it makes Windows recheck your system’s eligibility for ESU. A built-in tool in the latest Windows 10 updates allows Windows to verify whether your device qualifies.
Triggering this command runs an internal check that determines if the Enroll now button should be displayed.
- Run Command Prompt as Administrator.
- Type the following command and press Enter:
cmd /c ClipESUConsumer.exe -evaluateEligibility
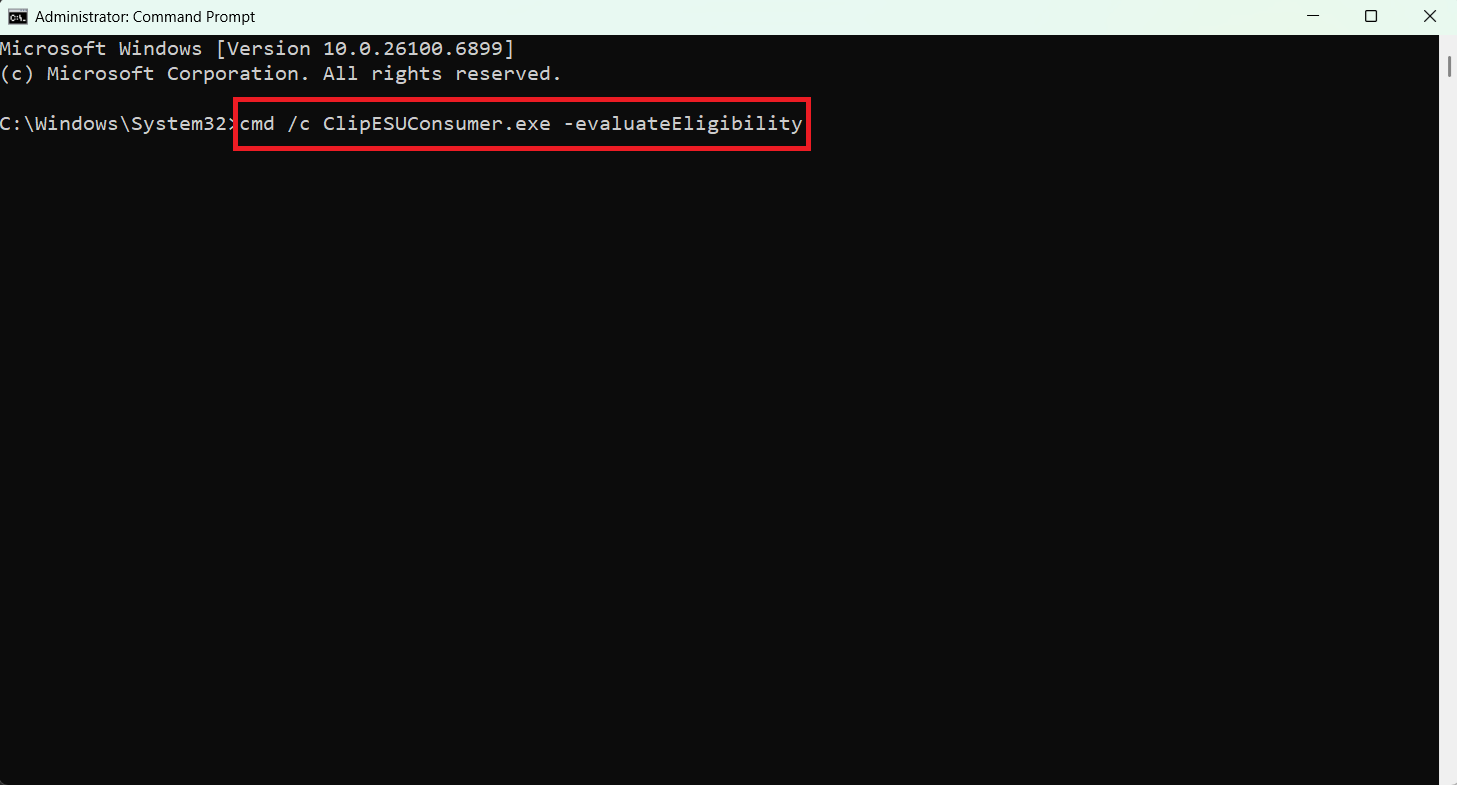
- Restart your PC and open Windows Update to see if the Enroll now option appears.
2. Refresh ESU Eligibility in Registry
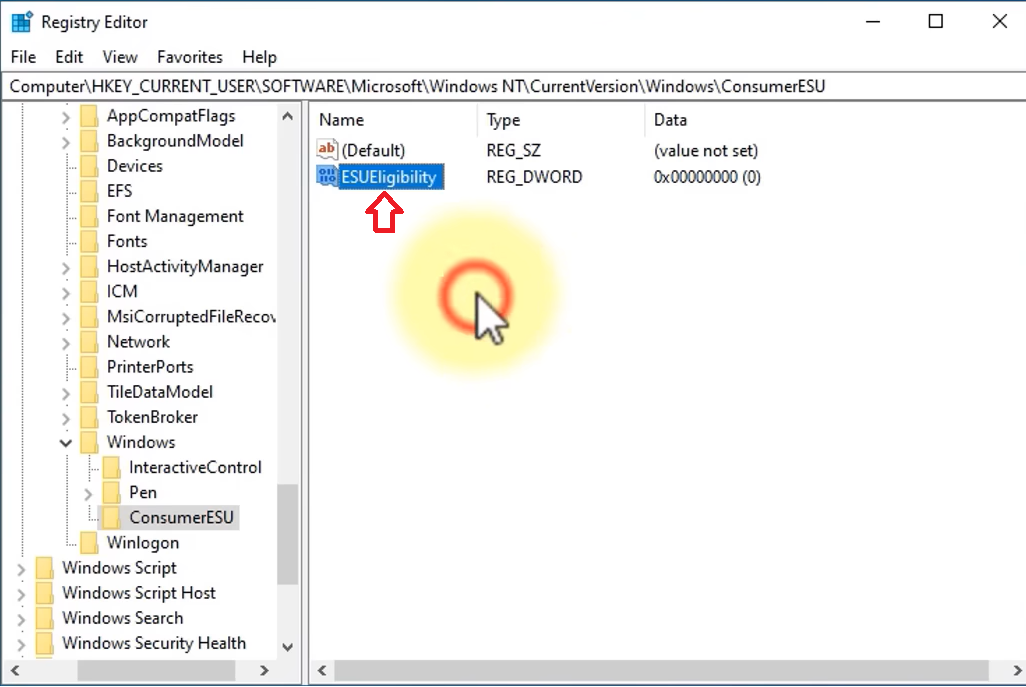
In some cases, incorrect or damaged registry values can prevent the Enroll now option from appearing. Refreshing these entries forces Windows to rebuild the eligibility state and display the correct options.
- Open Registry Editor.
- Go to:
HKEY_CURRENT_USER\SOFTWARE\Microsoft\Windows NT\Version\Windows

- Right-click Windows → New → Key.
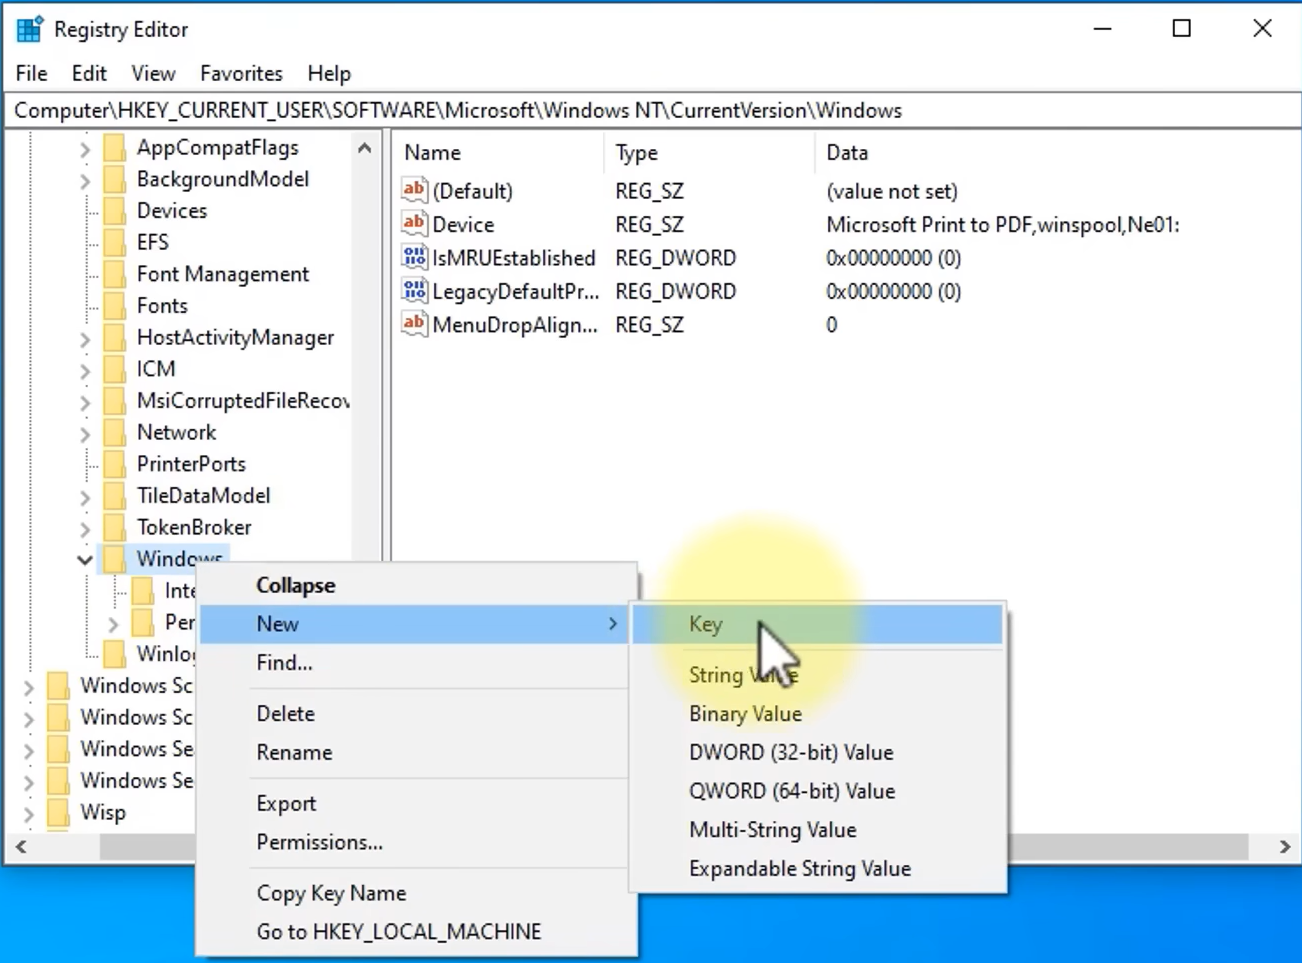
- Name the new key ConsumerESU.
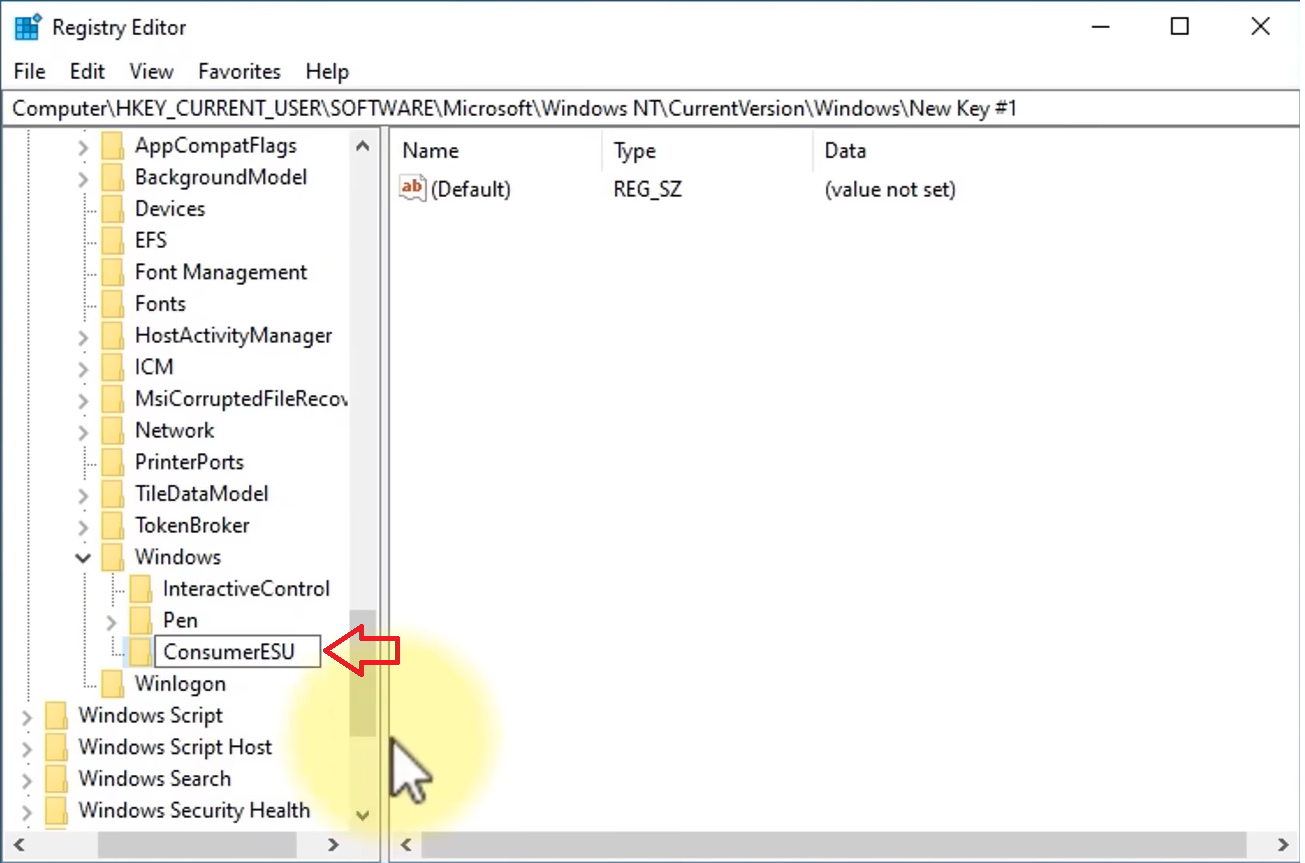
- Inside ConsumerESU, right-click on empty space → New → DWORD (32-bit) Value.
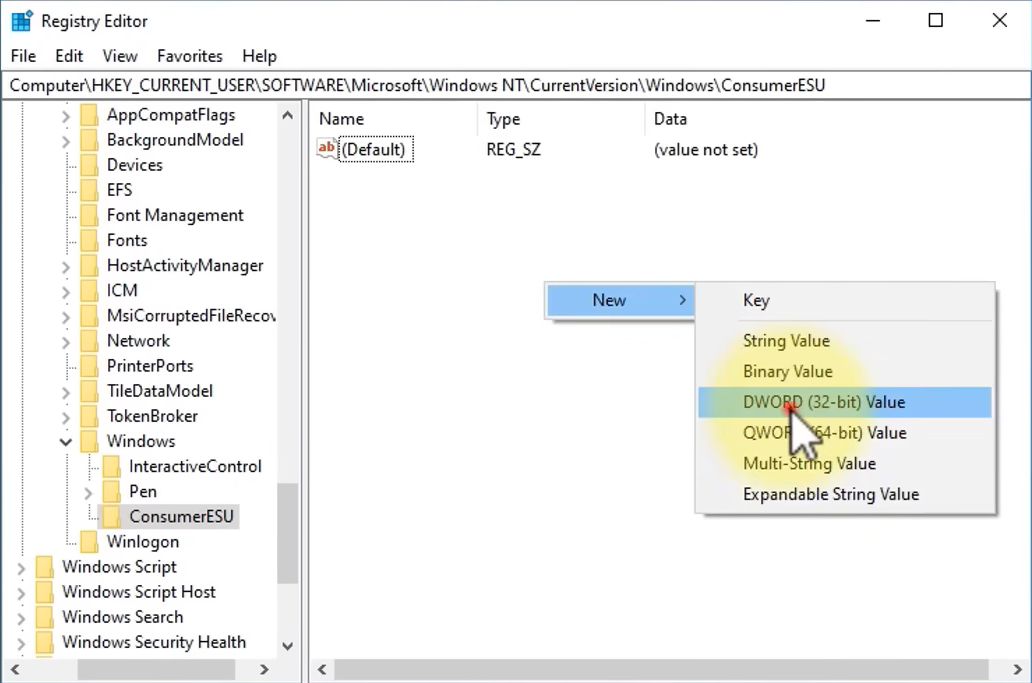
- Name this DWORD ESUEligibility.
- Double-click ESUEligibility and set its value to 2.
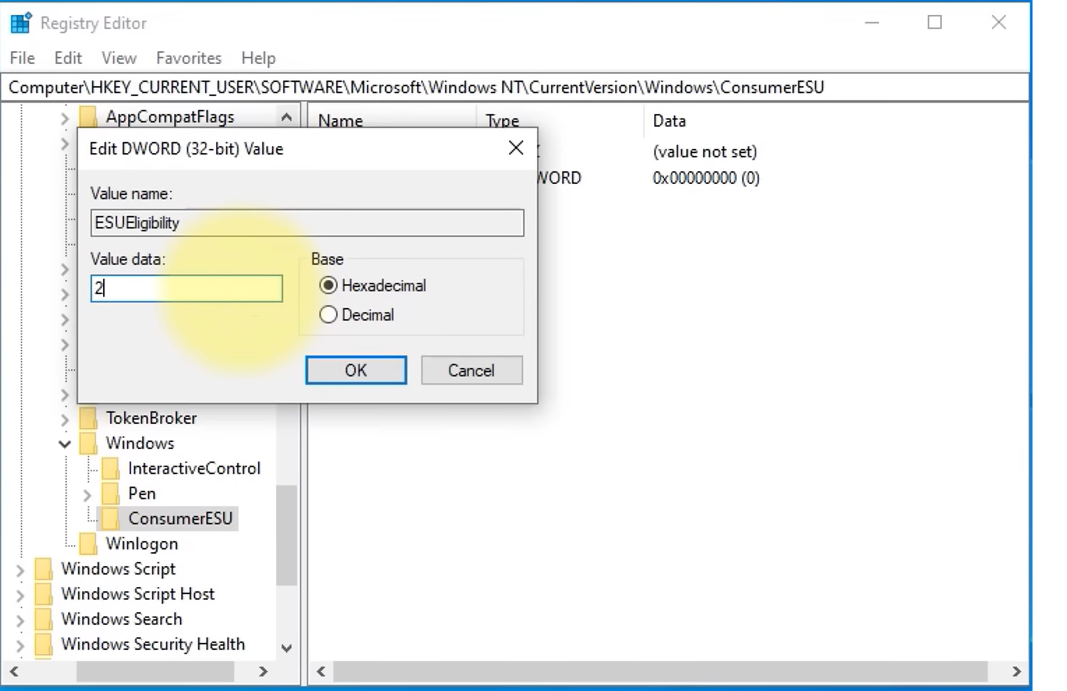
- Create another DWORD (32-bit) Value and name it ESUEligibilityResult.
- Set its value to 1.

- Close the Registry Editor and restart your PC.
- Go back to Windows Update to check for the Enroll now option.
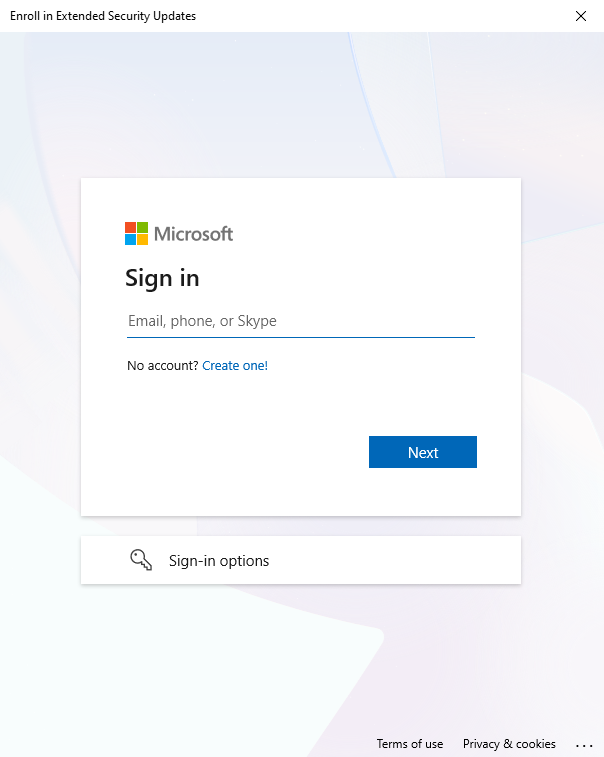
3. Enroll from Microsoft’s Website
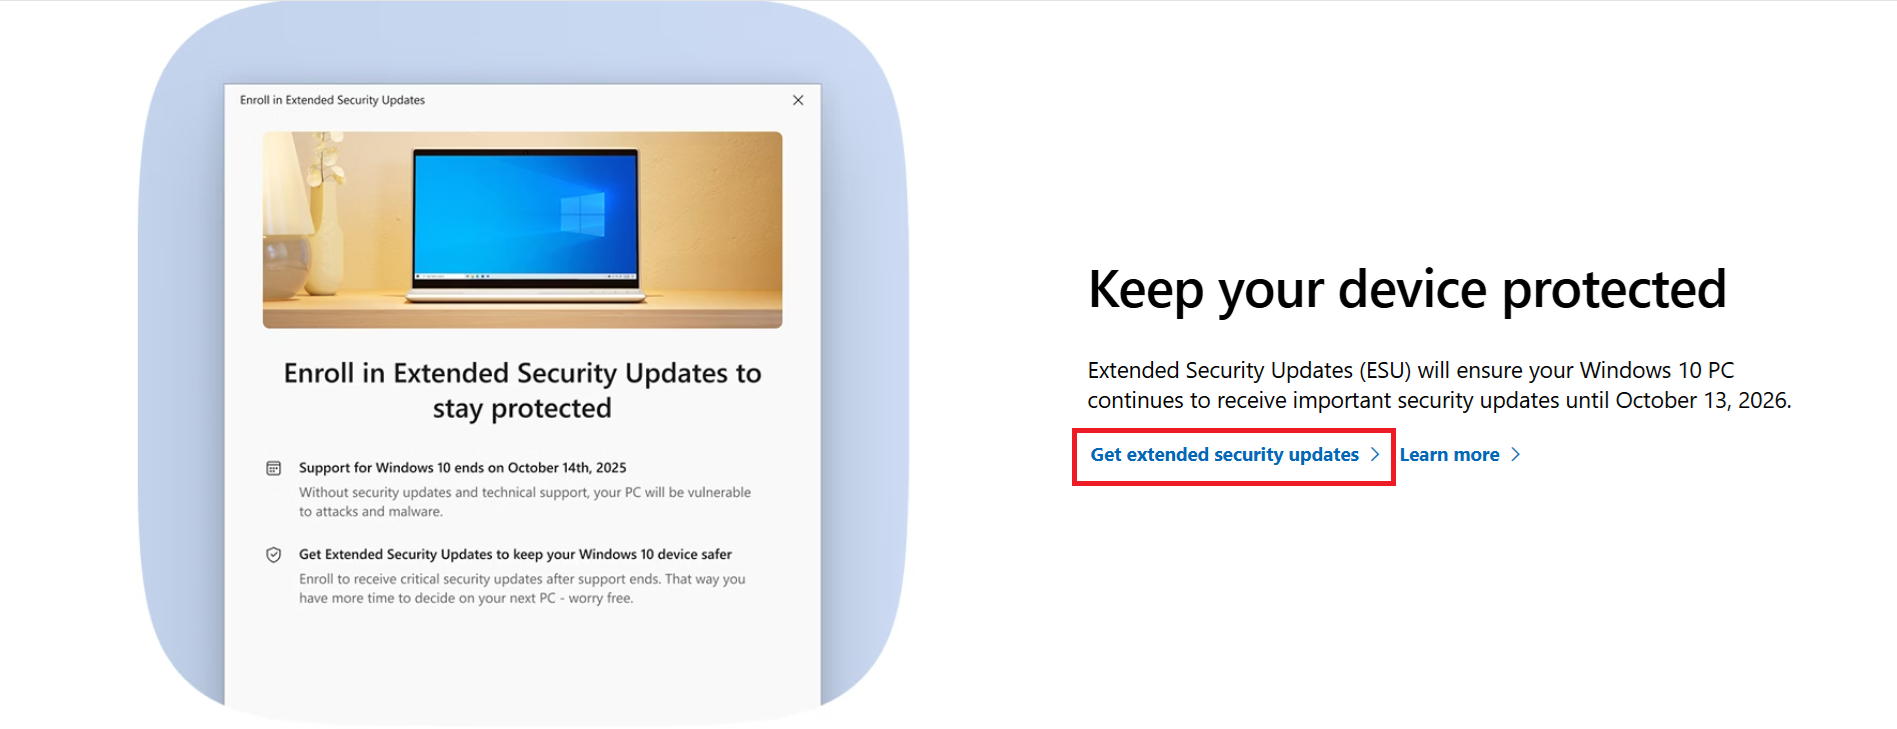
If the button is still missing, enrolling directly through Microsoft’s official website is a reliable workaround. This method opens the ESU enrollment page in your browser and allows you to complete the process without using the Windows Update interface.
- Go to Microsoft’s End of Support page.
- Scroll down and click Get extended security updates.
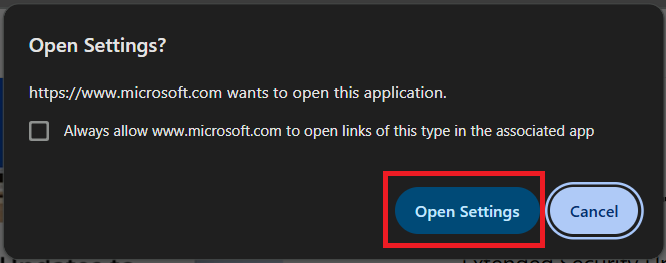
- Click Open Settings when the alert appears.
- Select Next to continue.

- Sign in to your Microsoft account.
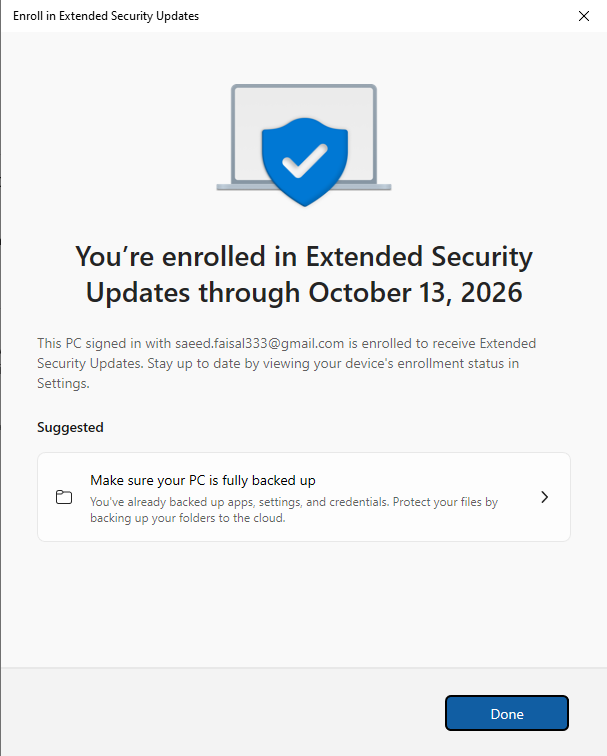
- Click Enroll once your device is confirmed eligible.
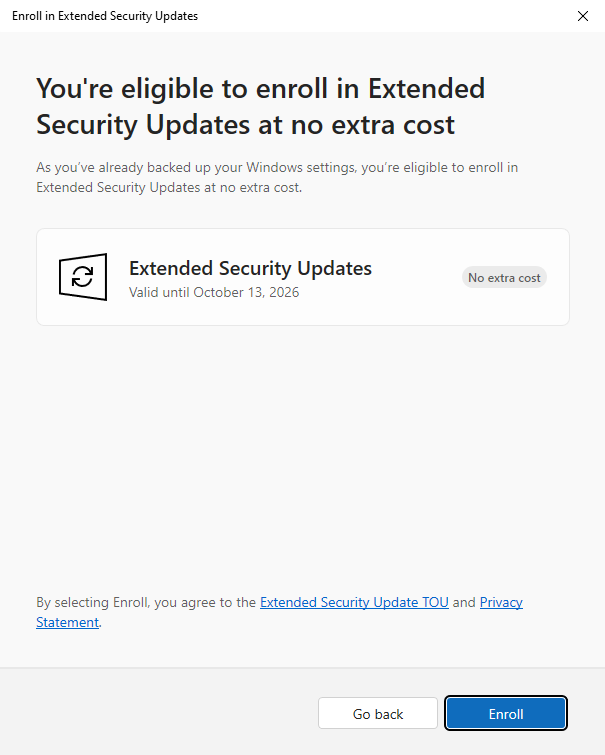
- Finish by selecting Done.