How to Fix WebView2 Runtime “Installation Failed” Error?
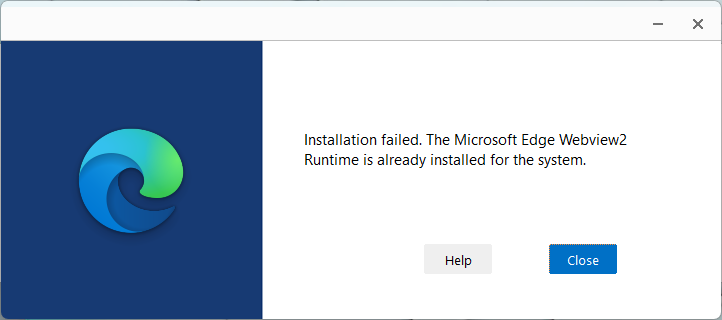
When there’s an issue with the Microsoft Edge WebView2 Runtime installation or its components, you may encounter the following error: “Installation failed. The Microsoft Edge WebView2 Runtime is already installed for the system.” This typically occurs when trying to manually install the WebView2 Runtime. Common causes include:
- Incomplete or corrupted previous installations
- Registry conflicts
- Insufficient permissions
- Leftover installation files from earlier attempts
These issues prevent the system from properly recognizing or reinstalling the runtime. We’ve outlined a set of proven methods to resolve this installation conflict below.
1. Run WebView2 Runtime Installer as Administrator
Running the WebView2 Runtime installer with administrative privileges ensures it can access and modify necessary system files and registry entries. Standard user accounts may lack the permissions needed to complete the installation properly. To avoid issues like file write errors or configuration failures, always run the installer as an administrator.
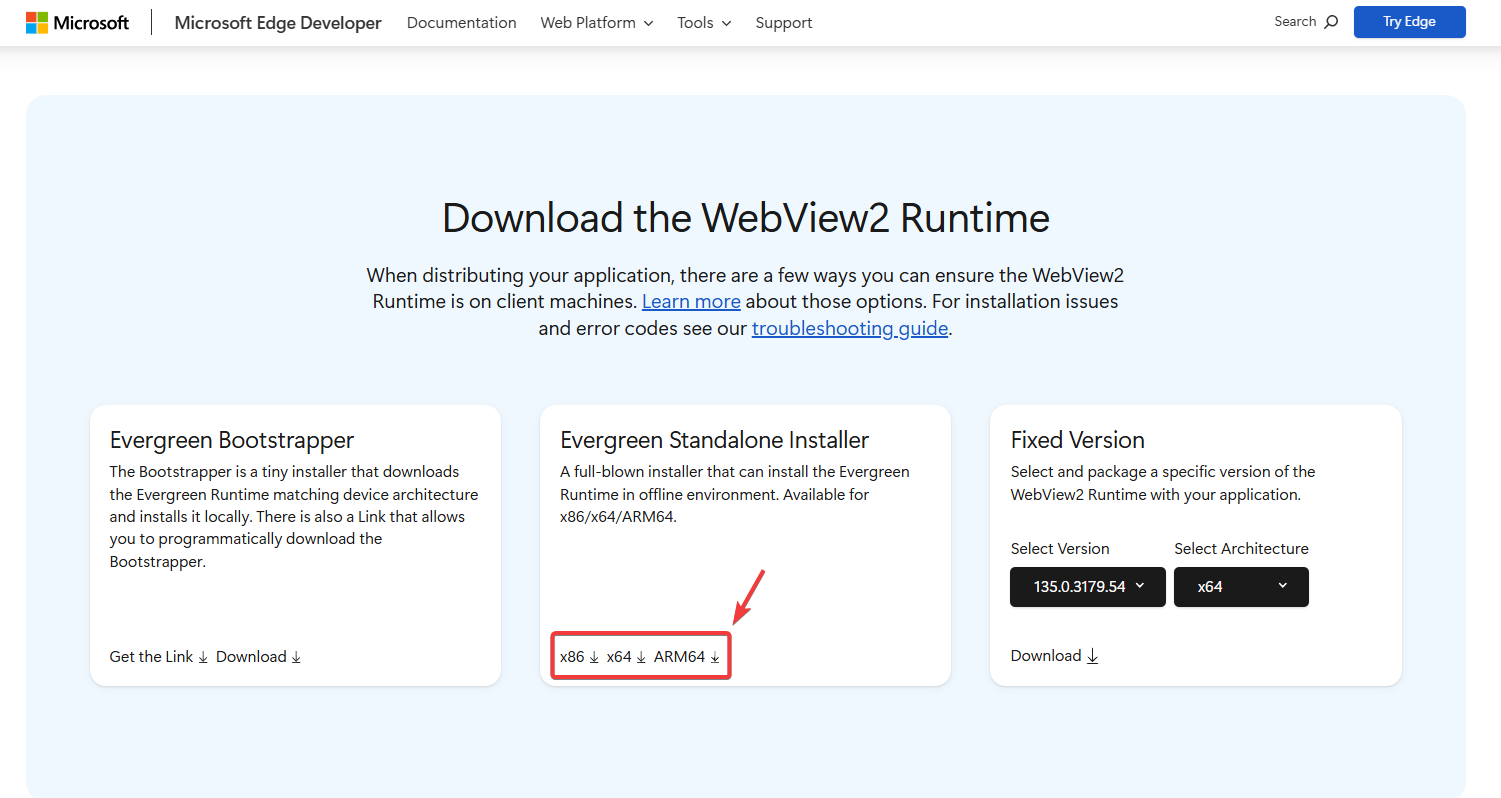
- Visit the official WebView2 Runtime download page.
- Click the Download button and choose the Evergreen Standalone Installer:
- Select x64 for 64-bit systems
- Select x86 for 32-bit systems
- After downloading:
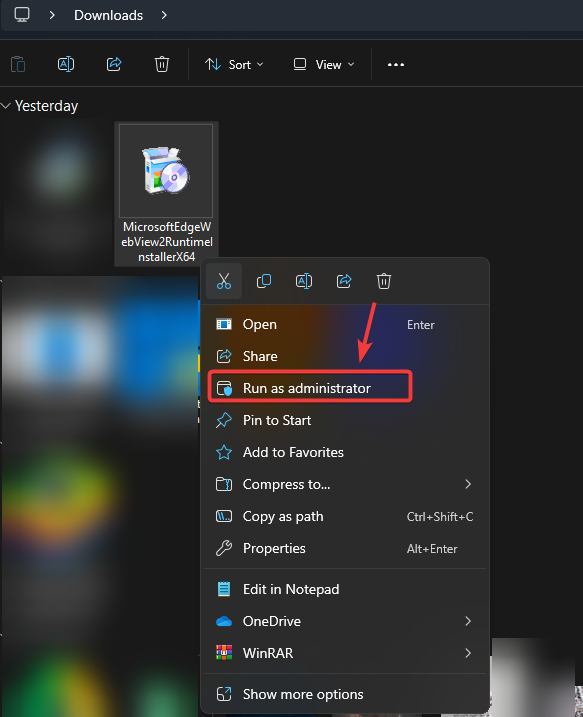
- Locate the installer file (usually in your Downloads folder)
- Right-click the file and select Run as administrator

- Complete the installation wizard and restart your computer for changes to take effect.
2. Perform a Clean Reinstallation of WebView2 Runtime
A clean reinstallation of WebView2 Runtime ensures that any corrupted files or incorrect registry entries left behind from previous installations are removed. These remnants can block new installations by falsely indicating that WebView2 Runtime is already installed. By fully removing all existing components before reinstalling, you eliminate potential conflicts and allow the runtime to install properly.
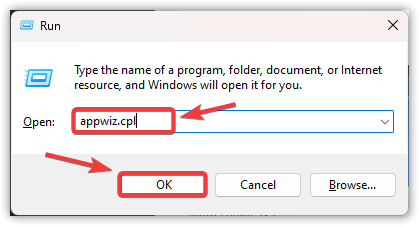
- Press Windows + R, type
appwiz.cpl, then click OK to open Programs and Features.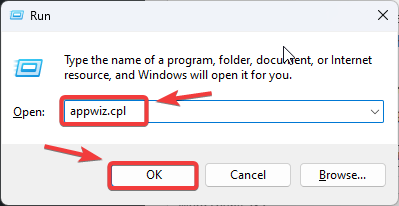
- Locate Microsoft Edge WebView2 Runtime in the list, right-click it, and select Uninstall (confirm if prompted).

- Visit the official WebView2 download page.
- Under “Evergreen Standalone Installer,” download either:
- x64 version for 64-bit Windows
- x86 version for 32-bit Windows

- Right-click the downloaded installer and choose Run as administrator to begin installation.
- After installation completes, restart your computer for changes to take effect.
3. Configure the Registry Entries
If the issue persists, it may originate from incorrect or missing registry entries related to WebView2. Adjusting these entries can help the system re-recognize WebView2’s installation state and remove invalid registry flags that may block reinstallation. Especially if WebView2 is required for EAC’s UI components or backend communication.
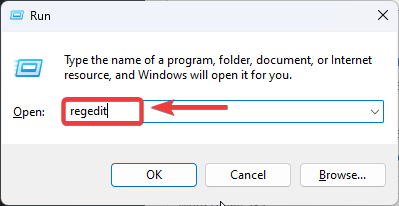
- Press Windows + R, type regedit, then press Enter (confirm UAC prompt if needed).
- Navigate through the registry to this exact path (use the left sidebar):
HKEY_LOCAL_MACHINE\SOFTWARE\WOW6432Node\Microsoft\EdgeUpdate\Clients
- Locate and delete this specific registry key (right-click → Delete):
{F3017226-FE2A-4295-8BDF-00C3A9A7E4C5}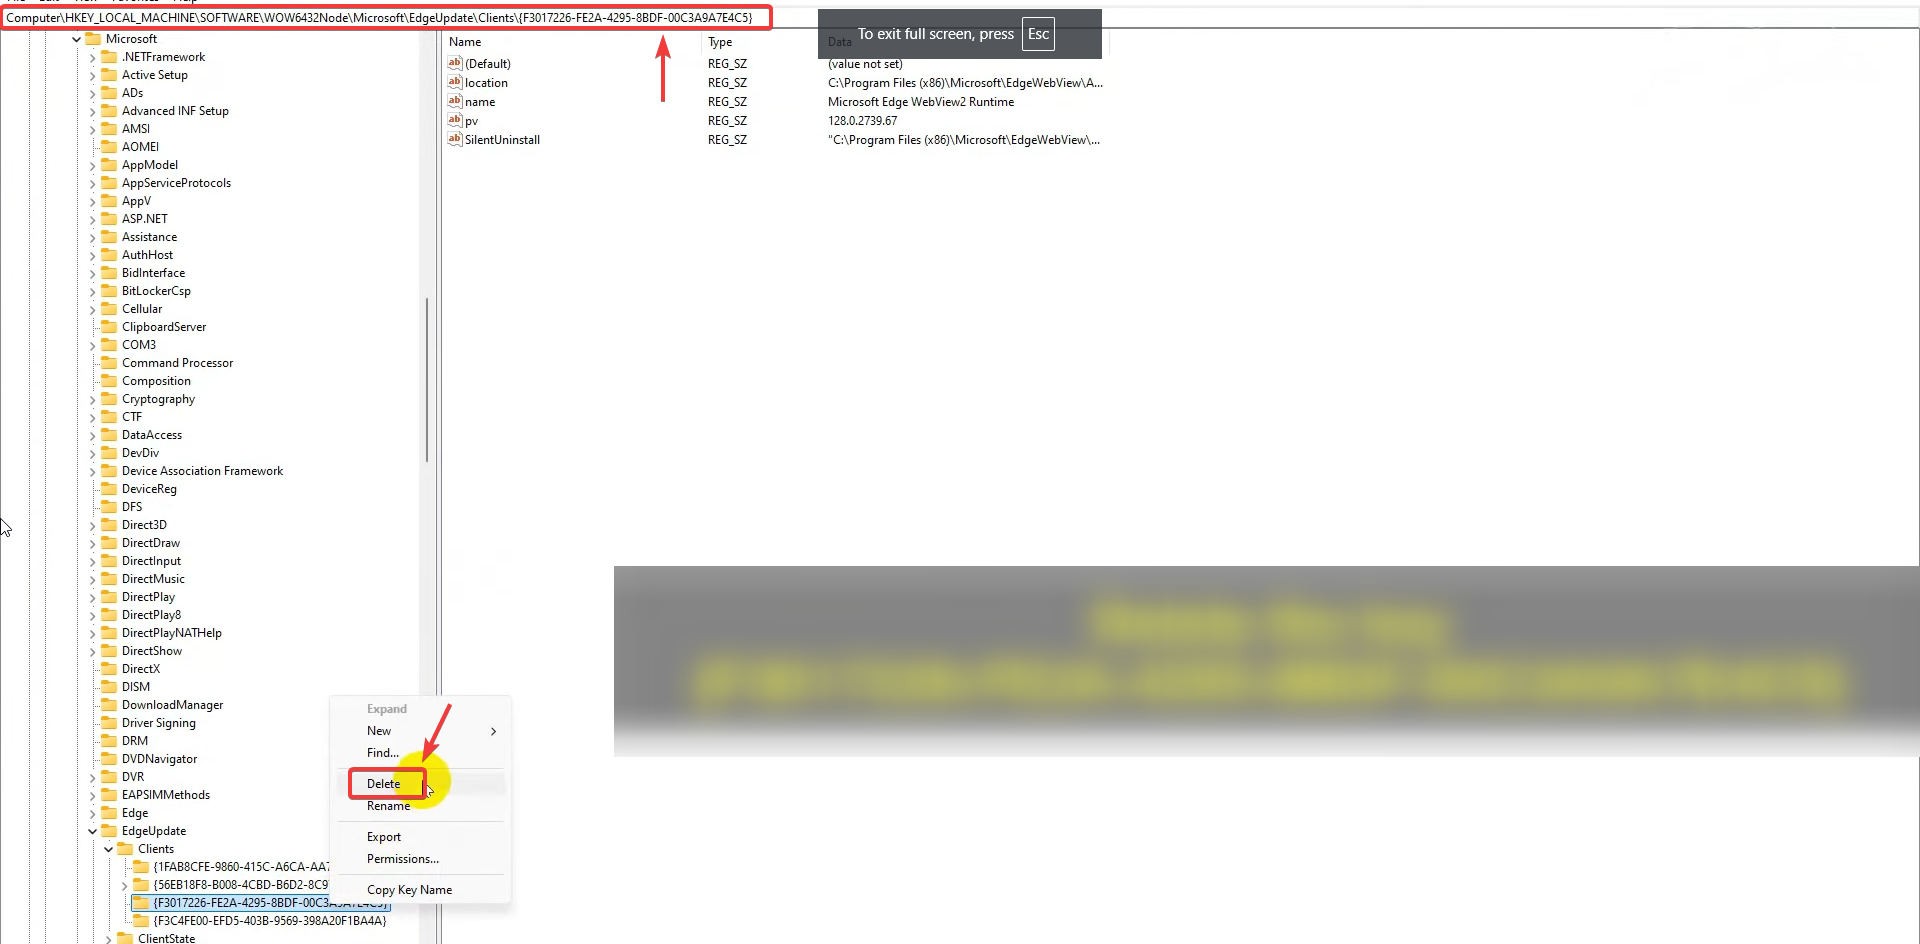
- After deletion, reinstall WebView2 Runtime using Method 1.
4. Repair the WebView2 Runtime Installation
Repairing the WebView2 Runtime can help resolve conflicts or errors preventing proper functionality. This method is especially useful if previous fixes haven’t worked and the issue persists during installation attempts.
- Press Windows + R to open the Run dialog box.
- Type appwiz.cpl in the text field and click OK or press Enter.
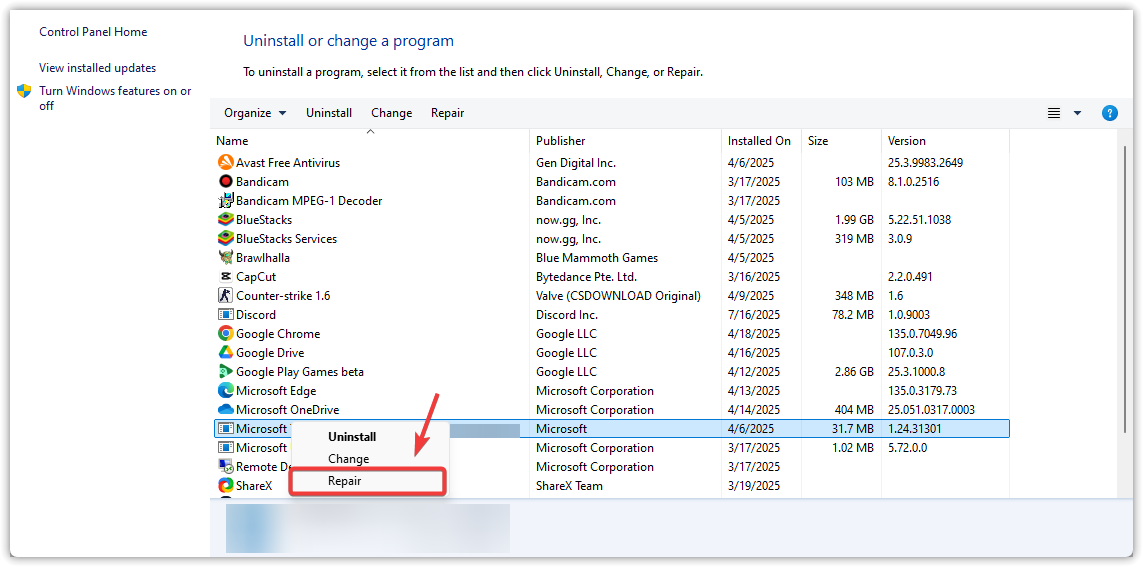
- In the Programs and Features window, locate Microsoft Edge WebView2 Runtime in the installed programs list.
- Right-click on it and select Repair from the context menu.
- Follow any on-screen prompts to complete the repair process (this may take 1-2 minutes).
- After the repair finishes, restart your computer to apply the changes.
If you’ve followed all the methods outlined above, the issue should be resolved. However, if the problem persists despite applying all solutions, consider reaching out to Microsoft Support for further assistance tailored to your specific case.


