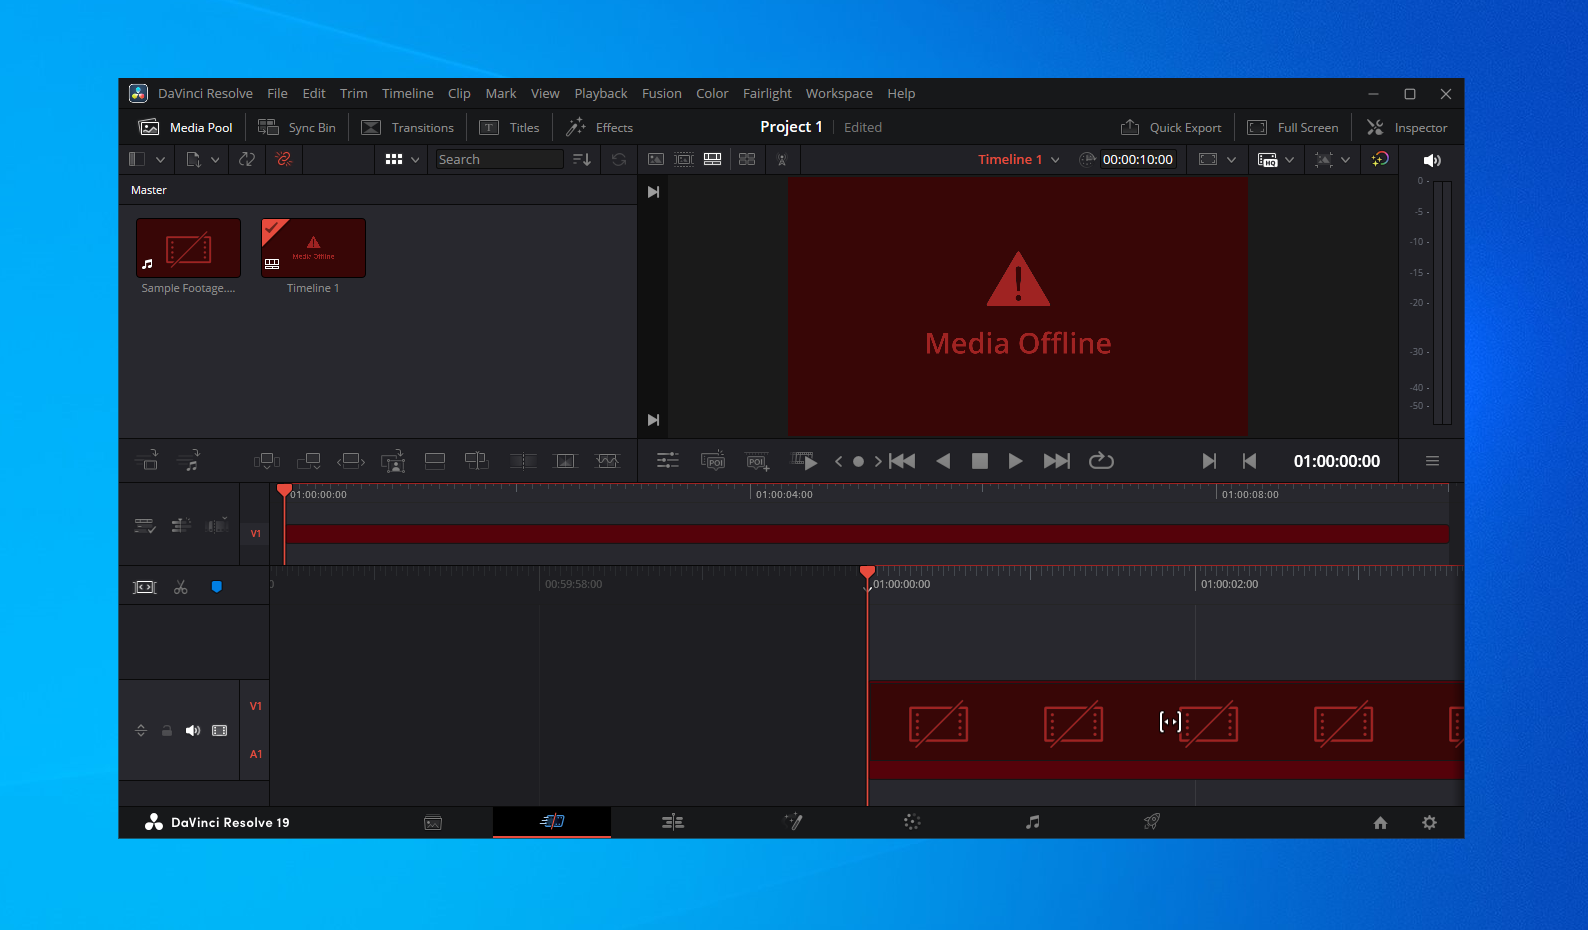
How to Fix “Media Offline” Error in DaVinci Resolve?
When the “Media Offline” error appears in DaVinci Resolve, all affected clips turn red in the timeline and media pool. This occurs when Resolve is unable to locate the original source files, typically due to the files being moved, renamed, or disconnected (such as from an external or network drive).
Another common cause is the use of unsupported formats or codecs such as 10-bit H.265 (HEVC) or AV1. These require DaVinci Resolve Studio for proper hardware decoding and are not supported in the free version. When these files are imported, they may fail to load, triggering the Media Offline error.
A less obvious reason is corrupted render cache. If timeline caching is enabled and the cache becomes damaged or invalid, it can lead to playback issues or missing previews upon reopening the project.
If you frequently work with 10-bit, AV1, BRAW, or similar formats, consider upgrading to DaVinci Resolve Studio. Also, ensure your CPU, GPU, and RAM meet the official system requirements to avoid performance and compatibility issues.
1. Relink or Replace Missing Clip
DaVinci Resolve tracks the exact path and file name of every imported clip. If the file has been renamed, moved, or is located on a disconnected drive, Resolve will mark it as missing.
To resolve this, you can relink the media to its new location or replace it with a backup copy that matches the original format and duration.
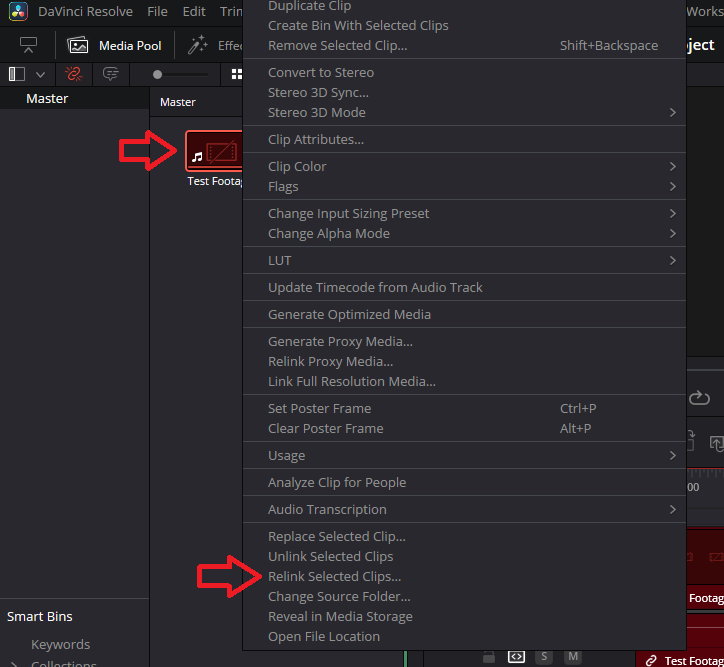
- Launch Resolve and right-click the missing clip in the Media Pool.
- Select Relink Selected Clips from the drop-down menu.
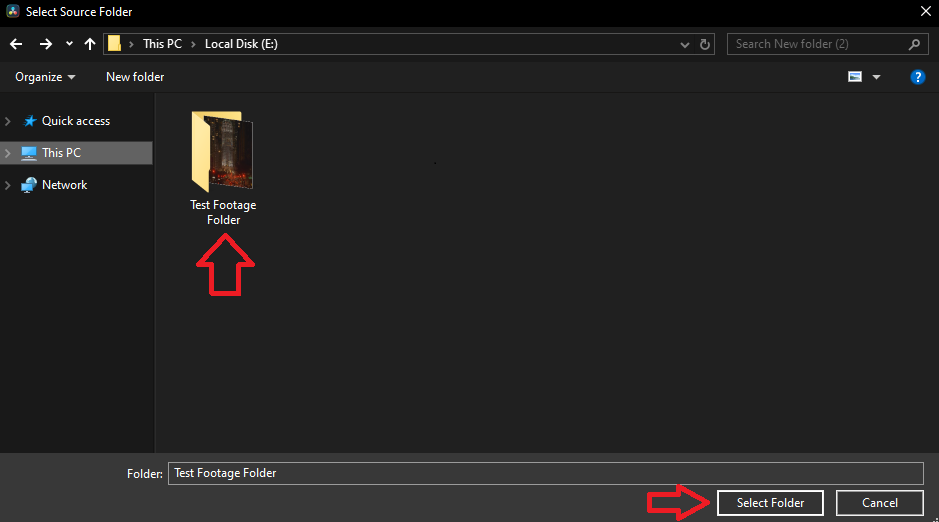
- Navigate to the folder where the source clip is currently stored, then click Select Folder.
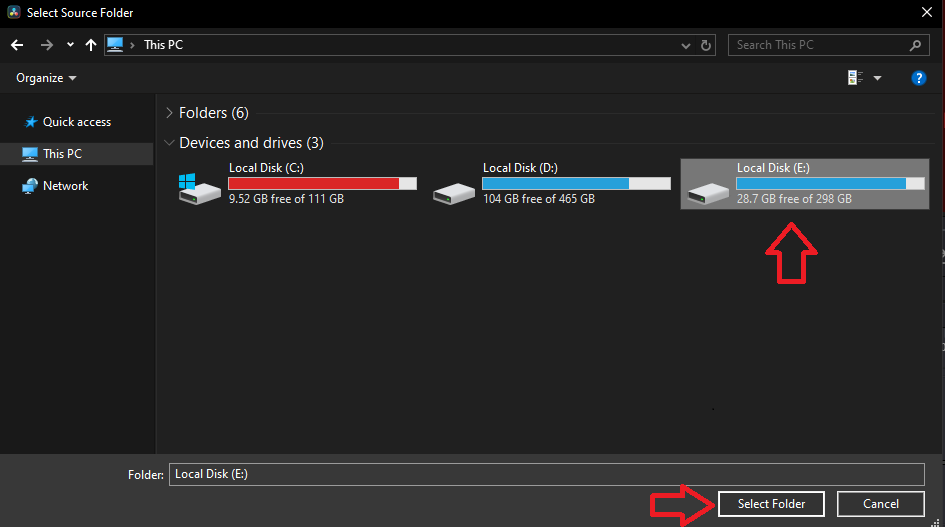
- If you’re unsure of the exact folder, select the entire drive in File Explorer so Resolve can search all directories.
- If Resolve displays an error such as “Clip could not be found”, click Close.
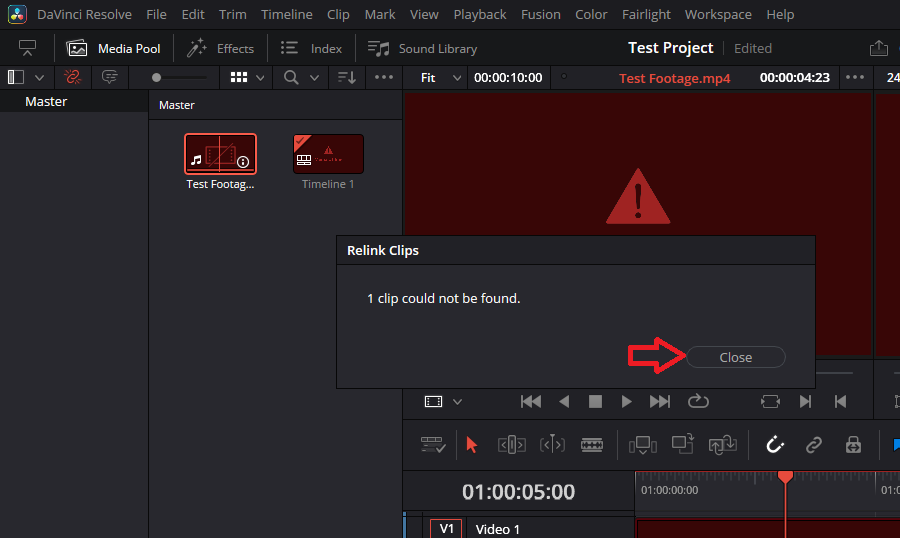
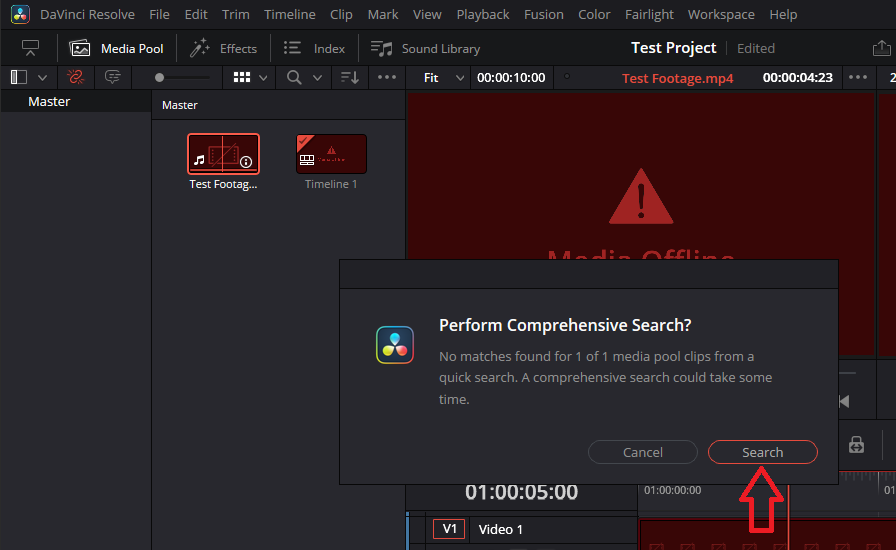
- In the following window, click Search to perform a recursive scan of all folders in the selected location. Resolve will try to automatically relink the clip.
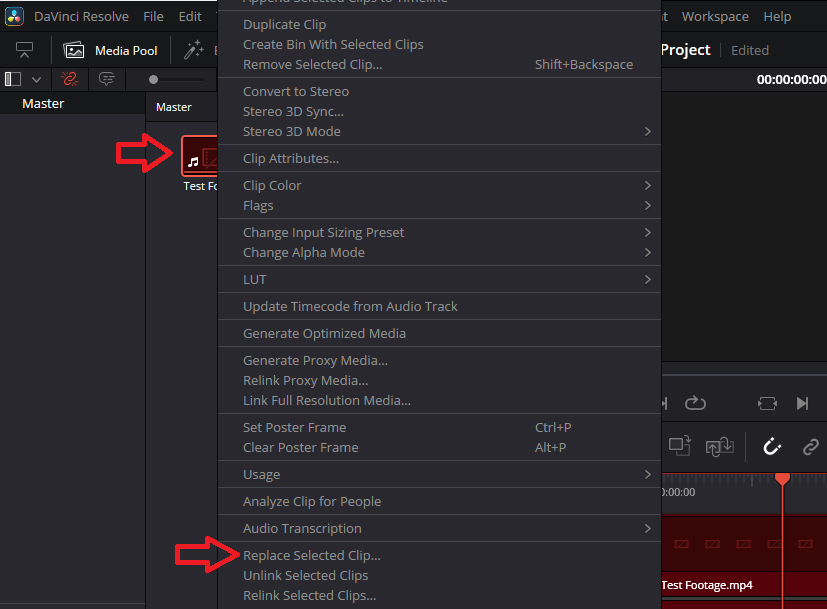
- If the clip has been renamed and cannot be relinked, right-click it and choose Replace Selected Clips.
- Browse to the location where a matching backup is stored and select it.
Note: The replacement must match the original in duration, resolution, frame rate, and codec to ensure proper alignment in the timeline.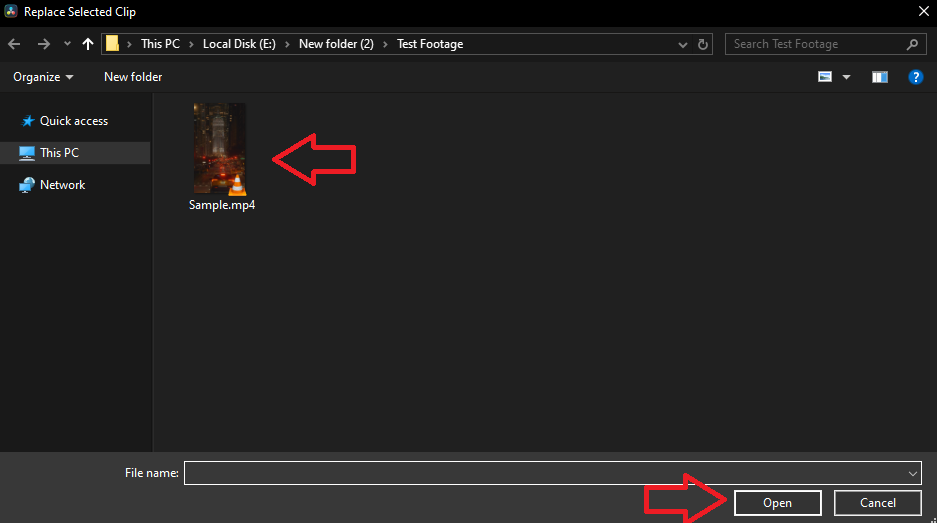
To prevent relinking issues in future projects, maintain a consistent folder structure and avoid renaming or moving files after importing them into Resolve.
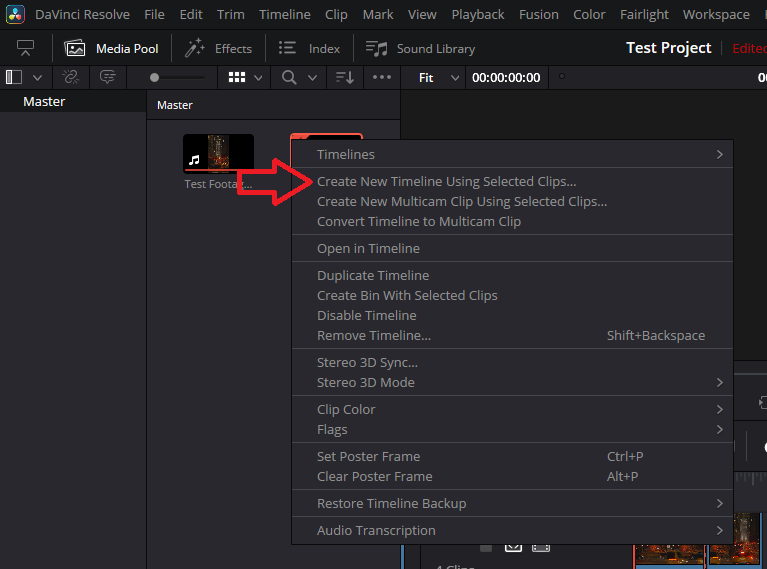
2. Create a New Timeline
Timeline corruption in DaVinci Resolve can occur due to crashes, plugin conflicts, or corrupted cache metadata. These issues may result in offline clips or playback failures. Creating a new timeline helps re-establish media links by generating fresh timeline metadata.
- Right-click on the existing timeline and select Create New Timeline Using Selected Clips.
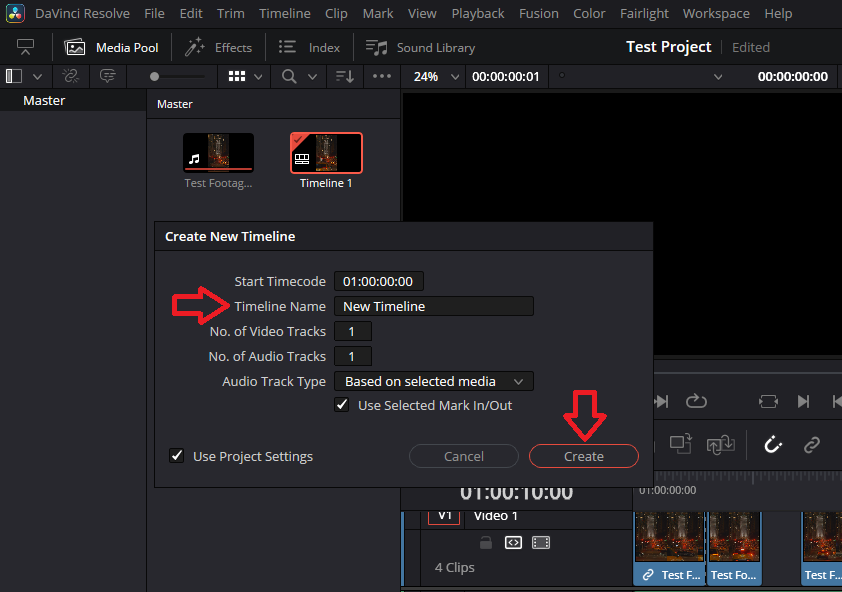
- Enter a name for your new timeline. Check Use Project Settings to keep your current configuration, or uncheck it to adjust custom settings. Click Create.
- To retain your original timeline structure and edits, right-click the new timeline and go to Decompose in Place → Using Clips Only.
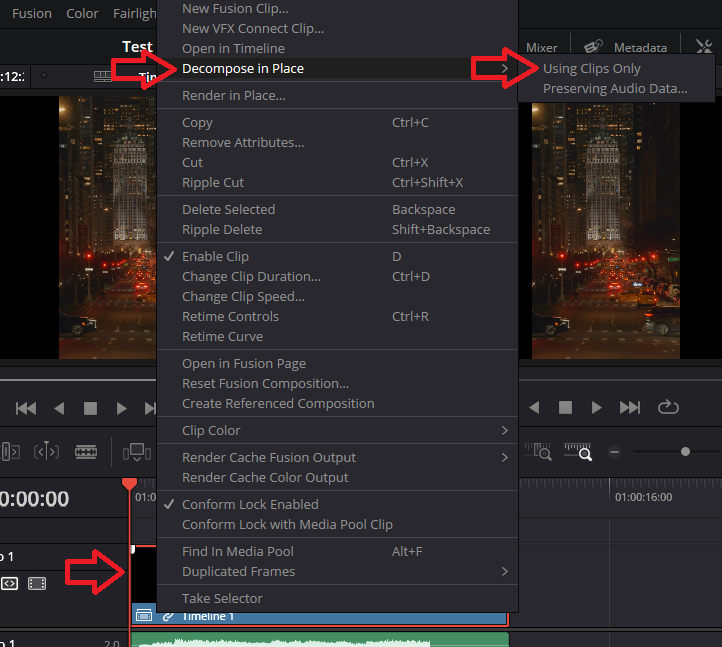
Decomposing reinserts the original media clips into the timeline. However, complex elements like compound clips, fusion effects, or nested timelines may not be preserved. Always duplicate your timeline before using this feature.
3. Toggle Hardware Acceleration
DaVinci Resolve uses GPU-based hardware acceleration to decode H.264 and H.265 formats. If the decoder becomes unresponsive due to driver or GPU conflicts, it can cause playback or media loading failures. Toggling this setting resets the decoder and may resolve such issues.
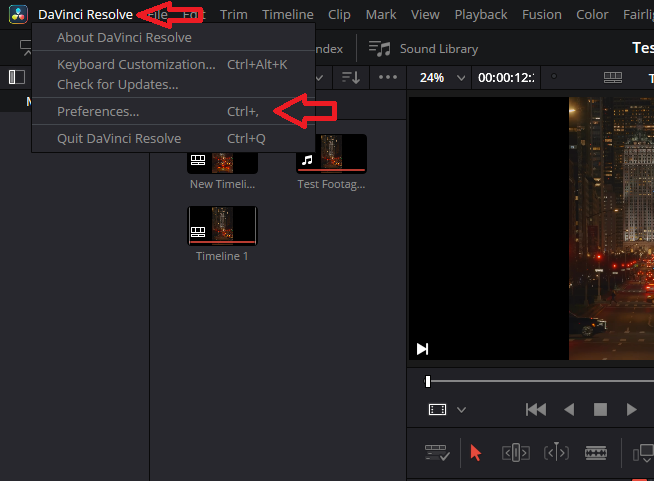
- Open Resolve and click the DaVinci Resolve button in the top-left corner. Choose Preferences from the drop-down.
- Go to the Decode Options tab. Uncheck ‘Decode H.264/H.265 using hardware acceleration’ and click Save.

- Close and restart Resolve. Then re-enable the same setting by checking the box and clicking Save again.
4. Set Render Cache to None
The render cache in DaVinci Resolve stores temporary files to enhance playback. However, if this cache becomes corrupted, it can disrupt media references and result in the Media Offline error. Disabling the cache forces Resolve to load data directly from the original files.
- Go to Playback in the top menu and select Render Cache → None.
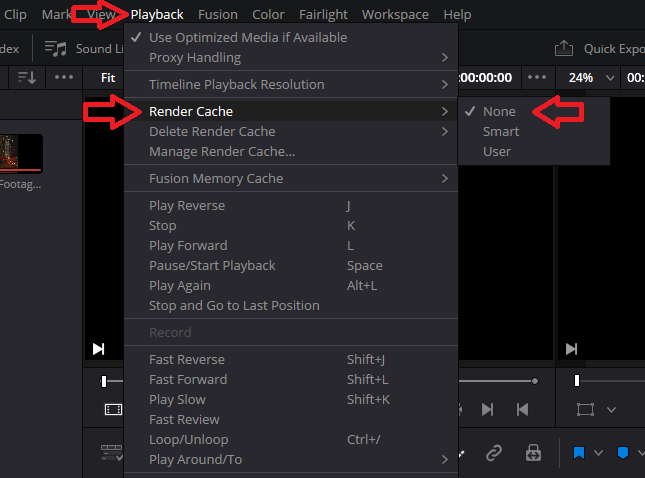
- Restart Resolve to remove any lingering cache processes and verify if the media loads correctly.
Optional: Transcode Footage to Optimized Media
If your footage uses high-compression formats (like 10-bit HEVC), converting it into optimized media can reduce strain on your hardware and improve playback reliability.
- In the Media Pool, right-click the clip and choose Generate Optimized Media.
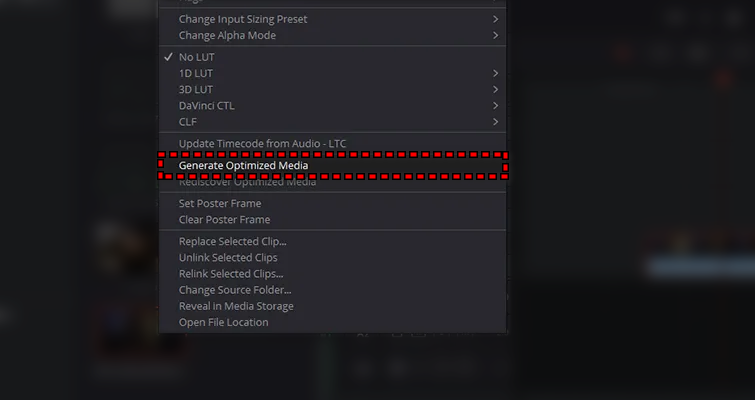
- Wait for the processing to complete. Playback should now be smoother, and the Media Offline issue may be resolved.
Note: This process requires disk space and may take time depending on file size, but it’s particularly useful for large or complex formats.


