How to Make a User Account an Administrator on Windows 10
To give a user account on Windows 10 more control, you can make it an administrator account. Administrator accounts can install software, change settings, and manage other users. Typically, user accounts are set up as standard users by default, which limits what they can do. You can upgrade a user to an administrator using the Settings app, Control Panel, or Command Prompt.
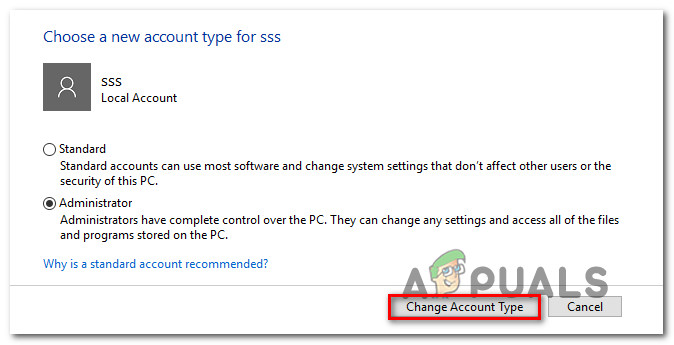
This change is usually needed when a user must access system settings or apps requiring admin rights. The process is simple but requires an existing admin account to make the switch. Each method has its own steps, but all need to be done carefully to keep your system secure and stable.
Note: It’s recommended to perform these changes while logged into an Administrator account, as most methods require administrative privileges. If not already logged in, you’ll need an Administrator username and password to bypass UAC prompts.
1. Use Windows 10’s Settings utility
To quickly give a user more control over system settings in Windows, you can easily upgrade their account to have administrative rights. By accessing the appropriate section, you can change a regular user account into one with the authority to install software, manage other users, and make system changes. This approach grants full administrative rights in just a few steps, keeping the process simple and efficient.
- Press Windows + I to open Settings.
- Click on Accounts.
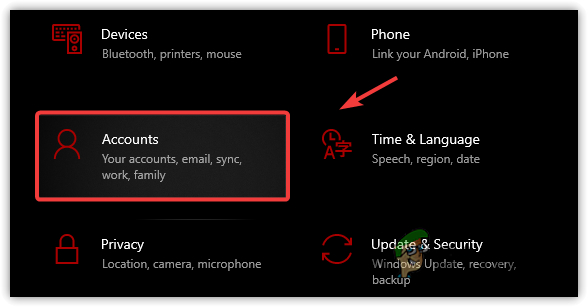
Navigate to the Accounts - In the left pane, click on Family & other people.
- In the Other people section, select the Standard User account you want to change.
- Click on Change account type.
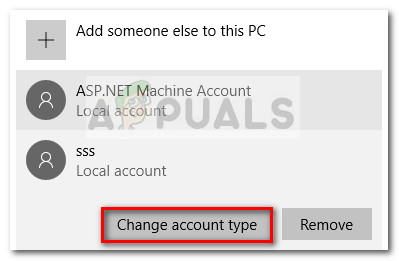
- From the Account type dropdown, select Administrator.
- Click OK.

- Close the Settings window.
2. Change user account type from the Control Panel
The Control Panel lets you easily change a user account to an administrator with just a few clicks, allowing more control over tasks like software installations and system settings.
- Press Windows + R, type control panel, and hit Enter.

- In Category view, click on Change account type under User Accounts.
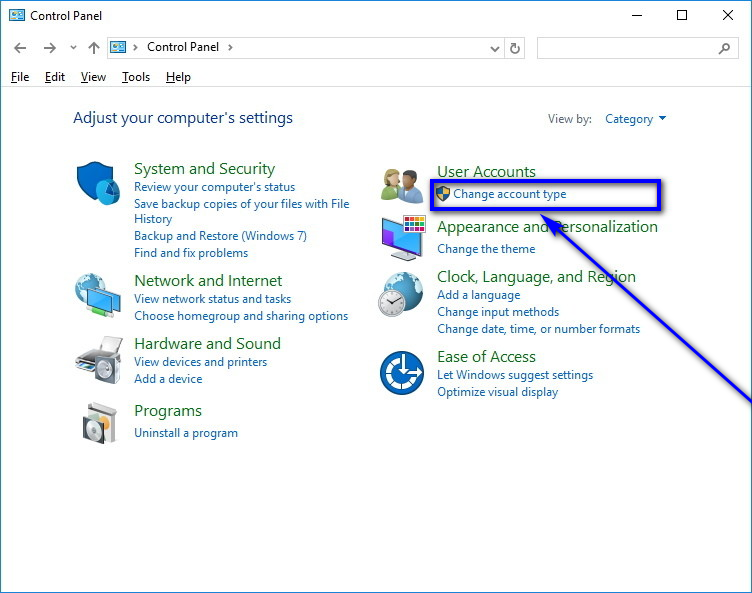
- Select the Standard User account to change to Administrator.
- Click Change the account type.

- Select the Administrator option.
- Click Change Account Type.

You can close the Control Panel; the selected Standard User account has been successfully turned into an Administrator account.
3. Change account type from the User Accounts utility
To quickly make a standard user an administrator, use the User Accounts tool. This tool lets you easily change account settings and give administrative rights. It allows the user to install software and change system settings without going through complicated menus.
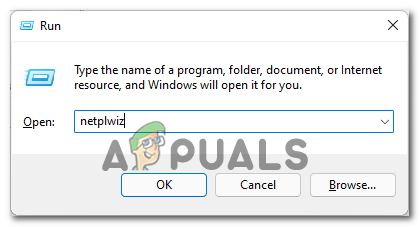
- Press the Windows Logo key + R to open a Run dialog.
- Type netplwiz and press Enter to open the User Accounts utility.
Under Users for this computer:, select the Standard User account to change.
- Click Properties.

- Go to the Group Membership tab.
- Select the Administrator option.
- Click Apply and then OK.
- Click Apply and then OK again in the User Accounts window.
4. Change user account type from an elevated Command Prompt
By using the Command Prompt, you can quickly change a user account to an administrator with a simple command. This method is useful when the Settings app or Control Panel isn’t available due to restrictions or errors. It provides a direct way to give full control over system settings, applications, and user management without relying on visual tools.
- Press Windows + R, type cmd, and hit CTRL + SHIFT + ENTER to open Command Prompt as an admin.
- Type the following command, replacing AccountName with the user name, and press Enter:
net localgroup Administrators AccountName /add
- Close the elevated Command Prompt. The user is now an Administrator.