How to Select a Static Lock Screen and Logon Image in Windows
Everyone has at least once tried changing the lock screen of their Windows 10 operating system. Each user can change the lock screen for their own profile. However, sometimes it isn’t possible to change the lock screen and logon image in Windows 10 through default settings. It also doesn’t change for all the users with the default settings. That is where the Group Policy Editor and Registry Editor comes with help for changing the lock screen and logon image.
The Group Policy Editor is not available on Windows 10 Home Editions; therefore, we have included a registry method that you can use to modify the setting.
Changing the Default Lock Screen and Logon Image
Most of the users are aware of the default lock screen wallpaper settings in Windows settings. However, there are situations where that option is disabled or the image isn’t working through that. That is why a user needs to use one of the below methods to force a specific image for the lock screen. Both of the below methods will have the same outcome; however, it depends on which tool the user has access to and is familiar with.
Method 1: Changing Lock Screen Image through the Local Group Policy Editor
The Local Group Policy Editor is the safest and easiest method to manage and configure the Windows operating system. Unlike the Registry Editor, this provides almost all of the options that users can modify for their system.
Note: This setting only applies to the Education, Enterprise, and Server SKUs. Also, If the Local Group Policy Editor isn’t available on your system, then directly jump to Method 2.
If your system is equipped with the Local Group Policy Editor, then follow the below steps to force a specific default lock screen and logon image:
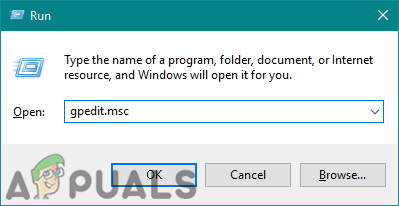
- Hold the Windows key and press R to open Run. Then, type “gpedit.msc” in the Run box and press Enter to open Local Group Policy Editor. Click Yes at the UAC (User Account Control) prompt.
Opening Local Group Policy Editor - Navigate to the following location in the left pane of the Local Group Policy Editor:
Computer Configuration\Administrative Templates\Control Panel\Personalization\
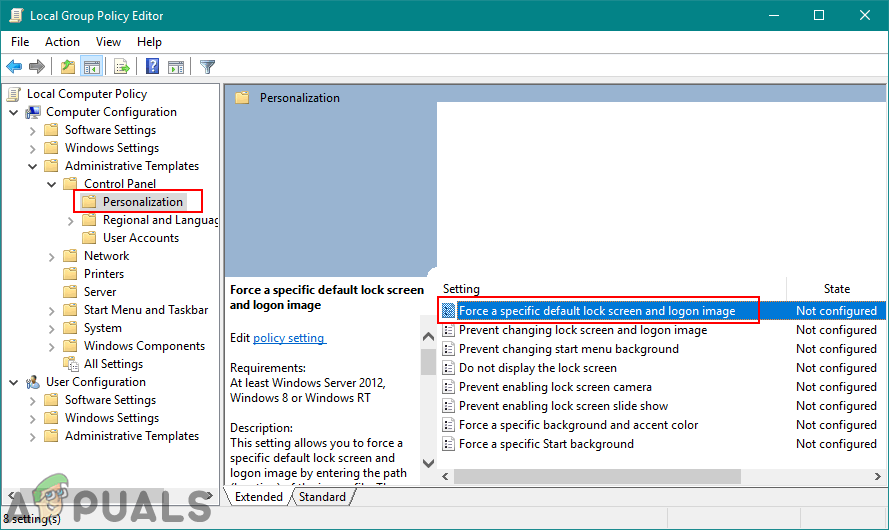
Opening the settings - Double-click on the Force a specific default lock screen and logon image option in the right pane. A new window will open, now modify the toggle from Not Configured to Enabled. Then, provide the local path for the image as shown below and click the Apply/Ok button to save the changes.
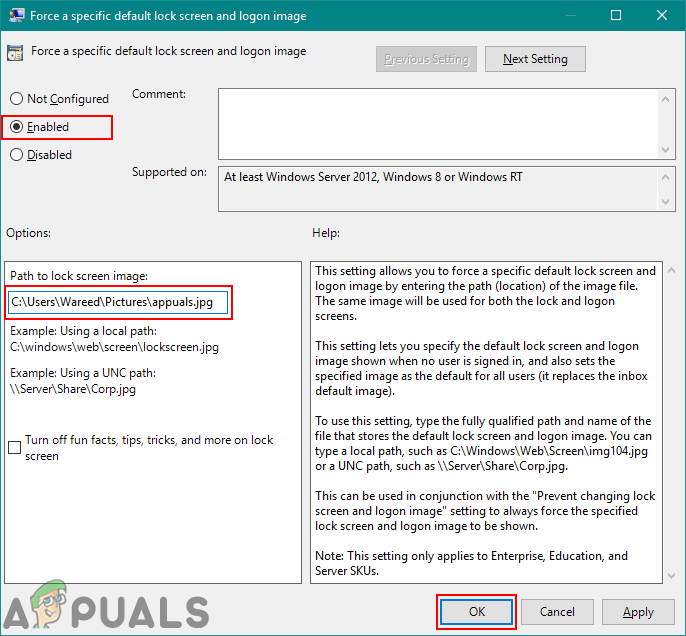
Enabling settings and providing a path to image Note: For a UNC path, type path as \\Server\Share\Image.jpg
- Now logout of your PC to check the new image on the lock screen.
Method 2: Changing Lock Screen Image through the Registry Editor
This method is for those that don’t have Local Group Policy Editor on their system. It requires a bit more work than the first method because some of the values or keys are not available by default. The user needs to manually create some of the keys/values to make them work. Follow the below steps to change the lock screen image through the registry editor:
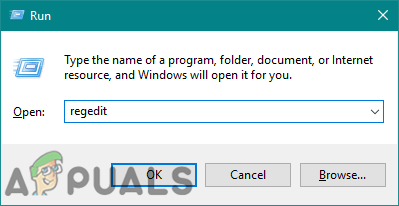
- Press the Windows + R keys to open a Run dialog box. Type “regedit” and press Enter to open Registry Editor. Also, make sure to choose Yes for UAC (User Account Control) prompt.
Opening the registry editor - Navigate to the following key using the left pane in the Registry Editor Window:
HKEY_LOCAL_MACHINE\SOFTWARE\Policies\Microsoft\Windows\Personalization
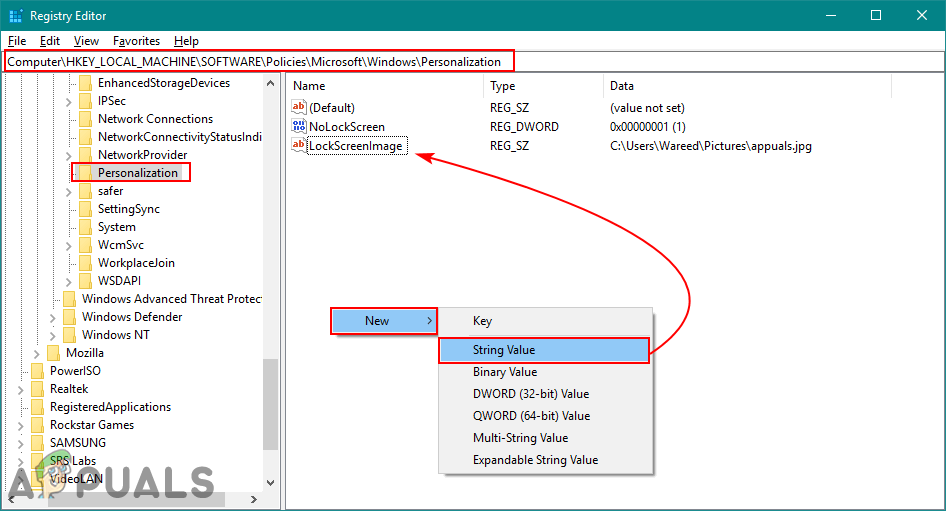
Opening the key and creating new value - Look for a value named LockScreenImage on the right pane. If it doesn’t exist, then create a new string named LockScreenImage by clicking anywhere on the right pane and choosing New > String Value.
- Double-click on the LockScreenImage value and put the local path of the image in the Value data.
Note: You can also add a UNC path as \\Server\Share\Image.jpg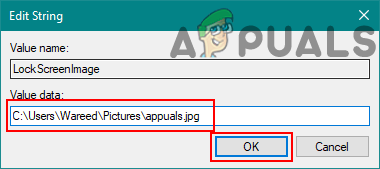
Adding a path of the image - After all the modifications have been made, make sure to restart your computer so that the changes will take effect.
There may be some issues with different versions of Windows 10 updates. However, if there are issues with the lock screen image, then try to meet the below conditions and try it out again:
- GPO “Force a specific default lock screen and logon image“
- GPO “Prevent changing lock screen and logon image“
- Registry entry DisableLogonBackgroundImage to 1
With all the above conditions, if you navigate to the following value (DisableLockScreenAppNotifications):
Note: If you don’t have it, then just create the value under the key.
HKEY_LOCAL_MACHINE\SOFTWARE\Policies\Microsoft\Windows\System\DisableLockScreenAppNotifications
And set the following value to “0“, then the custom lock screen behaves exactly as intended.


