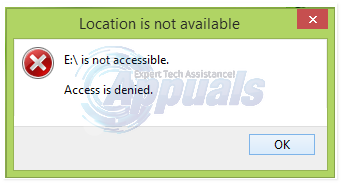
SOLVED: Location is not available (Access is denied)
In Windows 8/10, the error “Location is not available” seems to affect only users who upgraded from older Windows versions to Windows 8/10. Surprisingly, many users of pre – installed Windows 8/10 have not met with the same predicament. After a Windows upgrade, sometimes users are just met with a blunt “Access Denied” error and that is it. At the very best, some users can access the recycle bin and taskbar items without an option of doing anything much. The degree of extent of this error varies but basically once it has deployed there is nothing much you can do on your PC with the new Windows 10 Operating System. Every time you try to open a local drive you get the warning/error message.

Even with Administrator privileges, you may still encounter this dreaded error. To remove the “Location is not available” warning, you will need to reset the permissions. Follow any of the two methods below to do this.
Method 1: Reset Permissions Manually
Right click on the blocked drive or the folder and then click on the “Properties” option.
Navigate to the “Security” tab and click on it as well.
From under “Group or Usernames” choose Administrators, should be Your-UserorPC-Name\Administrators
Select “Edit”.
Once more, select the Administrators Here, don’t worry if you get the “Apply” button grey and inactive. Check any box on the “deny” side of options. The “Apply” button will instantly become active. However, you need to uncheck the deny option. (make sure, it doesn’t stay checked).
Check the topmost box in the “Allow” You’ll notice that all the boxes become checked as well in the exception of the last one at the bottom. On the opposite side, all the boxes under “Deny” become unchecked.
Click on “Apply”. A scan immediately starts, with folders being swiftly analyzed by the system. The scan should take a minute at the very most. Click OK after it is complete, but do not exit the first window.
NOTE: Sometimes during the scan you may still encounter the “Access Denied” error. Hit “retry” just to confirm; and if you still get the error now click on “continue”. Then click OK to exit the window.
In the initial window now click on “Users” and then edit. Repeat the steps above from number 5 to number 7 (don’t forget we are focusing on ”users” now, not “Administrators”). This time round, the Apply button will be active after your first action on step 5 while editing Administrator rights.
Click OK and exit all windows. Restart your computer. The Access Denied error no longer appears.
Method 2: Reset Permissions Using the Reset Utility
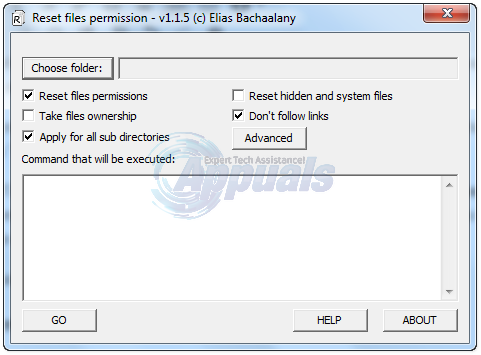
If you are resetting a folder and you find the steps above difficult or lenghty to follow you can use a Reset Utility. click (here) to download. After it has been downloaded, open and run it. You will see a small window pop-up as shown below. The password to extract the app is lallouslab

From here, choose the folder or the drive and click GO. Once done, check again to see if you can now access the folders or the drive, if not then run the utility again with “Take files ownership” option checked.
Method 3: Reset Permissions via Command Prompt
If the folder you are trying to access is shared on a network, then first disable Sharing. Once done, Hold the Windows Key and Press X. Choose Command Prompt (Admin).
In the command prompt window, browse to the directory where the folder is. For example, if the folder is called Pictures located in C:\Users\ and then in the command prompt window, type
cd /users
then type:
icacls Pictures /reset /t /q
In short, which ever folder is inaccessible, you’ll have to run this command.


