How to Fix ‘LAPRXY.DLL is Missing’ in Windows 11
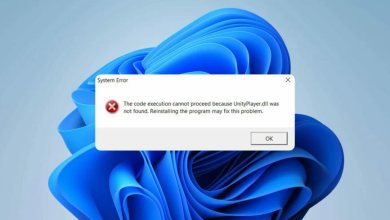
Some Windows 11 users are reportedly getting the ‘LAPRXY.dll is MIssing‘ error when attempting to open certain applications on the newest operating system from Microsoft. Most commonly, this issue is encountered when users attempt to re-register this file for development purposes.
What is LAPRXY.dll?
LAPRXY.dll is a DLL (Dynamic Link Library) file that is developed and published by Microsoft. LAPRXY is an acronym for Windows Media Logagent Proxy. The genuine LAPRXY.dll is a certified dependency that Windows 11 programs are permitted to use.
Typically, this DLL dependency is used by a wide array of Windows 11 programs, particularly UWP (Universal Windows Platform) applications.
The most common reason why you might end up experiencing the ‘LAPRXY.dll is MIssing’ error is a scenario in which a recent AV scan has ended up quarantining the file due to suspicion of being a malware file.
Note: Keep in mind that a lot of malware that we’re seeing lately comes with camouflaging capabilities. These will deliberately disguise themselves as a tolerated Windows file in order to avoid detection.
If your AV antivirus ended up detecting the security threat, you’re left without a key dependency that some of your currently installed programs might need.
In this case, there are several different methods that should allow you to fix the ‘LAPRXY.dll is MIssing’ error:
- Restore the fleet of System files by running SFC and DISM scans – These scans are capable of detecting missing or corrupted DLL files and replenishing them with healthy equivalents.
- Download the missing LAPRXY.dll file manually – If you don’t mind getting your hands dirty, you can also focus your approach and download the missing file manually from an online directory and paste it to the correct location.
- Repair install or clean install your computer – If you suspect that there are a lot of different DLL dependencies that are affected by the same issue, the ideal way to go about fixing this issue is to perform a clean install or repair install procedure.
Regardless of the route that you wish to take, we’ve created step-by-step instructions for each. Feel free to follow the method that you feel most comfortable with.
Deploy SFC and DISM Scans
Several Windows users that found themselves in a similar situation have reported that they managed to fix the problem simply by deploying a few utilities capable of fixing system file corruption – DISM (Deployment Image Servicing and Management) and SFC (System File Checker).
Note: DISM uses WU to replace corrupted data with healthy copies while SFC uses a locally cached copy to fix corrupted instances.
These two utilities have slightly different approaches, so we encourage you to run both scans in order to ensure that the LAPRXY.dll is replenished along with every other affected system file and dependency.
Here’s a step by step guide on performing DISM & SFC scans:
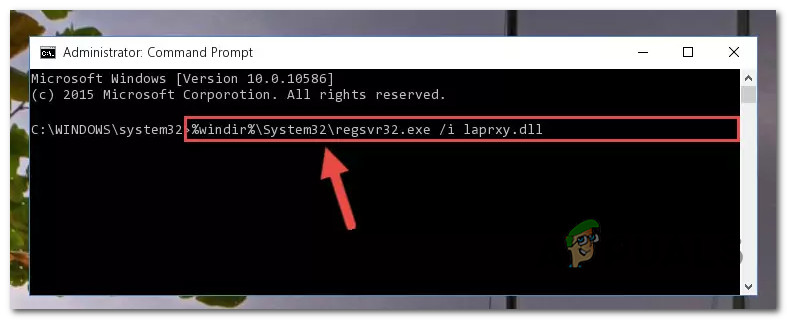
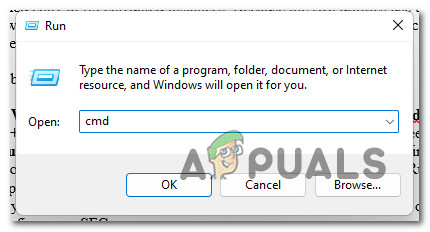
- Start by pressing Windows key + R to open up a Run dialog box. Next, type ‘cmd’ and press Ctrl + Shift + Enter to open up an elevated Command Prompt.
Open up a CMD prompt Note: At the UAC (User Account Prompt), click Yes to grant admin privileges to the CMD window.
- Inside the elevated Command prompt, type the following command and press Enter fire up an SFC scan:
sfc /scannow
Note: DO NOT interrupt this process under any circumstances after you start it. Doing this might create additional logical errors that will end up spawning more error messages.
- After the scan is finished, close the elevated Command Prompt and restart your computer.
Note: Even if the report logs from the SFC scan don’t reveal any mentions about the LAPRXY.dll, that doesn’t mean that no adjustments have been made. SFC is known for failing to report adjustments made in order to resolve logical errors. - Once the next startup sequence, follow step 1 again to open up another elevated Command Prompt. Inside the CMD window, type the following command to initiate a DISM scan:
DISM /Online /Cleanup-Image /RestoreHealth
Note: Before you deploy the DISM scan, ensure that your computer is connected to a stable Internet connection. This is critical because DISM uses the WU (Windows Update) component to download healthy counterparts for the corrupted files that are affected by corruption.
- After the operation is complete, reboot your PC and check if the problem is now fixed.
Download the MIssing DLL file manually
In case you have no issues downloading from a third-party directory like DLL-Files.com, Wikidll.com, or Dlldump.com, the quickest solution to fix this issue is to simply download the missing Dynamic Link Library file and paste it in the location where it needs to be.
Note: Our recommendation is to take the time and scan the file that you download (regardless of the directory you end up downloading it from) to make sure it doesn’t have malware attached to it.
To make things easier for you, we’ve created a guide that will walk you through the entire process of downloading and parsing the LAPRXY.dll file in the correct location:
- Open your default browser and access one of the following directories:
Dll-Files.com
WikiDll.com
DllDump.com
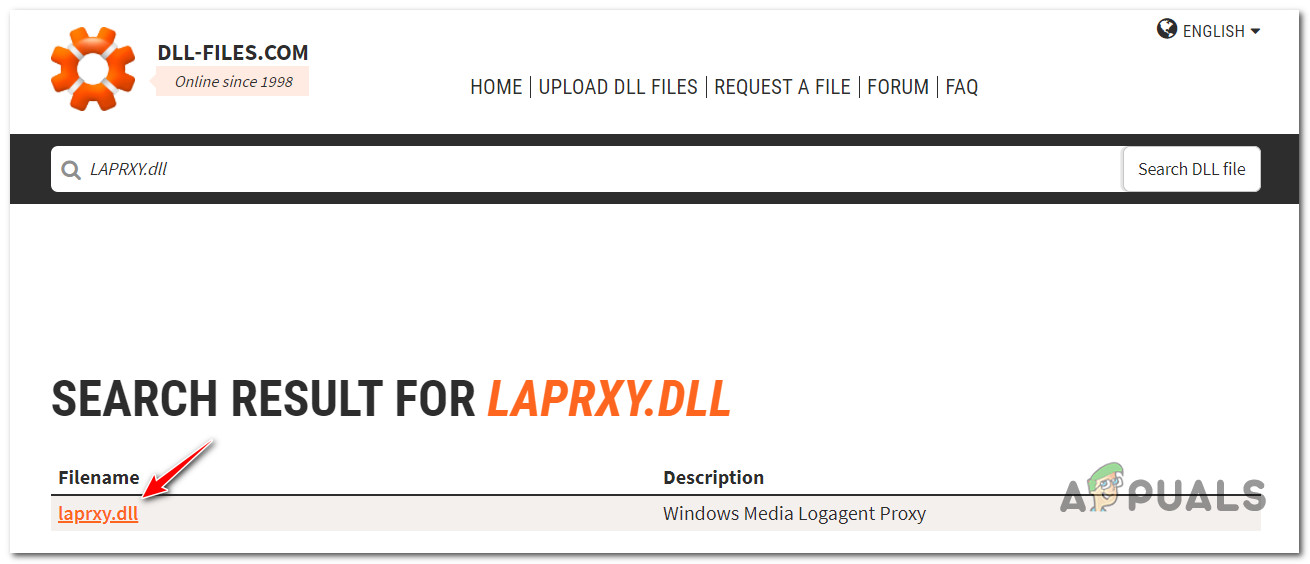
- Once you’re inside the DLL directory of your choice, use the search function at the top to search for LAPRXY.dll.
- From the list of results, click on the LAPRXY.dll hyperlink.
Accessing the LAPRXY.dll hyperlink - From the list of results, download the 32-bit or 64-bit version depending on your Windows infrastructure by clicking on the Download button.
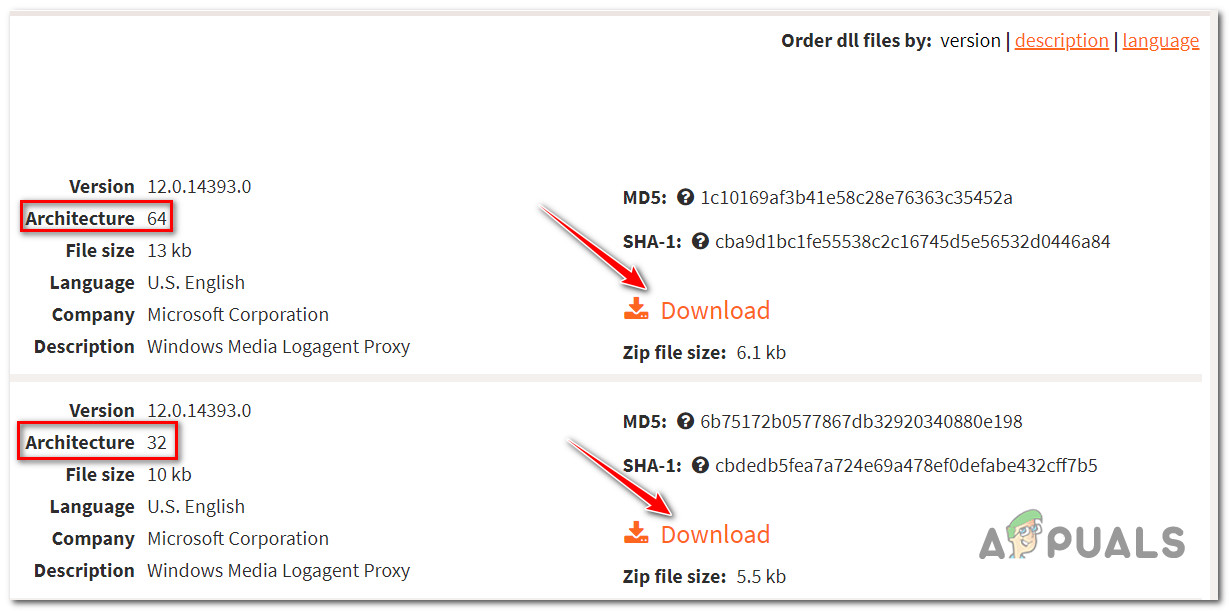
Downloading the DLL file - Once the file is successfully downloaded, unpack it, then take the time to upload it on a directory like VirusTotal to ensure that it doesn’t contain malware.
- After the results are in, look at the results and check if the scan detects any malware infection.
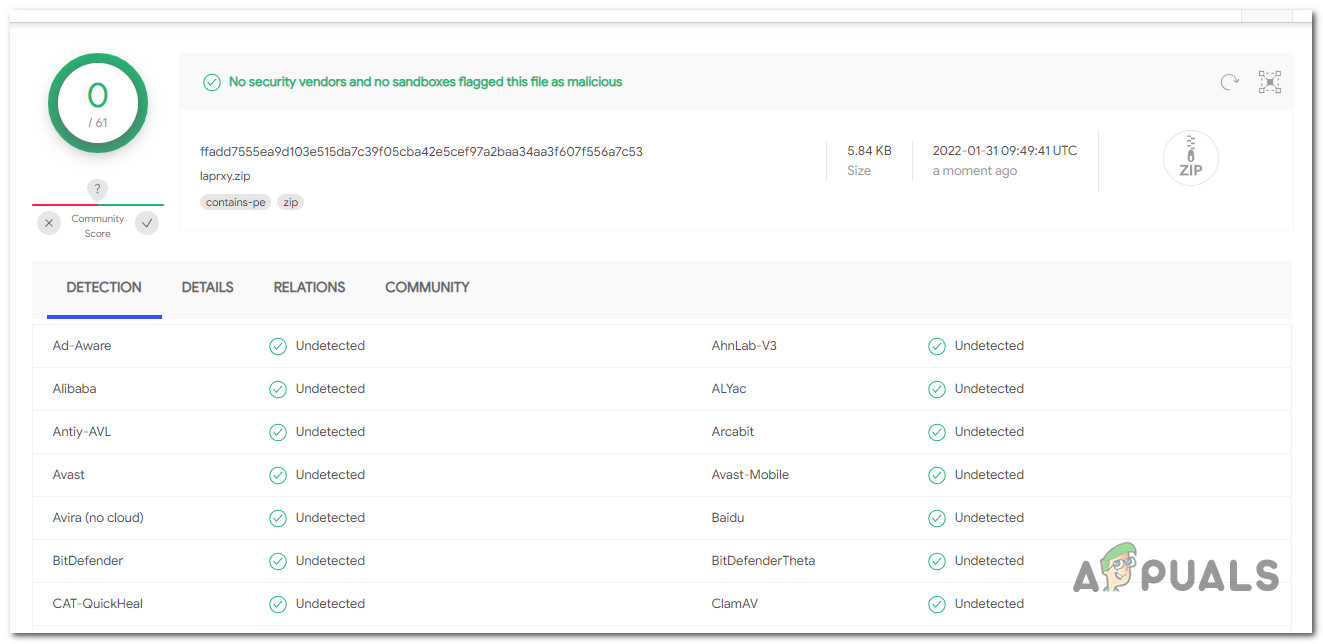
Check for a virus infection Note: If the scan has revealed an underlying virus infection, download a different instance of the LAPRXY.dll file and scan it again until you find one that doesn’t pose a security risk.
- Once you’ve made sure that the file is not infected by malware, you open File Explorer and paste LAPRXY.dll in the following location:
C:\Windows\System32
- When asked to provide admin access, click Continue to grant it, then reboot your PC once the operation is complete.
Perform a repair install or clean install
If you want the simplest approach out of your available options, the most convenient way of fixing the issue is to reset all Windows components including all booting data.
Several affected users that were also struggling to restore the LAPRXY.dll file have confirmed that they only managed to fix it after they successfully reset every Windows file and associated dependency.
When it comes to doing this, you have two ways forward:
- A clean install – This is hands-down the easiest approach since you don’t have any prerequisites. However, the major downside of this method is that it will not allow you to keep your personal files unless you back them out in advance.
- A repair install (in-place repair) – If you’re looking for a more focused solution, one way that will surely restore the LAPRXY.dll file is to go for a repair install. This will only reset your Windows components (including booting data) while allowing you to keep all your personal files (including apps, games, personal media, and even some user preferences).